Creating Missions
To create a new Mission, click on the New button on the Missions listing page to display the Mission creation wizard.
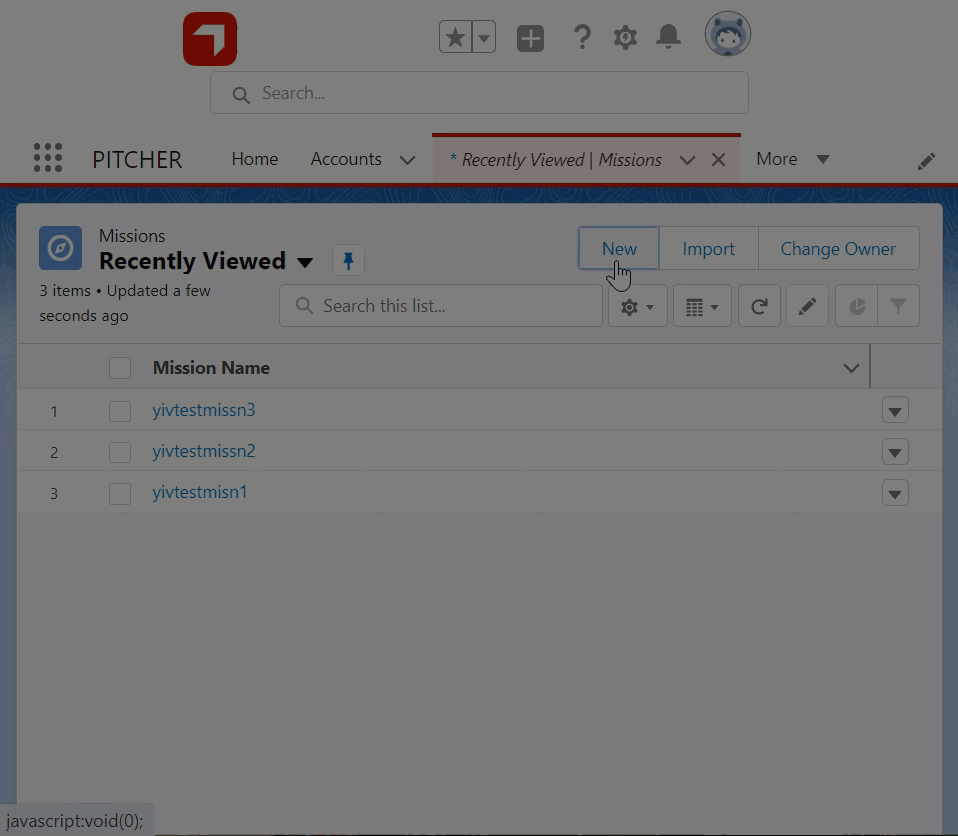
Create a new mission
Creating a Mission involves three significant steps:
Step 1: Defining Mission Details
In the first step, we start by filling in the general settings and description of a Mission. These details define the essentials of a Mission.
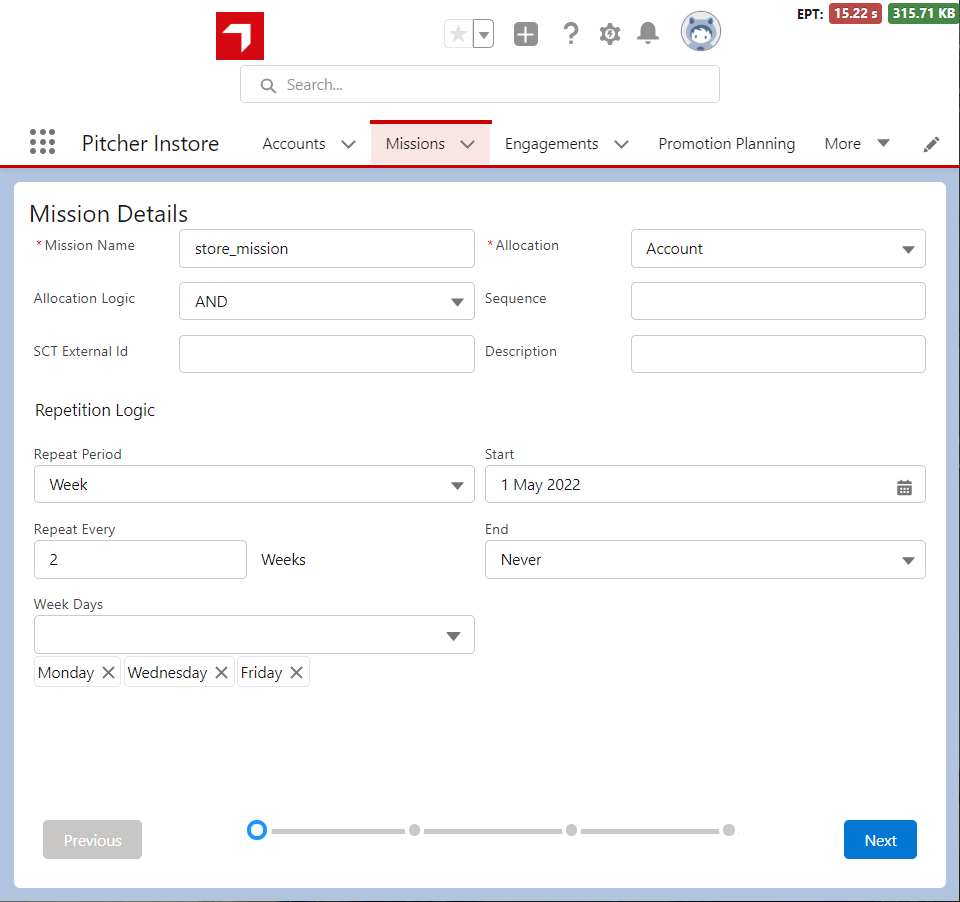
The Mission Details page
The fields described here are just the necessary fields enabled in the builder; however, more fields exist but remain disabled by default. You can allow these fields to appear in the builder when you need them. For more information, see Missions Managed Package Details.
Field Name | Details |
|---|---|
Mission Name* | A name for your Mission |
Allocation* | Instore Missions are always linked to a customer account. So, in the Allocation dropdown, select “Account.” |
Allocation Logic | The Allocation logic helps you add conditional rules to your Account selections. Select “And” from the dropdown menu if you're not sure. |
Sequence | Sequence is just a way that you could order missions in a list in case you don’t want them to appear in alphabetical order. |
Start | Select a start date for the Mission. Please note that the Mission will not be visible to sales reps until the start date has arrived. |
End | Select an end date for this Mission. The Mission will stop showing up in Pitcher Instore after the end date has passed. |
Repeat Period | You can have a Mission repeat at regular intervals such as daily, weekly, monthly, quarterly, yearly, etc. |
Repeat Every | Technical field that is automatically populated by the system based on repetition period and logic defined. Example: To enable the Mision only on Mondays and Wednesdays, select repetition period Week and then select the weekdays for that week, which will then be saved into this custom field |
Description | Free text describing your mission. |
Adding Mission Details
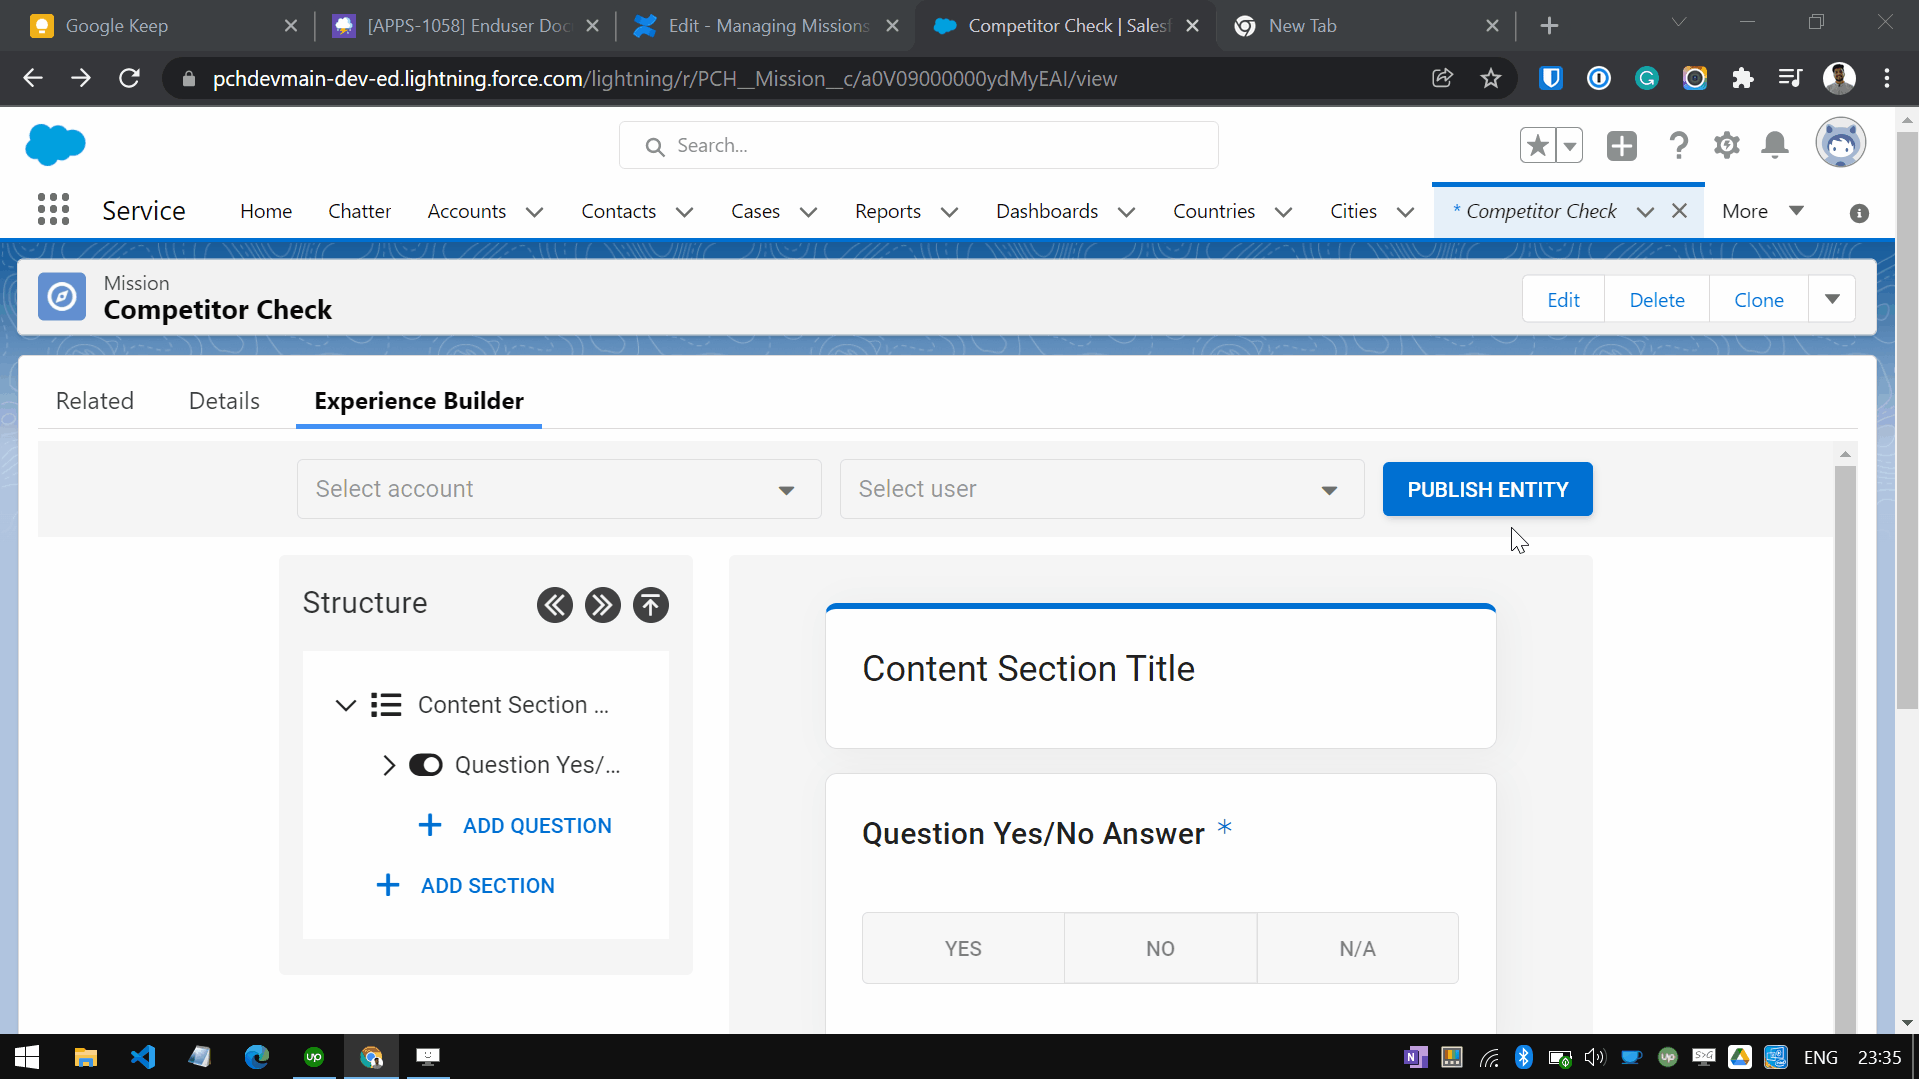
Step 2: Build Mission Content/Layout
After entering the details in the first step of the Mission Builder, the 2nd step is adding content, and determining what needs to be done within a Mission using the Canvas App.
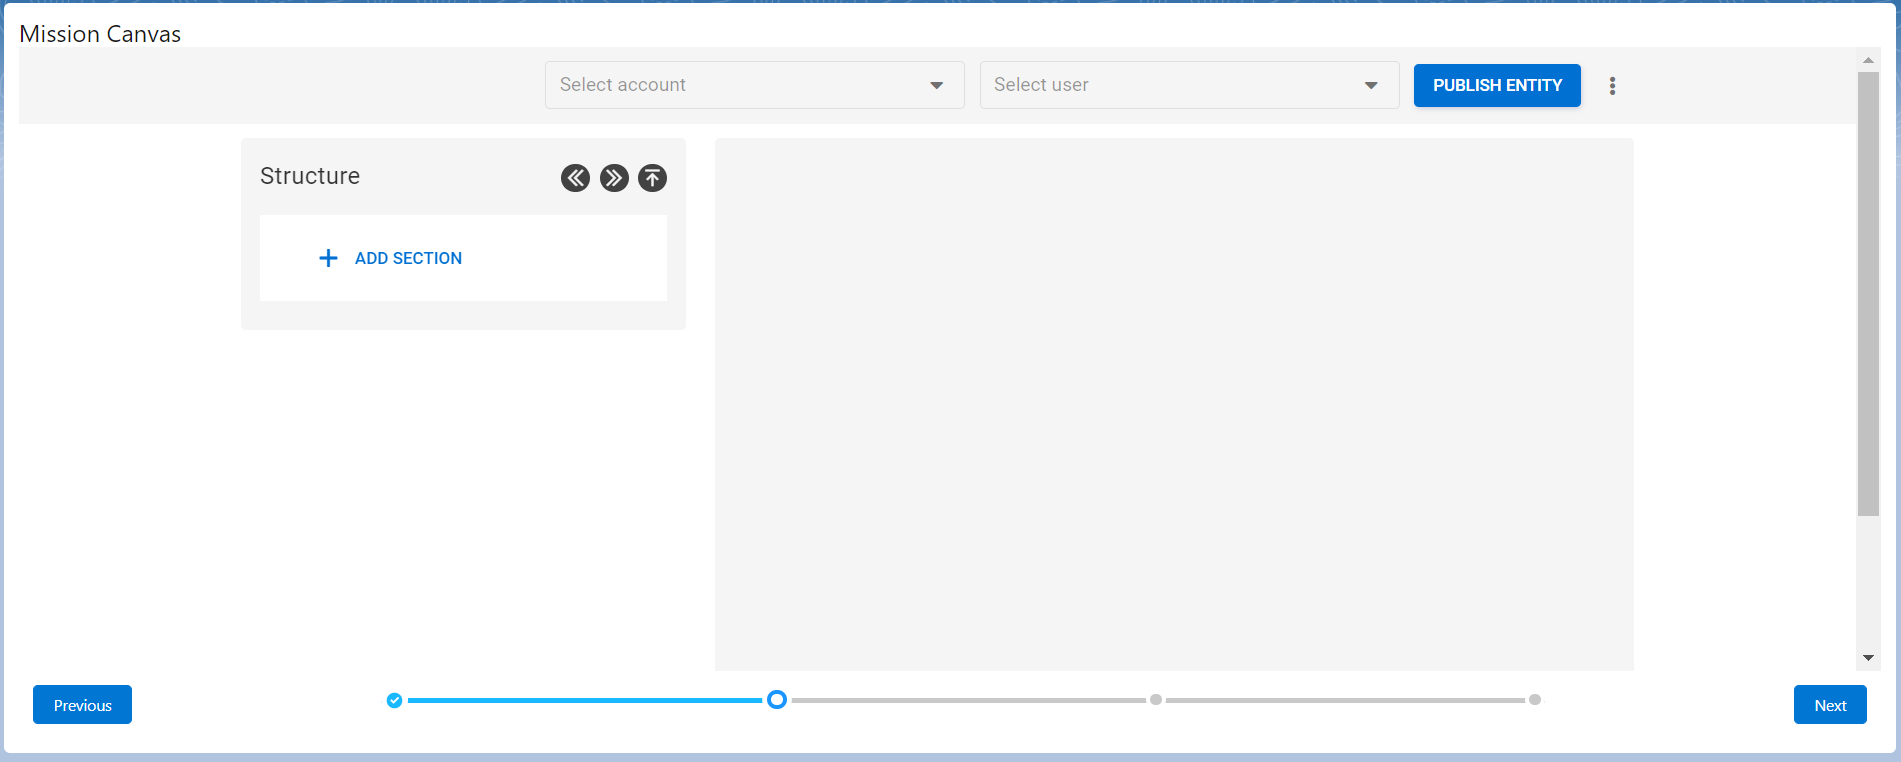
The Mission Canvas App
The content of Missions can be quite flexible spanning from simple questions to complex tables to audit products or promotions. We will see how to build mission content in the subsequent sections.
Alternatively, you can also define the mission content based on a predefined template.
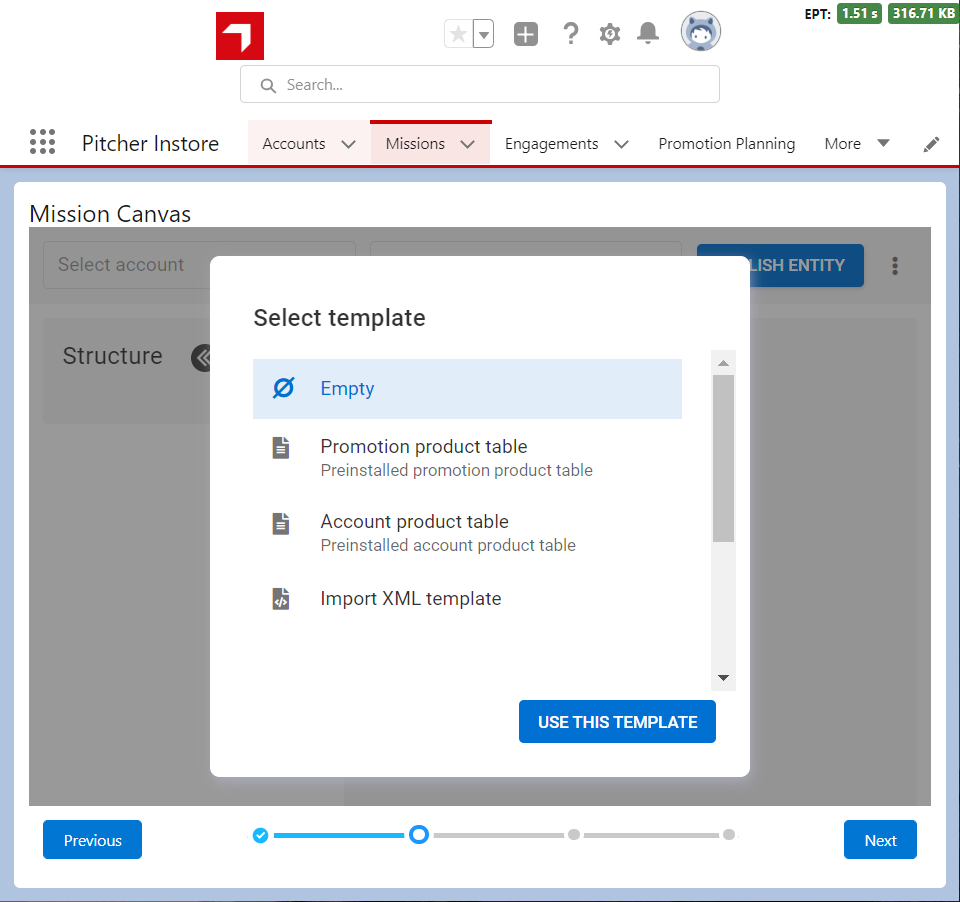
Template selection
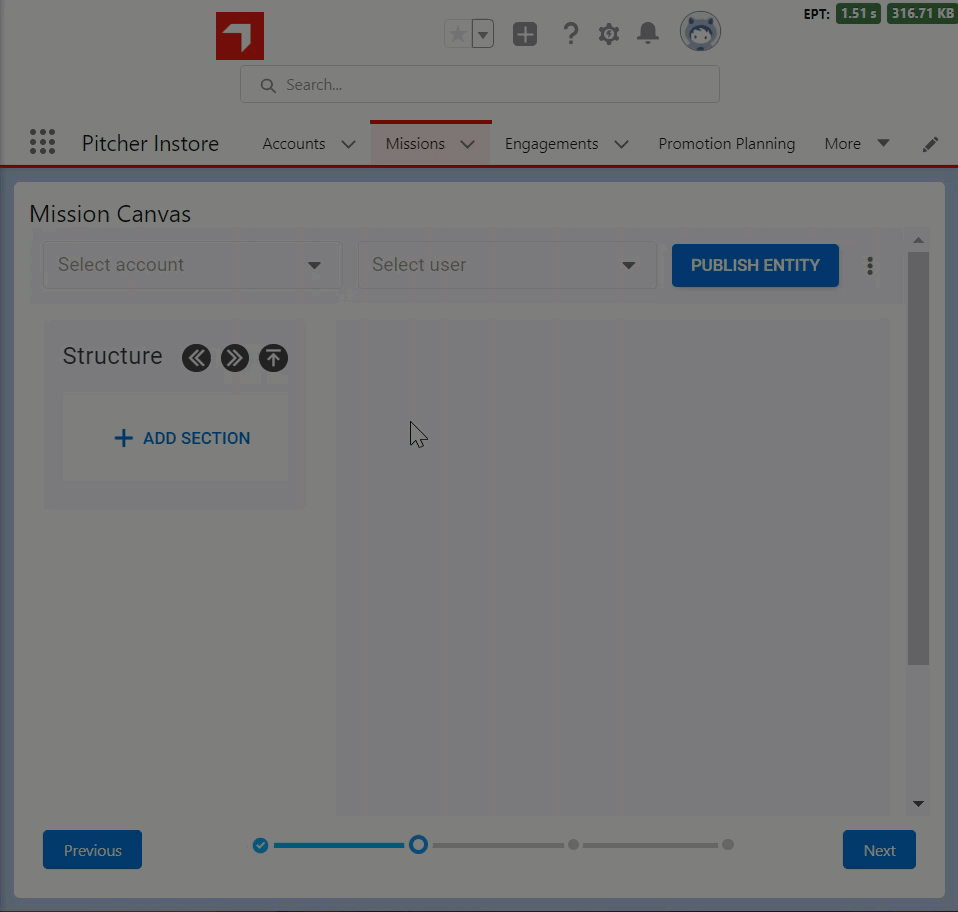
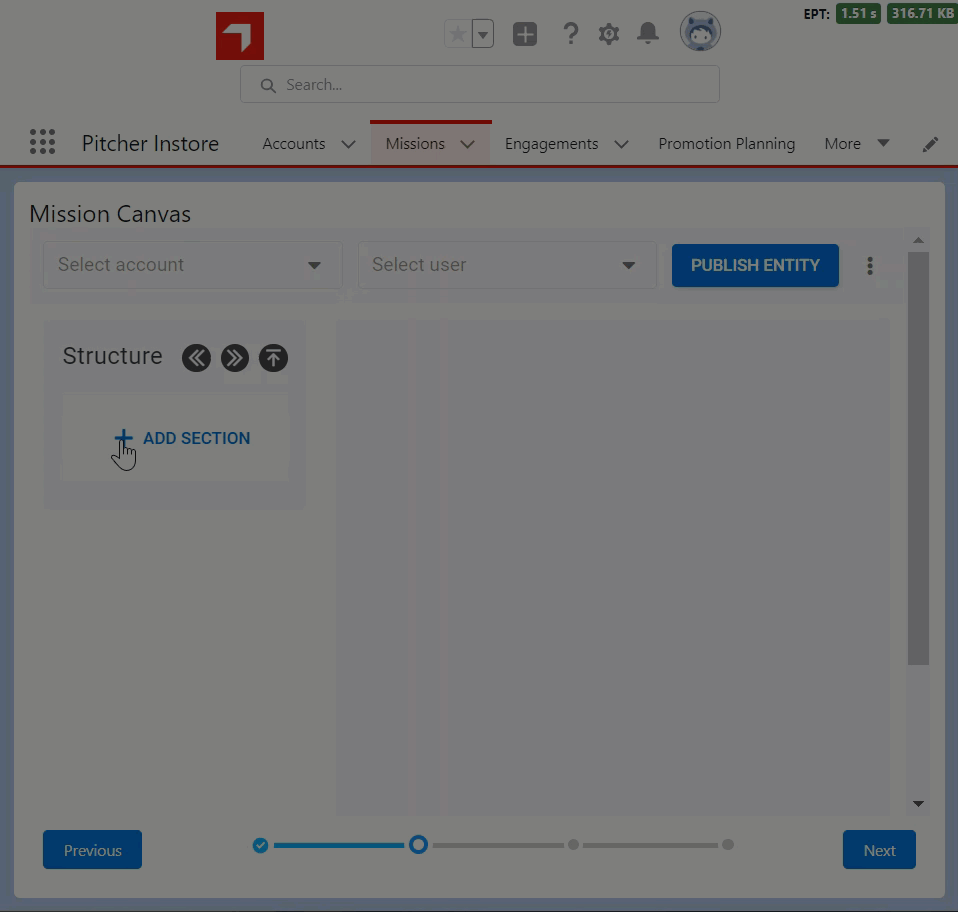
Defining Content structure
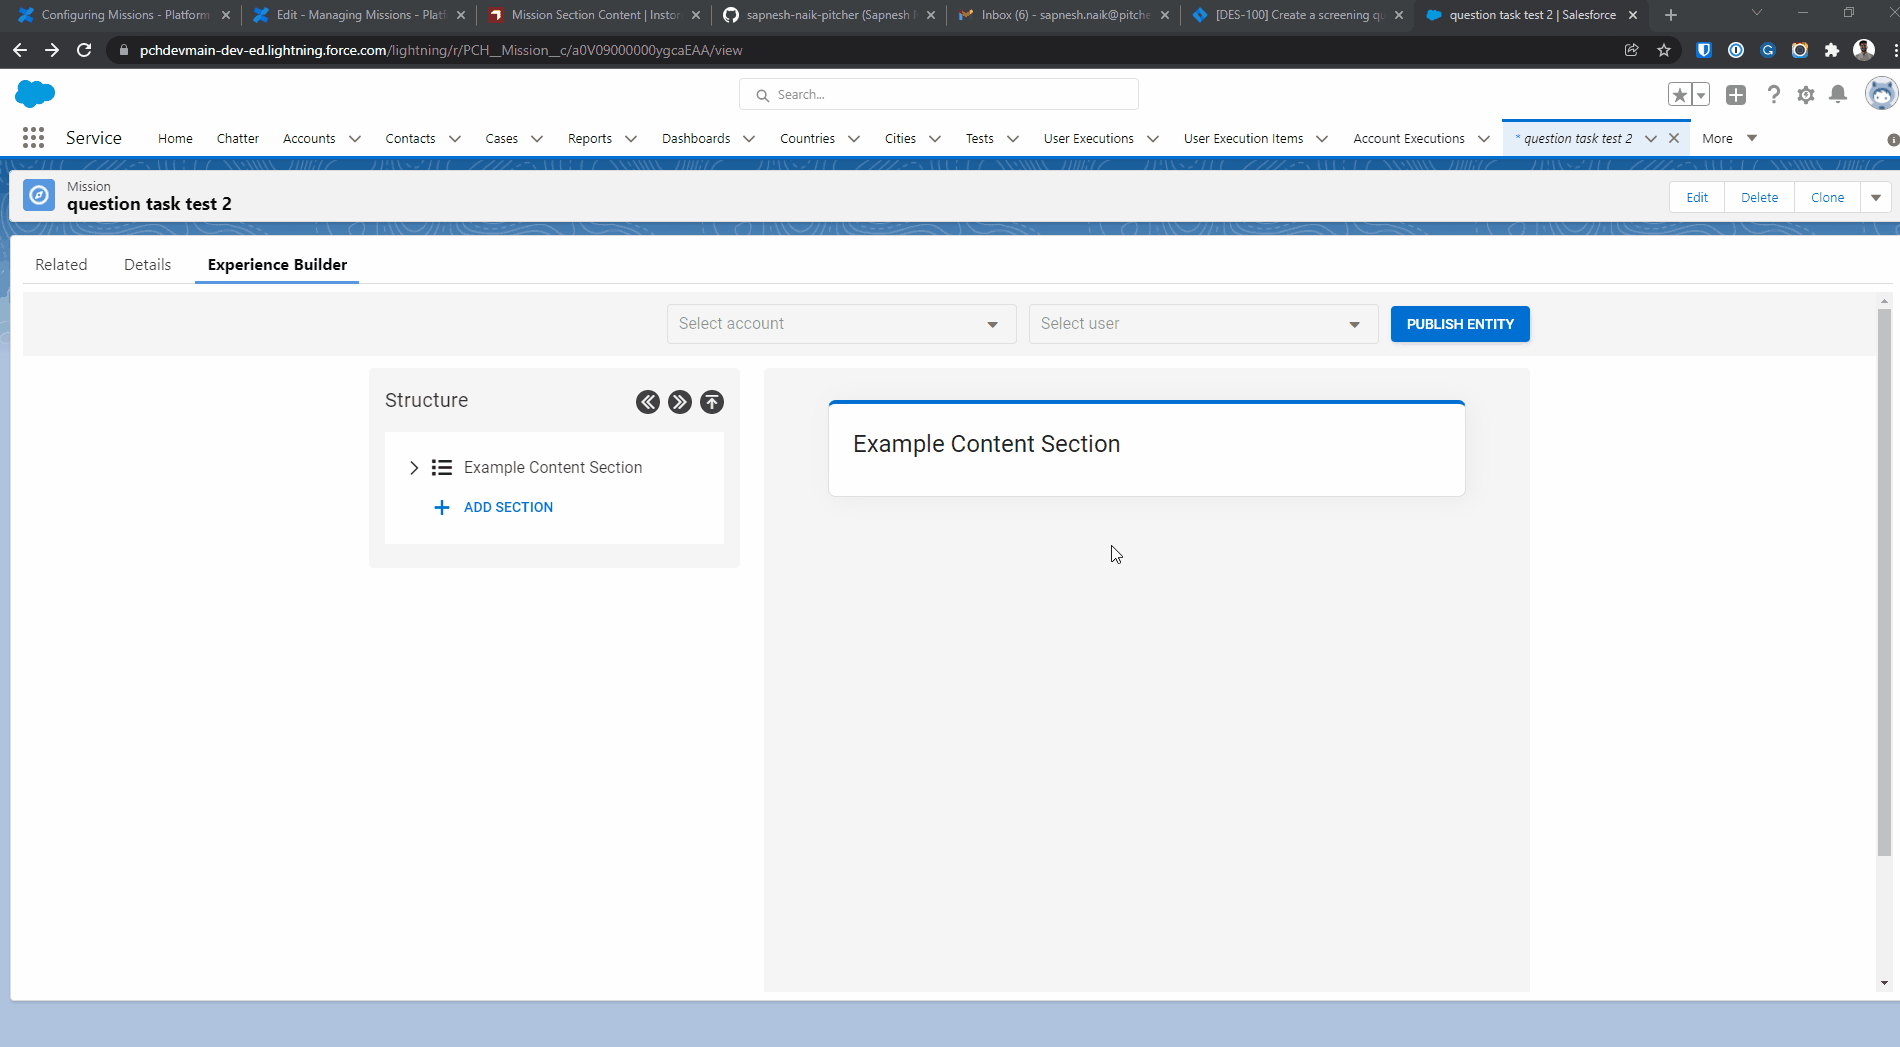
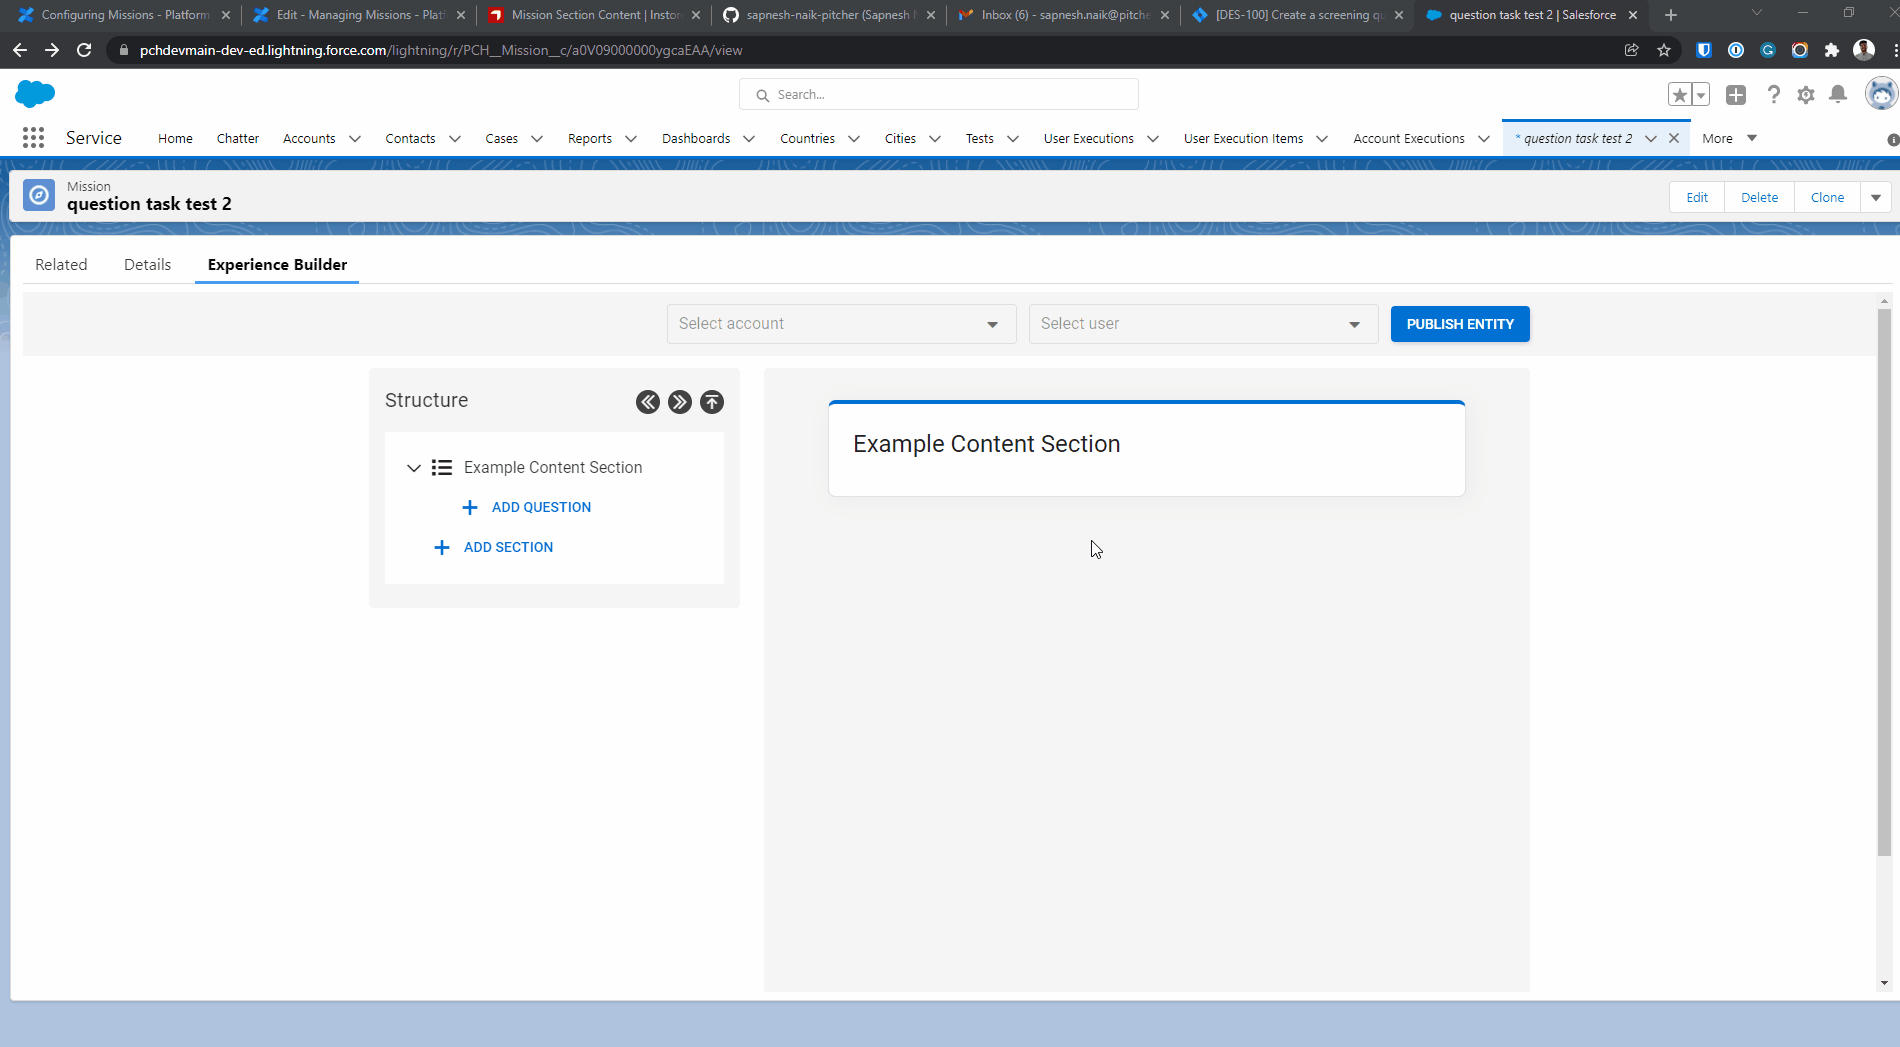
A Mission Section defines content within a Mission, and a Mission can contain one or more sections. You can add a new section by clicking the + Add Section button on the Mission builder page.
Adding a new section
Currently, two types of sections are supported. Let’s look at each of them in detail.
The content section is mainly used for adding Mission questionnaires.
To add a new content section:
Click on the Add Section button, select Content Section, and click on the Use this template button.
Add a title to the new content section.
Adding a Content section
You can now start extending this content section to have multiple questionnaires.
Adding Questionnaires
Questionnaire help sales reps collect required information during a customer visit.
These are some examples where questionnaires can be used:
Pre-sales questionnaire
Post-sales questionnaire
Customer satisfaction survey
New product research survey
Follow-up survey
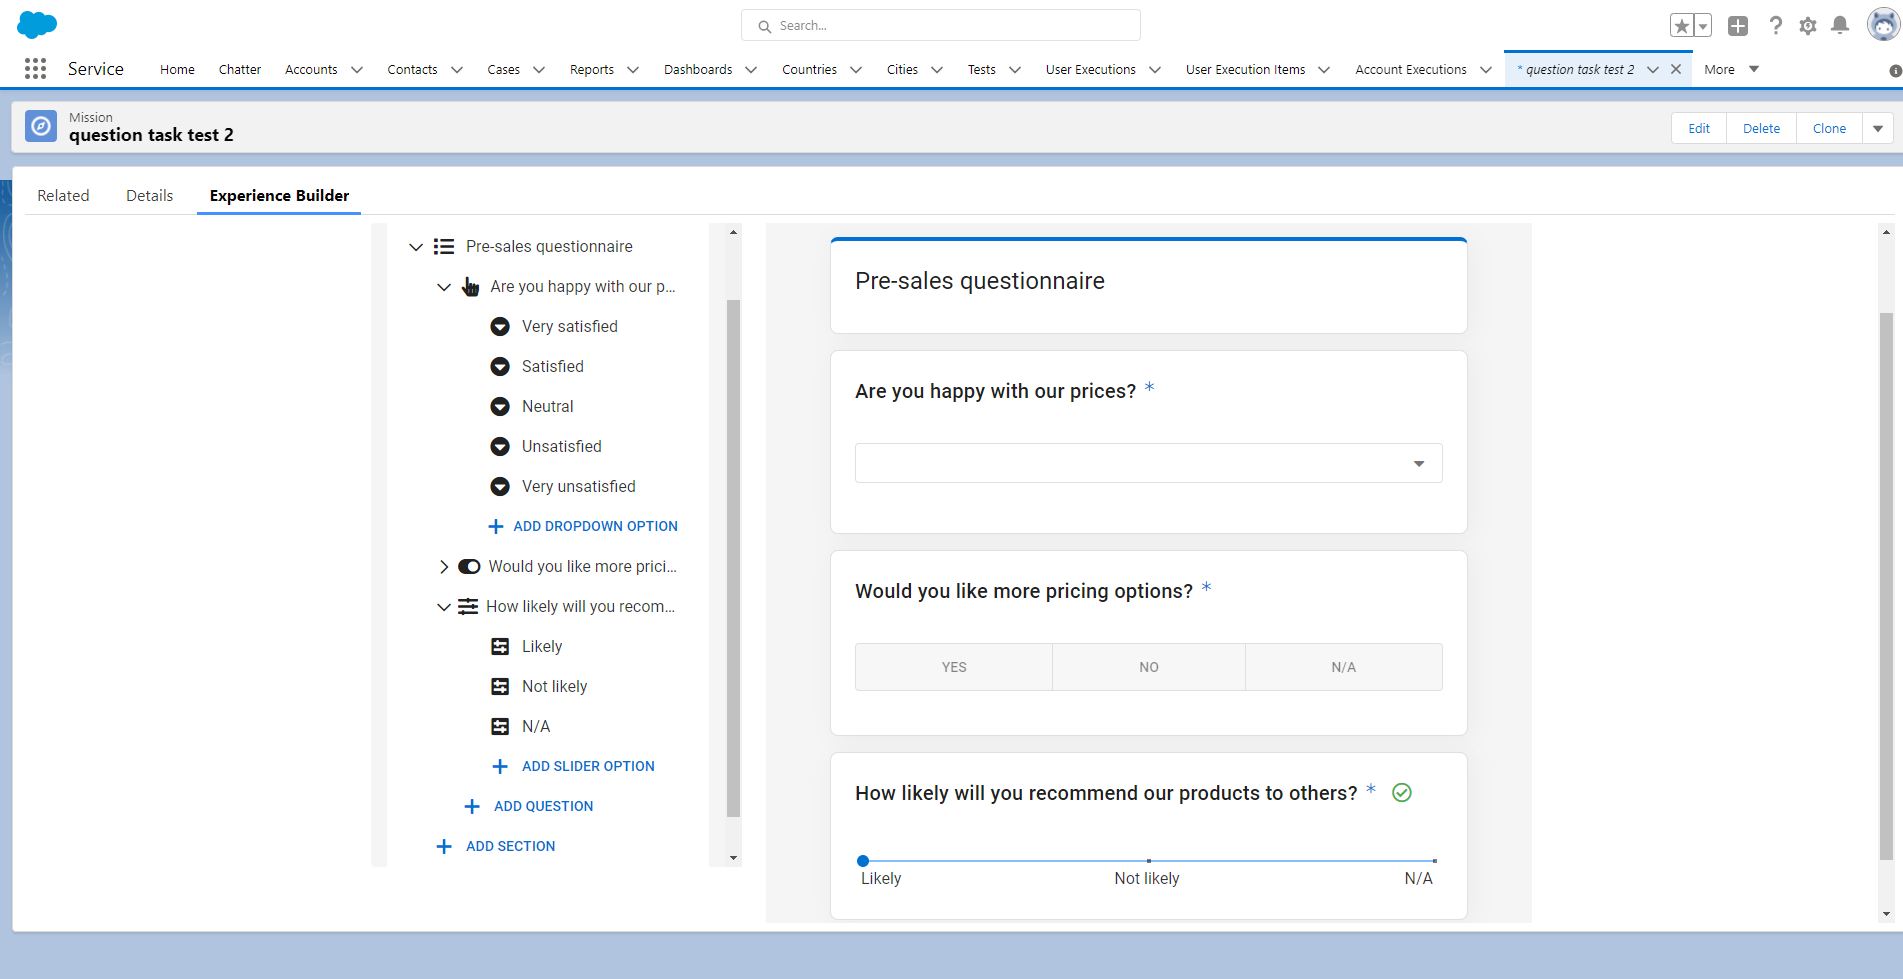
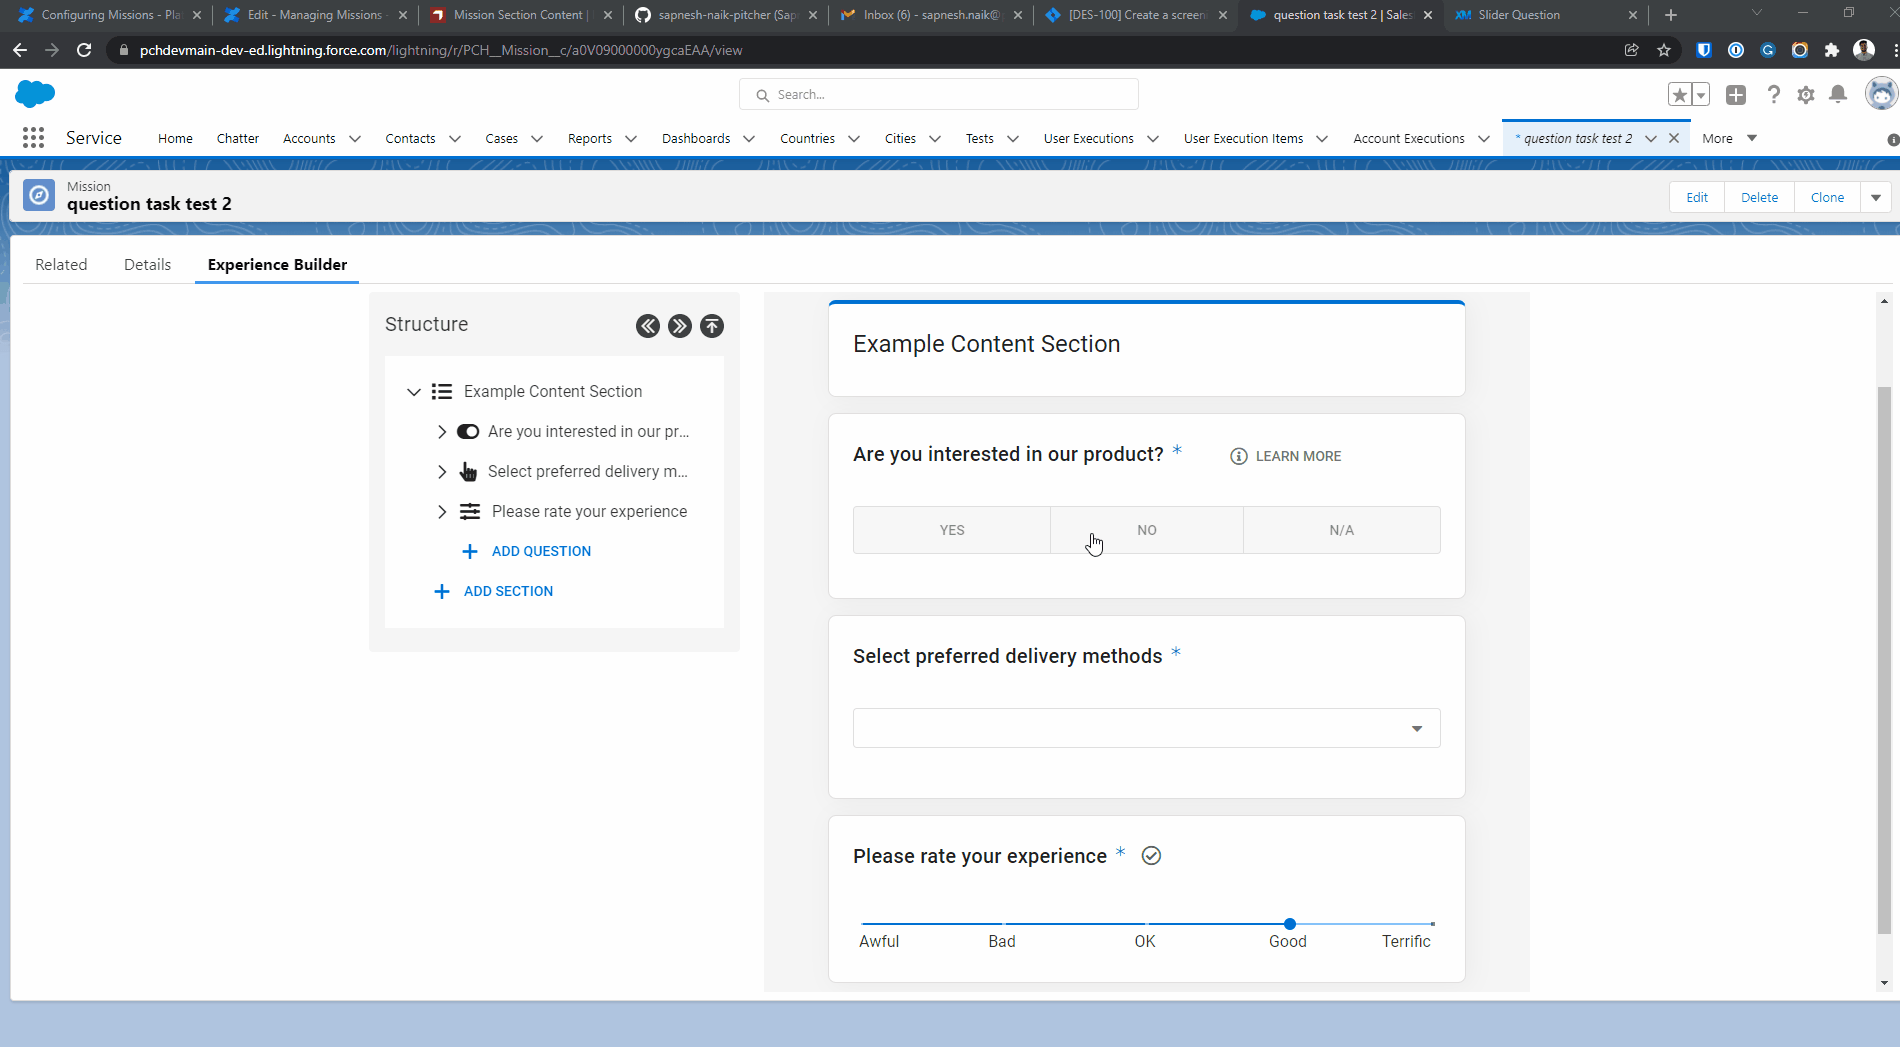
Example Questionnaire
To build a questionnaire form, first, add a content section in the Mission Builder:
Click on the content section, and click on the Add Question button.
Adding a new question
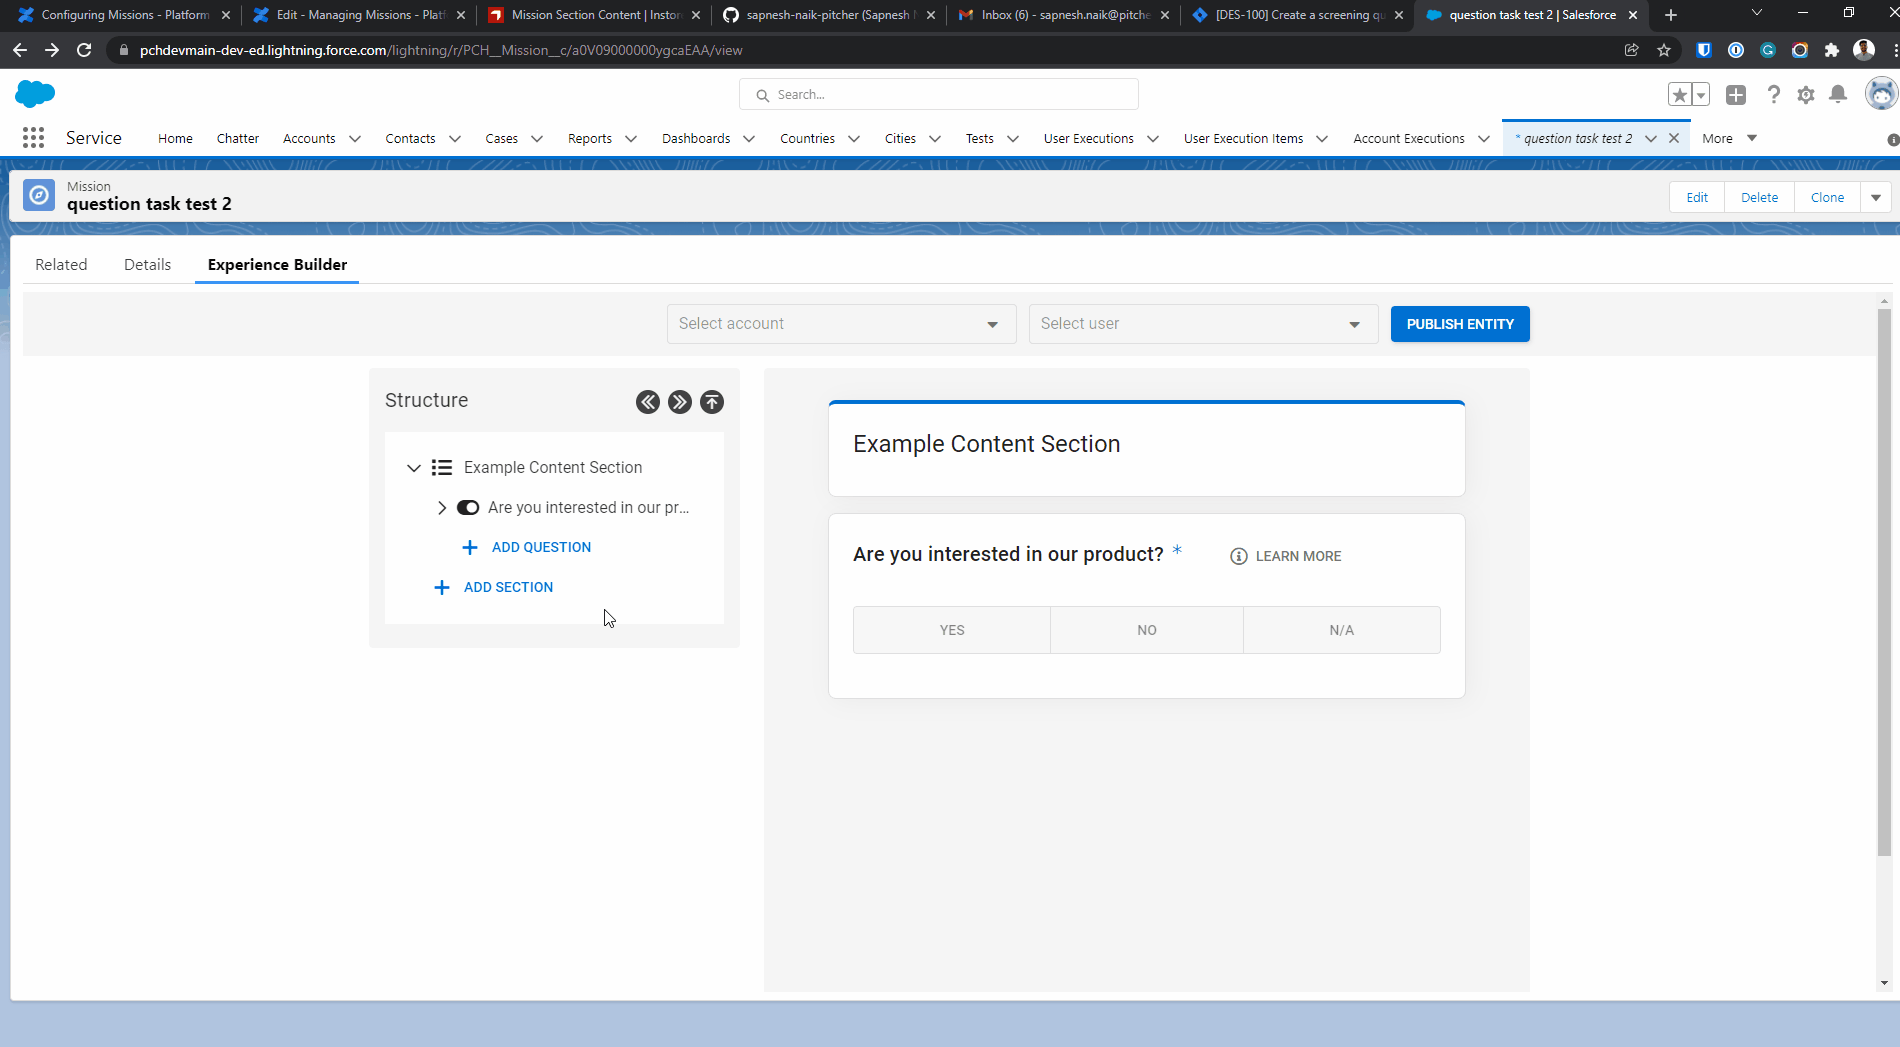
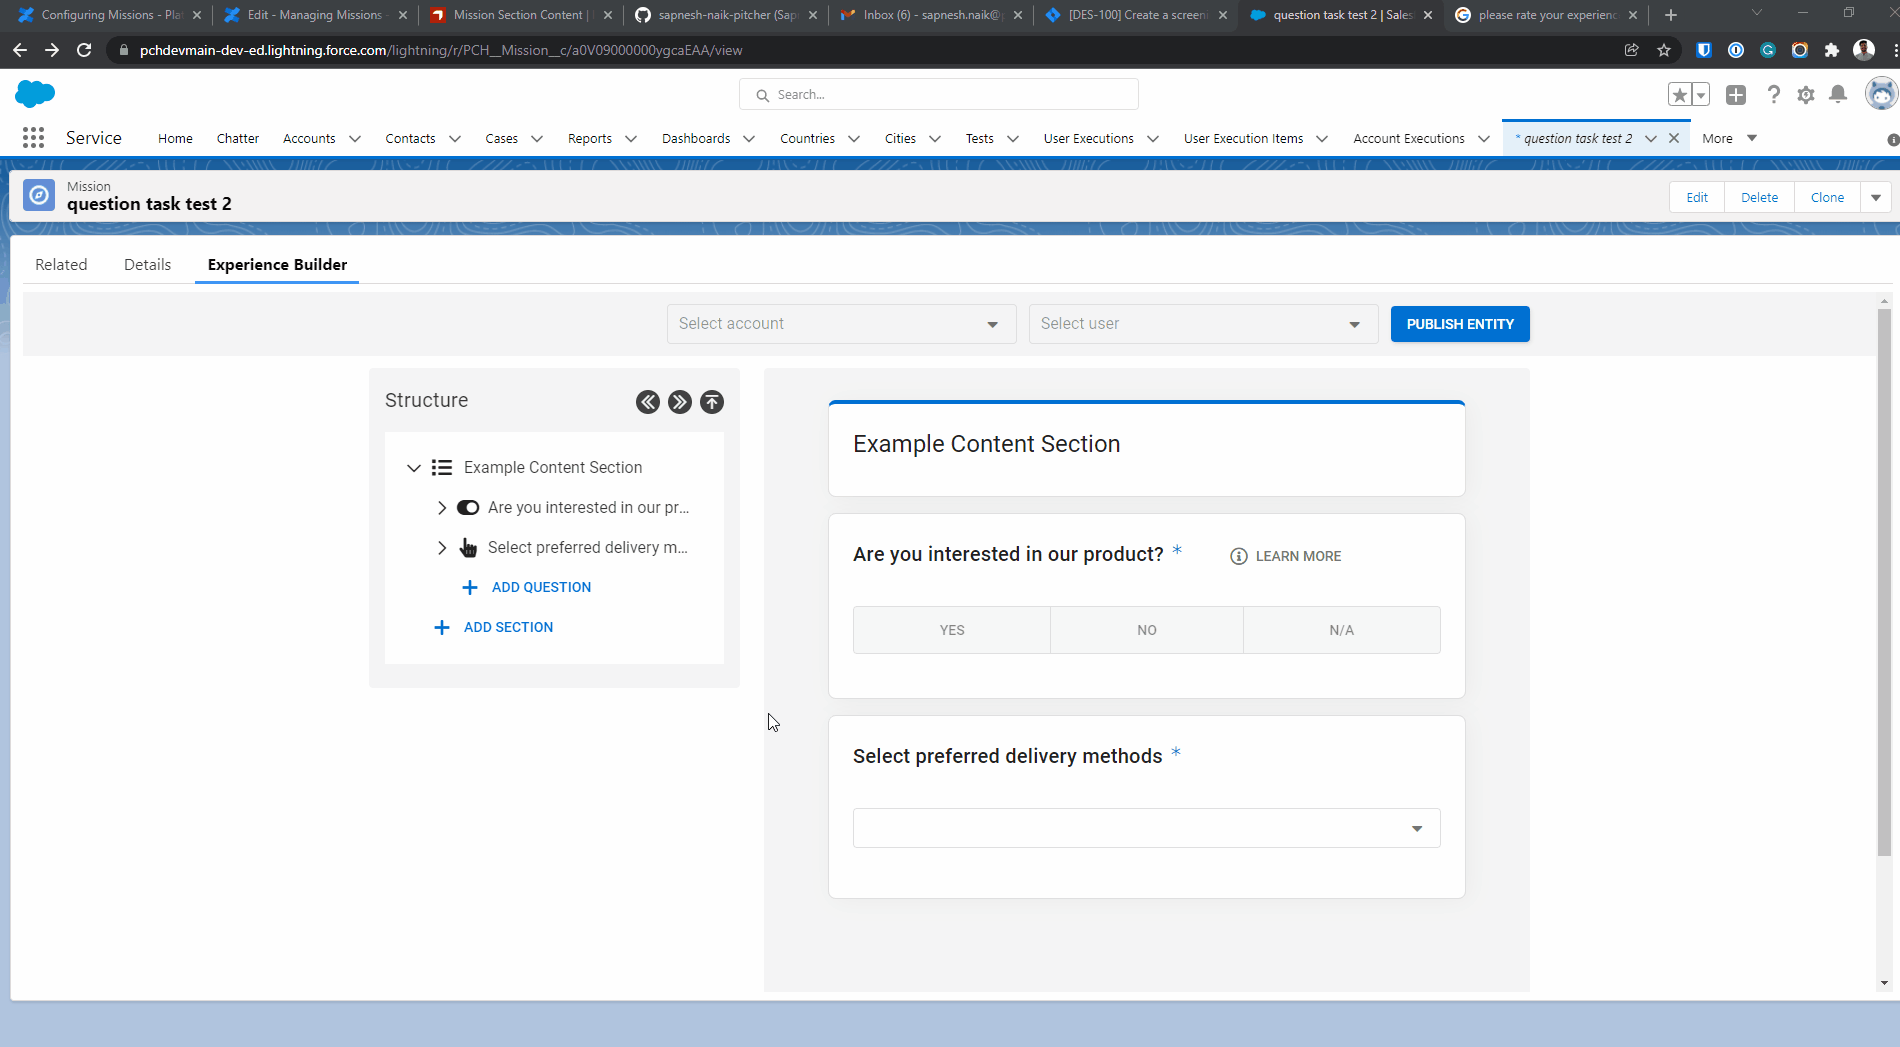
Select one of the five-question types. Currently, the Mission Builder supports five types of questions. You can use these question templates to build queries for various scenarios.
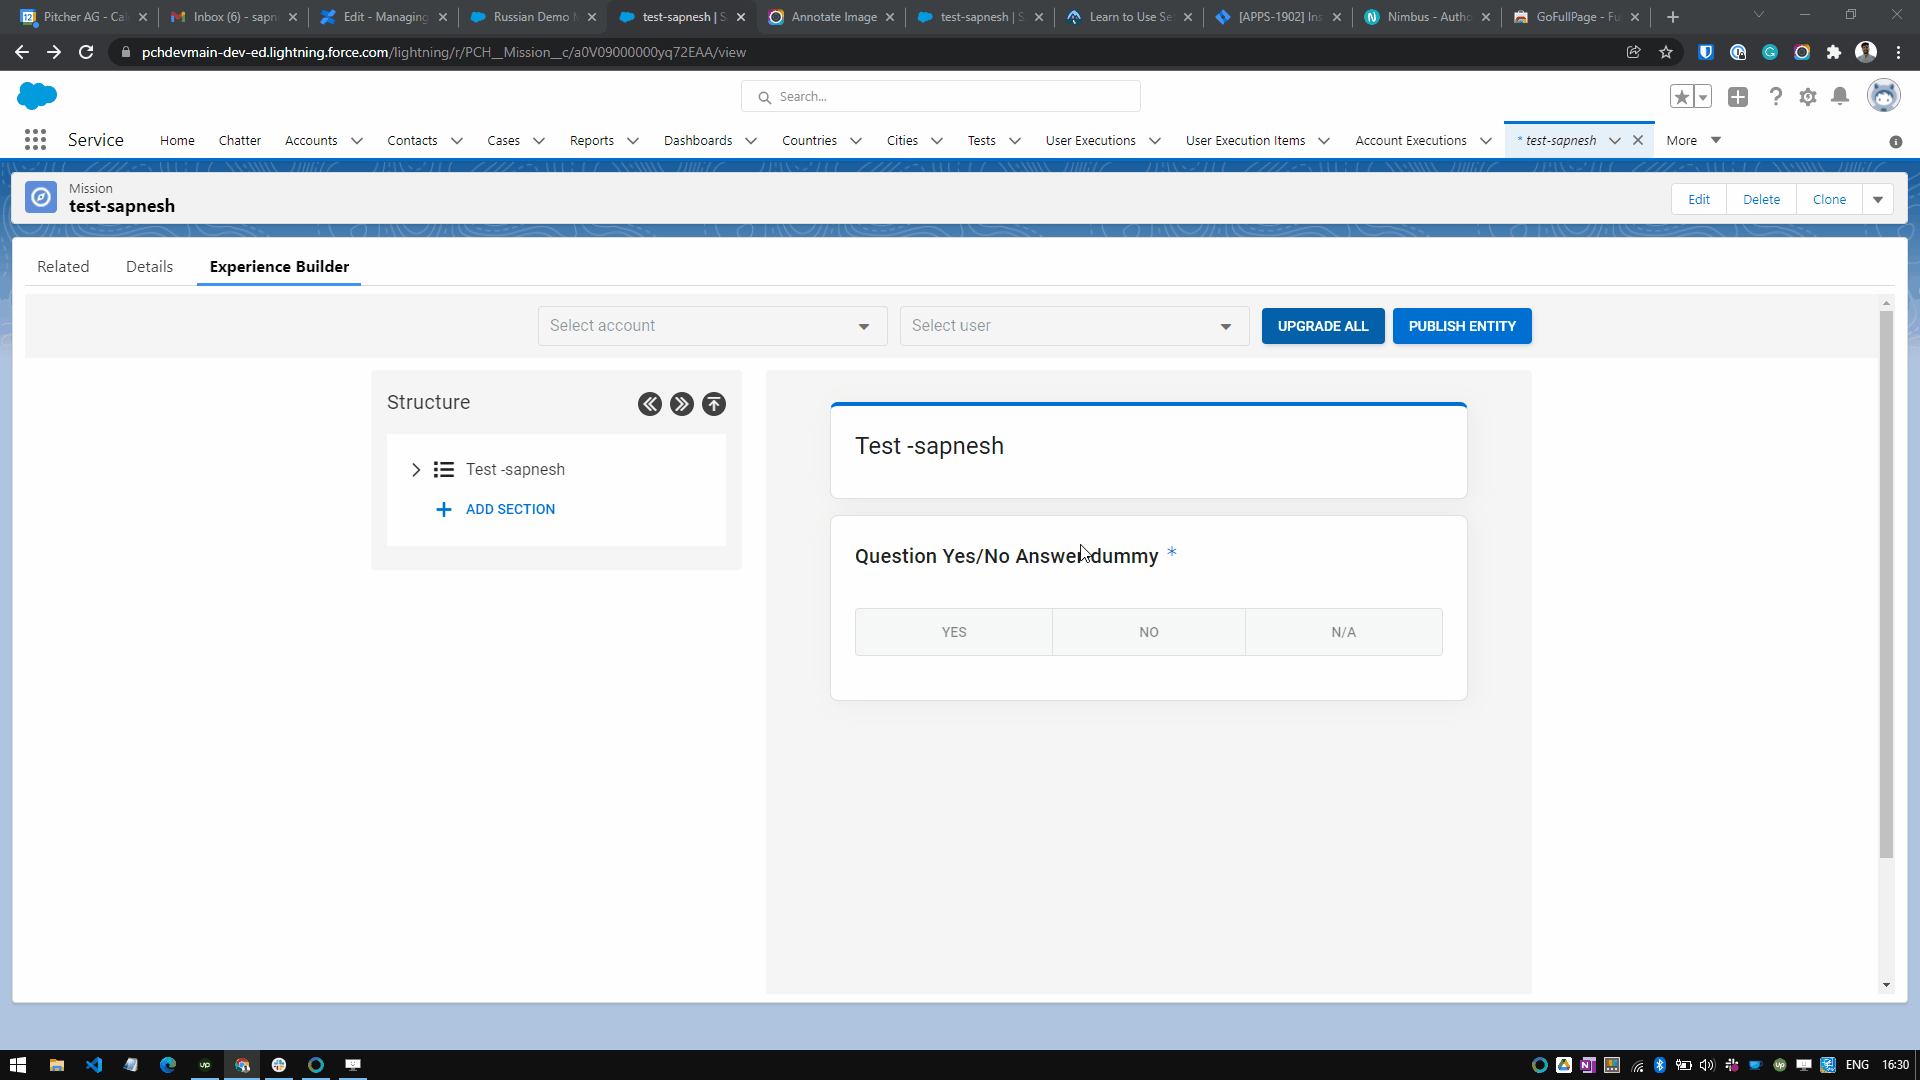
Question Yes/No Answer - These questions can only take a Yes or a No as an answer. You need to mandatorily provide the question title when adding a Yes/No type of question.
Adding a Yes/No type question
Question Picklist Answer - A picklist-type question has a set of pre-defined answers that a user can select. The answers are presented in a dropdown menu to the user. After adding a picklist-type question, expand the question in the structure menu and add a new answer option.
Question Picklist Answer
Question Slider Answer - You can use the slider question type as a more interactive alternative to the picklist type question. After adding a slider question, you can add the slider step options by clicking on the newly added question and selecting Add Slider Option.
Question Slider Answer
Question Multiple Choice - Multiple choice questions are fundamental survey questions that provide respondents with multiple answer options. After adding a multiple choice type question, you can add an answer choice by clicking on the newly added question and selecting Add Button.
Question Multiple Choice
No Answer Questions - These questions are read-only and can not take any answers. You can use these questions to define a disclaimer or a statement in the questionnaire.
Question No Answer
Question Attributes
You can enable additional options to customize the question behavior and tailor the user experience according to your needs.
Attributes Example 1:
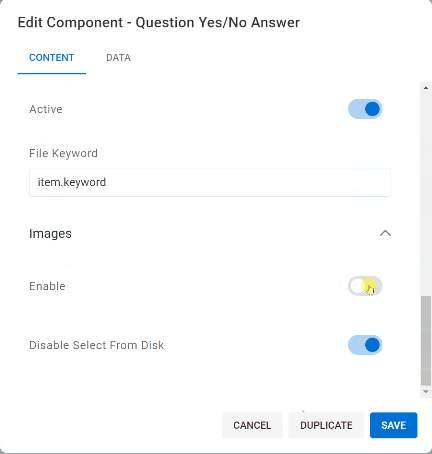
Question Attributes-1
Attributes Example 2:
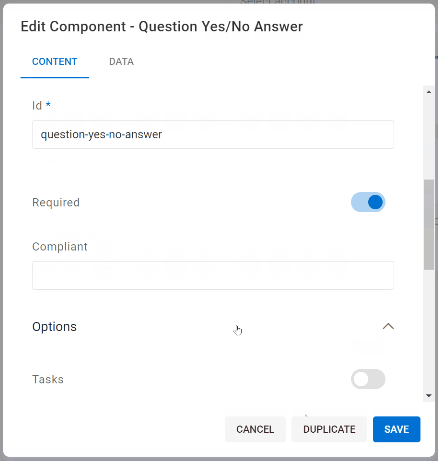
Question Attributes-2
Attribute Name | Details |
|---|---|
Mandatory questions | You can toggle the “Required” switch to make the question mandatory, and this disables the questionnaire submission until an answer is selected for the question. |
Question help | You can add a description or help text associated with them, and the sales rep will be able to access this information by clicking on the "ⓘ LEARN MORE" button at the top of a question. |
Question comments | You can enable comments to a question that can help a sales rep note necessary details about a question's response from the customer. |
Question tasks | You can also enable adding action tasks based on an answer. |
Question attachments | You can also enable the option to add images to a question. By default, sales reps can add pictures from the device camera, but you can also specifically allow the option to upload an existing image from disk. |
To learn more, see Tasks.
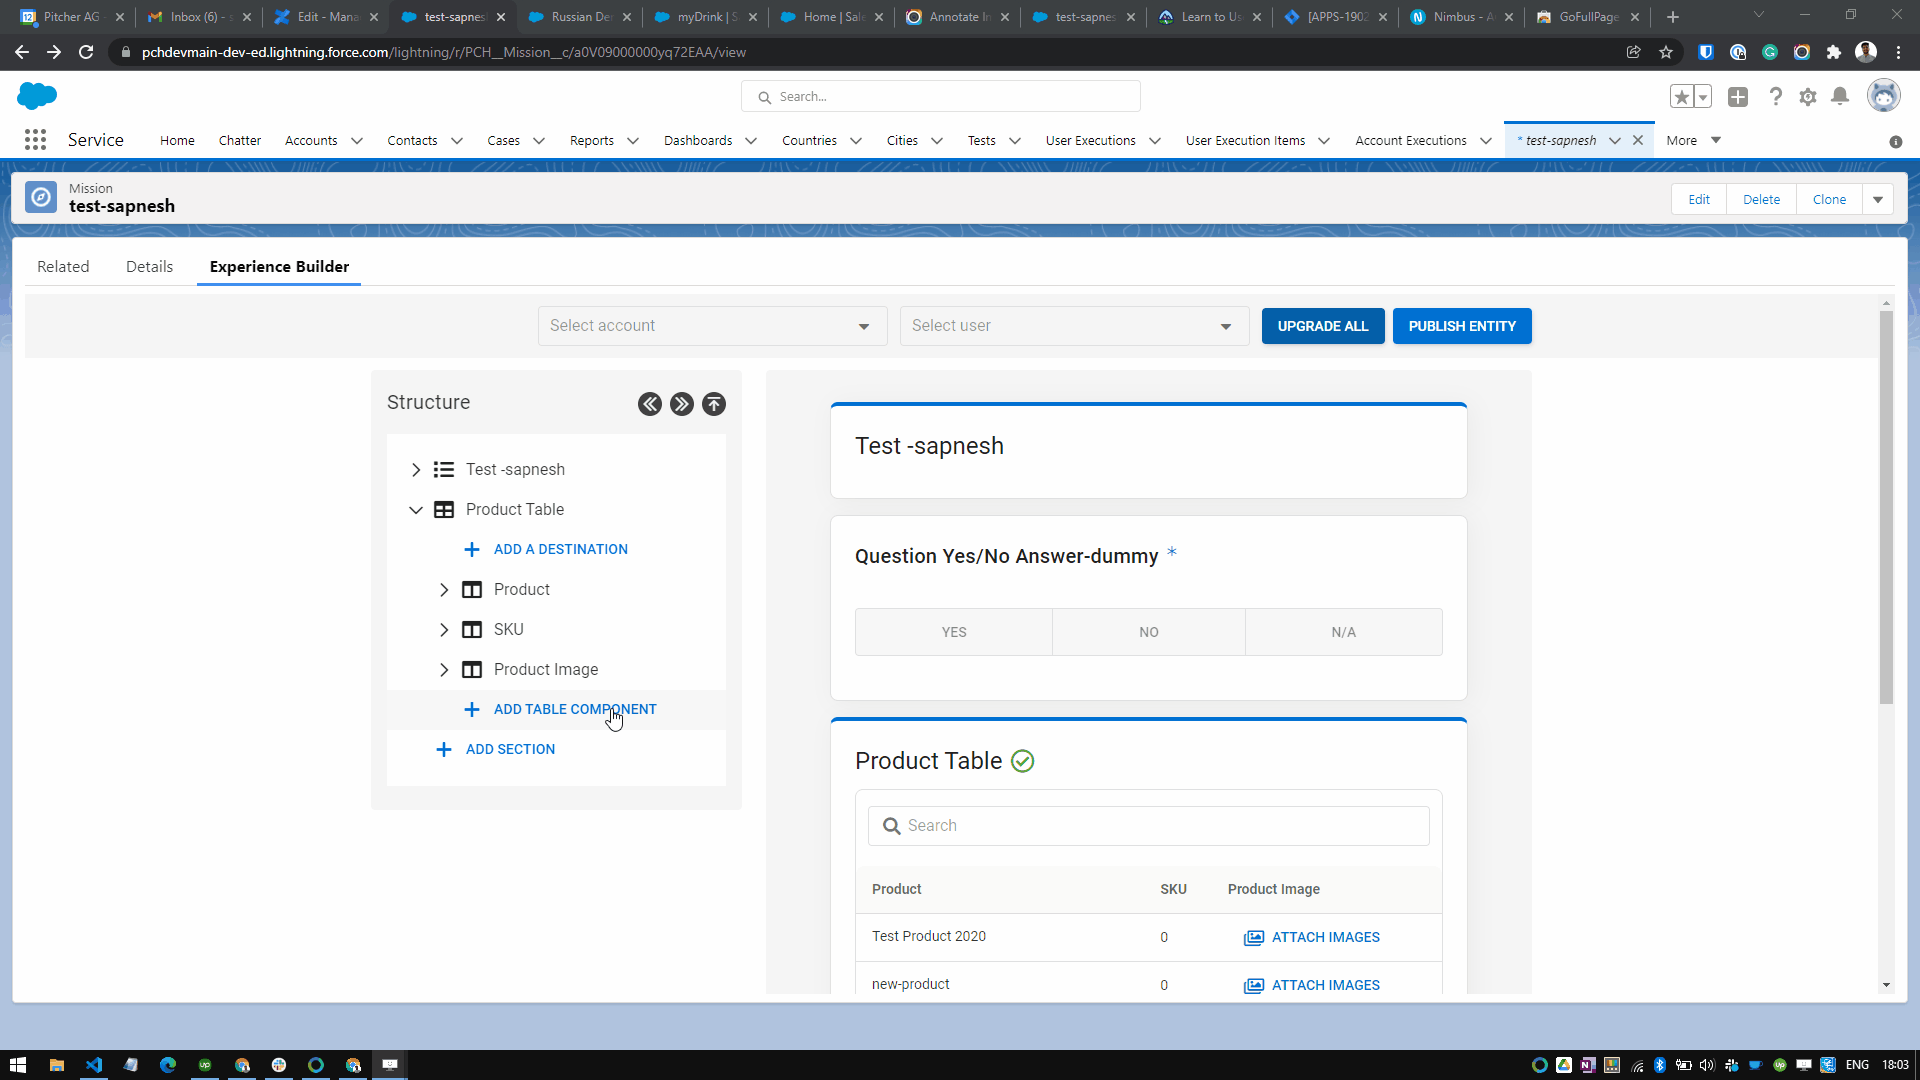
Tables are a powerful feature provided by the Mission Content builder. You can use tables to query, search and manipulate a Salesforce Object in your Mission content. We will take an example of Products and see how we can query and manipulate the Products data in a Mission table.
It is essential to have in-depth knowledge of the Salesforce object you are trying to configure tables. You can check the Salesforce Object Manager to get more details about the Salesforce Object you are trying to query.
Adding Tables
To start, click on the “+ Add Section” button and add a table section to your Mission content.
Enter the title and a unique ID for your table on the next screen.
More importantly, you also need to enter the table query that fetches the data from the Salesforce Object. The query is in the form of an SQL syntax.
Example:
SELECT * FROM {{ Product2 }} LIMIT 10
Click Save to add the table to your Mission structure.
Adding a new table
You can also write complex queries to narrows down the results to a greater extent.
Example: SELECT * FROM {{ Product2 }} LIMIT 10 where active =TRUE AND Type = Product AND Sharing Code = User.Sharing Code
Not all Salesforce objects are supported in table queries. You can find a list of supported objects from Pitcher Admin by going into “Instance > Files > config.json.”
Adding Table Columns
You might notice that the newly added table is empty and does not show any data. Because we have only added a data source query in the previous step, we need to add table columns and map them to Object fields to see the data in the table.
To add a new column:
Click on the newly added table to expand the options menu and select the ADD TABLE COMPONENT option.
Select Table Column and click on the “Use this template” button on the next screen.
Enter a column name and click the Save button.
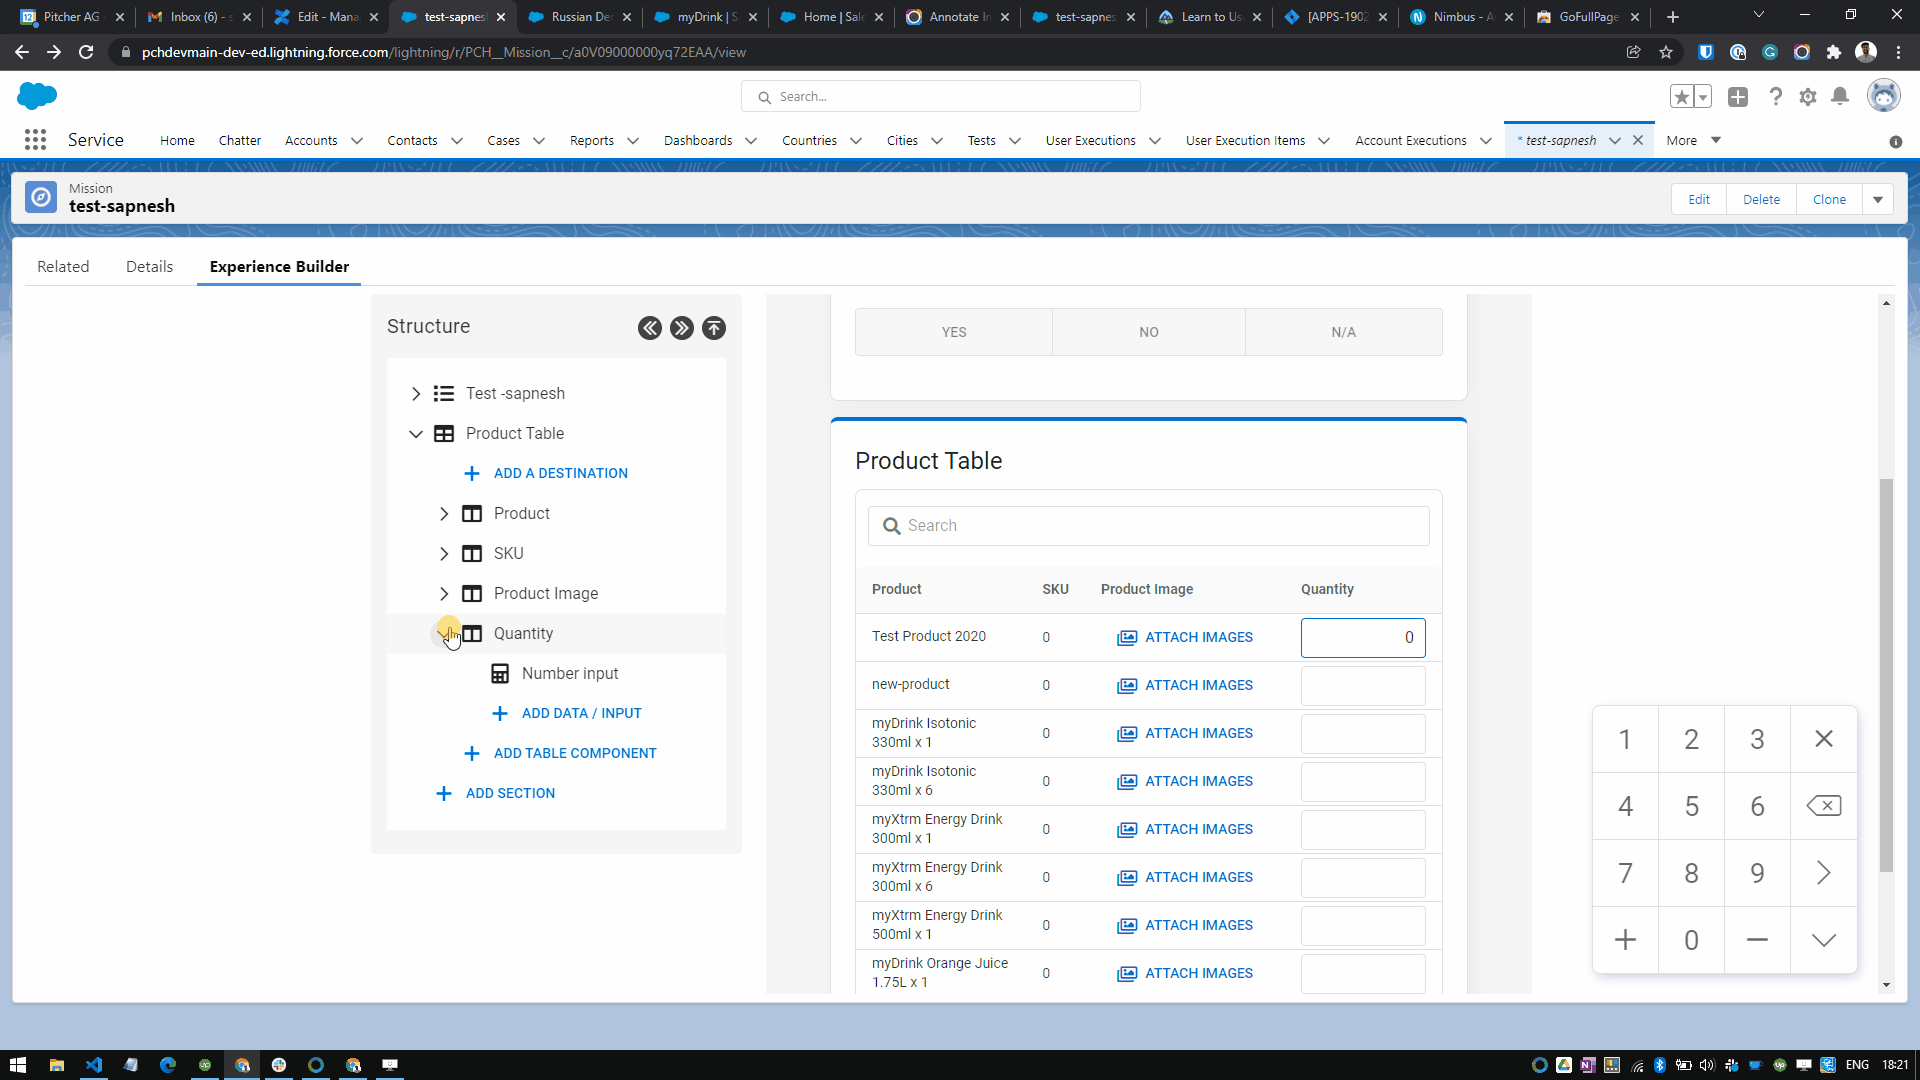
Now, you can define the column data by clicking on the column to expand the options menu and selecting the + ADD DATA/INPUT option.
A column can contain more than one data/input values. In such cases, the table values will be displayed together in the same column.
The following data/input options are available:
Data Display - Fetch the data from one of the Object fields by specifying the query in the form of
{{ item.FieldName }}For Example:
{{ item.Name }}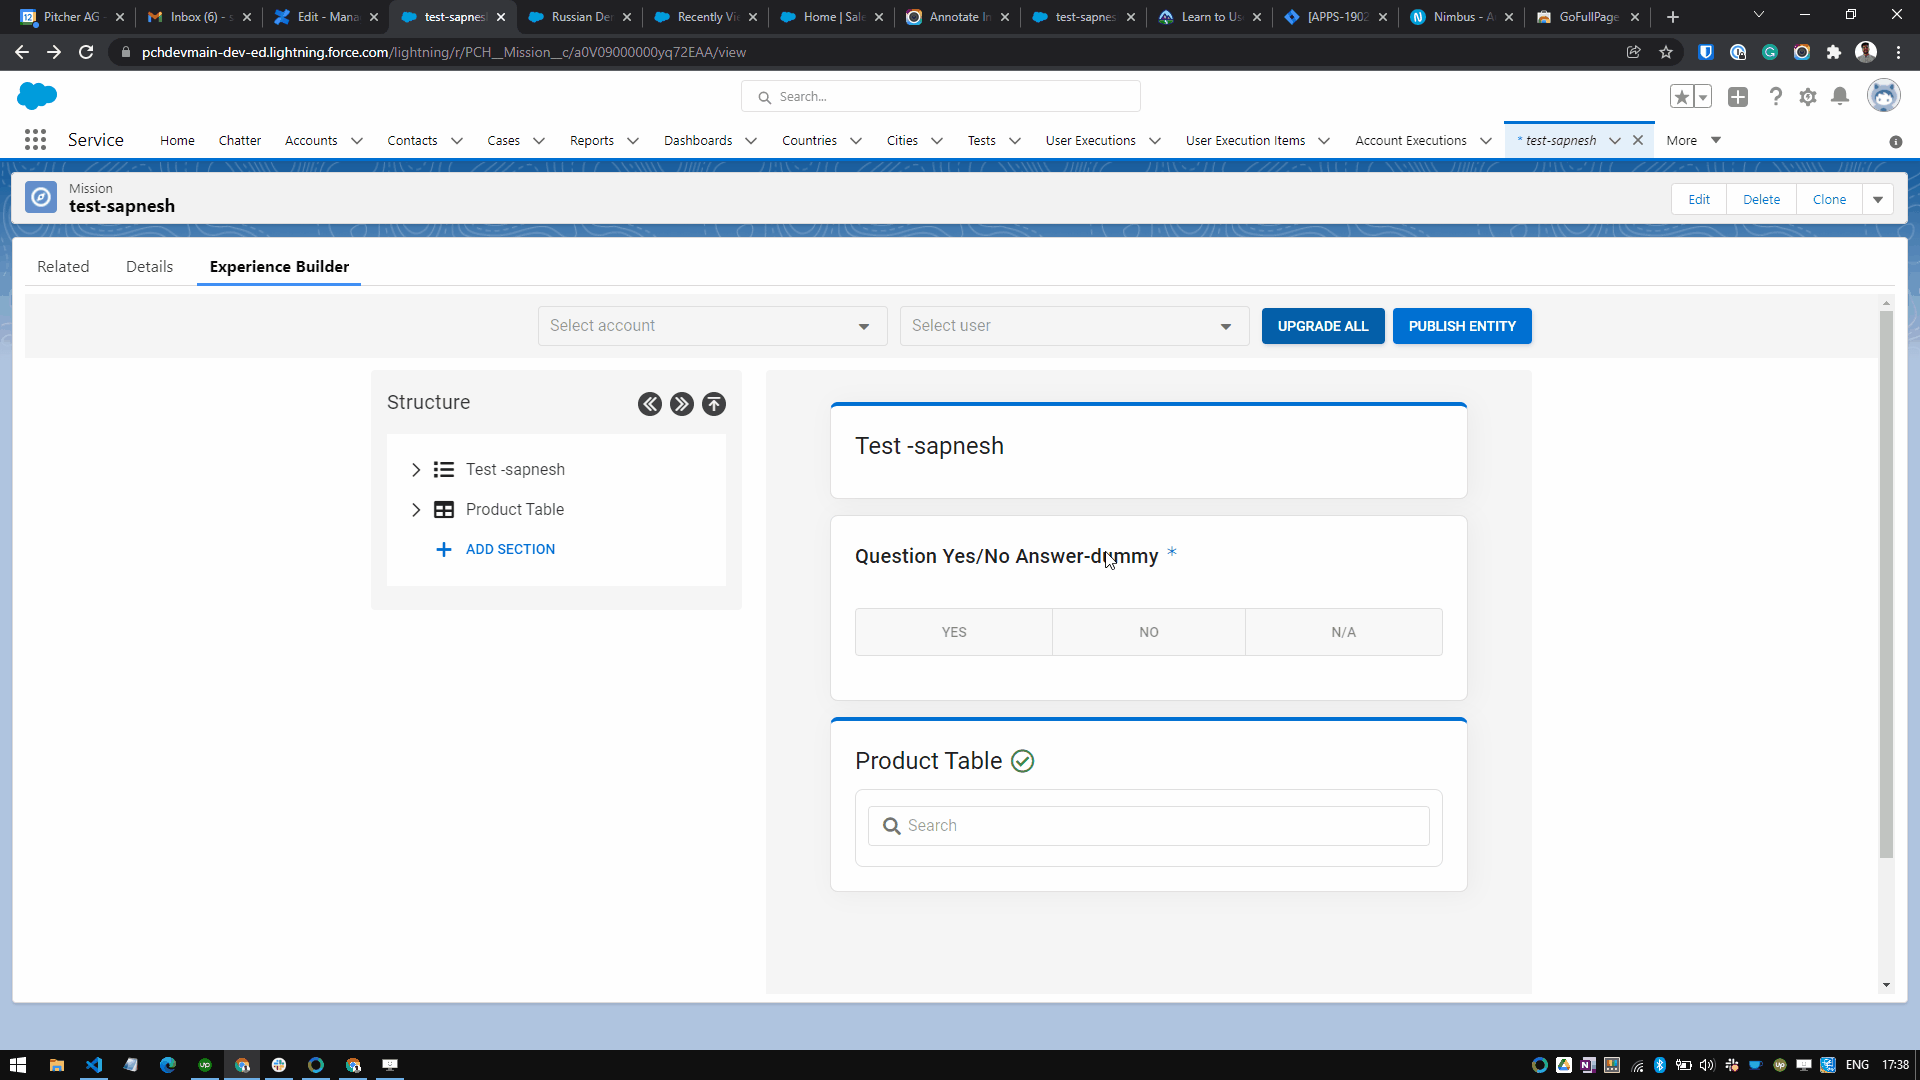
Data Display Input
Data Formula - Define a mathematical formula to manipulate the object data fields.
For Example:
{{ item.quantity ? item.price * item.quantity : 0 }}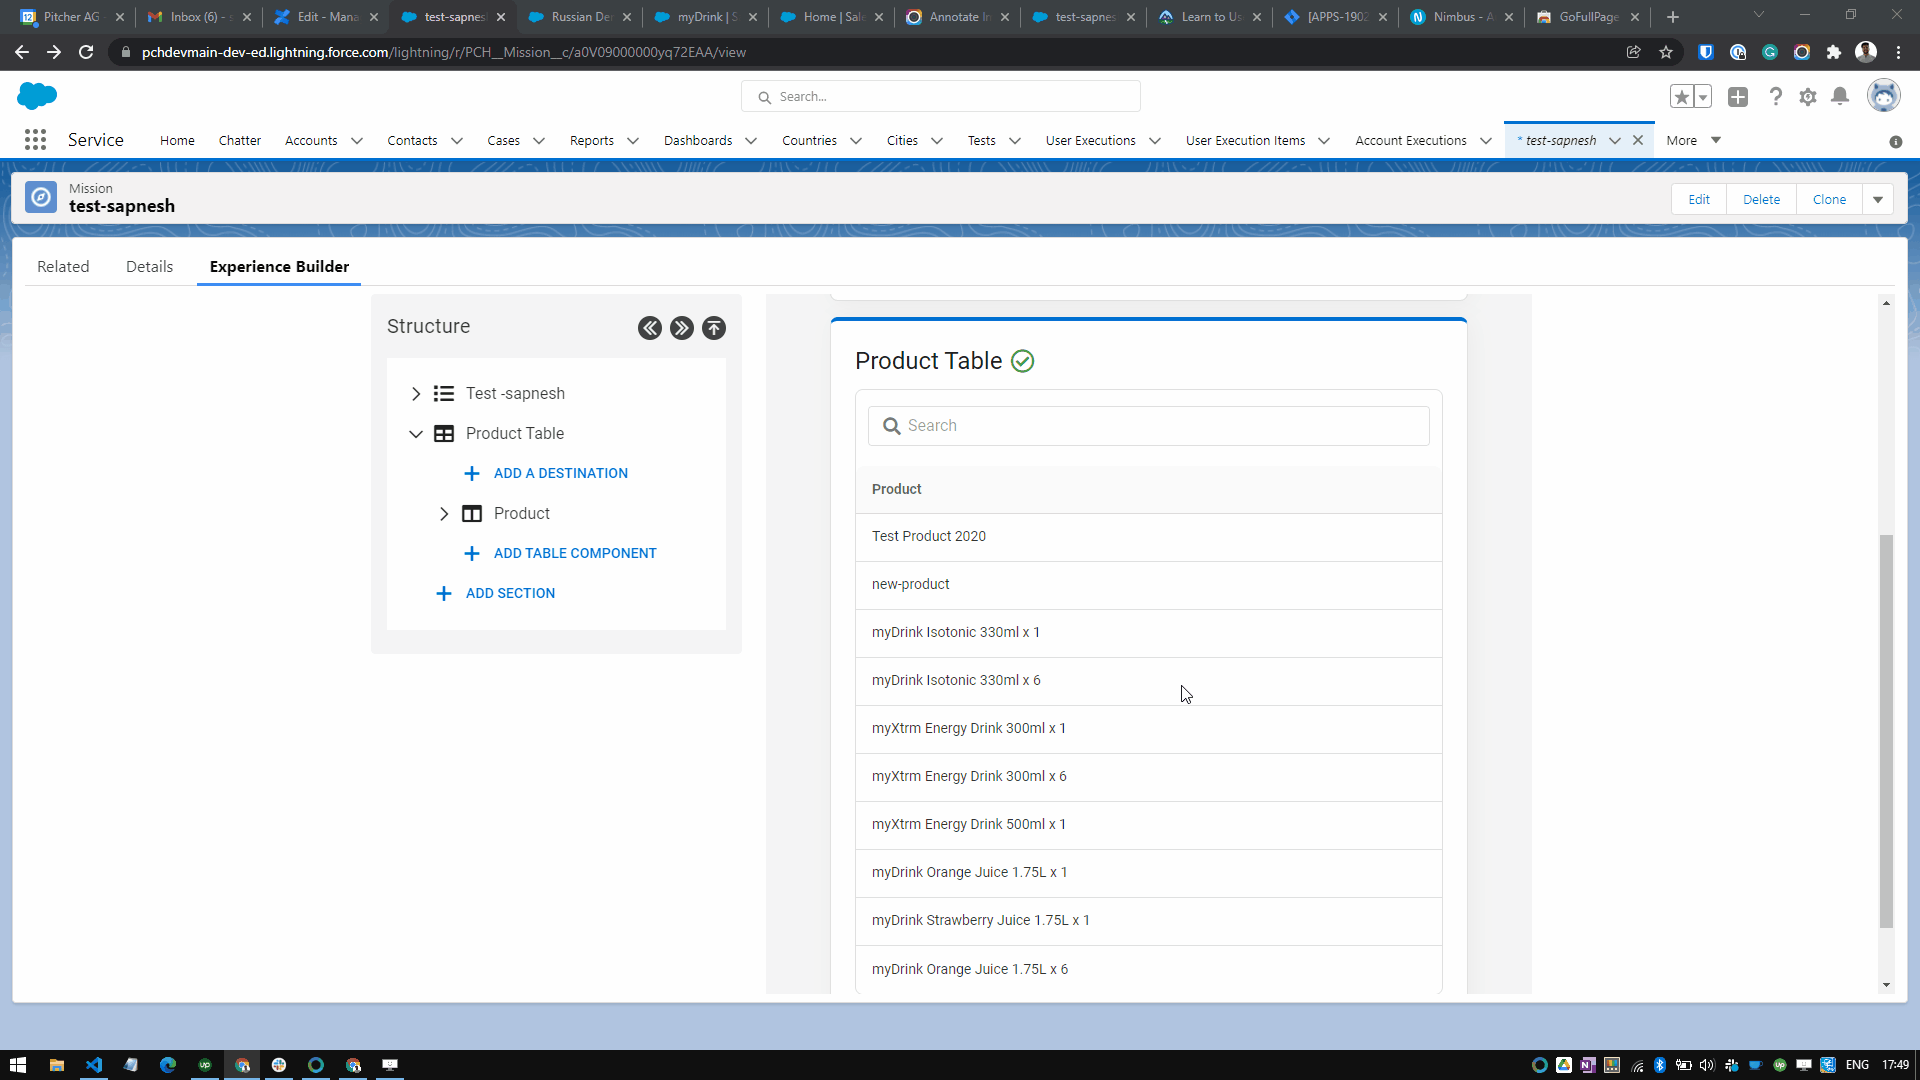
Data Formula Input
Image Capture - Add an input field to the column. You can also enable the option to upload images from the disk.
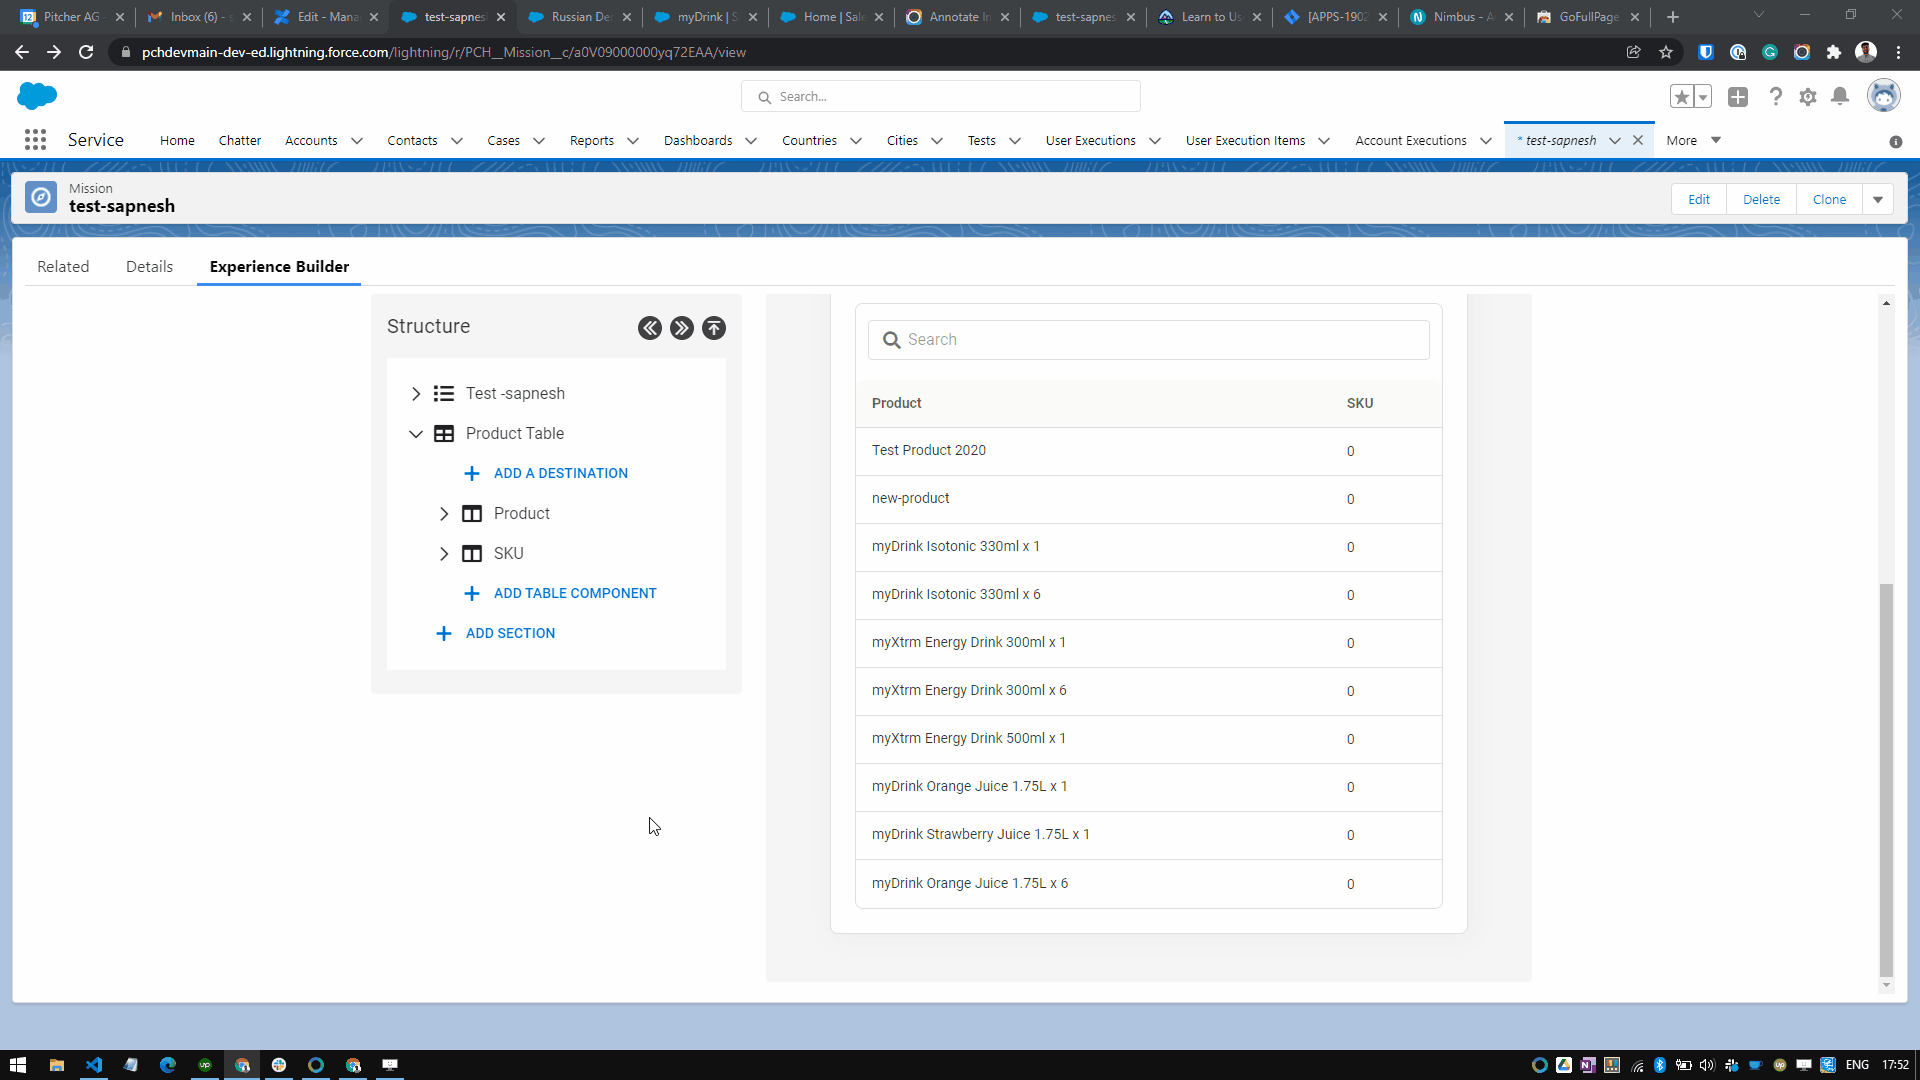
Image Capture Input
Number Input - You can define a number input and map it to one of the objects fields. The numeric value then gets assigned to the Object property depicted in the Destination field upon Mission Execution.
Number Input Option
Option Group - Similar to the number input, option groups can display a group-style input to the user. The selected value gets assigned to the Object property defined in the Destination field upon Mission Execution.
Option Group
Dropdown Input - Similar to the number input, the dropdown input can be used to display a dropdown-style input to the user. The selected value gets assigned to the Object property defined in the Destination field upon Mission Execution.

Dropdown option
Data placeholders
The data placeholders feature might be removed in the near future to avoid complexity and for simply this component to only show the available fields to select from. This will enable us to go from low-code > no-code
Data placeholders are available throughout the Mission content and can be used at any given place. These data placeholders can be used to make the Mission content dynamic based on the Account/User data. During Mission execution, the placeholder will be dynamically replaced with customer data during Mission execution.
For example:
Question: Does the product meet
{{ user.Name }}'s quality standards?Customer A:
Question: Does the product meet Customer A's quality standards?
Customer B:
Question: Does the product meet Customer B's quality standards?
The following data placeholders are available:
Placeholder Name | Type |
|---|---|
| function |
| function |
| function |
| function |
| function |
| function |
| function |
| function |
| function |
| function |
| function |
| function |
| function |
| function |
| string |
| function |
| function |
| function |
| function |
| function |
| function |
| string |
| string |
| string |
| string |
| object |
| object |
You can also get a preview of the data placeholder values when you select a customer/user account for preview:
Data placeholders
Preview Mission content as a customer
You can also see what the Mission content might look like from a specific Account or User’s perspective. This comes in handy to analyze how the Mission might look like for a specific account/user during Mission execution.
Select either a customer account or a user preview Mission content as that account/user.
Preview Mission Content
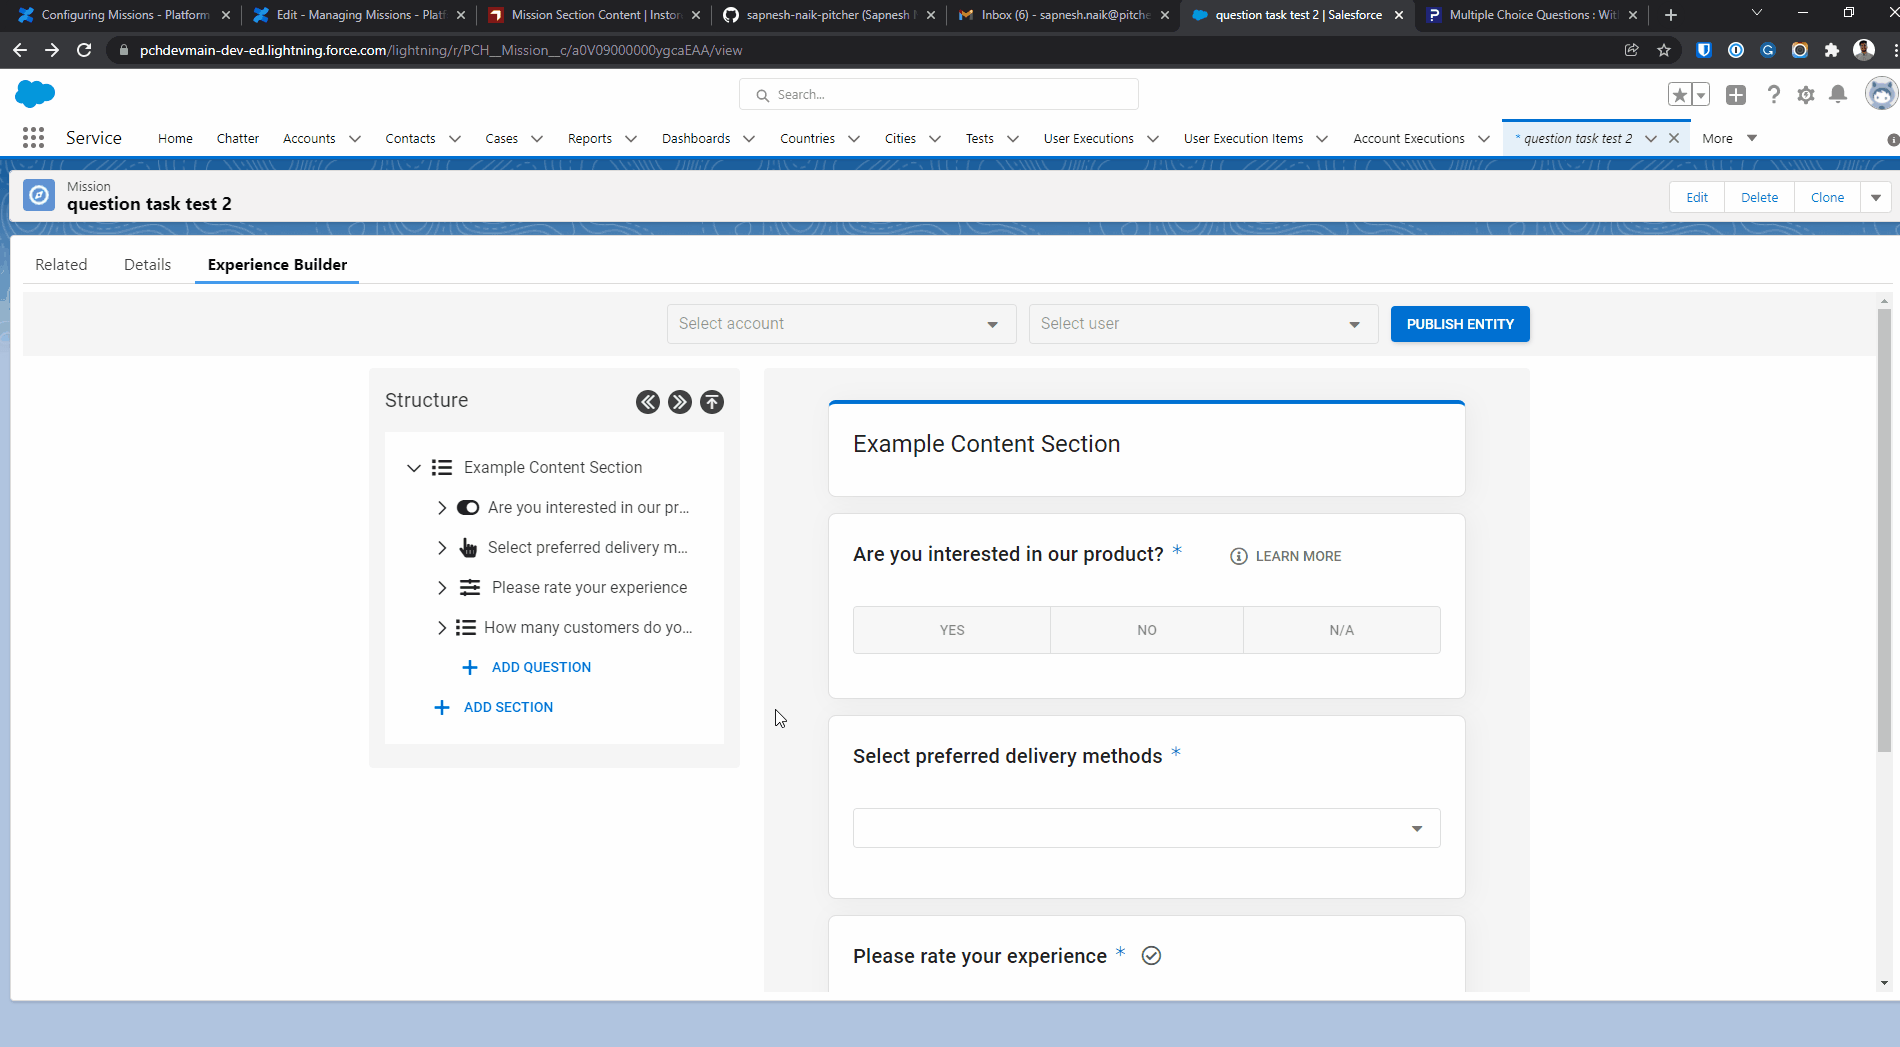
Saving Mission content changes
Please remember to click the “Publish Entity” button to save the Mission builder changes.
Saving a Mission
Step 3: Defining Mission Allocation
In the second step, we allocate the Mission to at least one customer Account.
Allocating to individual Accounts
The Account section contains two tabs, Account and Account Hierarchy, that provide options to allocate the Mission to customer Accounts based on individual allocation or inheritance.
To allocate a Mission to individual customer accounts:
Select the Account tab
Search for an Account.
Enable include or exclude rules for the Mission as required.
You can also allocate Missions to a family of accounts (parent-child).
To allocate Missions based on account hierarchy:
Select the Account Hierarchy tab.
Search for an Account.
Check the Inheritance checkbox to allocate the Mission on any child accounts related to the selected account.
Enable include or exclude rules for the Mission as required.
Allocating to a group of accounts
You can also allocate a mission to a group (segment) of accounts based on a certain account attribute or by filtering accounts using tags.
Select the Segment tab
Click on the Account Attribute tab and select an account attribute from the dropdown menu.
Click on the Tag tab and select tag groups, filters tags, and defined exclude/include rules for the Mission as required.
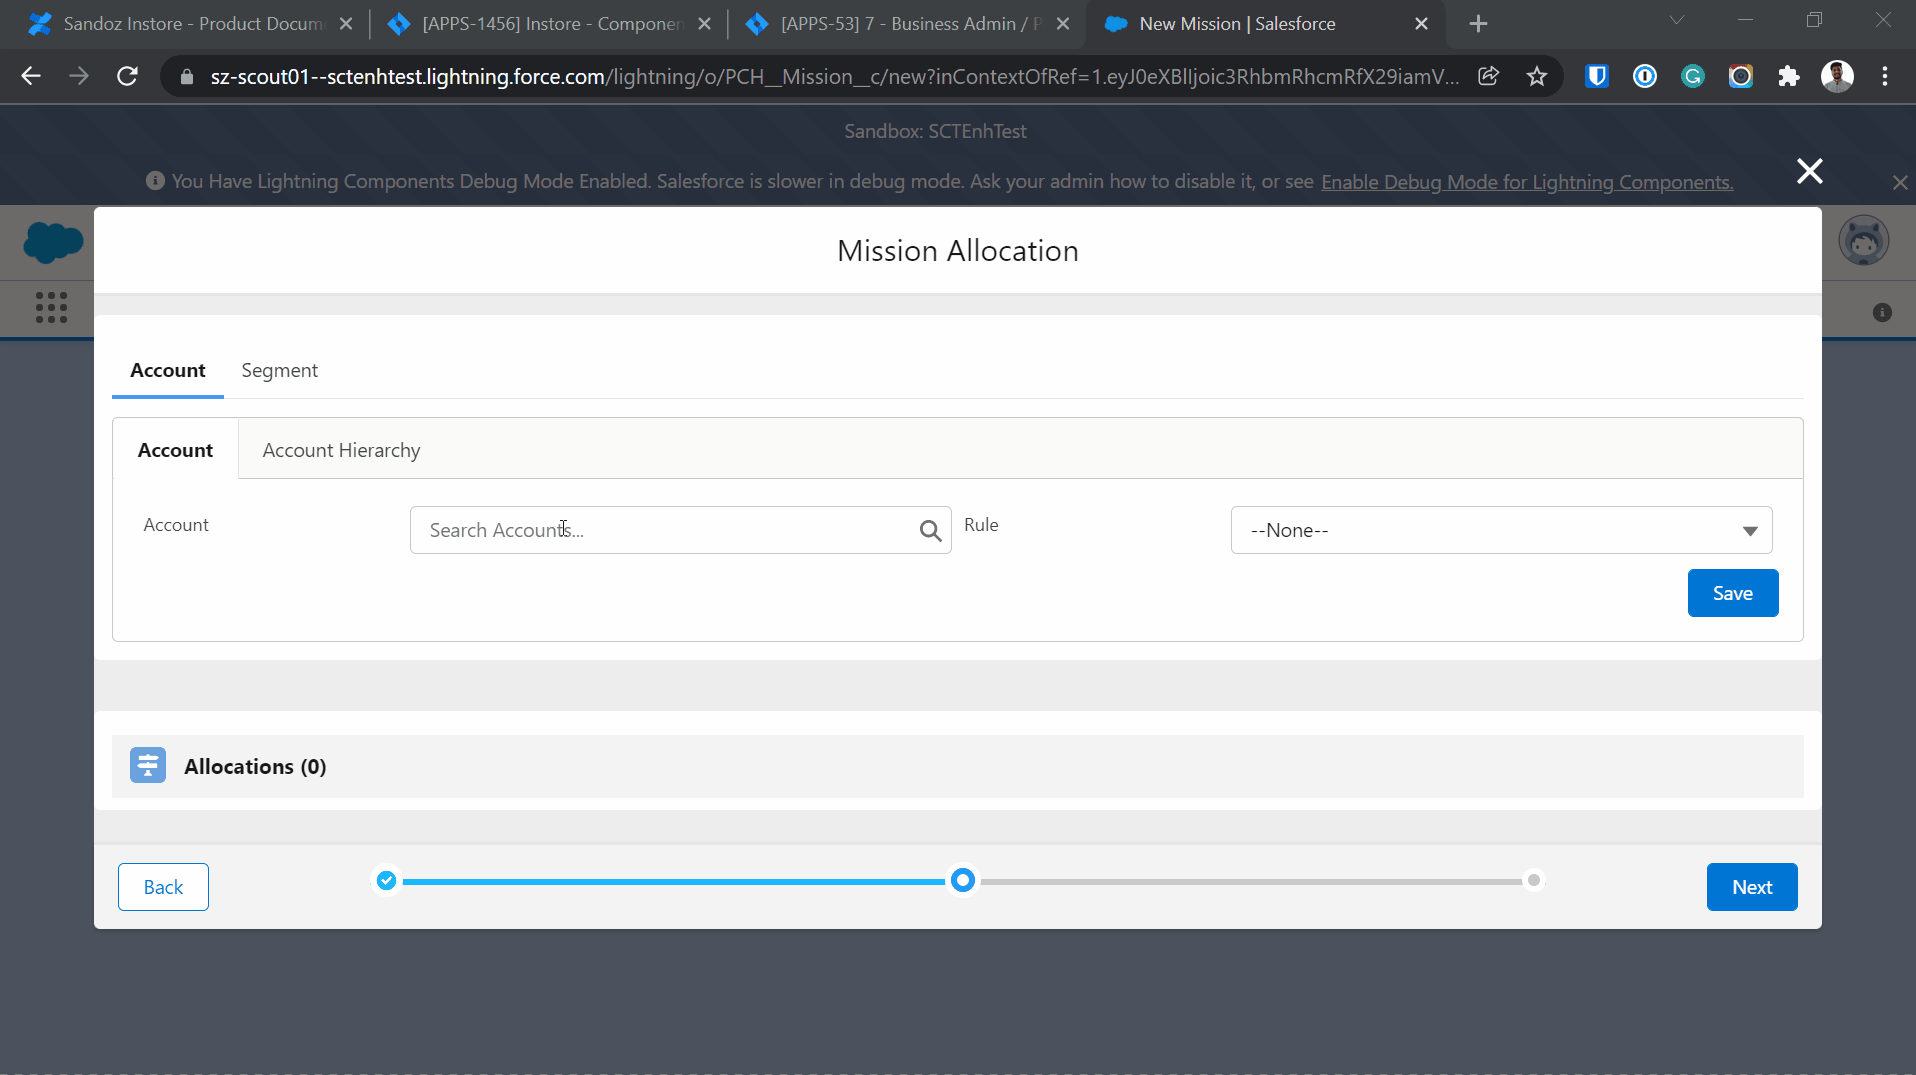
Adding Mission allocation details
Step 4: Defining Mission actions
In the last step, you can set the Mission activation status to activate, update or deactivate.
Activate Mission - Click on Activate to activate a new Mission.
Update Mission - Click on Update to make changes to an existing Mission. Please note this button will be disabled during a new Mission creation.
Deactivate Mission - Click on Deactivate to disable an existing Mission. Please note this button will be disabled during a new Mission creation.
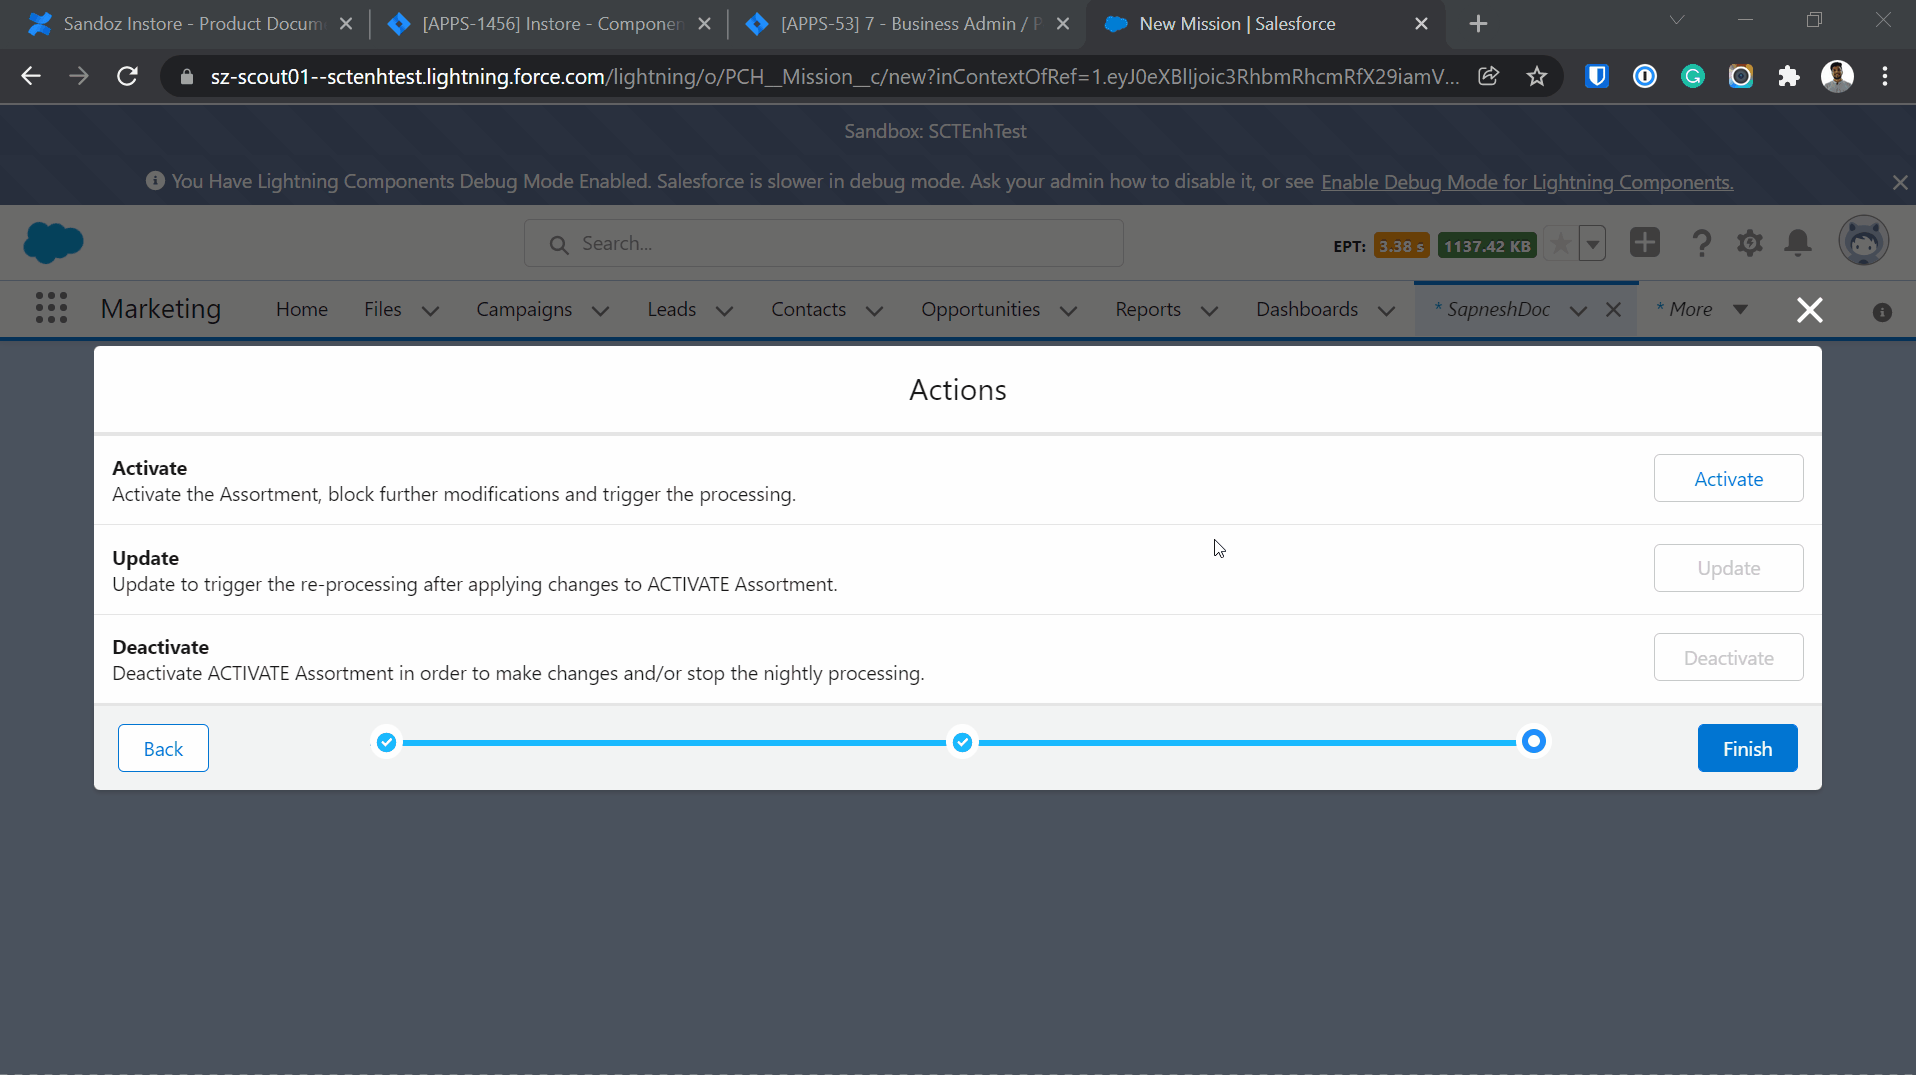
Adding Mission action details
Once you activate the Mission, click on Finish to create the Mission and navigate to the Mission detail page.