Tasks Management
Instore tasks signify a piece of work to be done or undertaken. Tasks help you track and complete activities, and you can also create new tasks and assign them to other users. Let’s see how we can use Instore tasks for various activities.
Some examples where tasks can be helpful:
Preparing weekly and monthly reports.
Negotiating all contracts with prospective clients.
Getting back to a client with a purchase quote.
Preparing and submitting sales contracts for orders.
Answering client questions about credit terms, products, prices, and availability.
Table of Contents
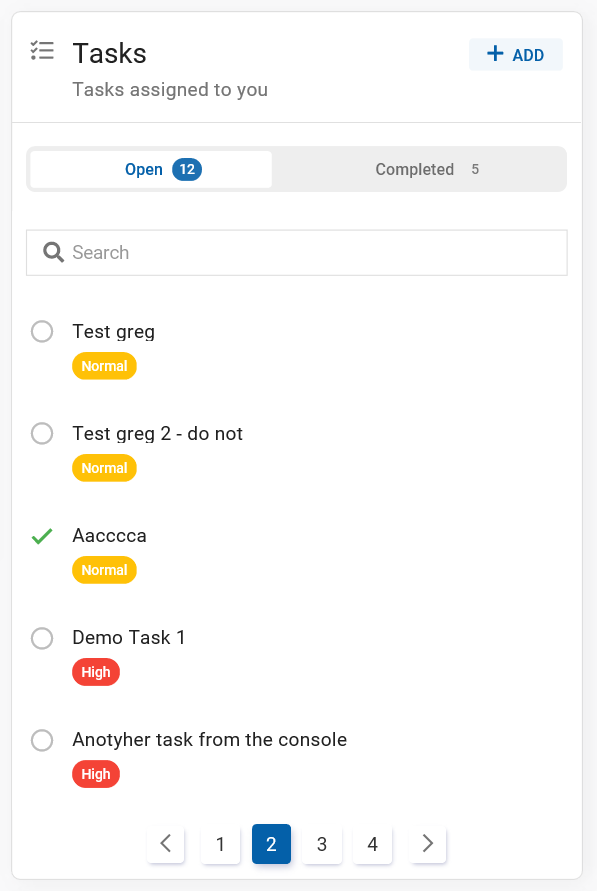
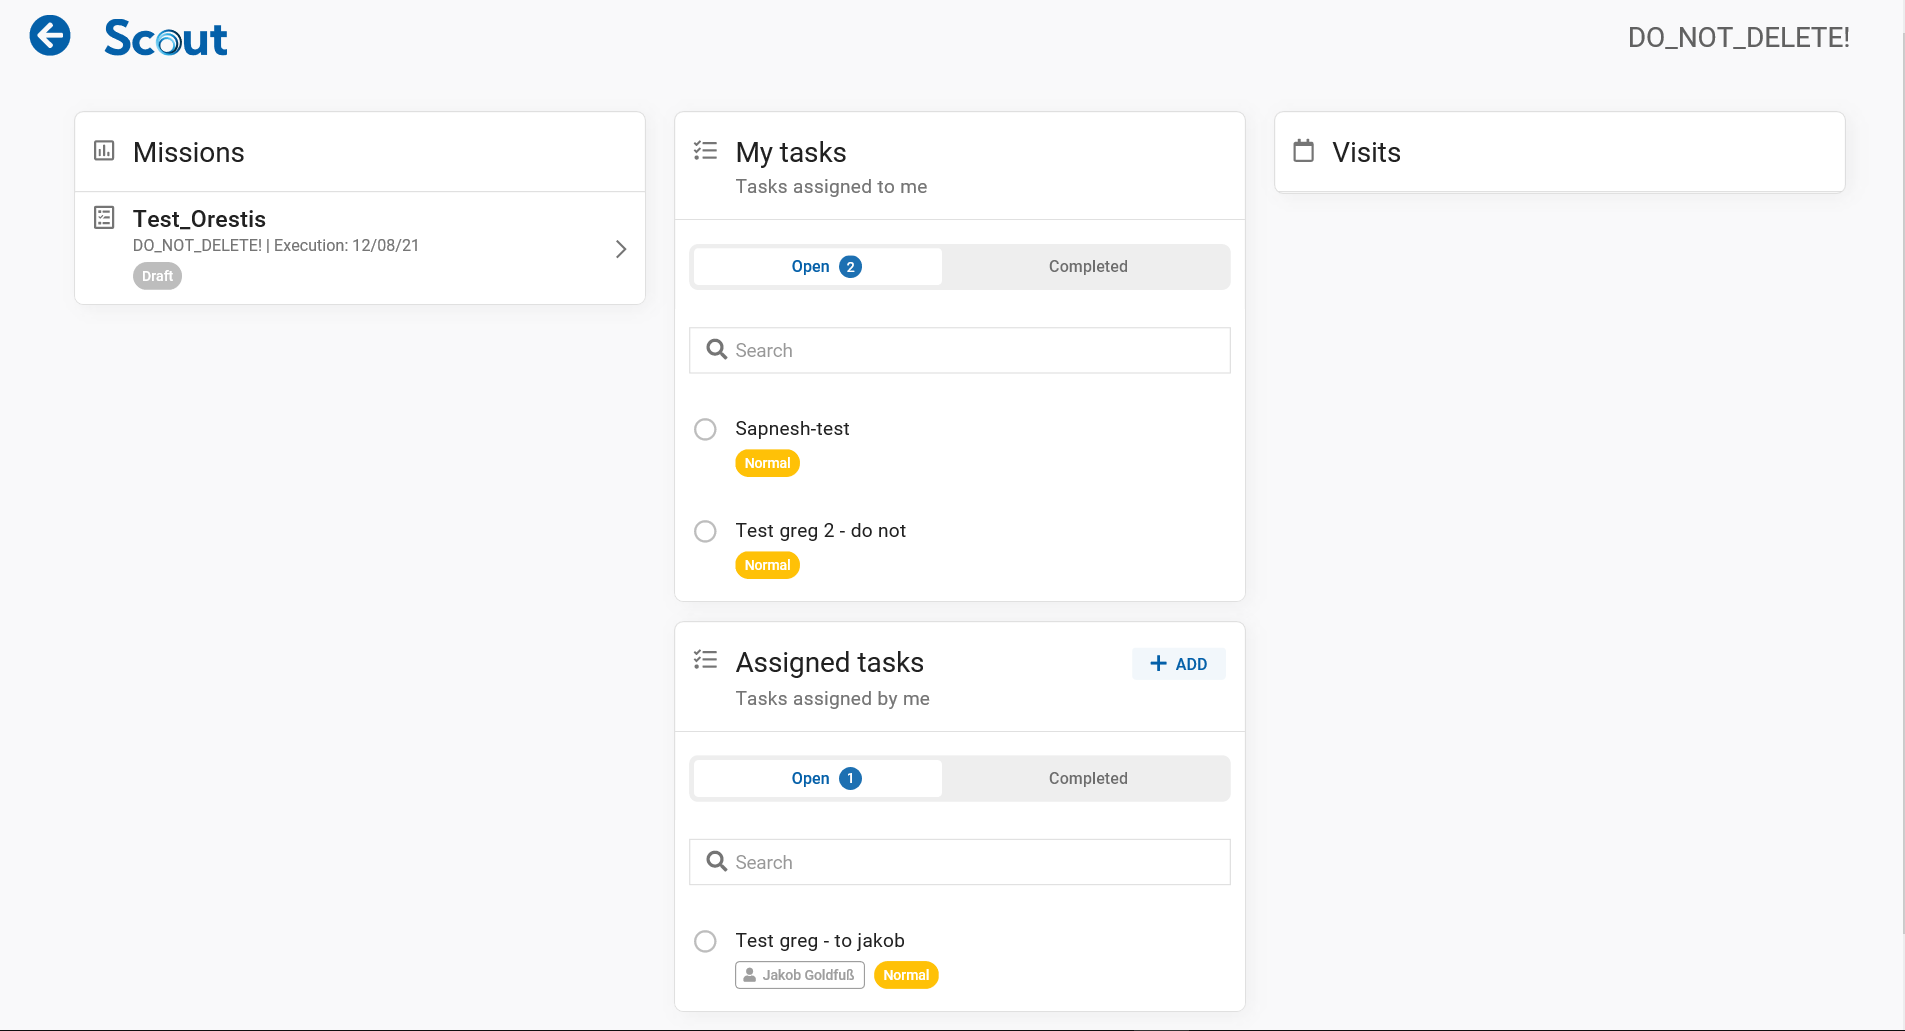
The tasks console.
You can access your tasks from either the account console or the territory console. The tasks card has a search option that you can use to find a task quickly. The completed tasks appear in the Completed section of the tasks card, and the rest appear in the Open section.
Tasks Card visible from account/territory console
Please refer to the console guide for more information on the territory console and the account console.
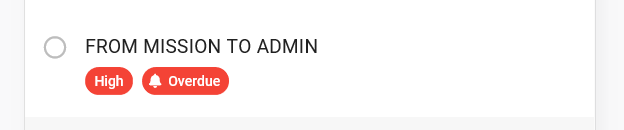
The tasks card also contains colored tags to provide glanceable information on the task's priority and due status.
What does a task contain?
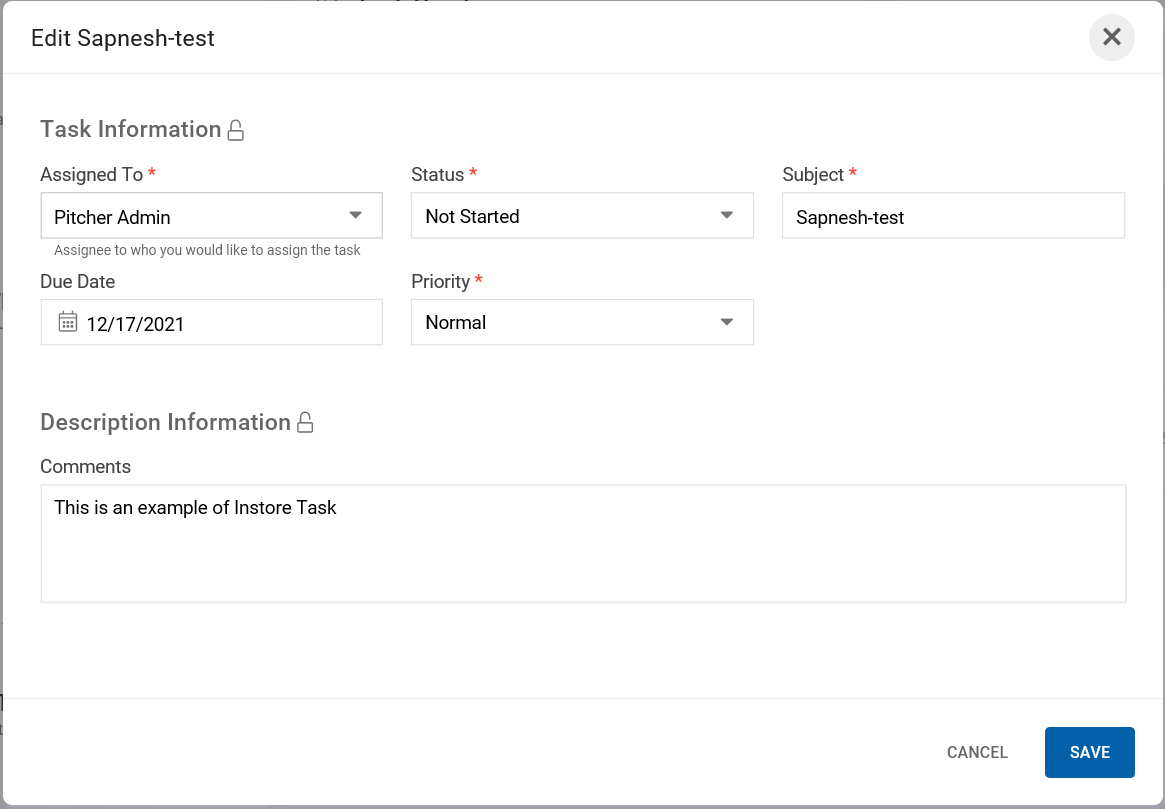
You can click on a task from the tasks card to bring up a popup that shows more information about the task.
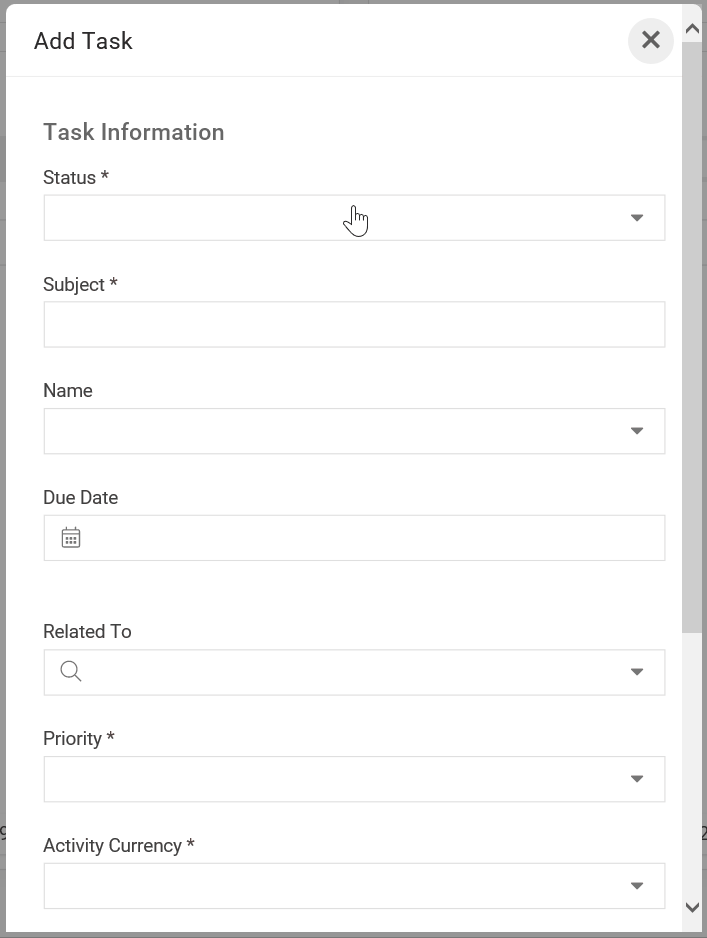
An Instore Task has the following information:
Assigned To: The user to whom the task is assigned.
Status: The status can be any of the following:
Not Started.
In Progress.
Completed.
Waiting on someone else.
Deferred.
Subject: Subject line of the task.
Due date: due date for the task.
Priority: A task priority of either high, normal, or low.
Comments: Any additional information related to a task.
Task view.
Create tasks from the territory console.
You can see tasks assigned to you from the territory console.
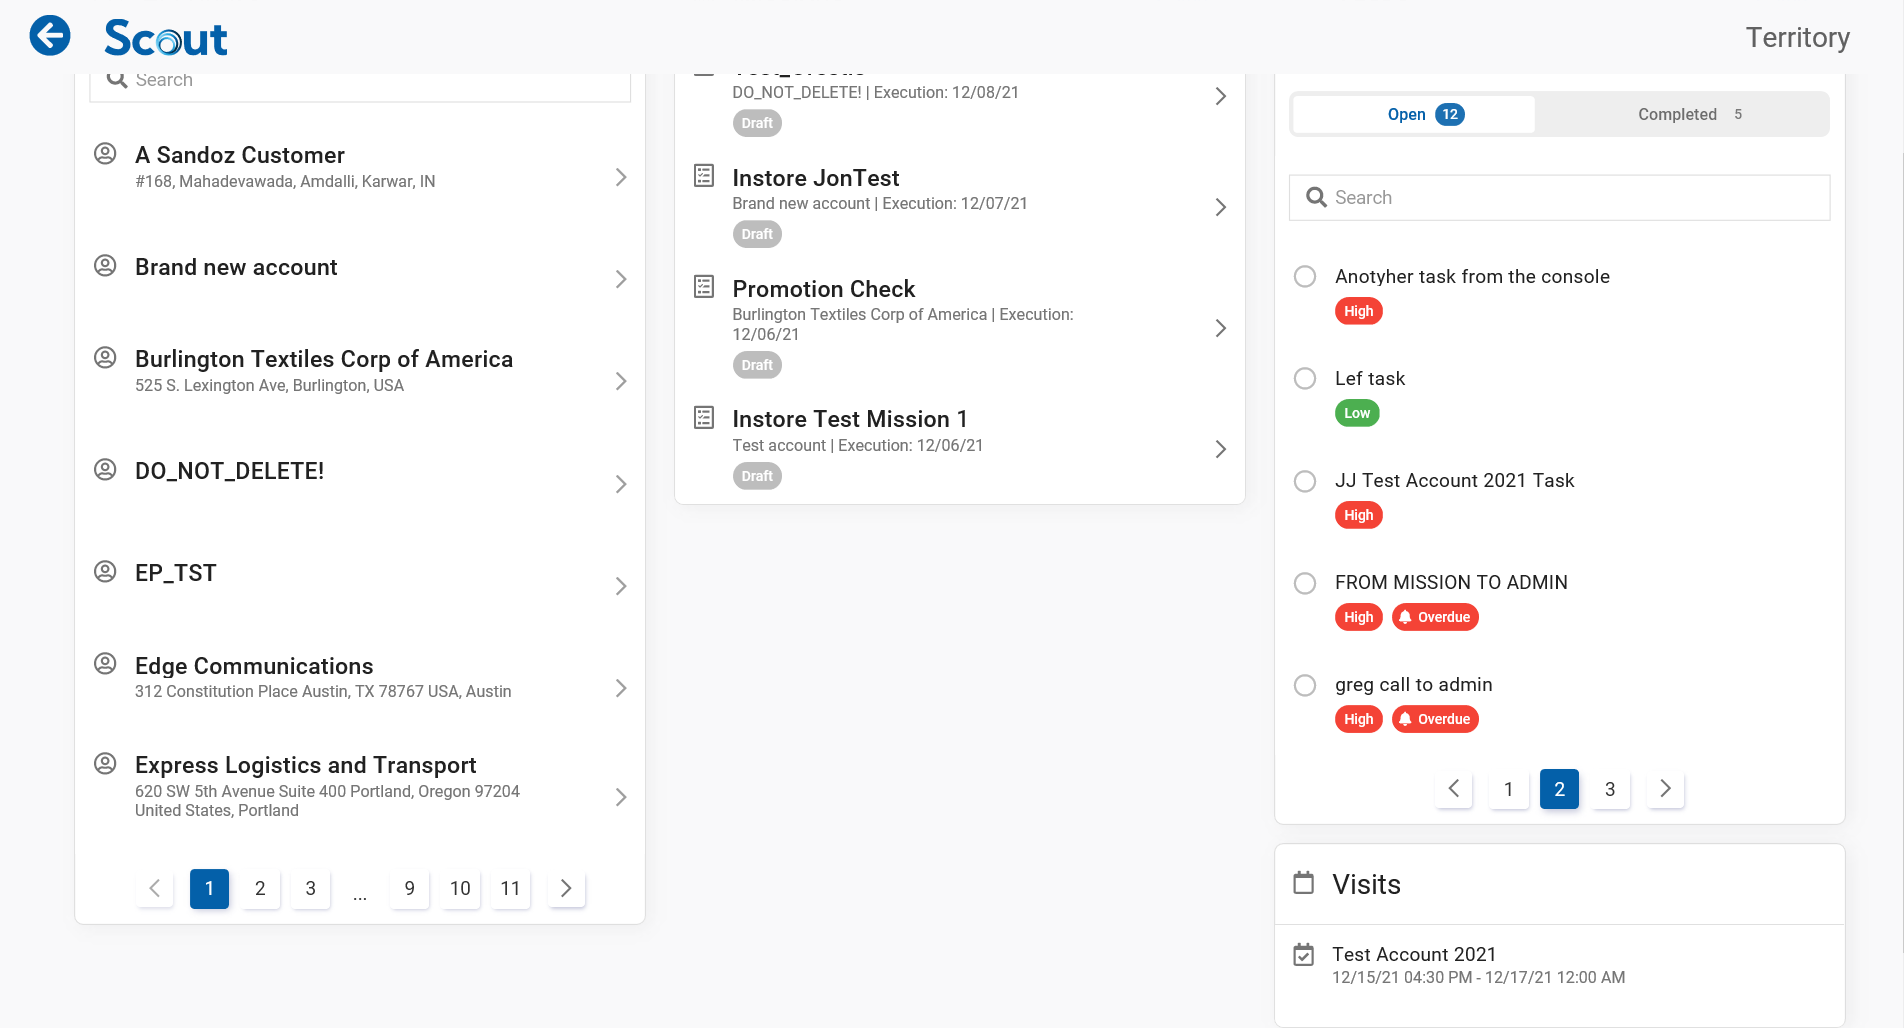
Tasks Card in the territory console
You can also create tasks from the territory console and assign them to a user and customer account.
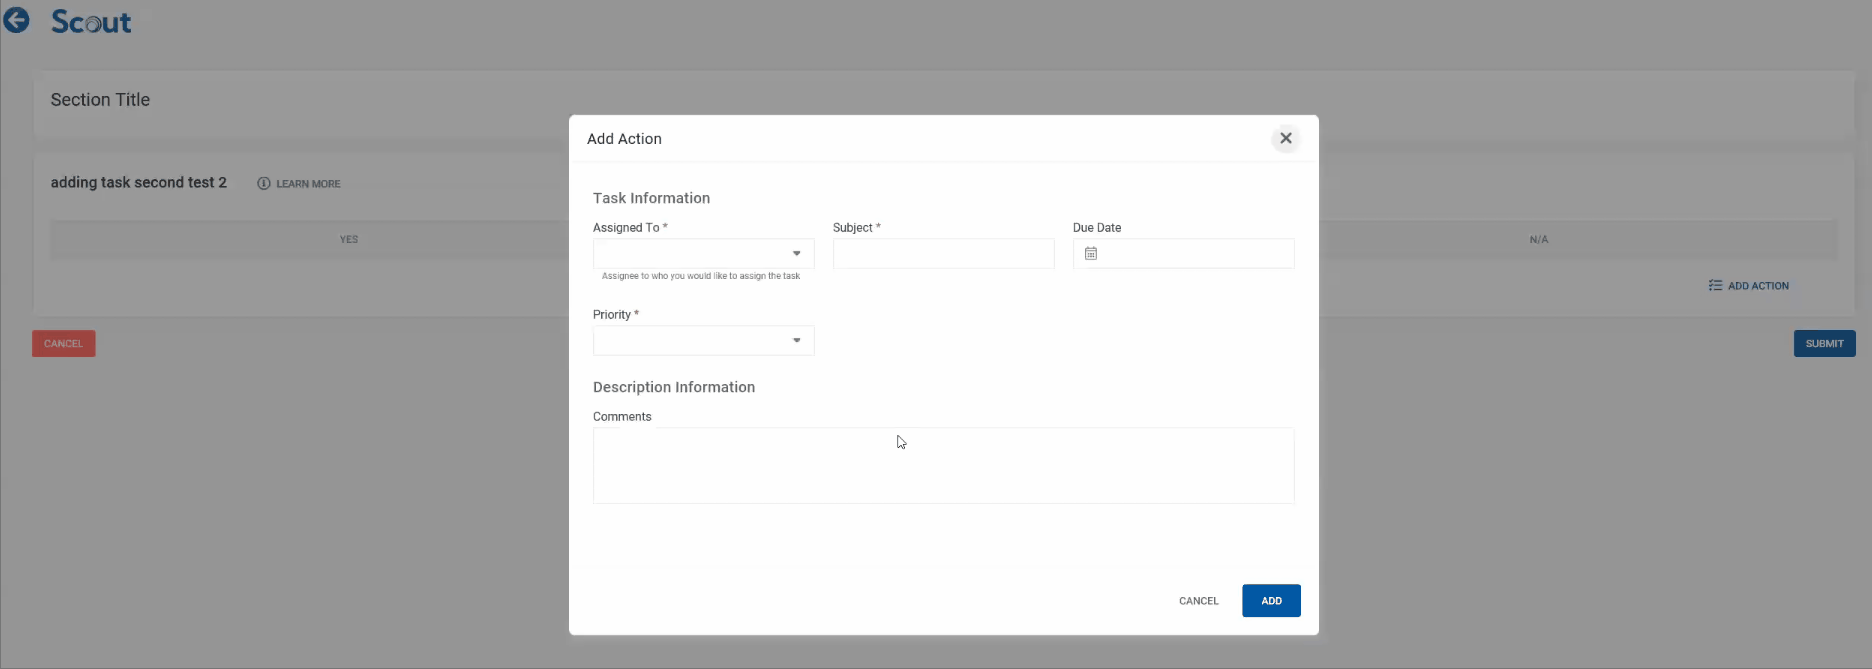
To create a new task, fill in the following details in the task creation form:
Select a status.
Add a subject.
Select a user from the "Name" dropdown list.
Select a due date for the task.
Select a customer account from the "Related To" dropdown list.
Select a task priority of either high, normal, or low.
You can also add any additional information in the comment box.
Creating a new task
The task that you created should now appear in the tasks card.
Create tasks from the account console.
The Account console contains two cards that display the tasks assigned to you and any tasks you may have assigned to other users.
Creating a task from the account console is similar to doing it from the territory console, except for the customer account already being filled in. Any tasks created from the account console automatically get assigned to the active customer account.
Create tasks during mission execution.
You can also create tasks related to an Instore mission during mission execution and assign them to any user. Instore automatically assigns tasks to the customer account belonging to the mission.
Want to know more about mission execution? See Instore Missions.
Create tasks during mission execution
Please note that any tasks created during mission execution persist when you submit the mission.
Working on a task.
When you start working on a task, you can use one of its five available status items to track its state.
Let’s try to understand task workflow with an example.
Example: A Task to Generate revenue reports
Your superior creates the task, sets the status to “Not started,” and assigns it to you.
You analyze the task details and start working on the task by changing the status to “In Progress.”
To generate reports, you need documents only your superior has access to, so you communicate the request to your superior. And in the meantime, you change the task status to “Waiting on someone else.” You can also add a comment to the task to mention more details.
Once you get all the required documents and generate a report successfully, you can change the task status to completed.
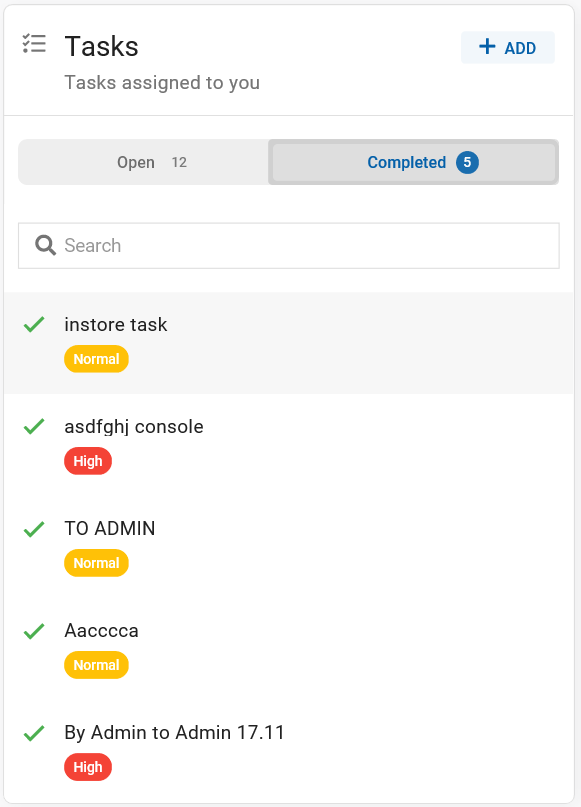
Completed tasks
All completed tasks appear in the Completed tab on the Tasks card.