Route Optimization on windows
This part describes Route Optimization feature on Windows. It also covers save trip functionality for the windows platform.
Trip Planning
To plan a trip select the accounts and then click on the Trip Plan button on the top left corner of the window (see image below). Notice that the number of accounts selected is also shown along side the Trip Plan button.
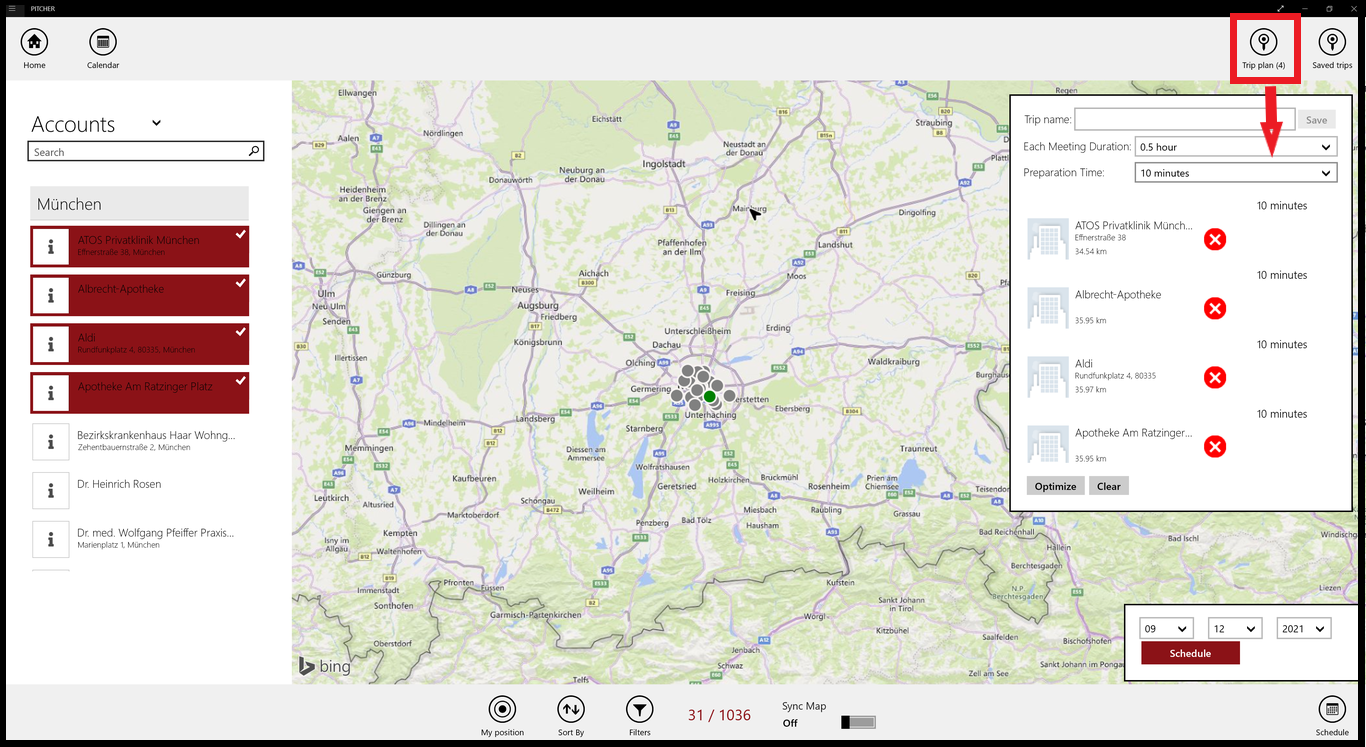
Trip planning
Trip plan window will appear where the user can provide the following details:
Trip name
Each Meeting Duration
Preparation time for each meeting
Save The Trip
To save the trip give suitable name in the first field of the Trip planner window and then save it.
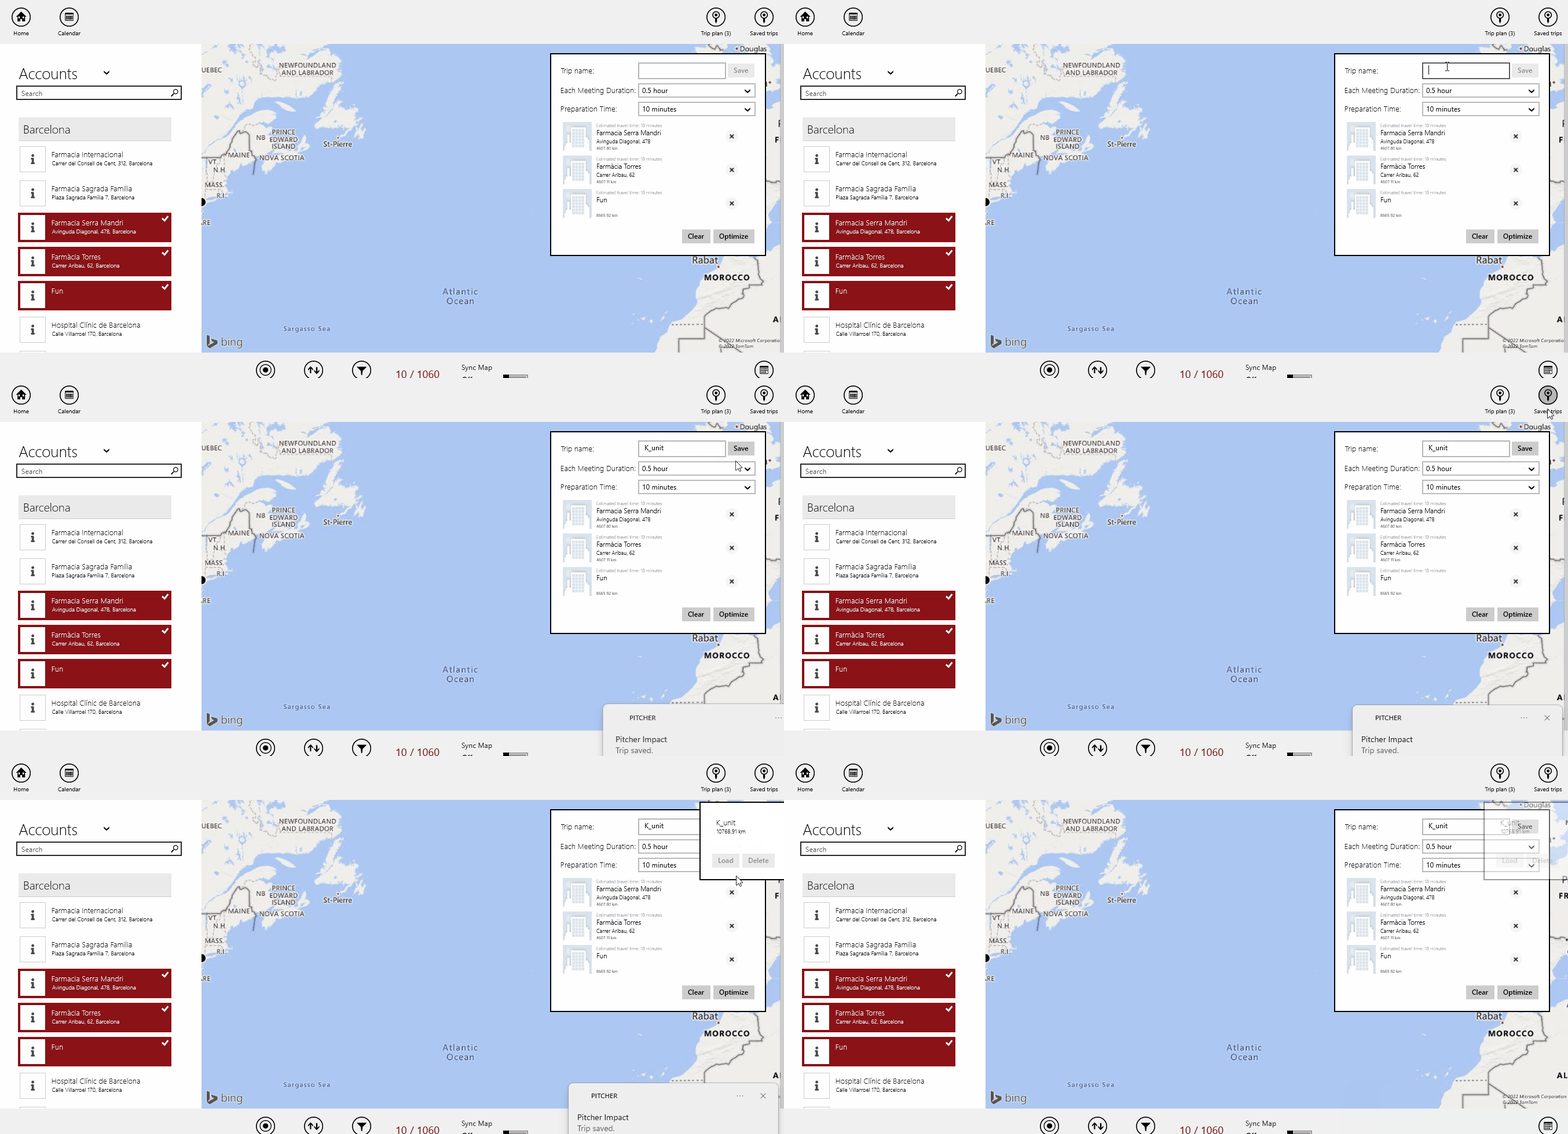
Save trip
Each Meeting Duration
Default duration time for each meeting is 30 minutes and maximum duration that can be allotted between the meetings is 6 hours.
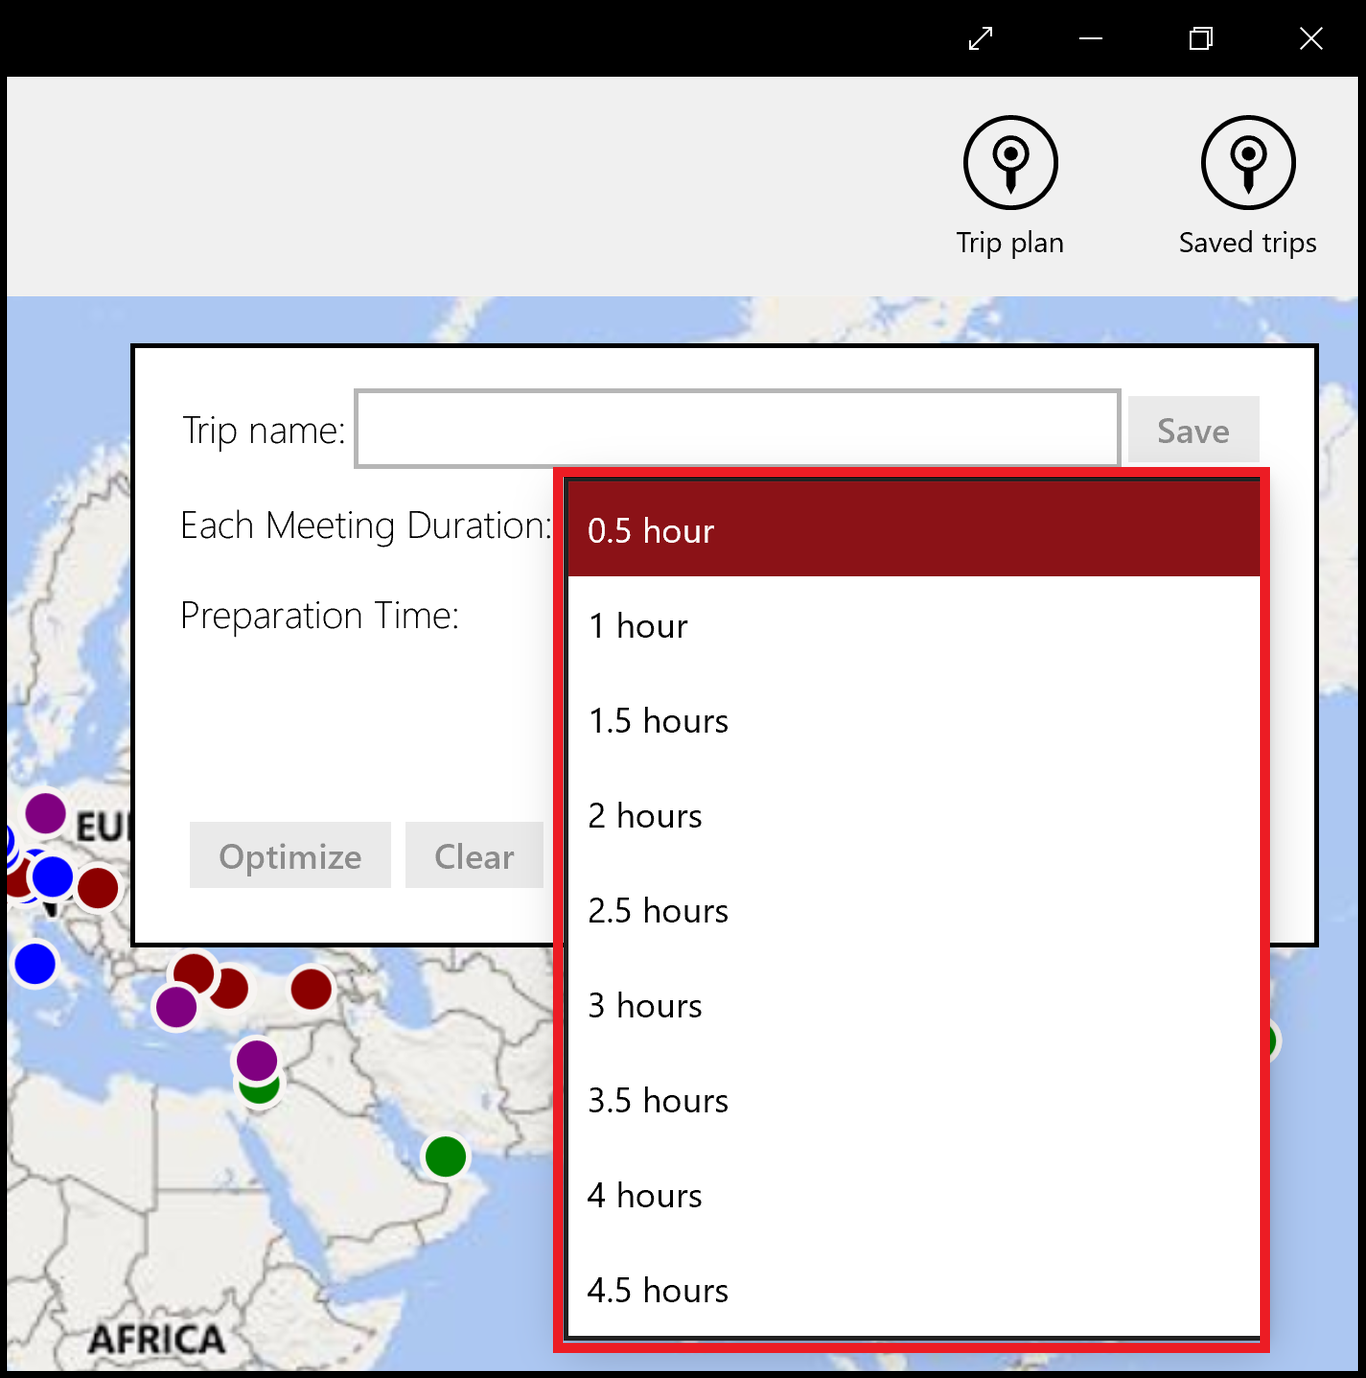
Each meeting duration
Preparation Time
It is the time needed to prepare for the meetings before starting a call. It allows the user to adjust the minimal gap between meetings. The preparation time is added before each scheduled meeting, including the first one. Default preparation time is 10 minutes with gap difference of 5 minutes and possible values are:
No gap (0 minutes), 5, 10, 15, 20, 25 and 30 minutes.
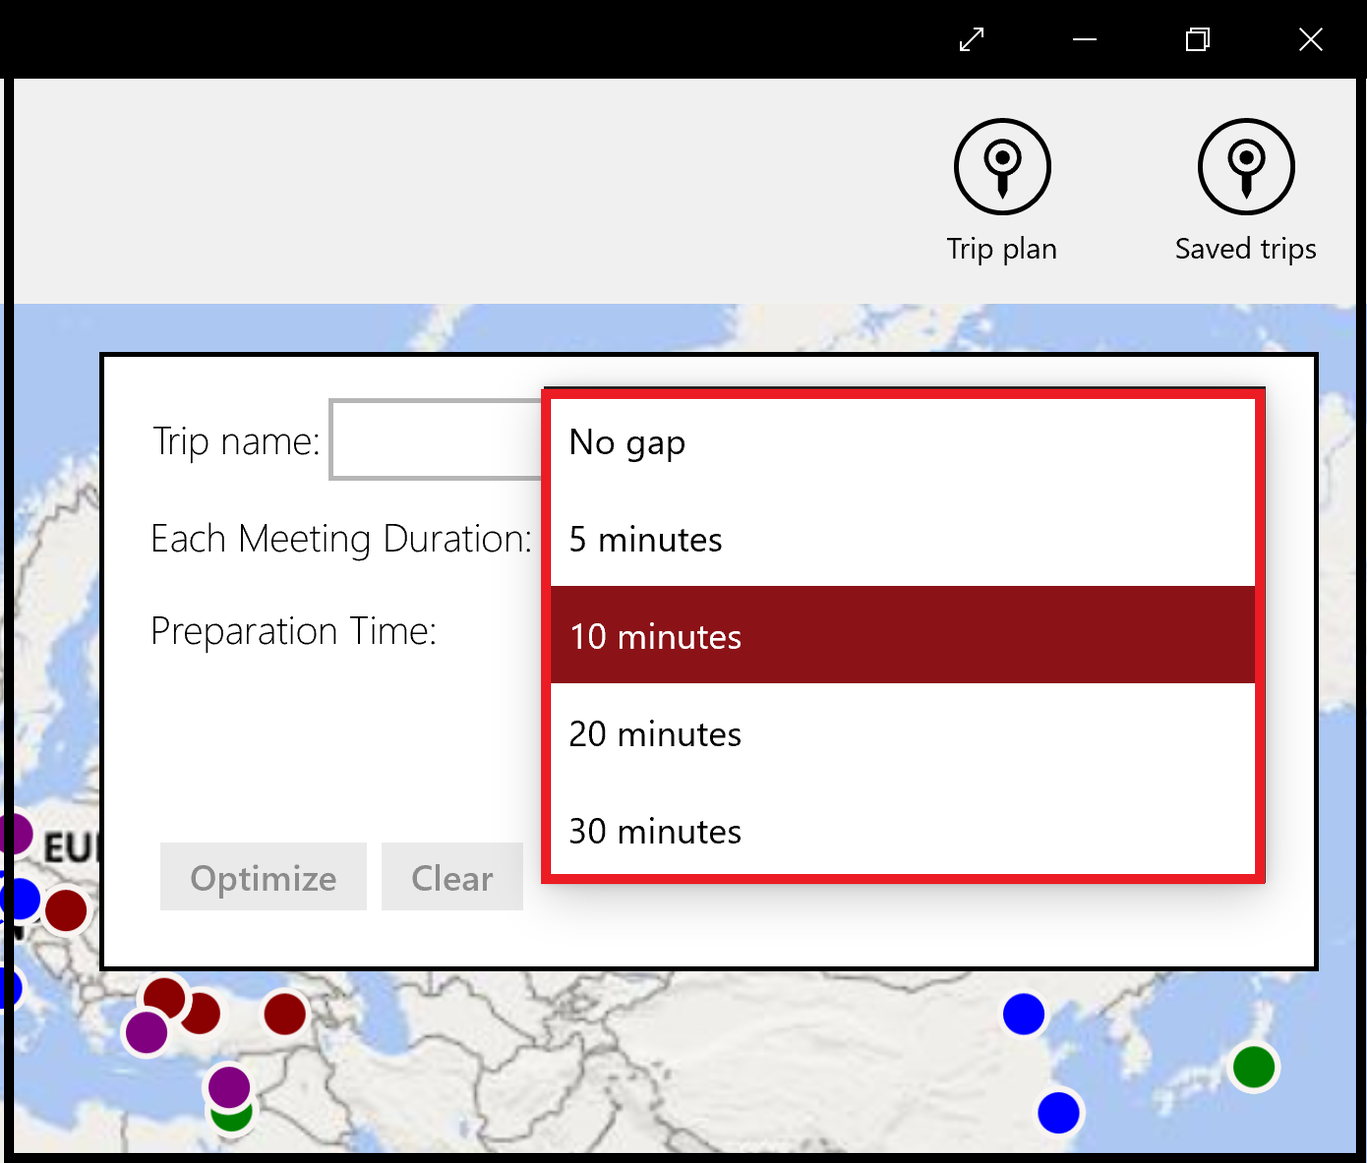
Preparation time for each meeting
For scheduling see the quick call scheduling.
The default starting time of the day is 9 am and it can be adjusted using the Pitcher Settings. Workday starting and ending hours can also be adjusted and reset back to default on the Calendar settings by the user.
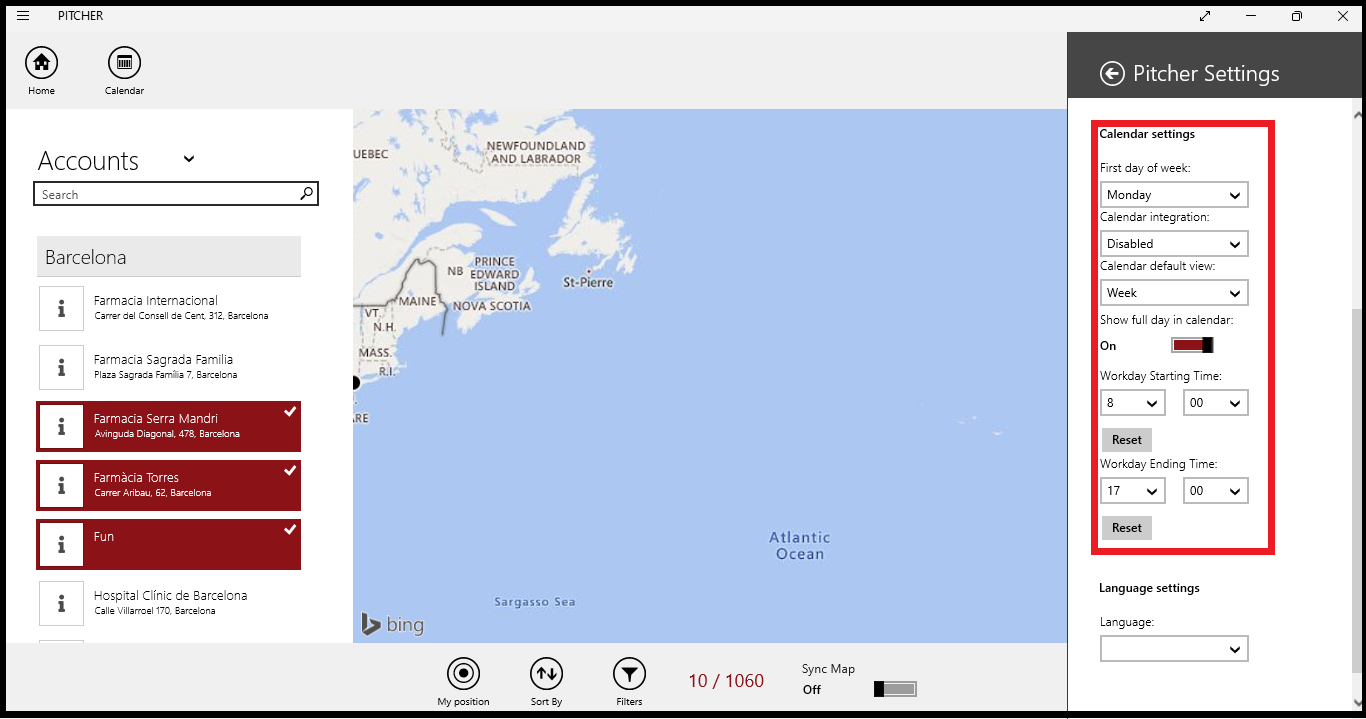
Pitcher settings for calendar and time
Route optimization
The route can be optimized by using data from google maps. In order to optimize the route, select at least one account and tap the Optimize button in the bottom left corner of the pop up window.
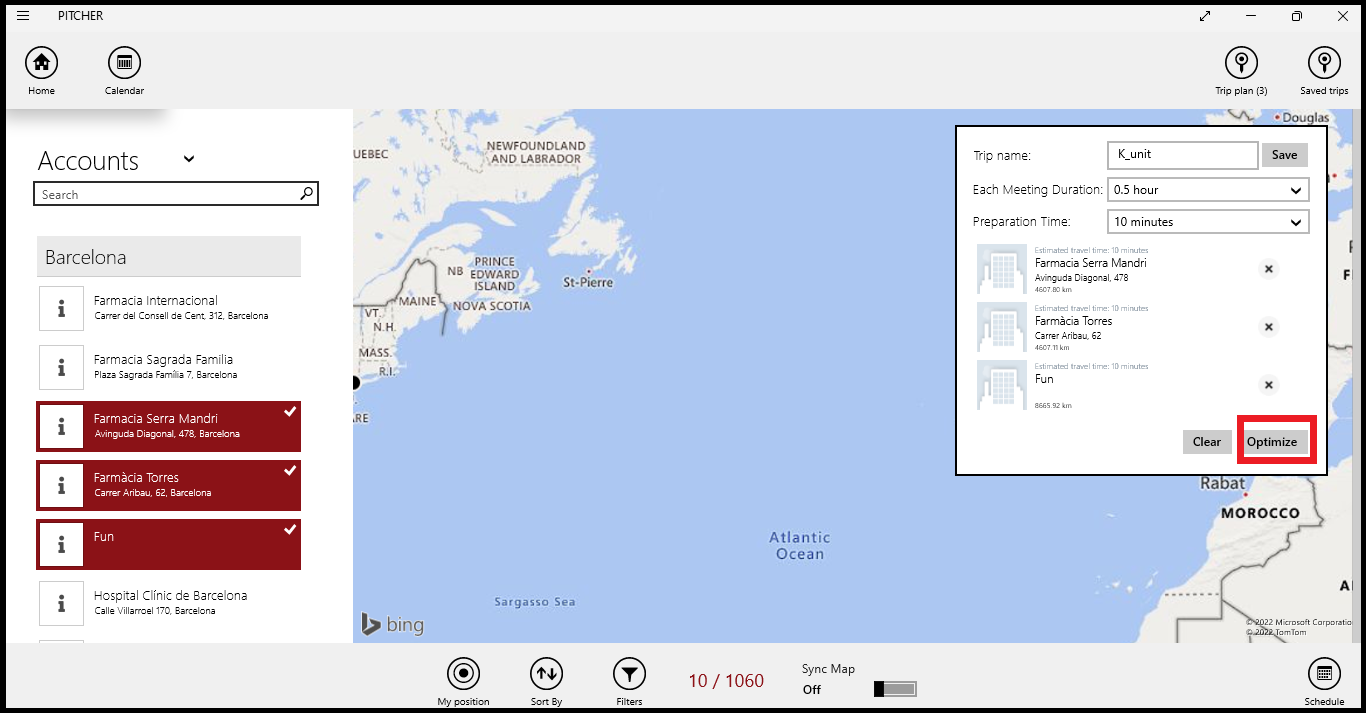
Optimize the trip
The map fetches the current location from the device. Starting point can also be changed by providing another location name on the top of the screen (see image below). Thhe current/selected location is marked with a red marker on the map. It is the start and finish of the trip. Markers with numbers in them means the accounts to be visited. Tapping on each of the markers shows the account name.
At the bottom, the total travel time and distance of the trip is shown.
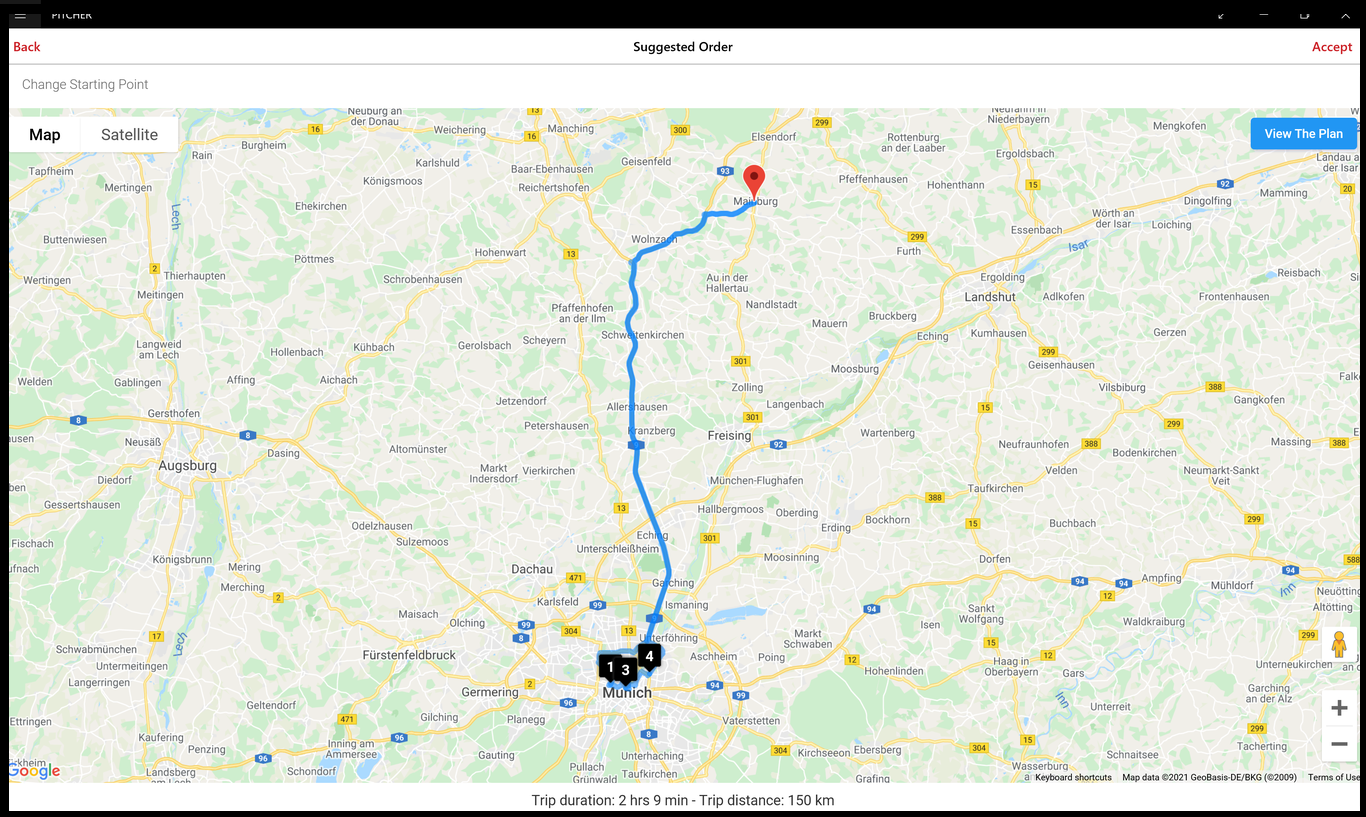
Optimized route
After seeing the suggestions click Accept (on the top right corner of the screen . See above image). The map will hide and the list of accounts will get reordered to assure the shortest travel time. To the top left of each account Estimated travel time information is shown. Also right below the name of each account, total distance is shown in KM.
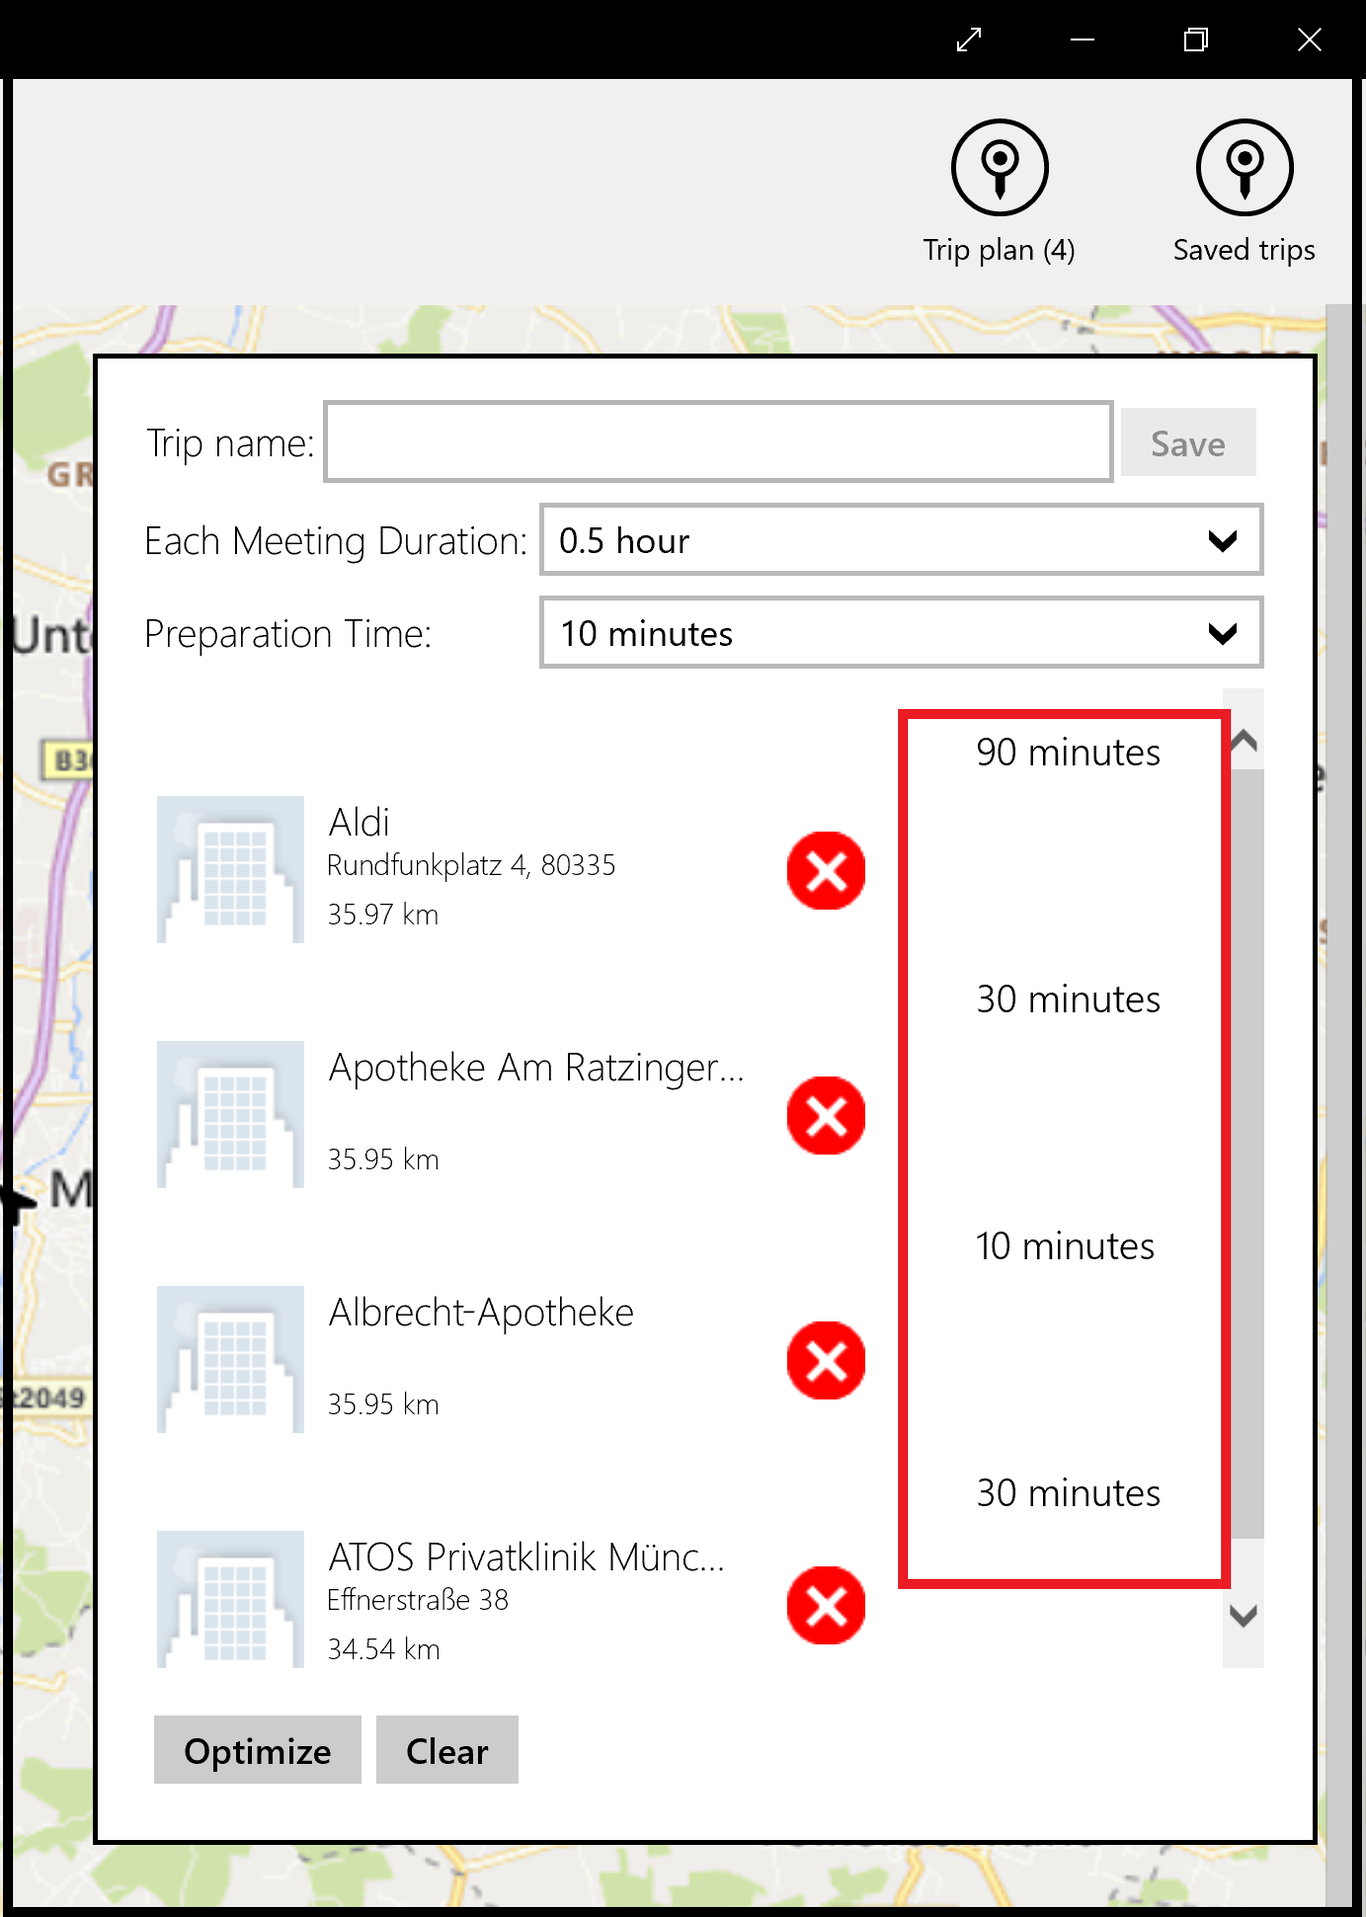
Estimated travel time along with distance
The accounts can be reordered and the travel times will get updated accordingly (based on the data fetched from Google Maps). An account can be removed or added to the list. However, for the newly added accounts, there won’t be any travel time information for commuting from and to other accounts. In order to get that information, use Optimize trip feature again.
