Planning And Executing Detailed Calls on Android Devices
This page provides a detailed description of the planning and execution of detailed calls on android devices.
Planning
Planning Detailed Calls allows the user to schedule calls by selecting appropriate materials per Account/Contact and reporting pre-call notes. Planned calls are synced with the CRM.
Pitcher offers Salesforce as a default CRM. However, some customers can have customized CRM solutions from other service providers as well.
Meeting Planner
There are two types of calls that can be executed under the meeting planner button:
Detailed Call
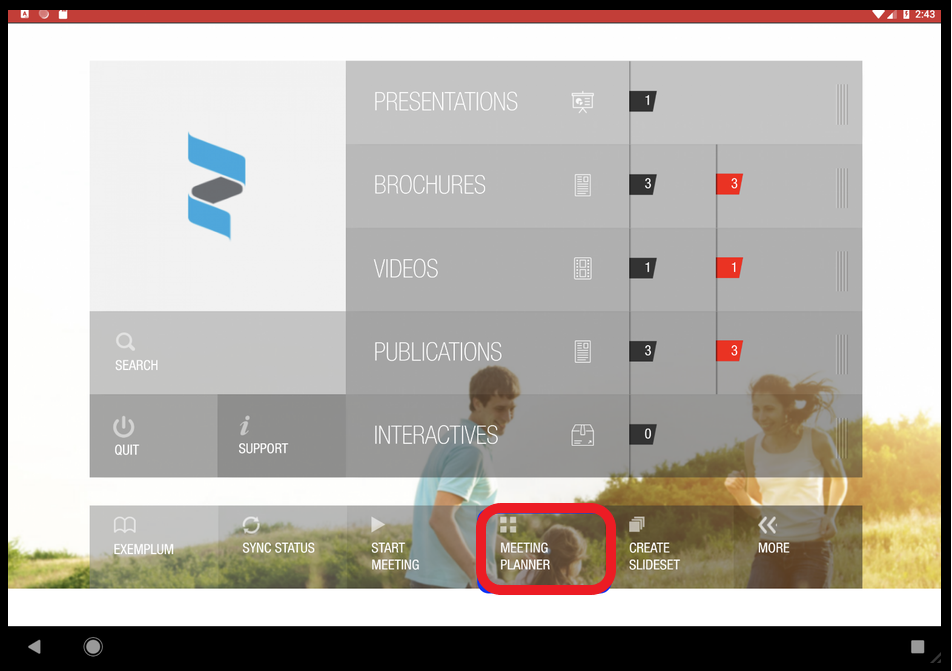
Meeting planner for planning the calls
To plan a detailed call tap on the Meeting Planner in the app.
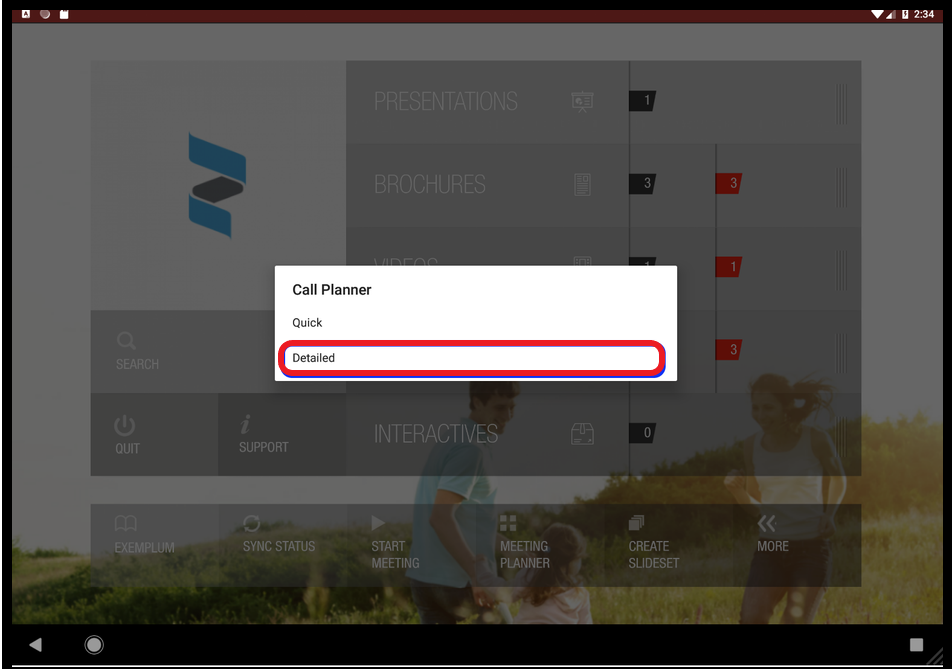
Detailed Call option
A pop up window will appear with the list of Call Planner options. Select Detailed from the option to plan detailed calls. A meeting planner will open as shown below:
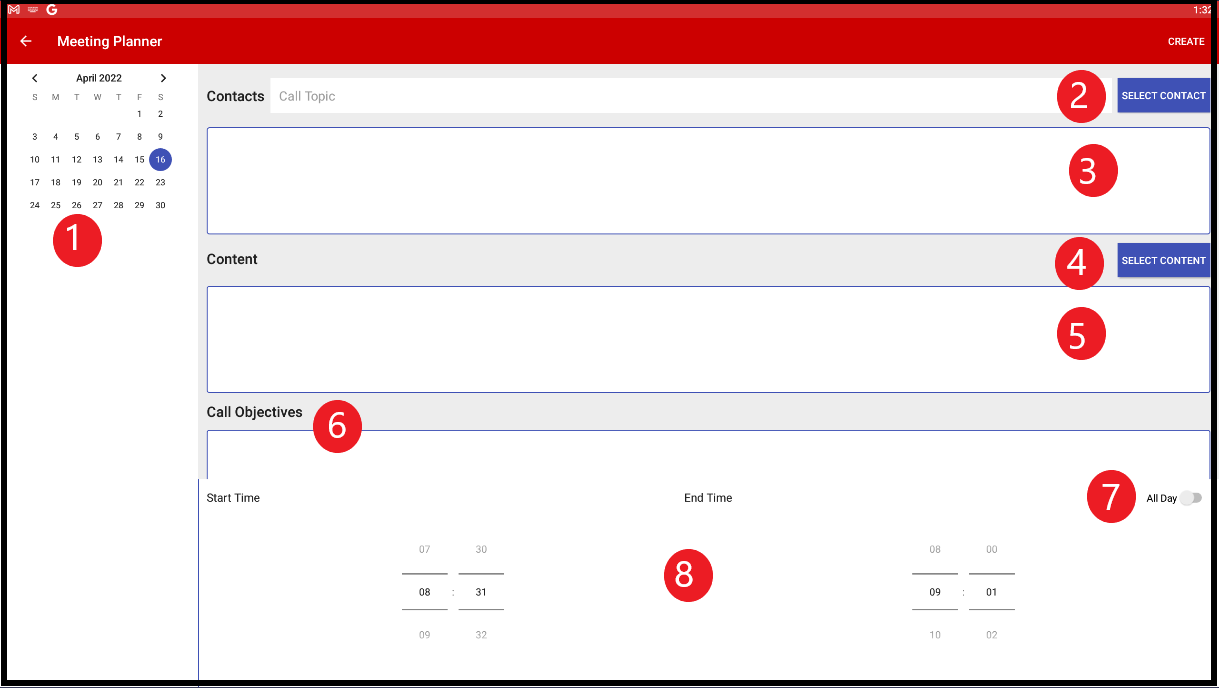
Meeting Planner window
Description of the Meeting Planner:
Calendar - Select the date for detailed call. The empty space below the calendar displays that day's calls.
Select Contact - User can select contact(s) by using this button. A separate window will open for contact selection
Display list for selected contact - After user has made selection of contact(s), they will appear here.
Select Content - User can select content(s) for detailed call. A separate window will open for content selection.
Display list of selected content - The selected content(s) will appear here.
Call Objectives - The user can specify the call objectives for the detailed call here.
Start/End Time - The user can specify the start and end time for the detailed call.
All Day on/off slider - Using the slider user can mark it all day event.
Contact Selection
After tapping on the contact selection a new window will open for the user to search and select contact. By default account list will be displayed.
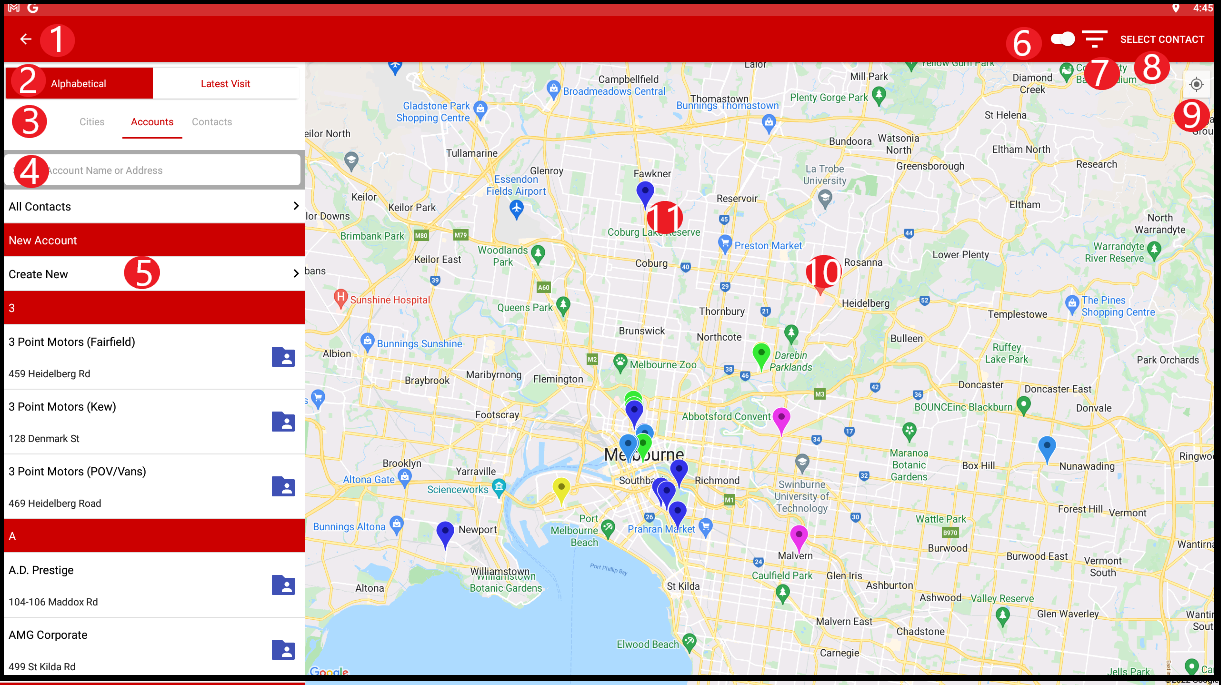
Account selection window
Back Button - Takes the user back to planner
Sorting - User can sort the cities, accounts, contacts alphabetically or by the last visited
Cities, Accounts, Contacts Tab - User can set the preference based on Cities, Accounts and Contacts
Search Bar - Allows the user to search for account name or contact names or see the list of accounts based on cities.
Display List - Displays list of accounts.
Turn Filter On/Off - User can turn on/off the filter (If applied any)
Displays Filter - Displays the filter (if applied any). A window will display the filters.
Select Contact - After the contact has been selected from the map or from the display list then user needs to tap on this button to further plan the call.
Google Map - Displays the map
Account location - Various colored balloon or pins will display the various accounts location in particular city.
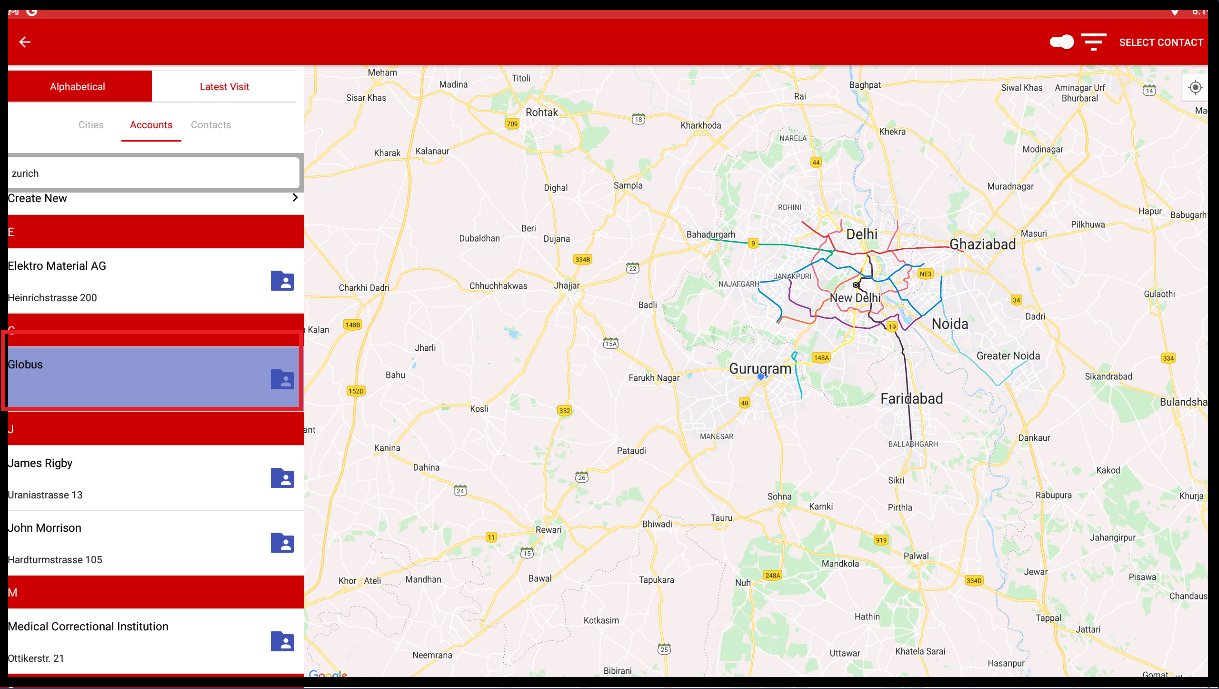
Sample selected account
Tap on the account and then list of contacts will be displayed.
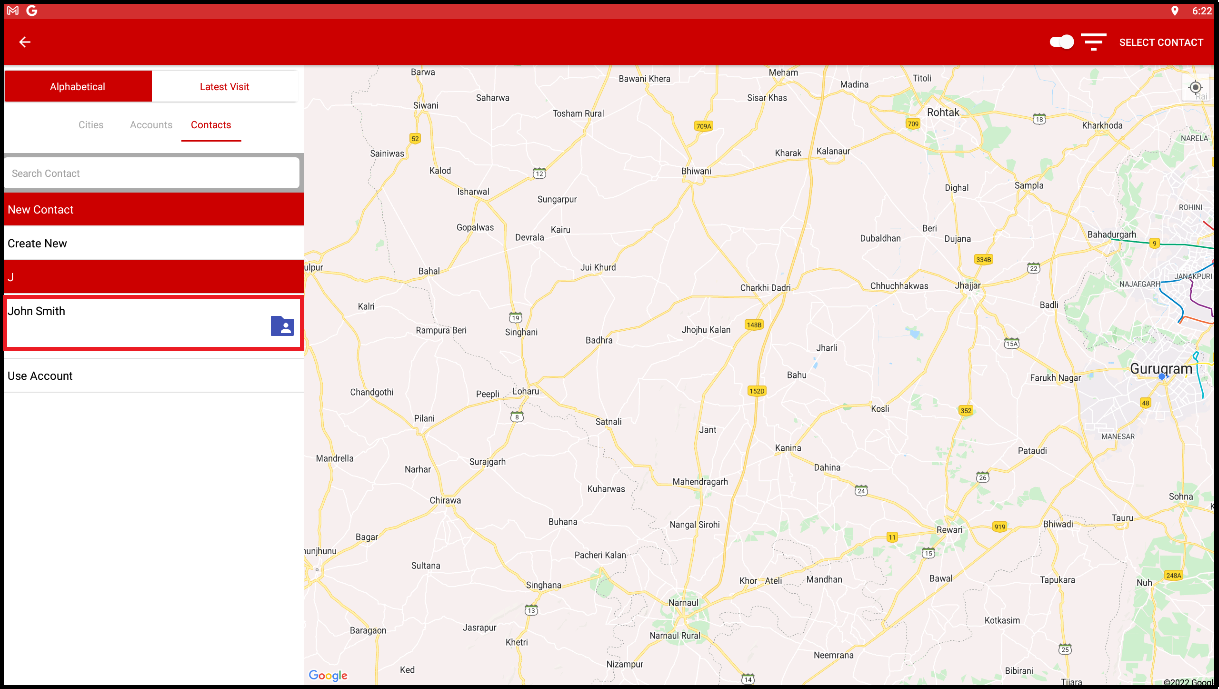
Contact within the selected account
Select the contact and the Pitcher zero card will open displaying the details of the contact for that particular account.
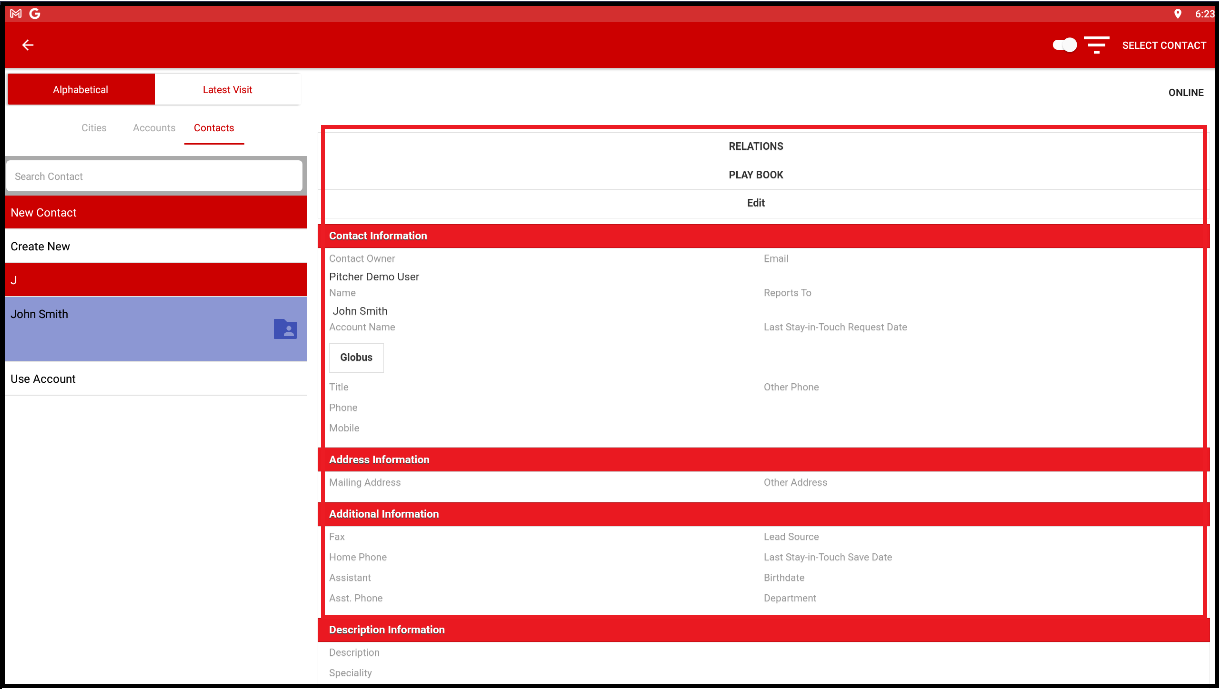
Contact details
The contact details can also be edited.
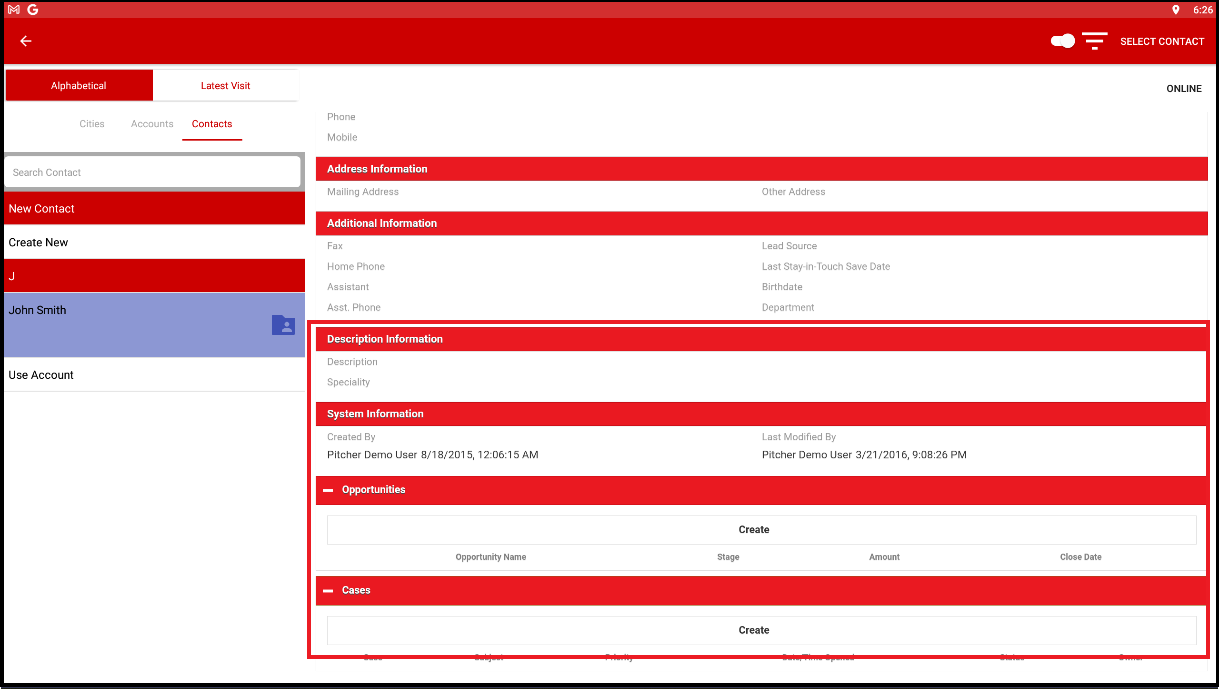
Edit Contact Details
Once the contact has been selected tap on Select Contact and the pre call or planning window will open again with the selected contact added to the list as shown below.
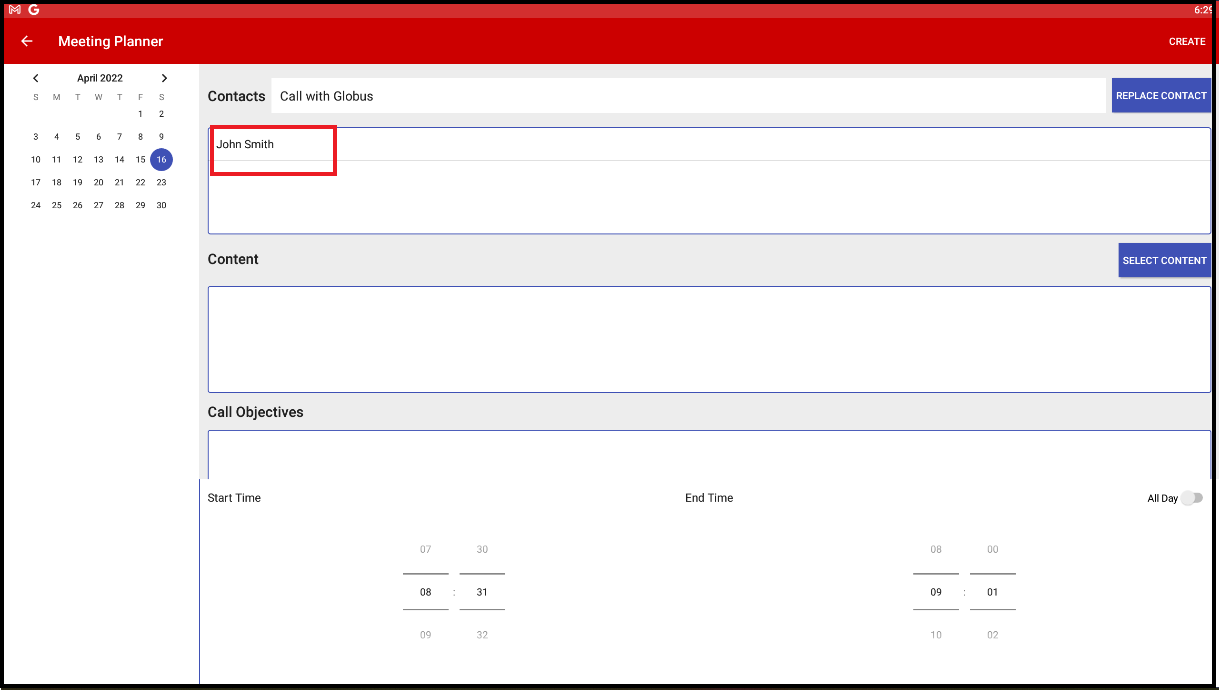
Selected contact Added to the List
Once we are done with contact selection, we will proceed with content selection. Select the content that is intended for the presentation.
Select Content
To select content tap on the SELECT CONTENT button on the pre-call or planning view. A new pop up window will appear with list of contents available for selection.
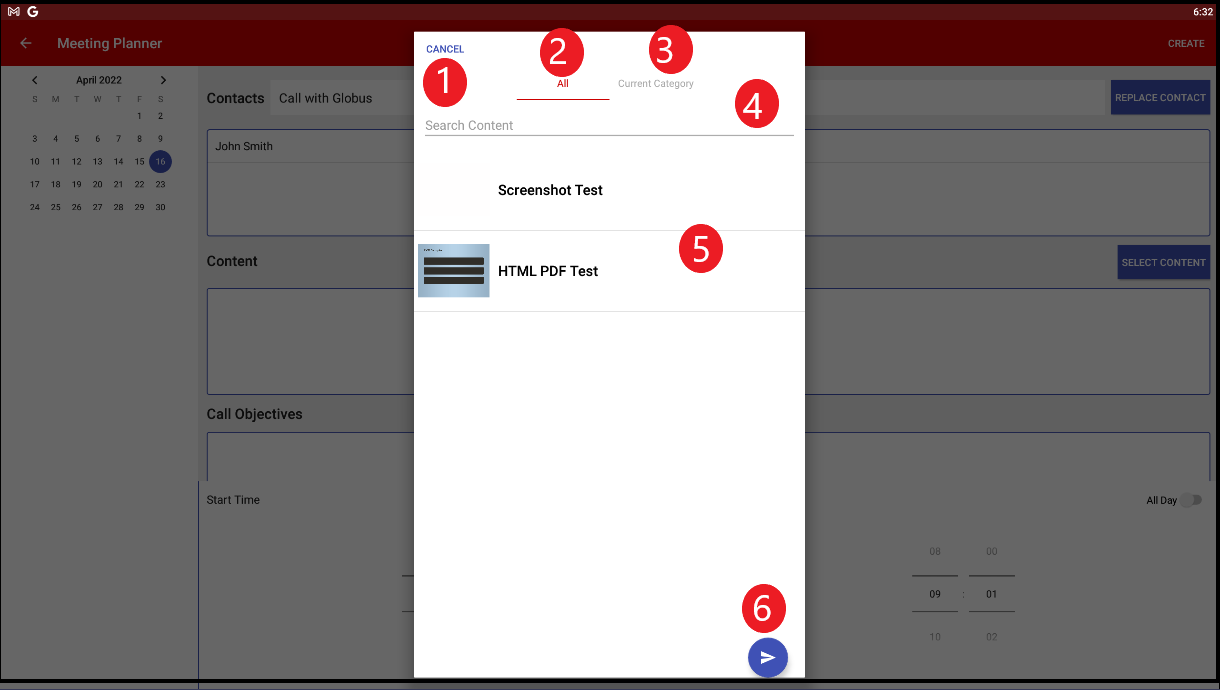
Content Selection pop up window
Description:
Cancel Content Selection - User can cancel and move to planner window
All - Displays all the contents
Category - Displays the content category wise
Search - Searches the content
Display List - Displays the list of content available for selection
OK Button
In the pop-up window content can be searched easily also contents can be viewed category wise.
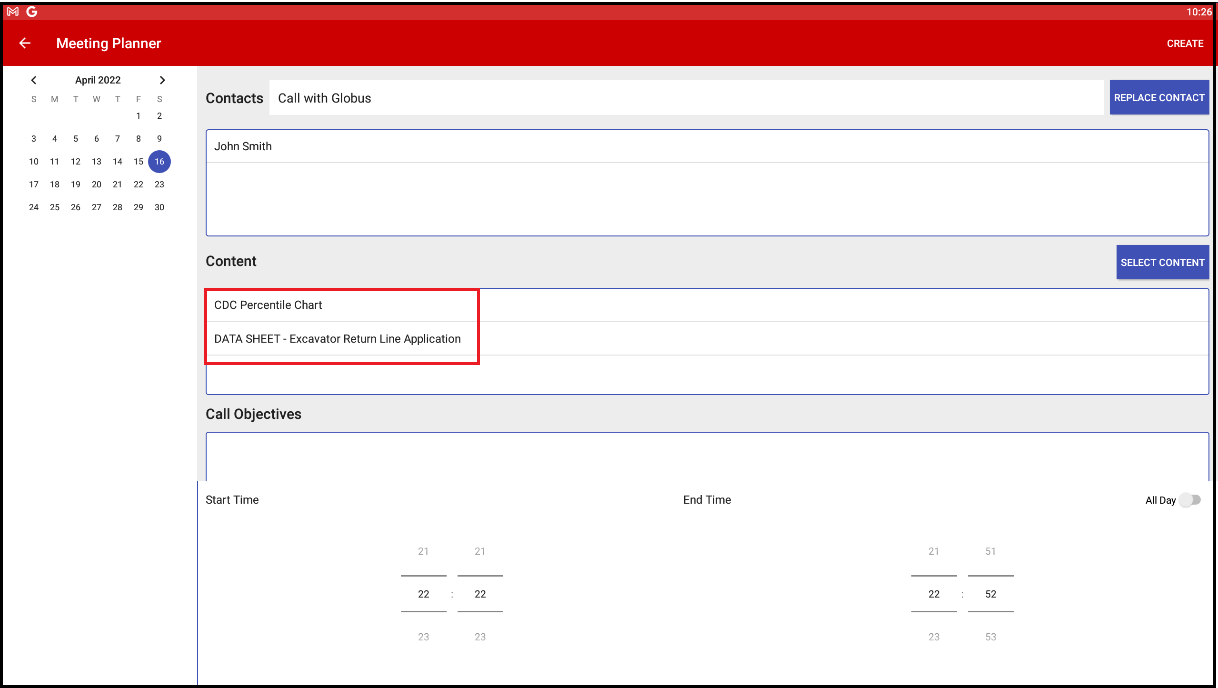
Selected contents displayed
Select Start and End Time
Tap on any content in the window and the content will appear in the selected list in the pre-call or planning view. Once the contact and content has been selected, set the start date and end time. If the call is intended to happen for the entire day use the All Day slider and it will select by default 8 hours starting with 9 am as default time.
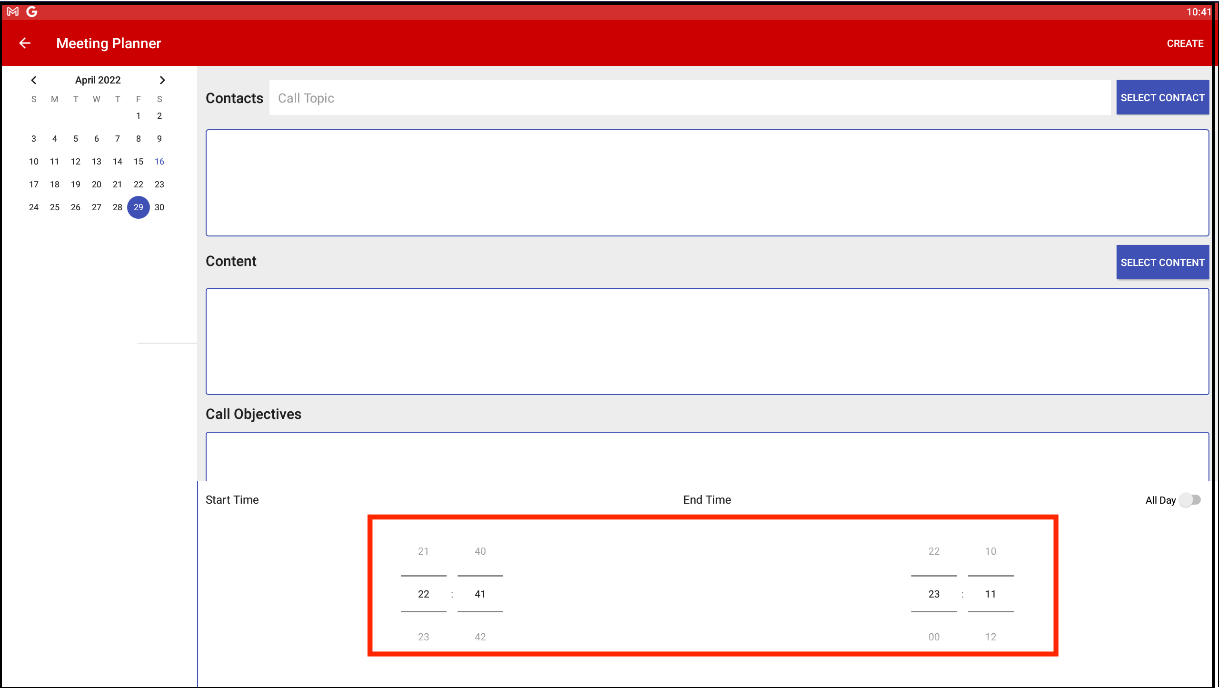
Select Start and End Time
Following this tap on create button on the top right corner of the planning view.
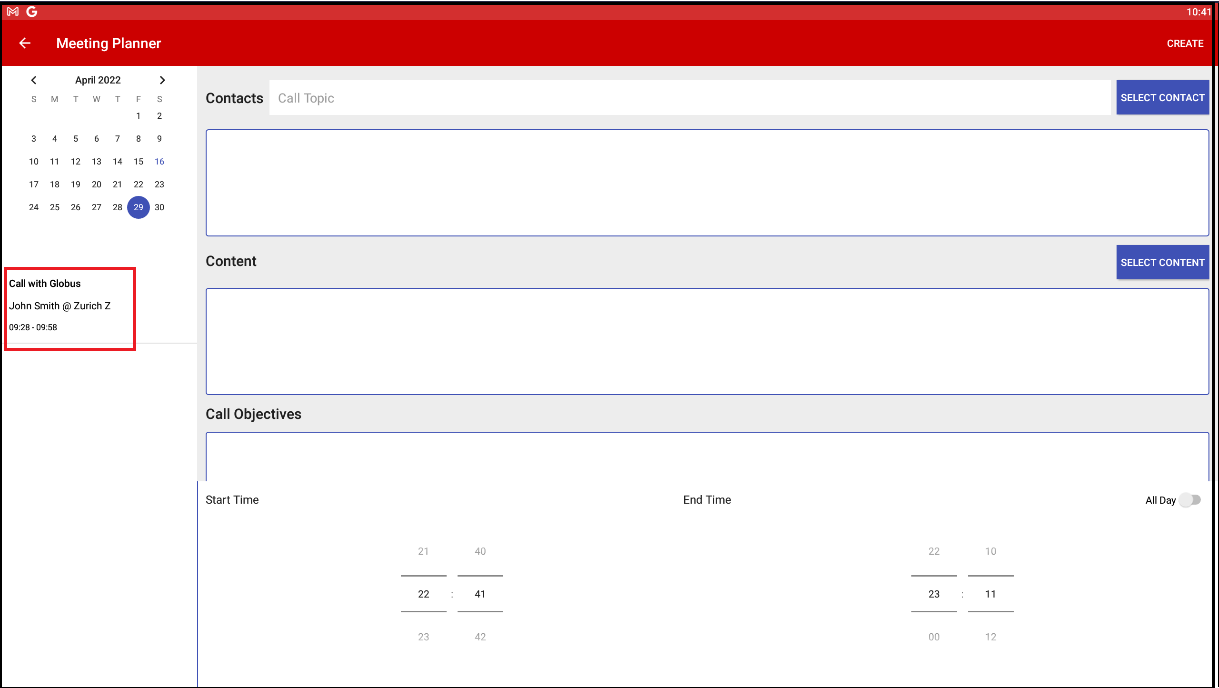
Detailed call is listed below the calendar
Once the user creates the call, the detailed call appears below the calendar as shown above.
Replanning
To replan a detailed call, tap on the detailed option in the meeting planner (or meeting in some instances) see the planning section.
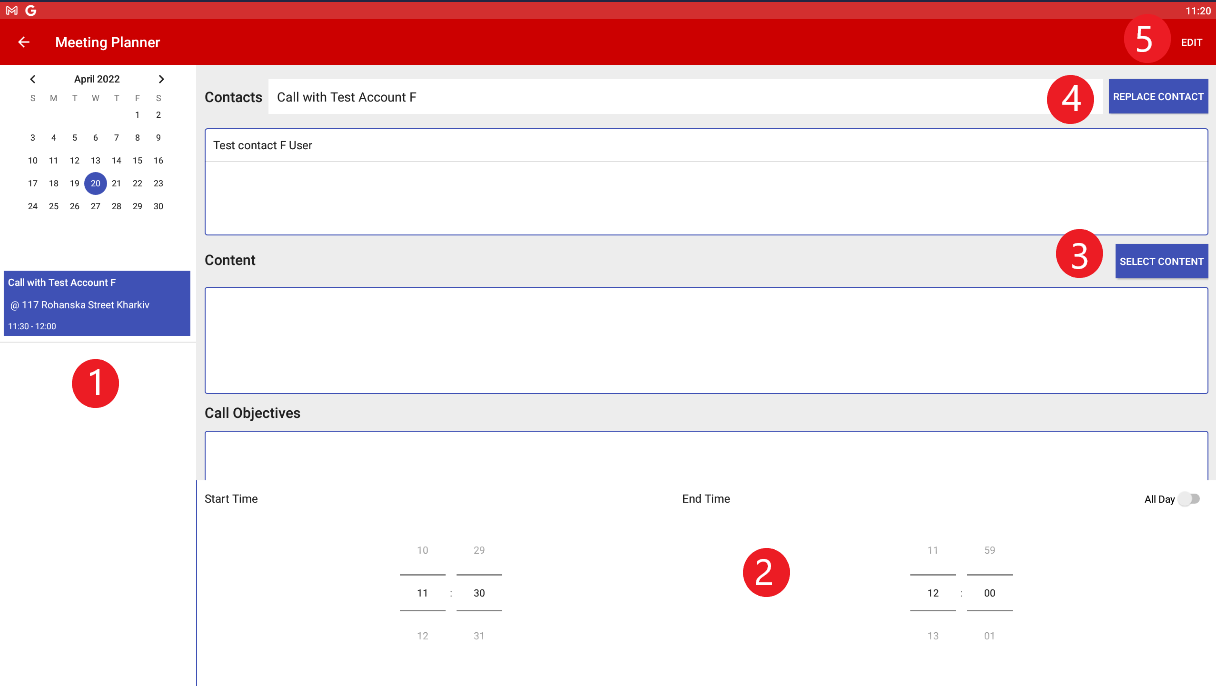
Replan the detailed Call
Following is the description for replanning a detailed call :
Select the date and the account. for replanning.
Edit the start time and end time of the call
Content can be added/replaced.
Contacts can be added/replaced.
Edit will ask the user to overwrite existing planned details, save as new or the user can cancel the replanning.
For finally replanning the call the user has to overwrite the call.
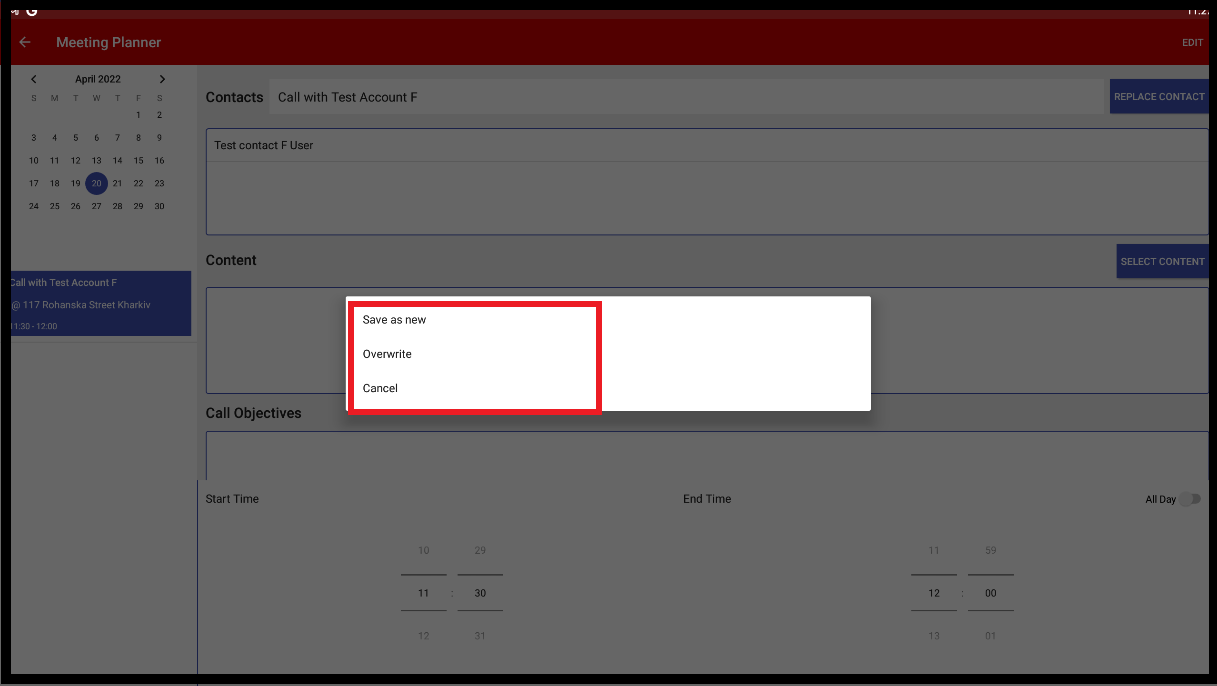
Save the edited call
Executing Detailed Call
Starting Detailed Call
After planning one or more meetings, the user can start executing calls in the Pitcher Impact app.
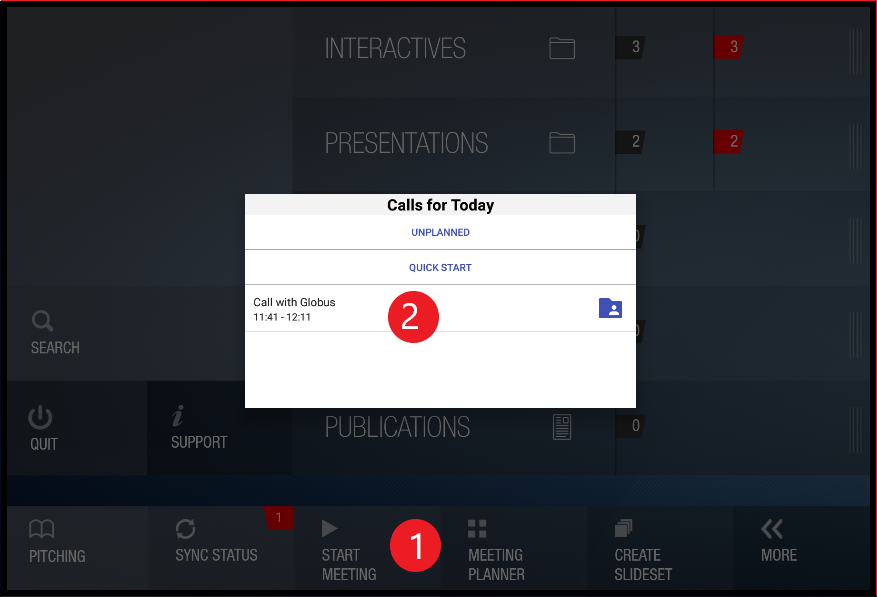
See Detailed Call
Tap on Start Meeting to see planned calls if there are any.
From the list, select the call to be started.
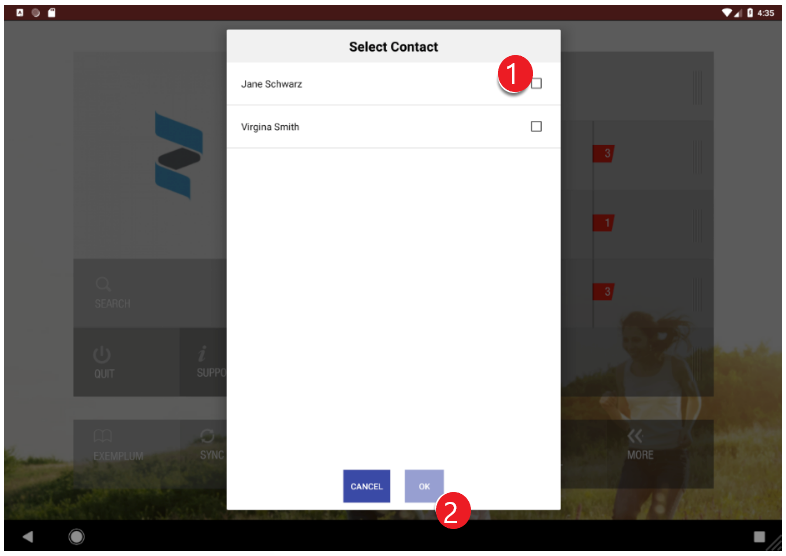
Select the contact if not selected in the planning stage
If the contact was not selected during the planning stage, select contact.
Tap on OK to start the meeting.
End Meeting
After the call is started user will land on the home screen and can start using the content as required.
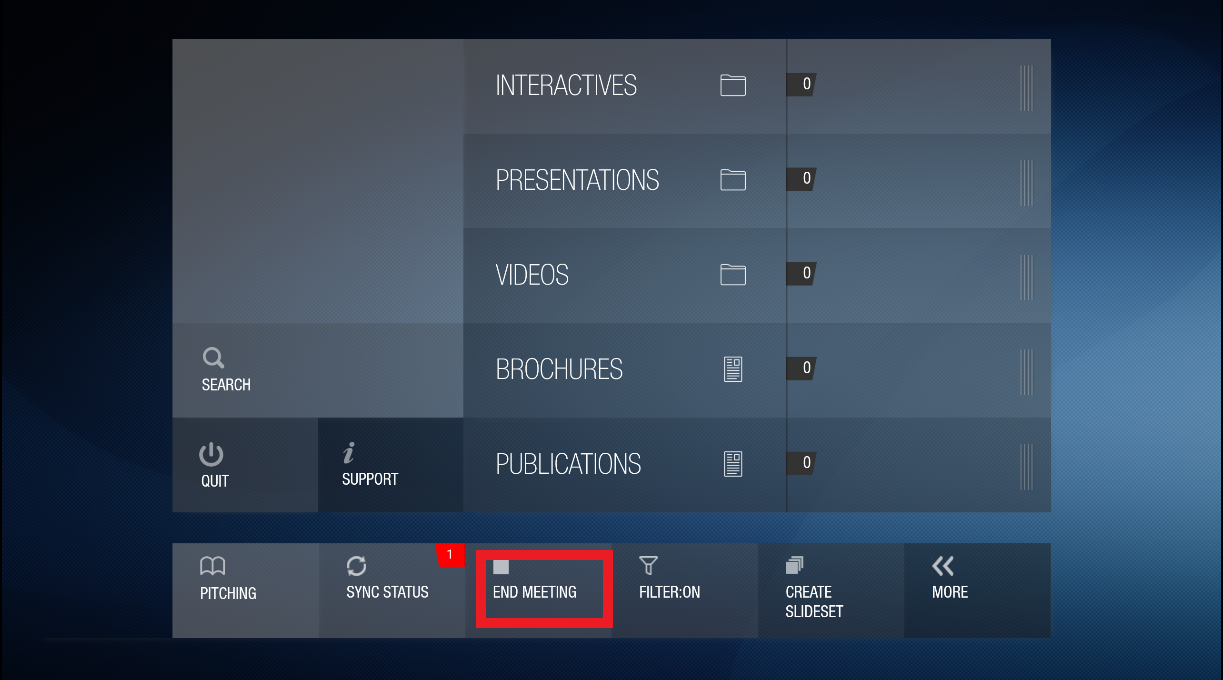
End Call
When the call is finished user can tap on End Meeting and it will open a post call form.
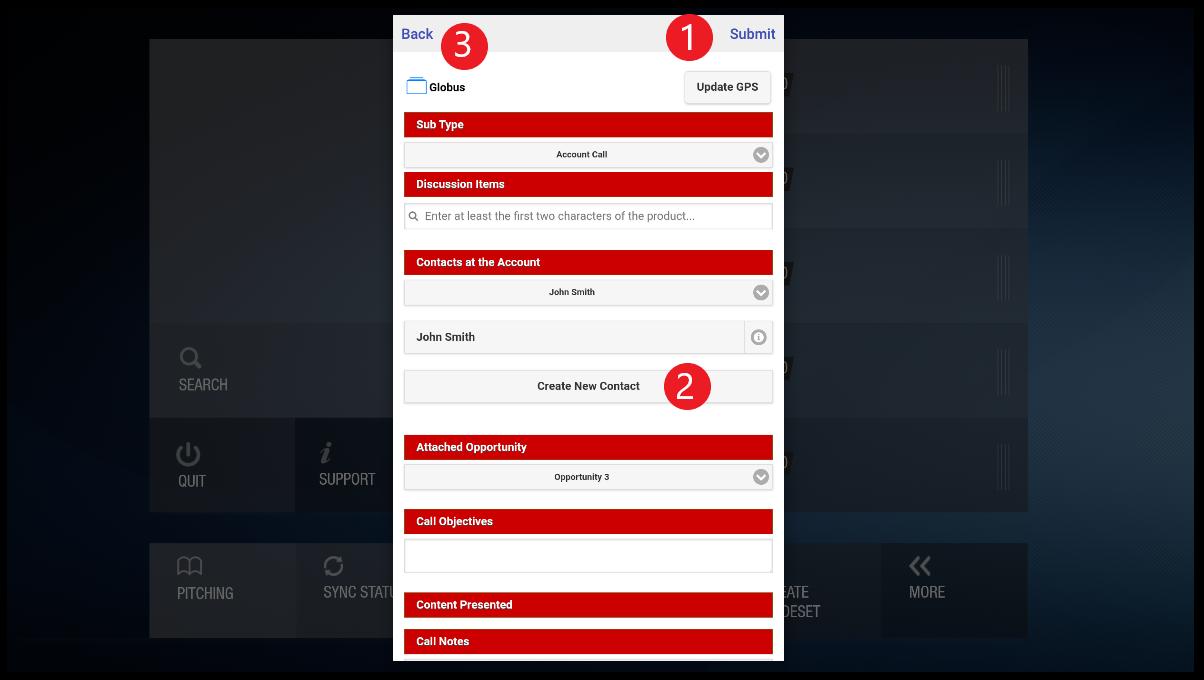
Post Call Form
Submit post call form
Complete the post-call report form with call information
Back
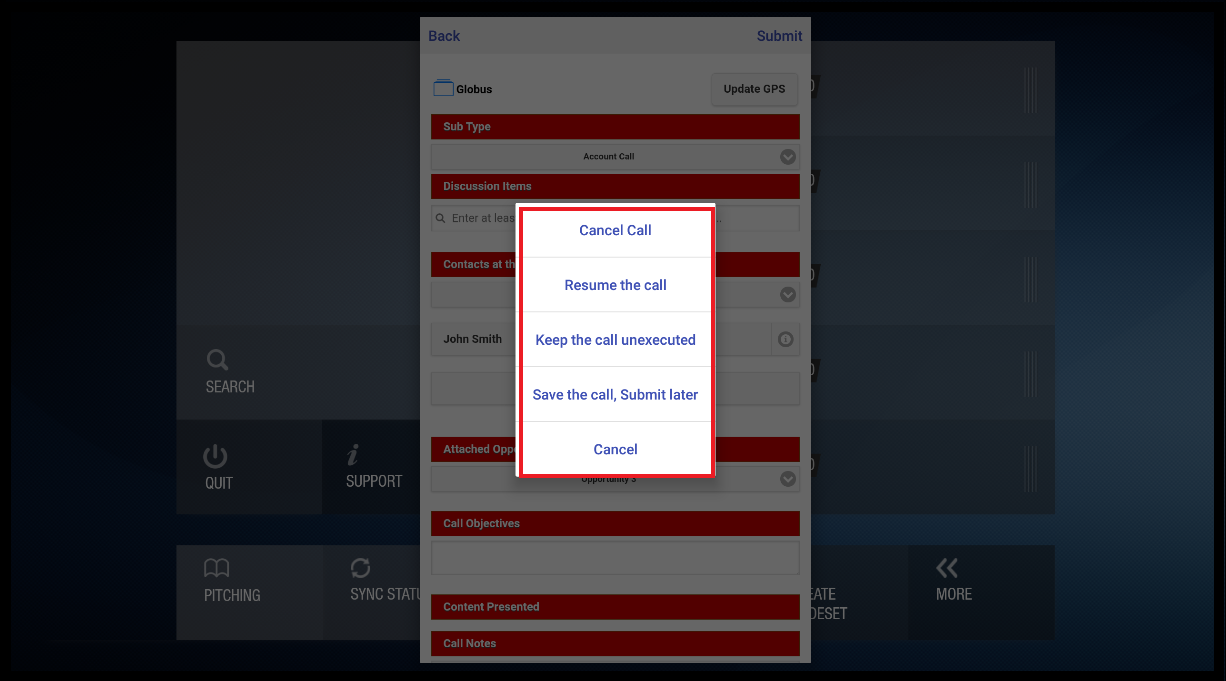
Back option in Post Call Form
If the user opts to tap on back button then following options will appear for selection :
Cancel Call
Resume the Call
Keep the call unexecuted
Save the call and submit later
Cancel the window.
