Pitcher Impact Live!
Pitcher Impact Live! is a remote meeting application from Pitcher that allows Sales Reps to schedule internet-based remote calls with customers. Pitcher Impact Live has the following features:
Instantly start live meetings and share meeting links with external customers
Share screen with meeting participants
Initiate text-based chat with meeting participants
Let us see the Impact Live! functionalities in detail:
Pitcher Impact Live! - Overview
Impact Live! consists of two main components:
Live Controls - It is part of Impact iOS UI. This part is the control panel for the host. The host can start/stop/share the meeting and share the screen from here. The host can also open the text chat. Sharing the screen is done by the native app but is triggered by the controls.
Live Web - A web application the participants use to join the meeting. Once connected, they can provide their name and see the host’s screen, turn on/off their camera and audio streams, and use the chat.
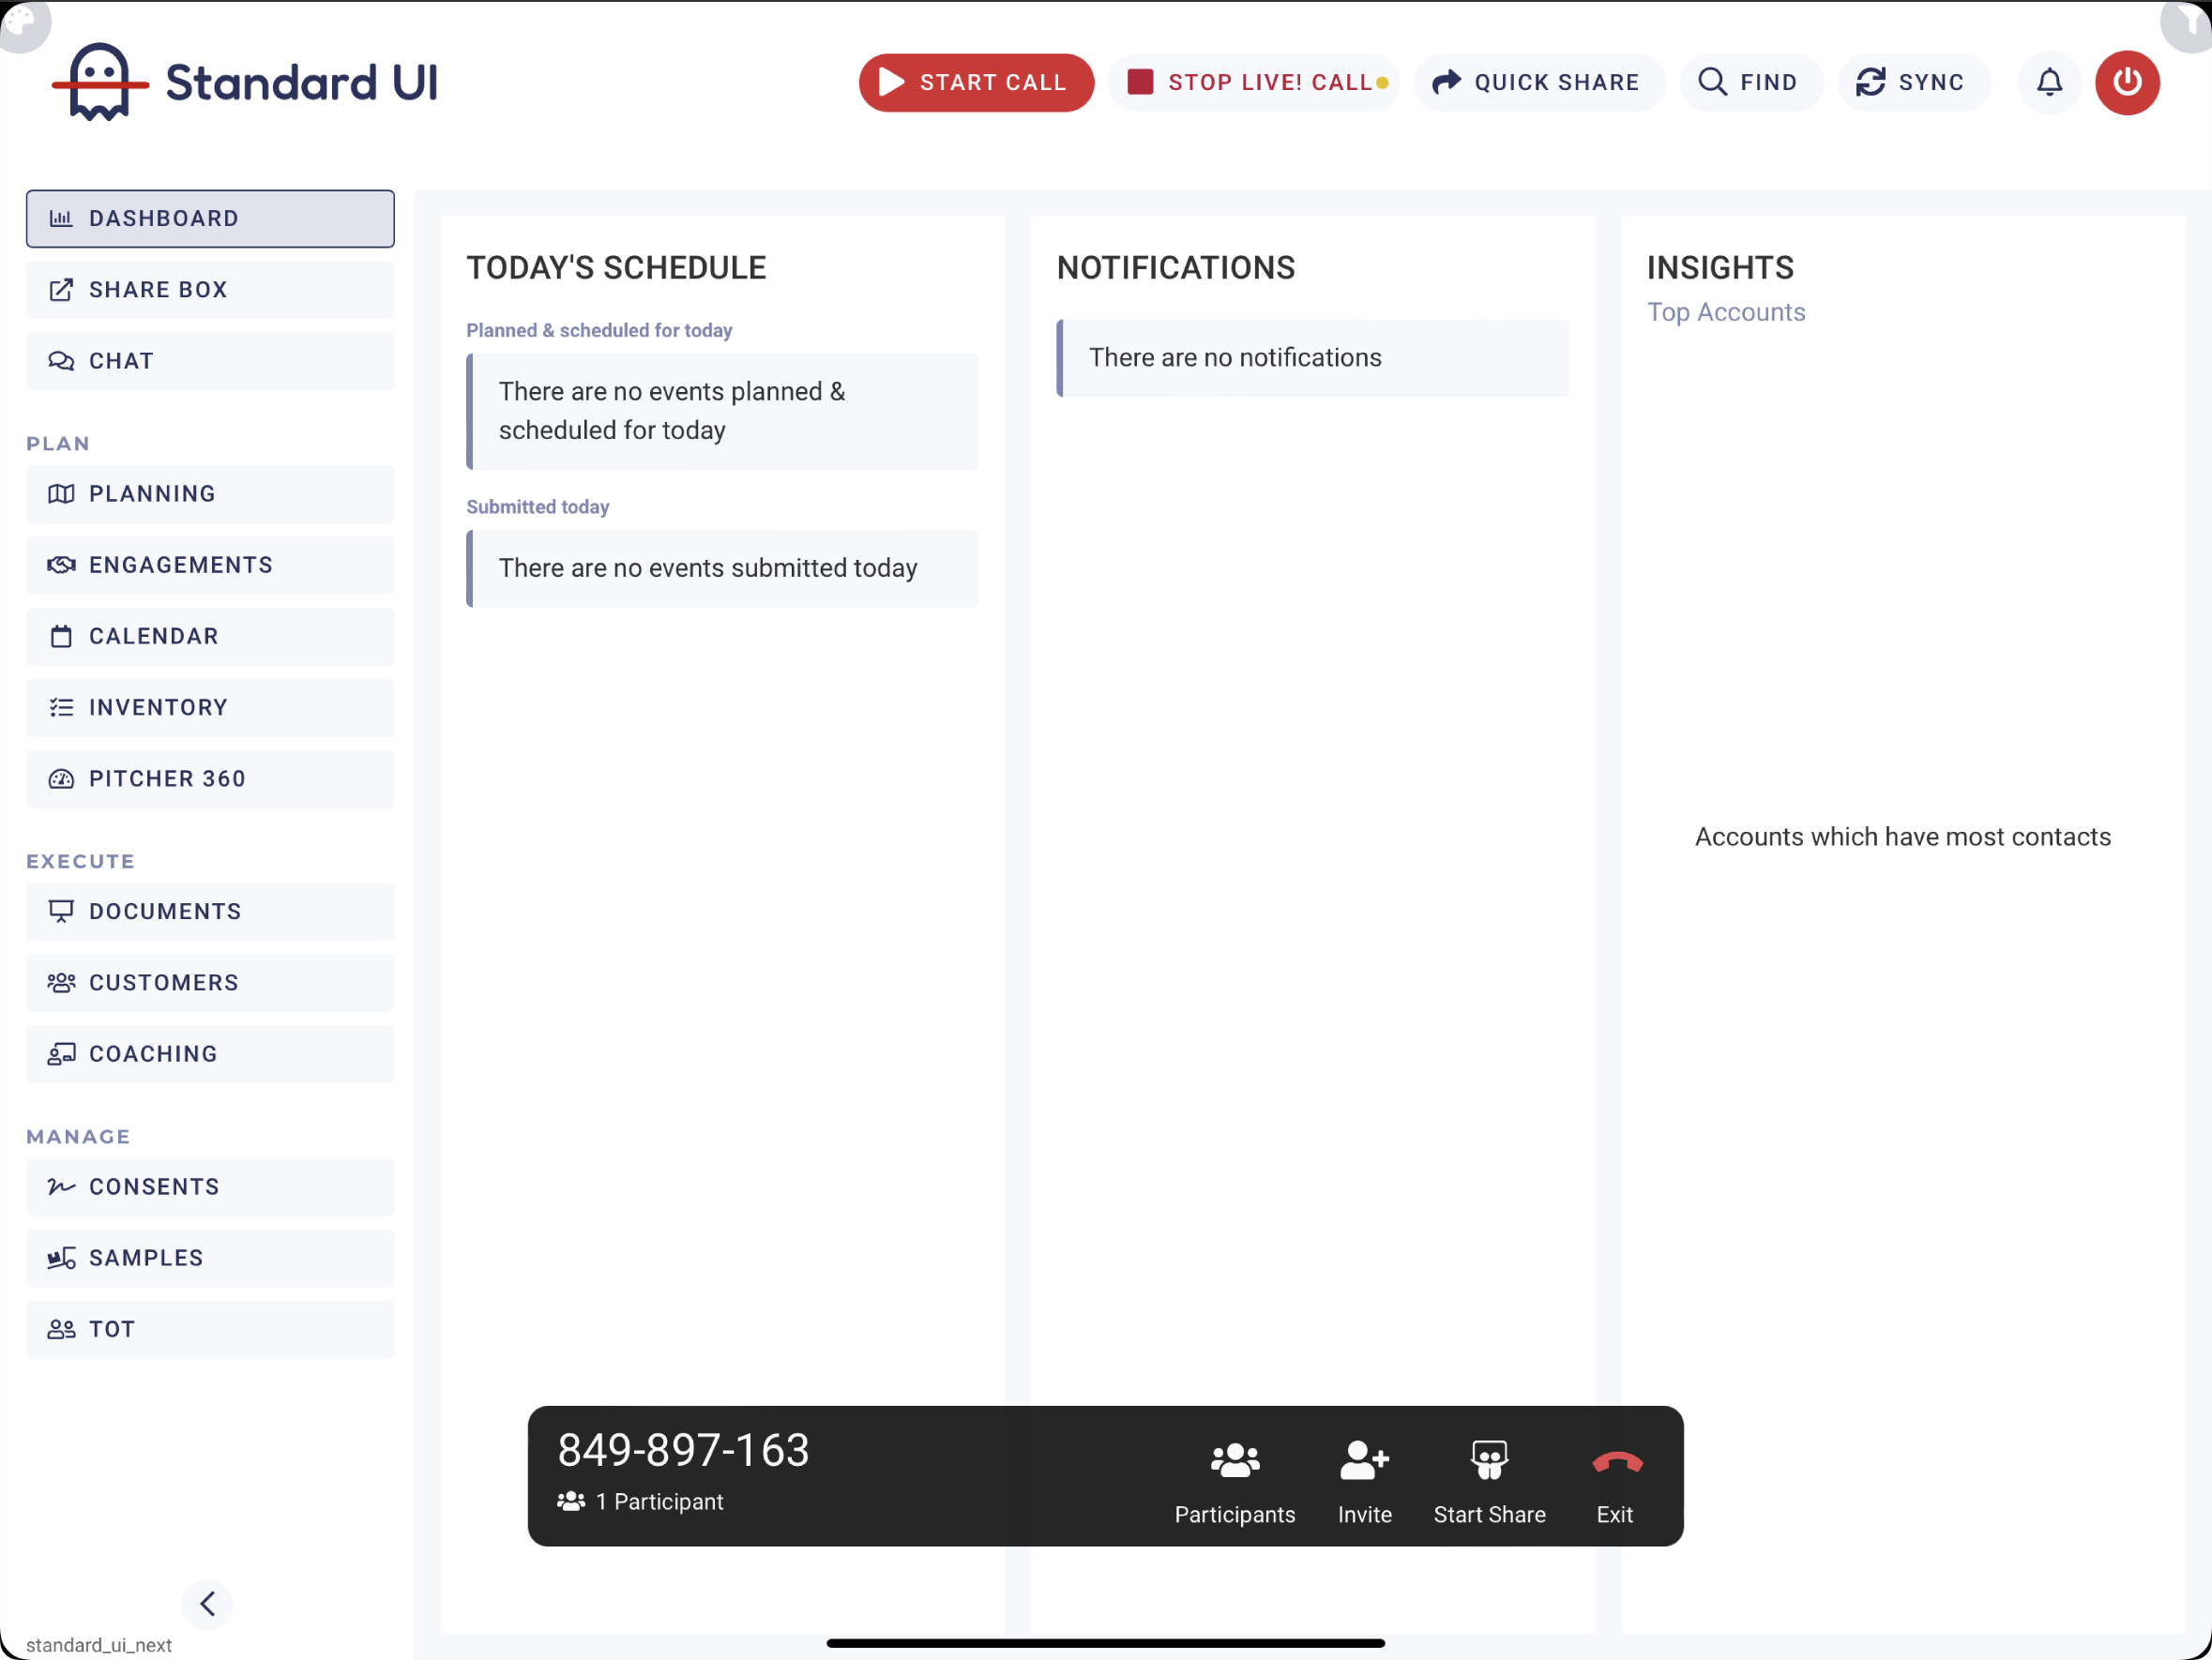
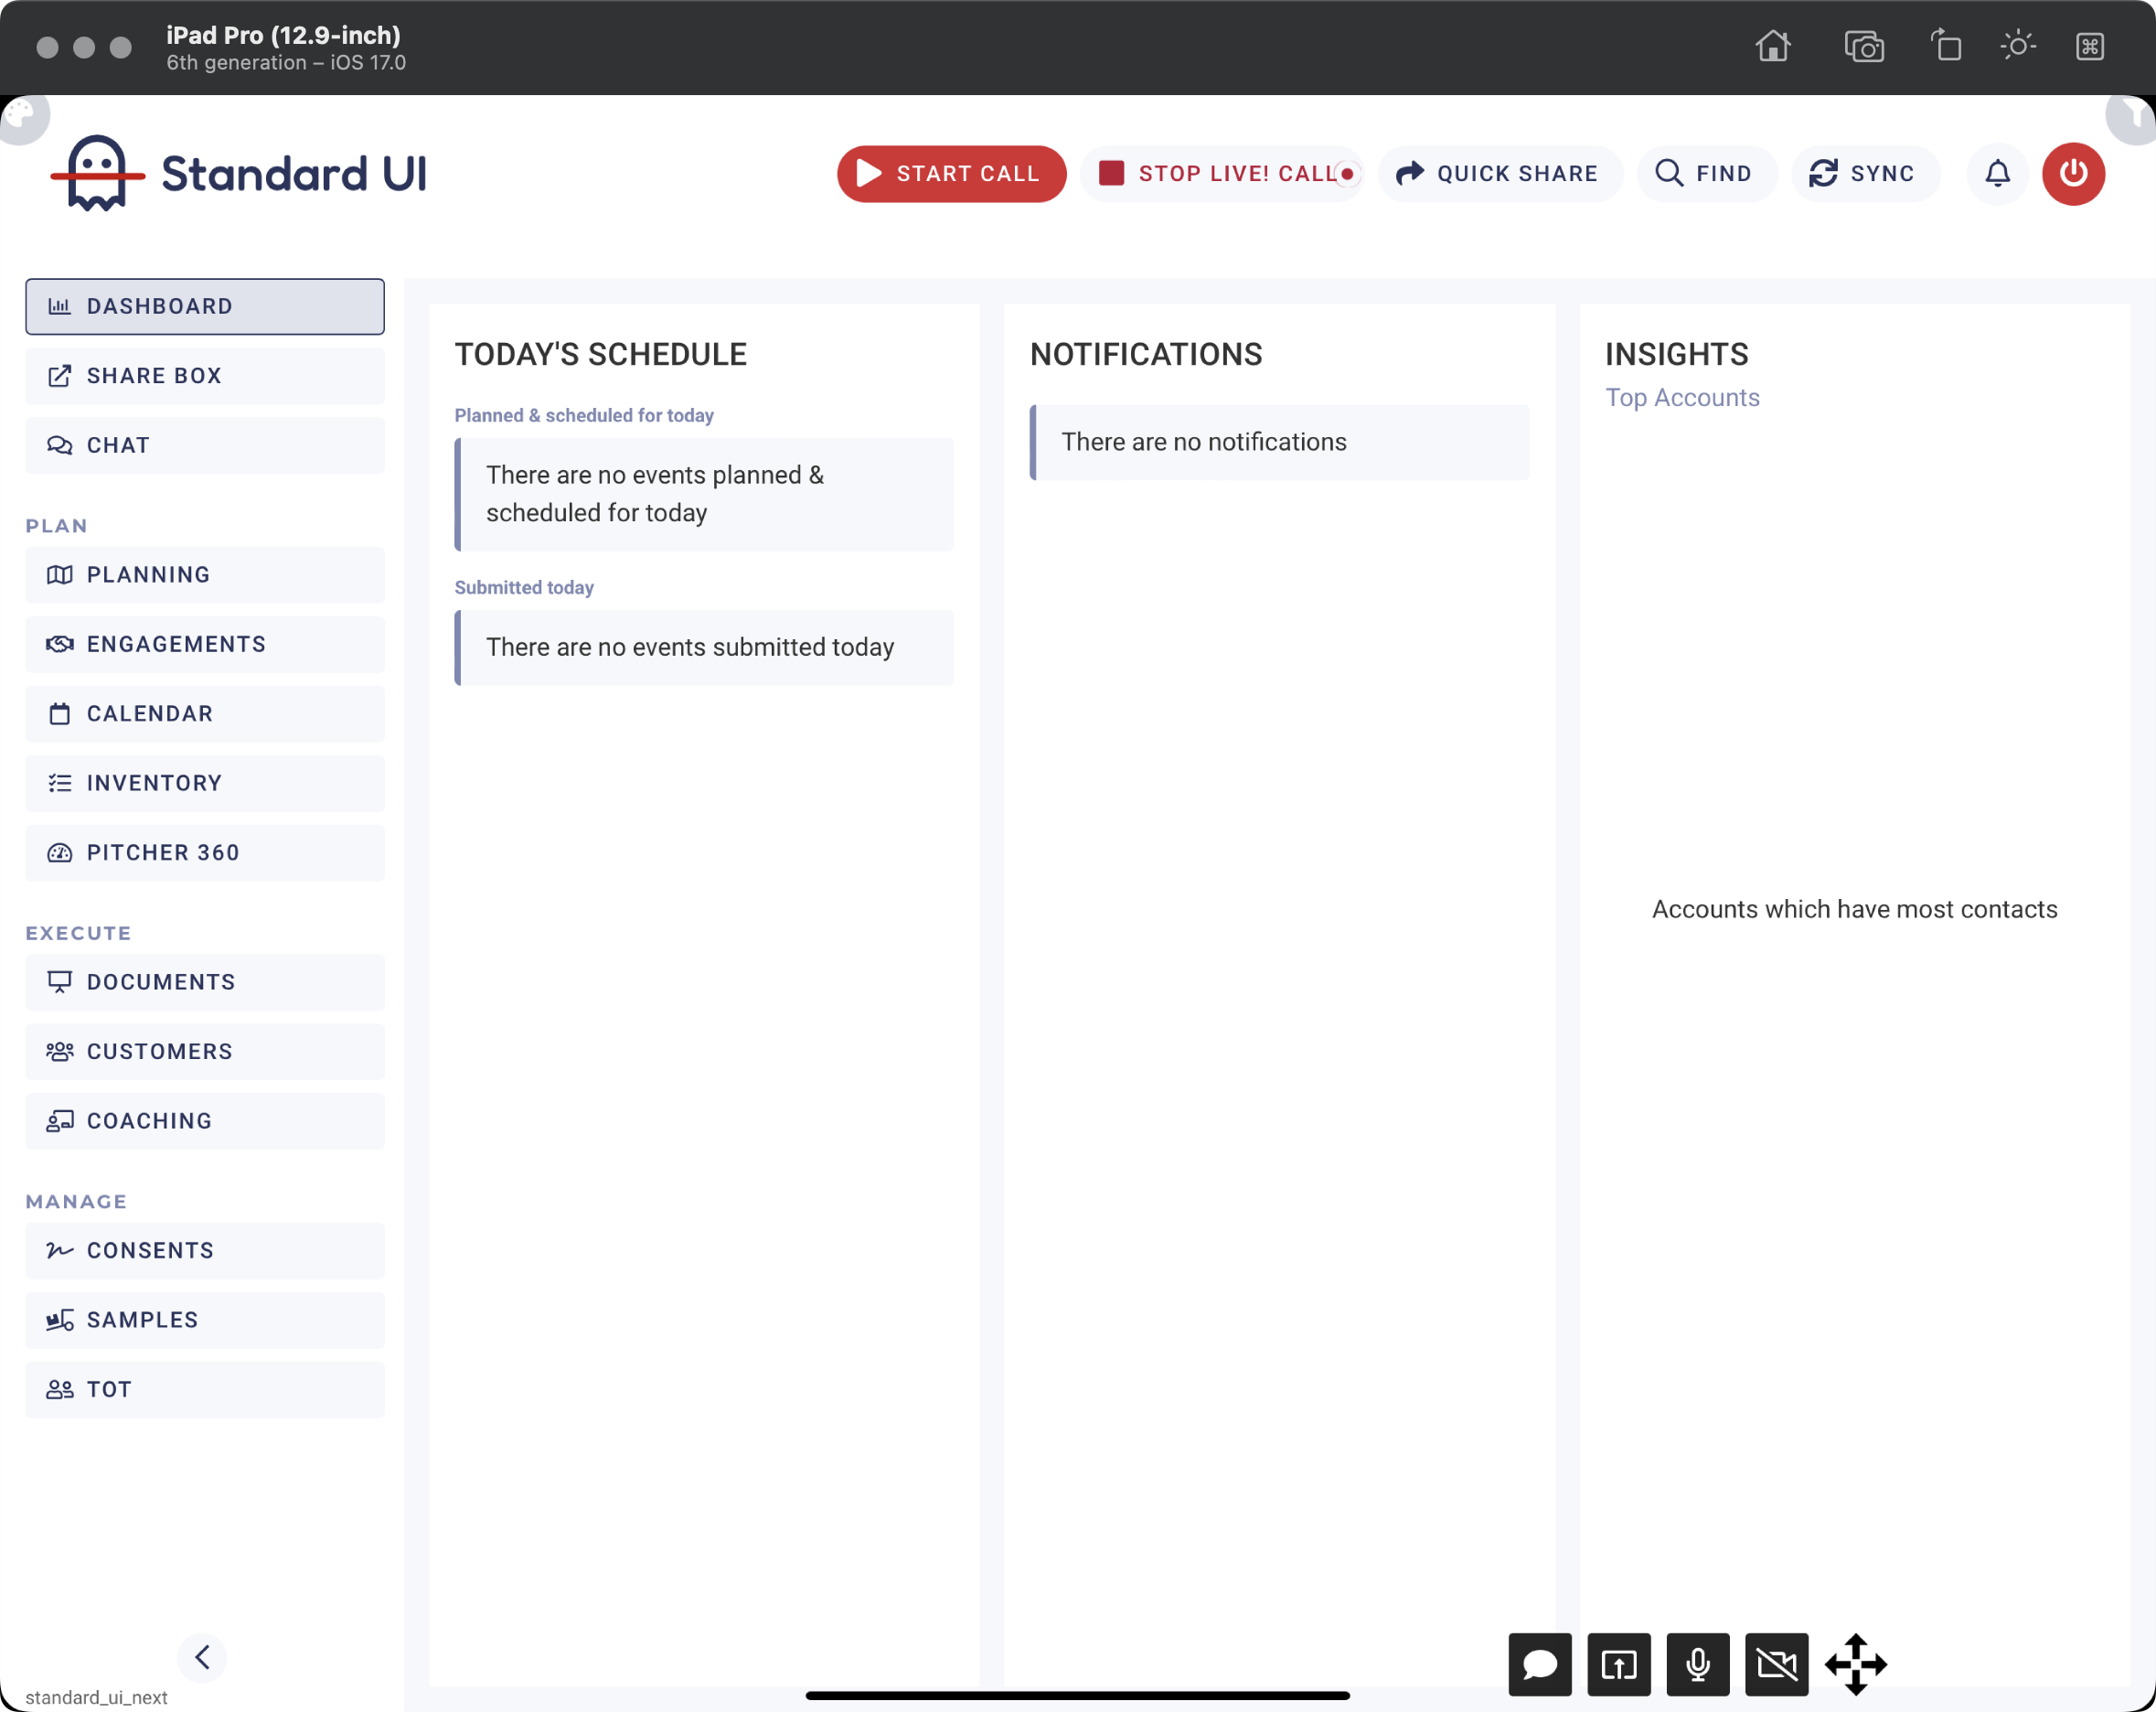
Starting a Call
Follow these steps to start an Impact Live! call:
Click the Start Live! Call at the top of the window. When the meeting is started, you’ll see the control bar at the lower part of the screen.
Click Invite to see the meeting URL and share it with participants.
Click Start Share to start presenting and launch camera/mic streaming.
To end the meeting, click Exit.
Inviting Participants
You can invite participants by sharing the meeting URL with them. The participants can join the meeting and view the content presentation with their camera and mic.
To invite a participant:
Select Participant or Presenter from the dropdown in the Invite dialogue. By default, the Participant option is selected. It will generate a joining link for the participants.
Copy the meeting link and share via a relevant communication channel.
Send Mail: Tap ‘Send Mail’ to share the meeting URL via the native iPad mail application.
Open External Mail App: Tap ‘Open External Mail App’ to share the meeting URL via an external mail application, e.g., Microsoft Outlook.
%20-%202022-10-02%20at%2021.55.35-20221003-072456.png?inst-v=973f3c37-d617-4a1c-9816-b97ed52324dd)
Inviting Participants
Important: Selecting Presenter will allow you to pass over the controls to the Presenter so they can share their screen, invite participants, or remove participants in the meeting.
Sharing Screen - Overlay Menu
Once the meeting is started and participants have joined, you can stream the iPad screen and open an audio/video connection in the room.
You will see a Remote Sharing Overlay Menu once the meeting is started.
The unique meeting code for this session is displayed on the left side. This code is part of the session link you will share to present and show content remotely with your customer. The participant will only have to click the link to open the session.
Tap Start Share to open the iPad Camera and Microphone. Tap on 'Allow' if the system asks for permission to use the camera and microphone. Now, you can begin sharing your screen with the customer.
Note: For the first time call, you need to allow the device permissions for the camera and microphone.
Note: Screen sharing will automatically be paused whenever the meeting overlay menu is visible during a Live! call.

Remote Sharing - Session Controls
Once the sharing is started, you can see the session controls. When the screen sharing gets started, then the Session Menu will open.
The Chat button allows you to exchange session-specific chat with your participants. Click on the button to initiate a chat with your participants.
You can pause screen sharing with the Pause/Continue button. The screen will be frozen for the participants. The participants will remain on the last shared screen until you decide to continue screen sharing again.
The Mute/Unmute button allows you to mute or unmute your microphone.
The Camera Start/Stop button lets you start and stop the video camera.
The Move icon lets you move the session controls menu across the window at your convenience.
Presenter’s Camera Image - whenever a presenter enables his camera, it will show the Presenter’s Camera Image on the right side of the window.
Participant’s Camera image - participant(s) camera image appears on the left side of the window. You can also move camera images across the window at your convenience. The name(s) of the participant(s) are shown in the image frame.
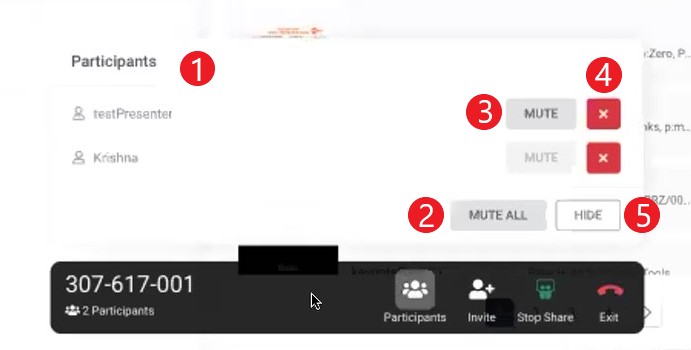
Participants List
You can access the participant list by clicking the Participants button.
A list of the participants is displayed on the left side.
You can Mute All to establish silence in the room during your presentation. The participants will be able to unmute themselves again from their browsers.
You can Mute each participant via this button. If the participant is already muted, this button will be greyed out so you can identify who has their microphones on.
You can remove each participant individually from the X button. It will remove the participant from the meeting. Please note that they can still click the invitation link and rejoin the meeting.
Once you finish your operations, you can Hide this window to continue your presentation.
Participants List
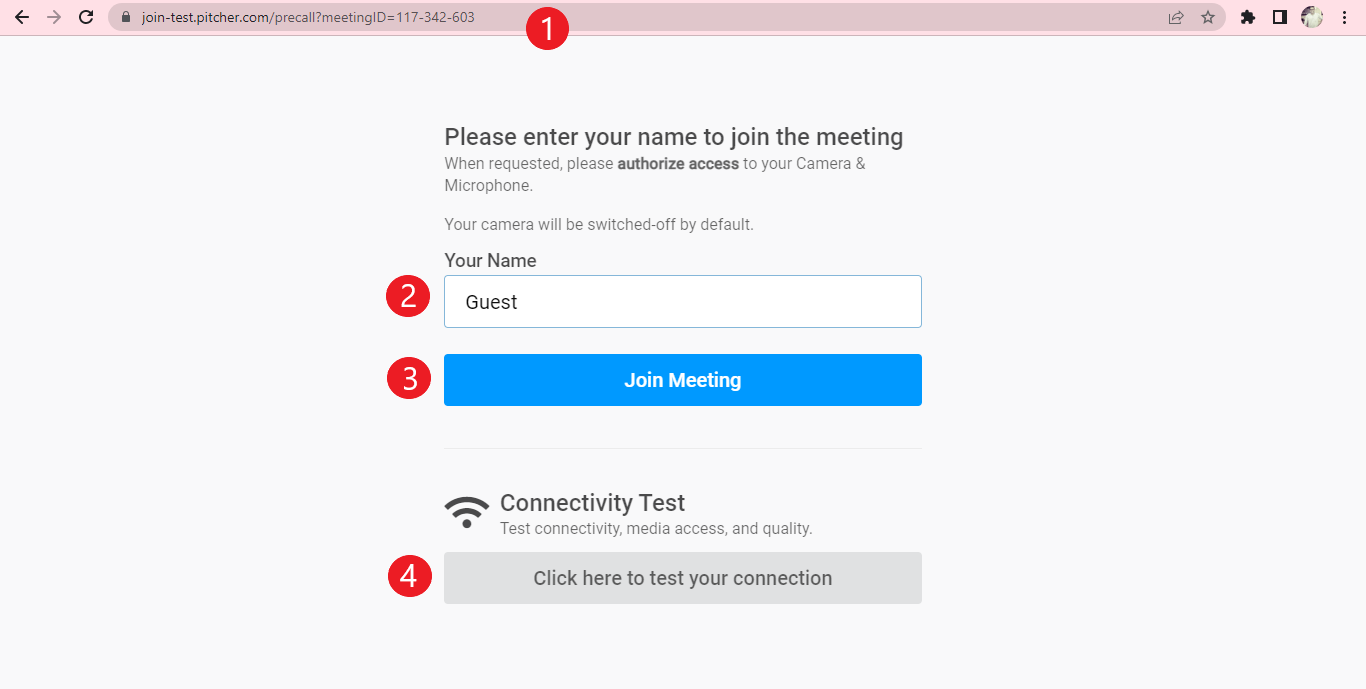
Participant’s View - Impact Live!
When you send an invite with the meeting link to participants who have clicked that link, they will be taken to the 'Pitcher Join' page. The Meeting ID is displayed in the link (URL).
Participants need to enter their names.
Participants then either click on the button 'Join Meeting', or
Click on the 'Connectivity Test' button to test connectivity.
Pitcher Impact Live! - Participant’s View
Participant’s View - Join Meeting
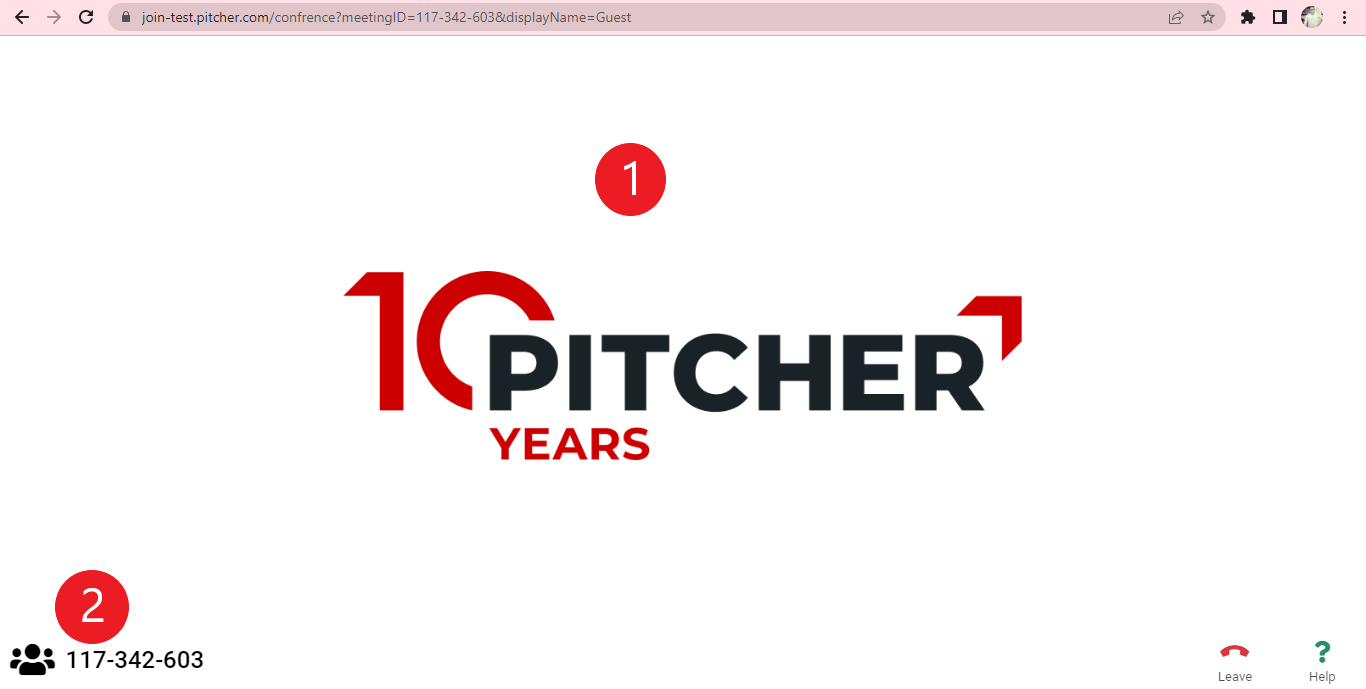
After participants click the 'Join Meeting' button, they will be taken to the "waiting room" page of Pitcher Join until the presenter has started the sharing session.
The Meeting ID is displayed on the bottom left of the screen. Also shown is the number of active participants in the current session.
Participant Joining View
Participant’s View - Screen Sharing
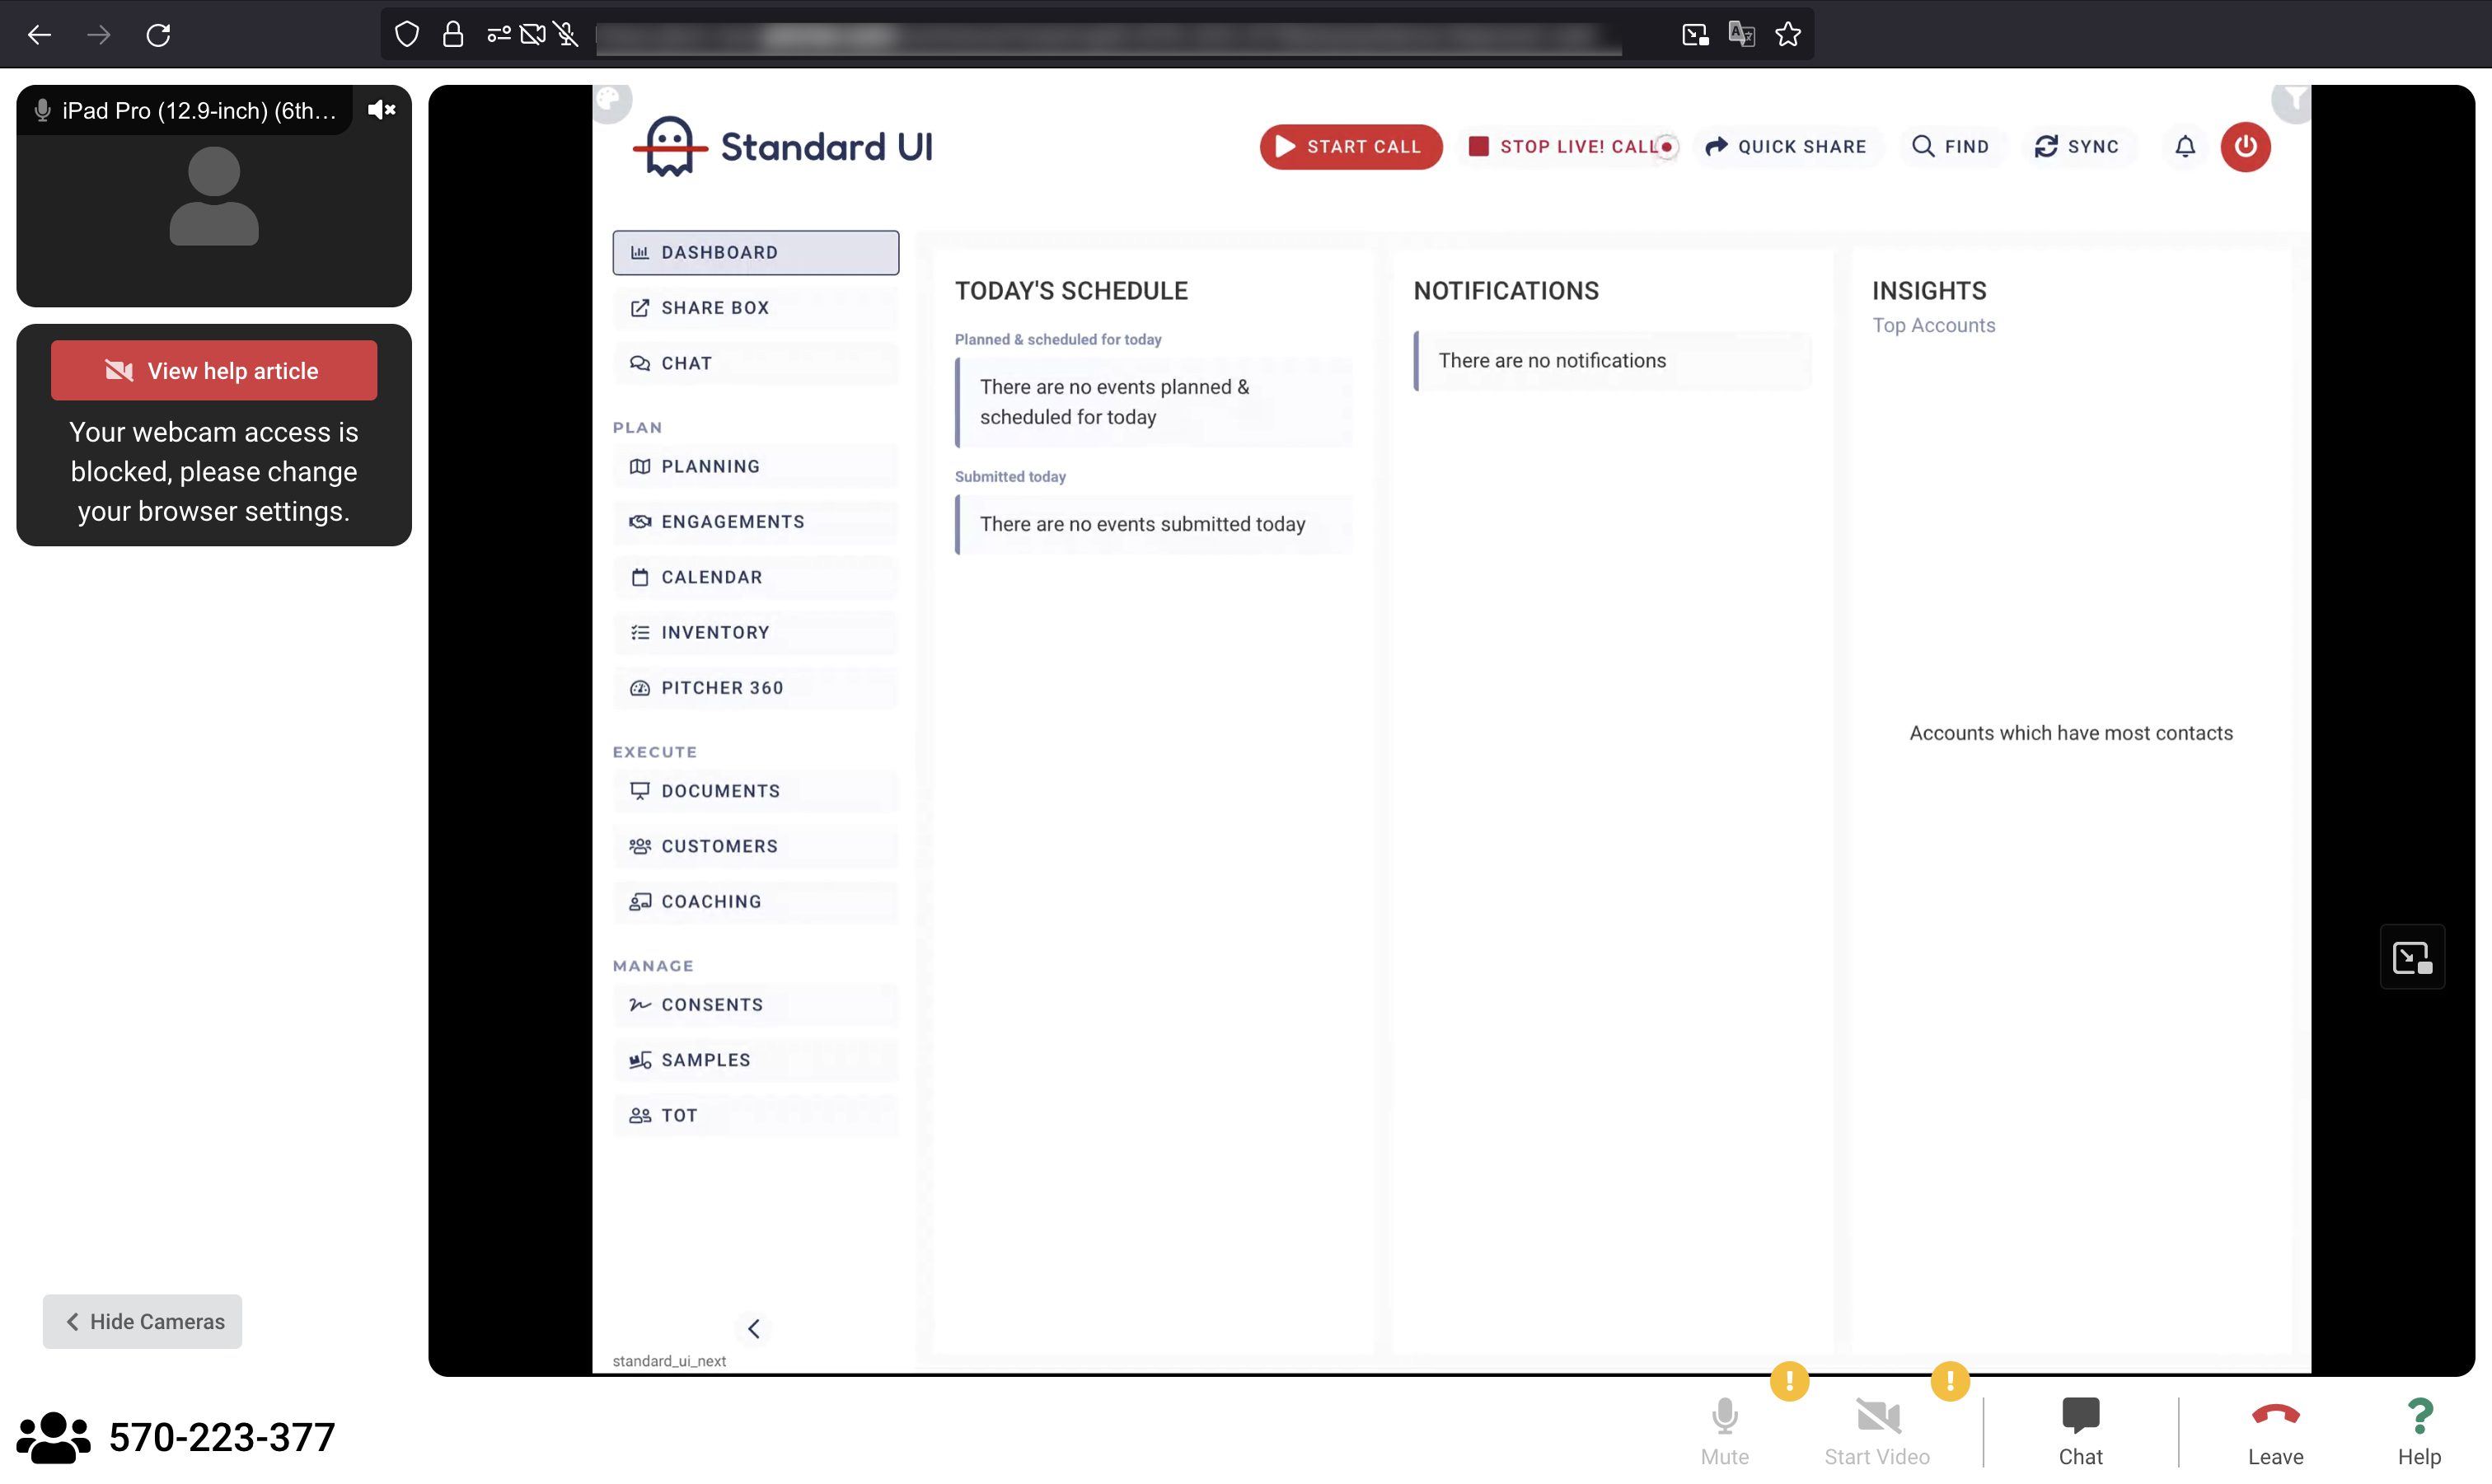
Once the sharing session starts, participants will be able to see the iPad screen of the presenter.
Click Show Cameras to enable camera images of other participants and the presenter.
The current active Meeting ID and the number of active participants in the current session are displayed on the bottom left of the screen.
This is this microphone’s Mute/Unmute button.
The camera open & close button activates and de-activates the video camera.
The chat button is only available when a meeting has been started.
The End Session button ends the session on the participants' side.
The Help button of Pitcher Live! when clicked, a series of Q&A entries are displayed, providing a good insight into Live! functions and functionality.
Participants View - Chat
Participants can start a chat by tapping on the Chat button.
The chat window will open, and participants can type text.
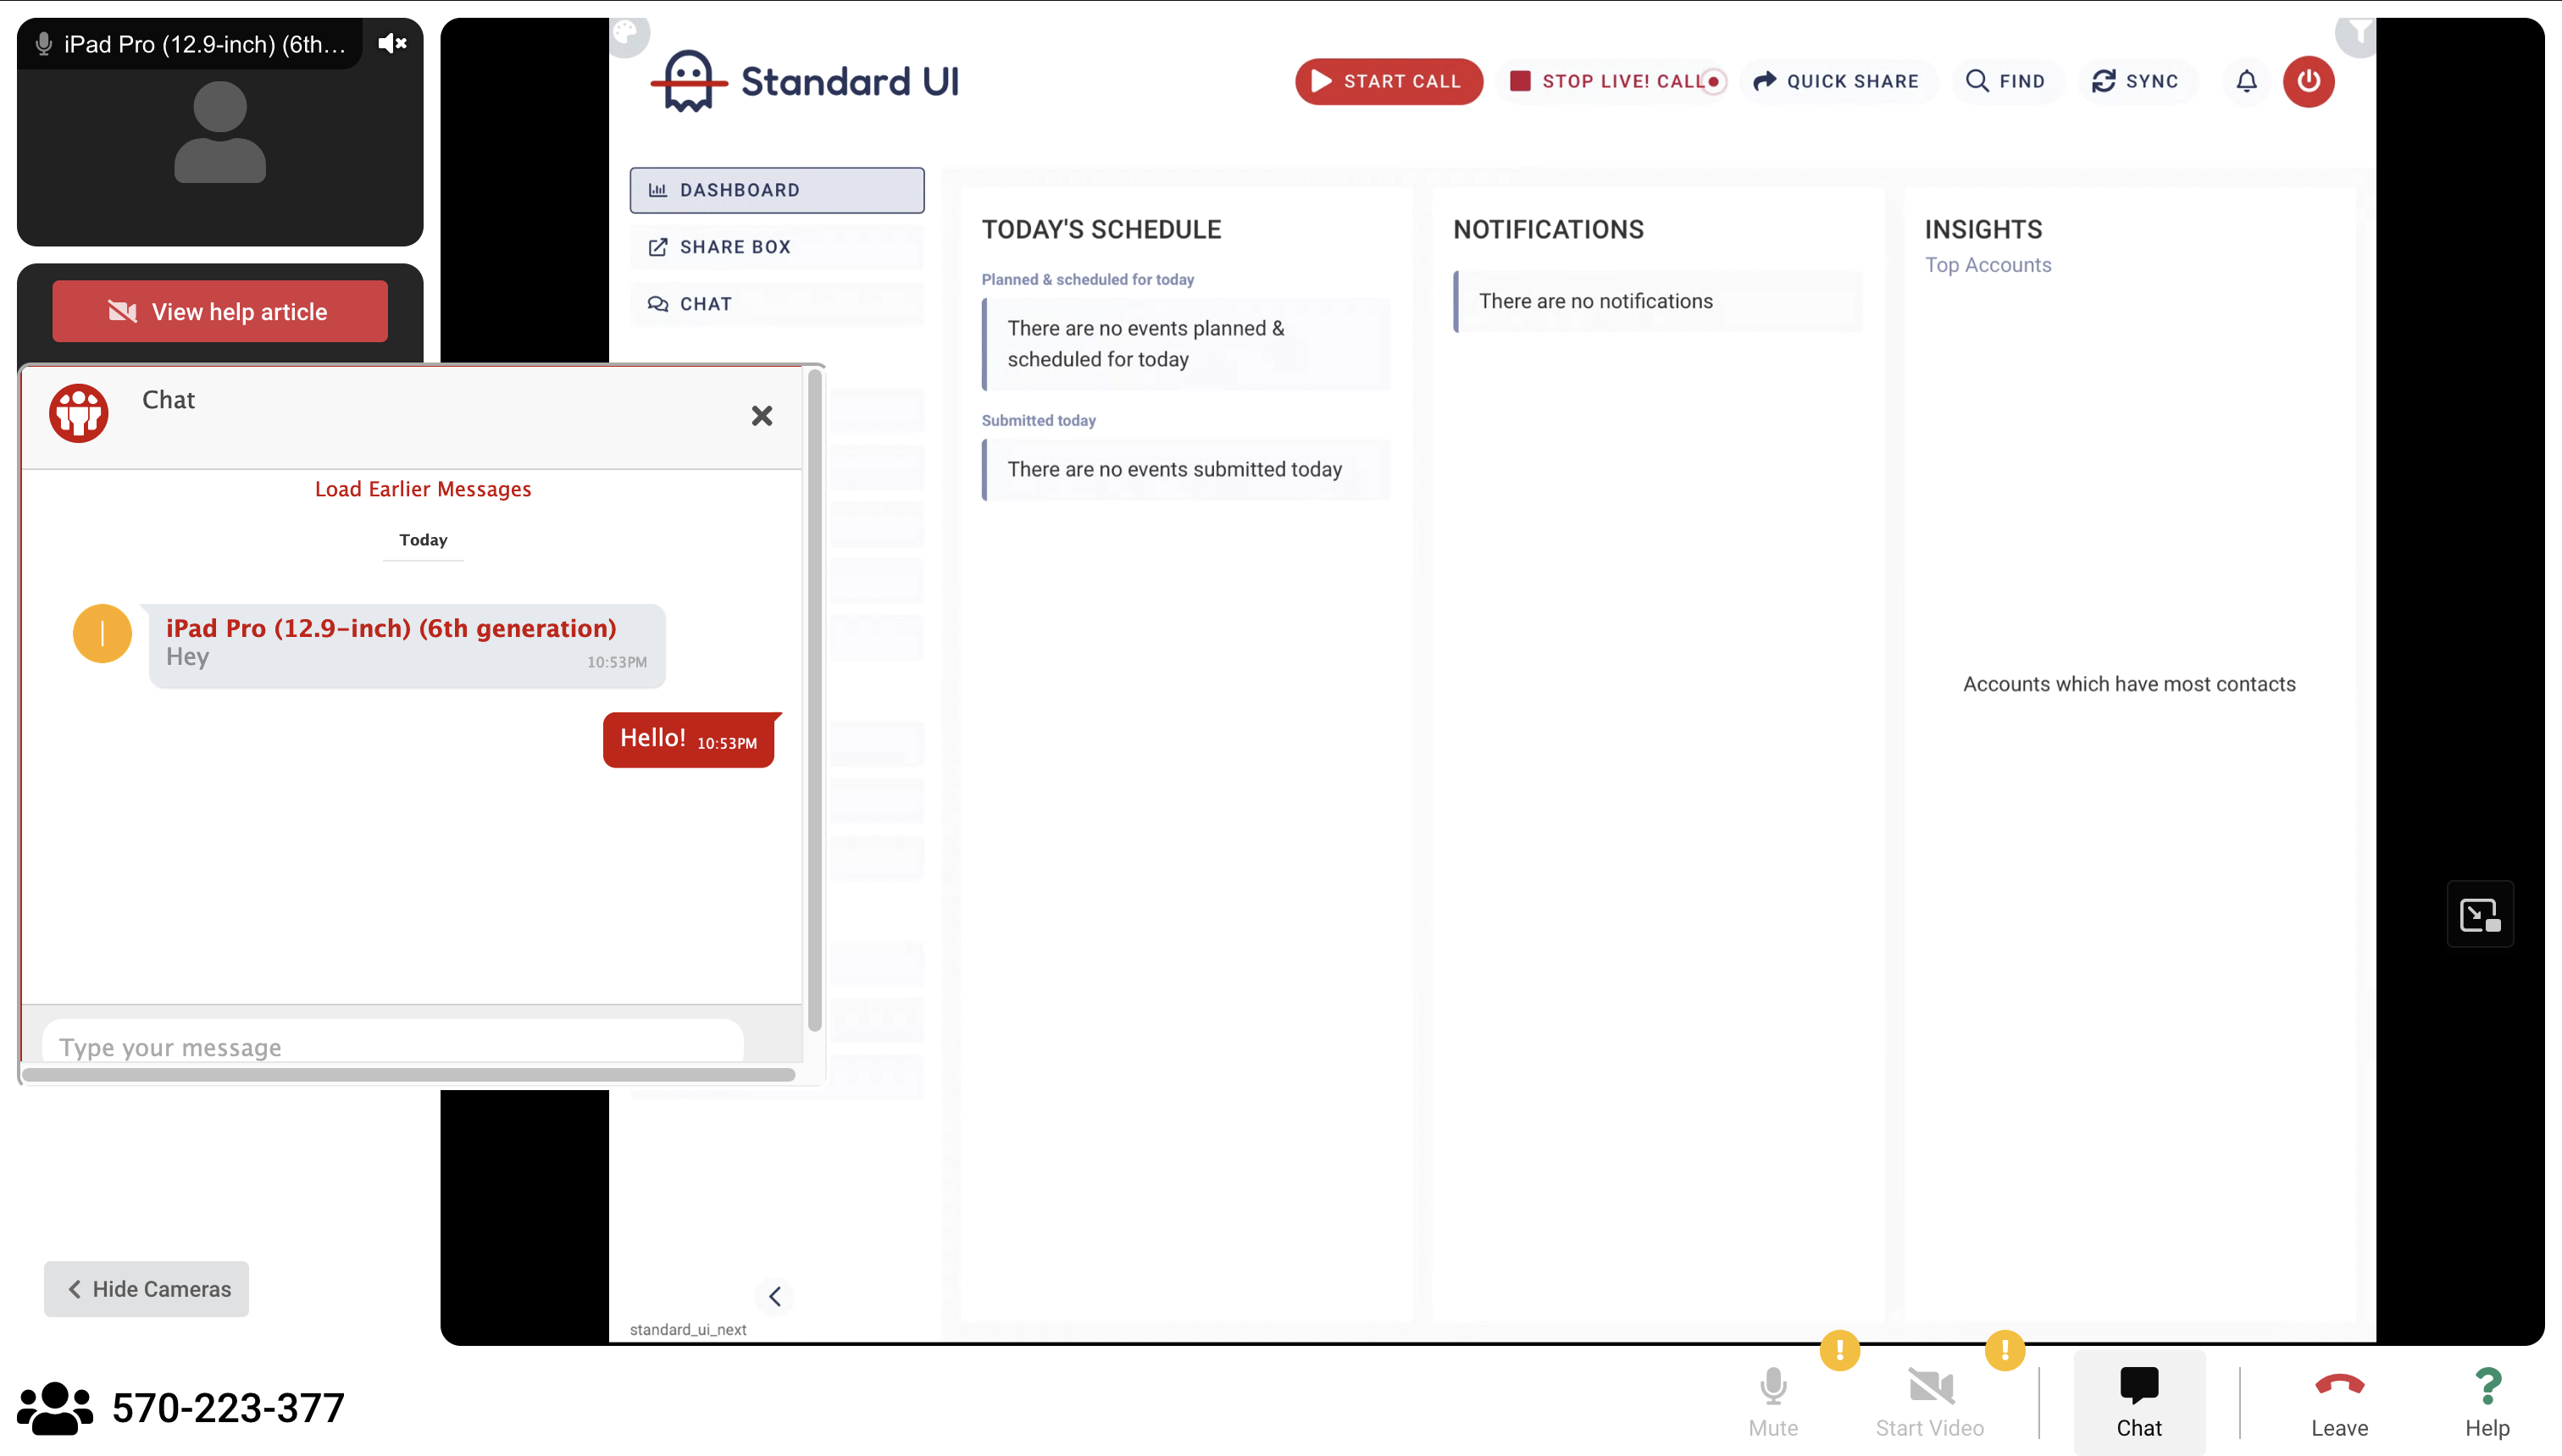
Note: It is important to note here that the chats will be shared with all participants in the session.
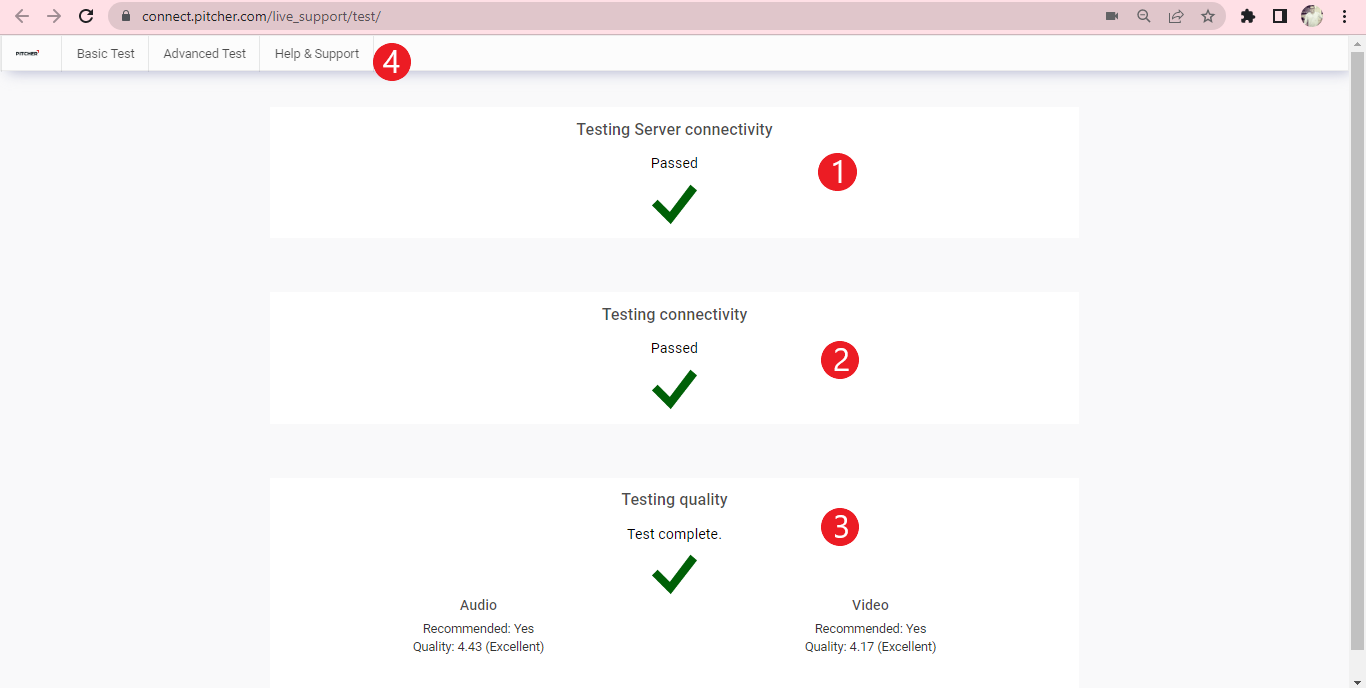
Connectivity Tests - Basic Test
On the initial screen, if you click on the button 'Click here to test connectivity, a series of basic tests will start to measure connection speed and quality.
Testing Server connectivity: Checks if the streaming server is readily available.
Testing connectivity: Checks if the current connection of the participant is sufficient speed.
Testing quality: Checks if video and audio quality (speed) are good enough to run a Live! session.
Help & Support: Here, a collection of Q&A topics can be found, which help to troubleshoot issues on the participant side.
Basic Connectivity Tests
Impact Live! - Detailed Planning
Impact Live! meeting link can be created by planning a detailed call in the Pitcher Impact application.
To plan a detailed call:
1. Tap “Planning” and then select “Detailed”.
2. Select the date from the calendar to plan your call.
3. Select the Account or Contact with whom you want to plan the call.
4. Select the content you want to share during the call.
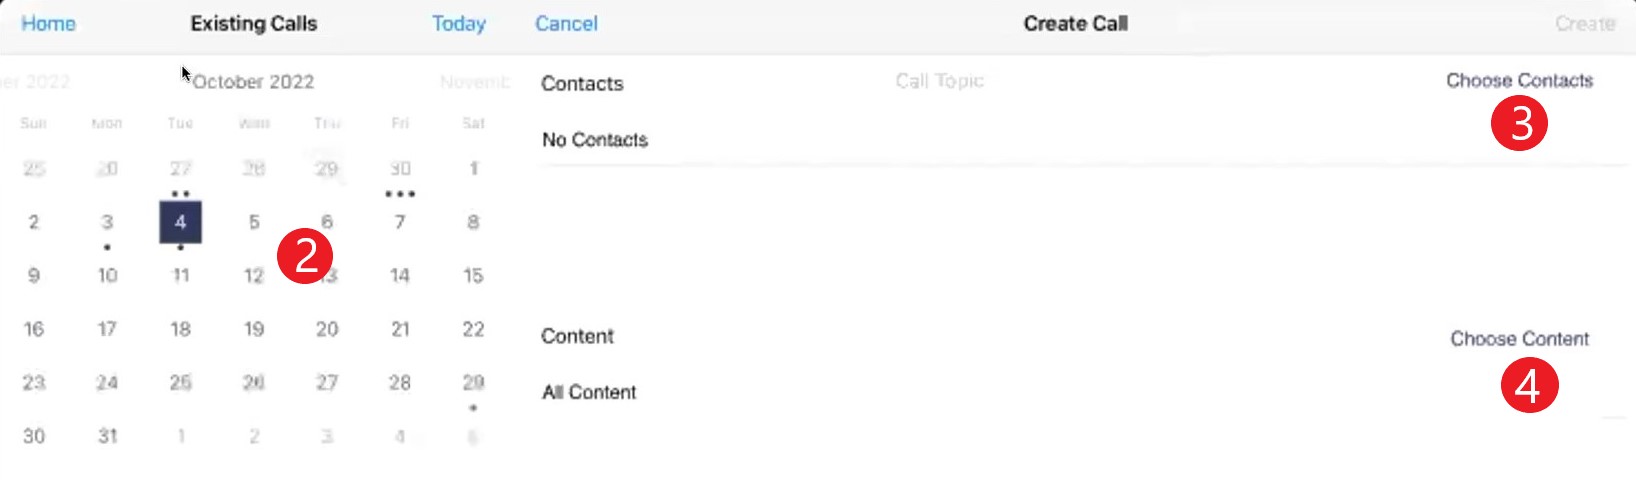
Select Contact
5. Mention the call objectives.
6. Select the call type from the dropdown.
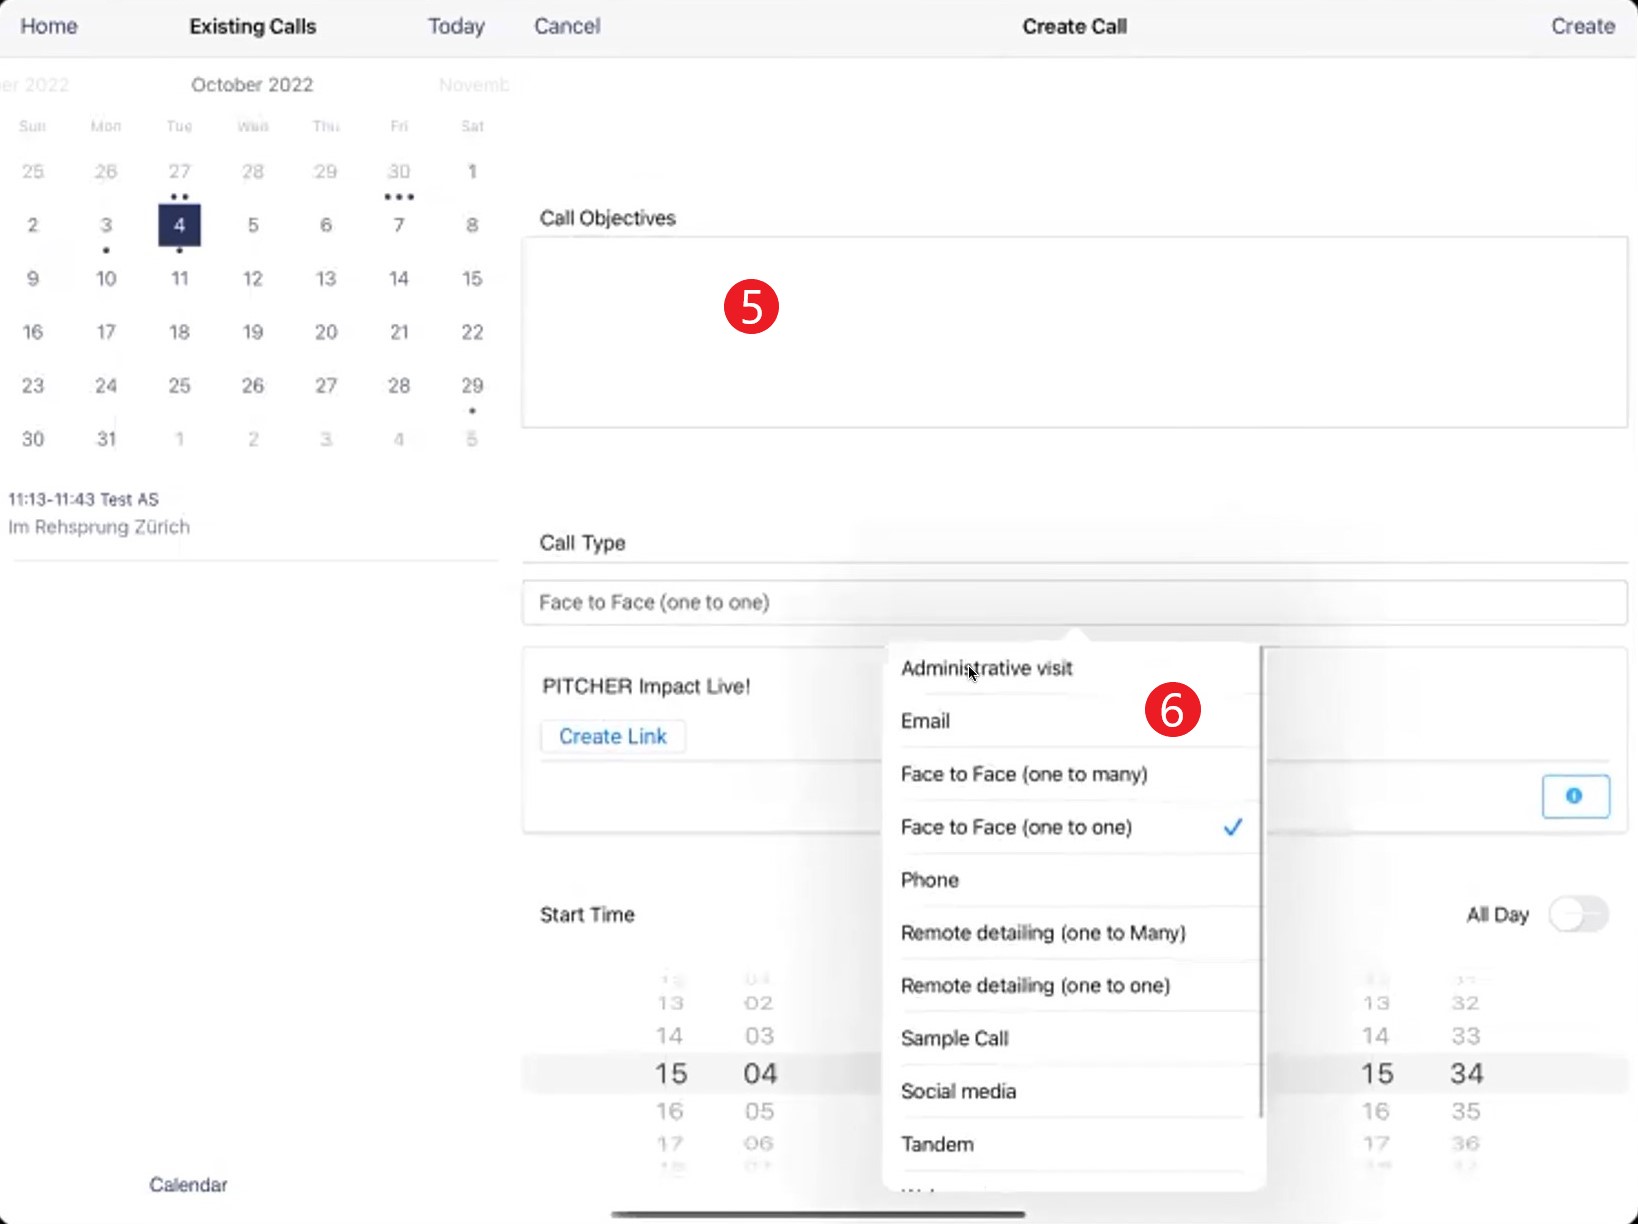
Call Objective & Call Type
7. Select the time of the call, i.e., start and end times, from the time selector.
8. Test your connection before creating the meeting link by clicking the info button. For more information, refer to the Connectivity Tests section.
9. Click the Create Link button to create the meeting link.
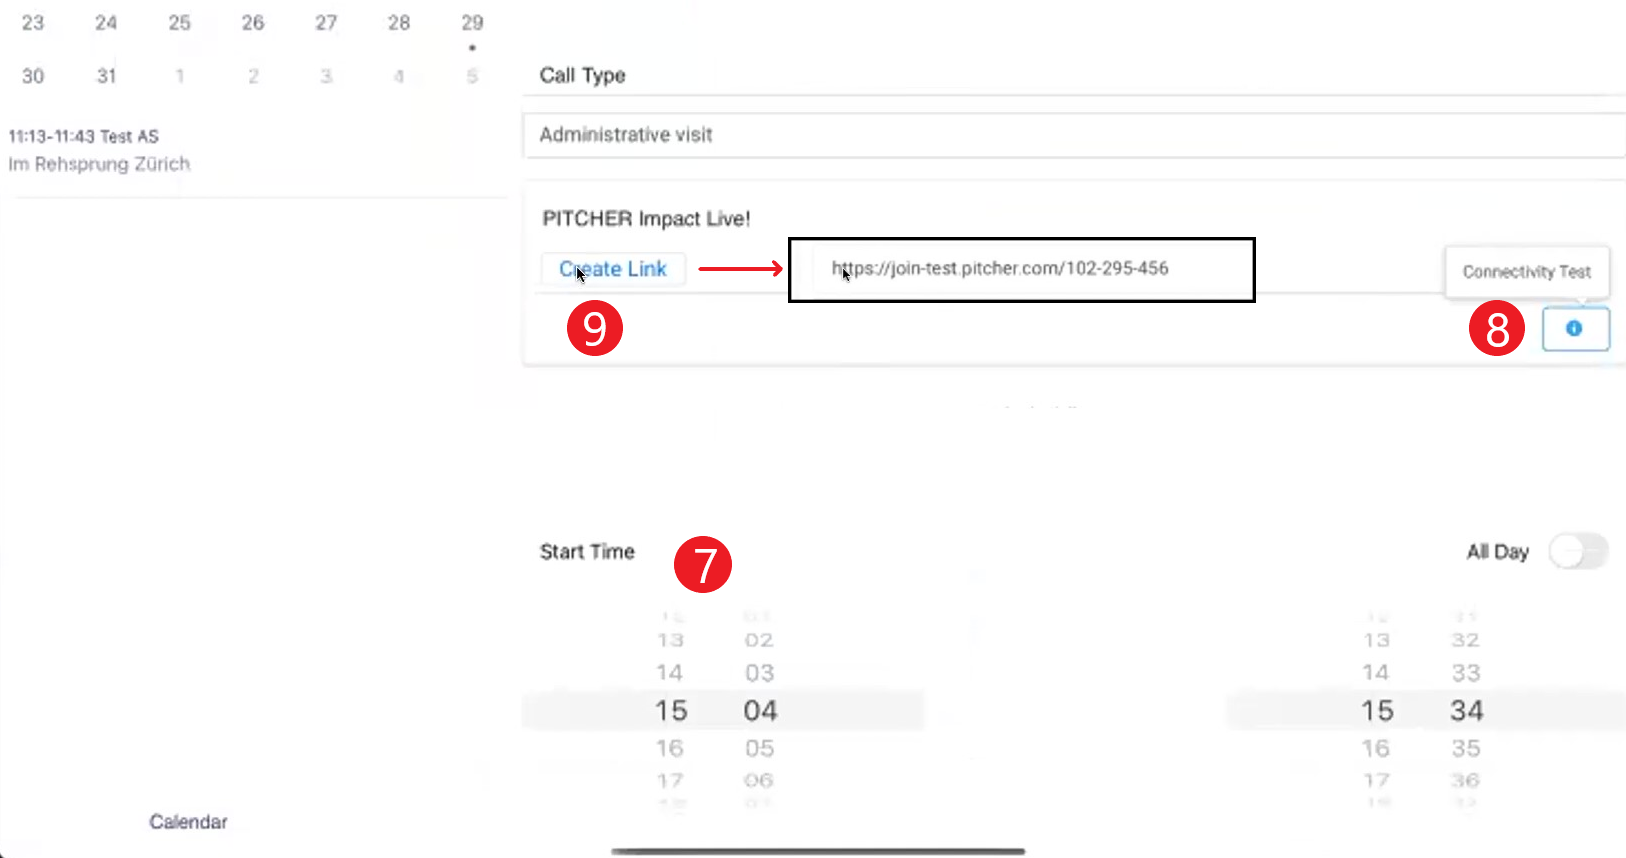
Connectivity Testing & Creating Link
Note: Once the meeting link is created, it will be synced with CRM. You can then conduct the call and fill in the information in the Post Call form once the call ends. For more information, please see Planning & Executing Detailed Calls in iPad and Post Call Forms.