Installing the Indoors Managed Package
This document gives the walkthrough on the installation of the Pitcher Indoors package on CRM and its configuration. For CRM, SalesForce is being used.
Pre-Installation
Install dependent packages
Pitcher Zero
Installation
Follow these steps to install/upgrade the package:
Enter the package installation link obtained from your Pitcher representative. This should redirect you to the login page of Salesforce.com. For Sandbox organizations, swap http://login.salesforce.com with http://test.salesforce.com in the URL.
Select Install for Admins Only, Install for All Users, or Install for Specific Profiles, depending on the need.
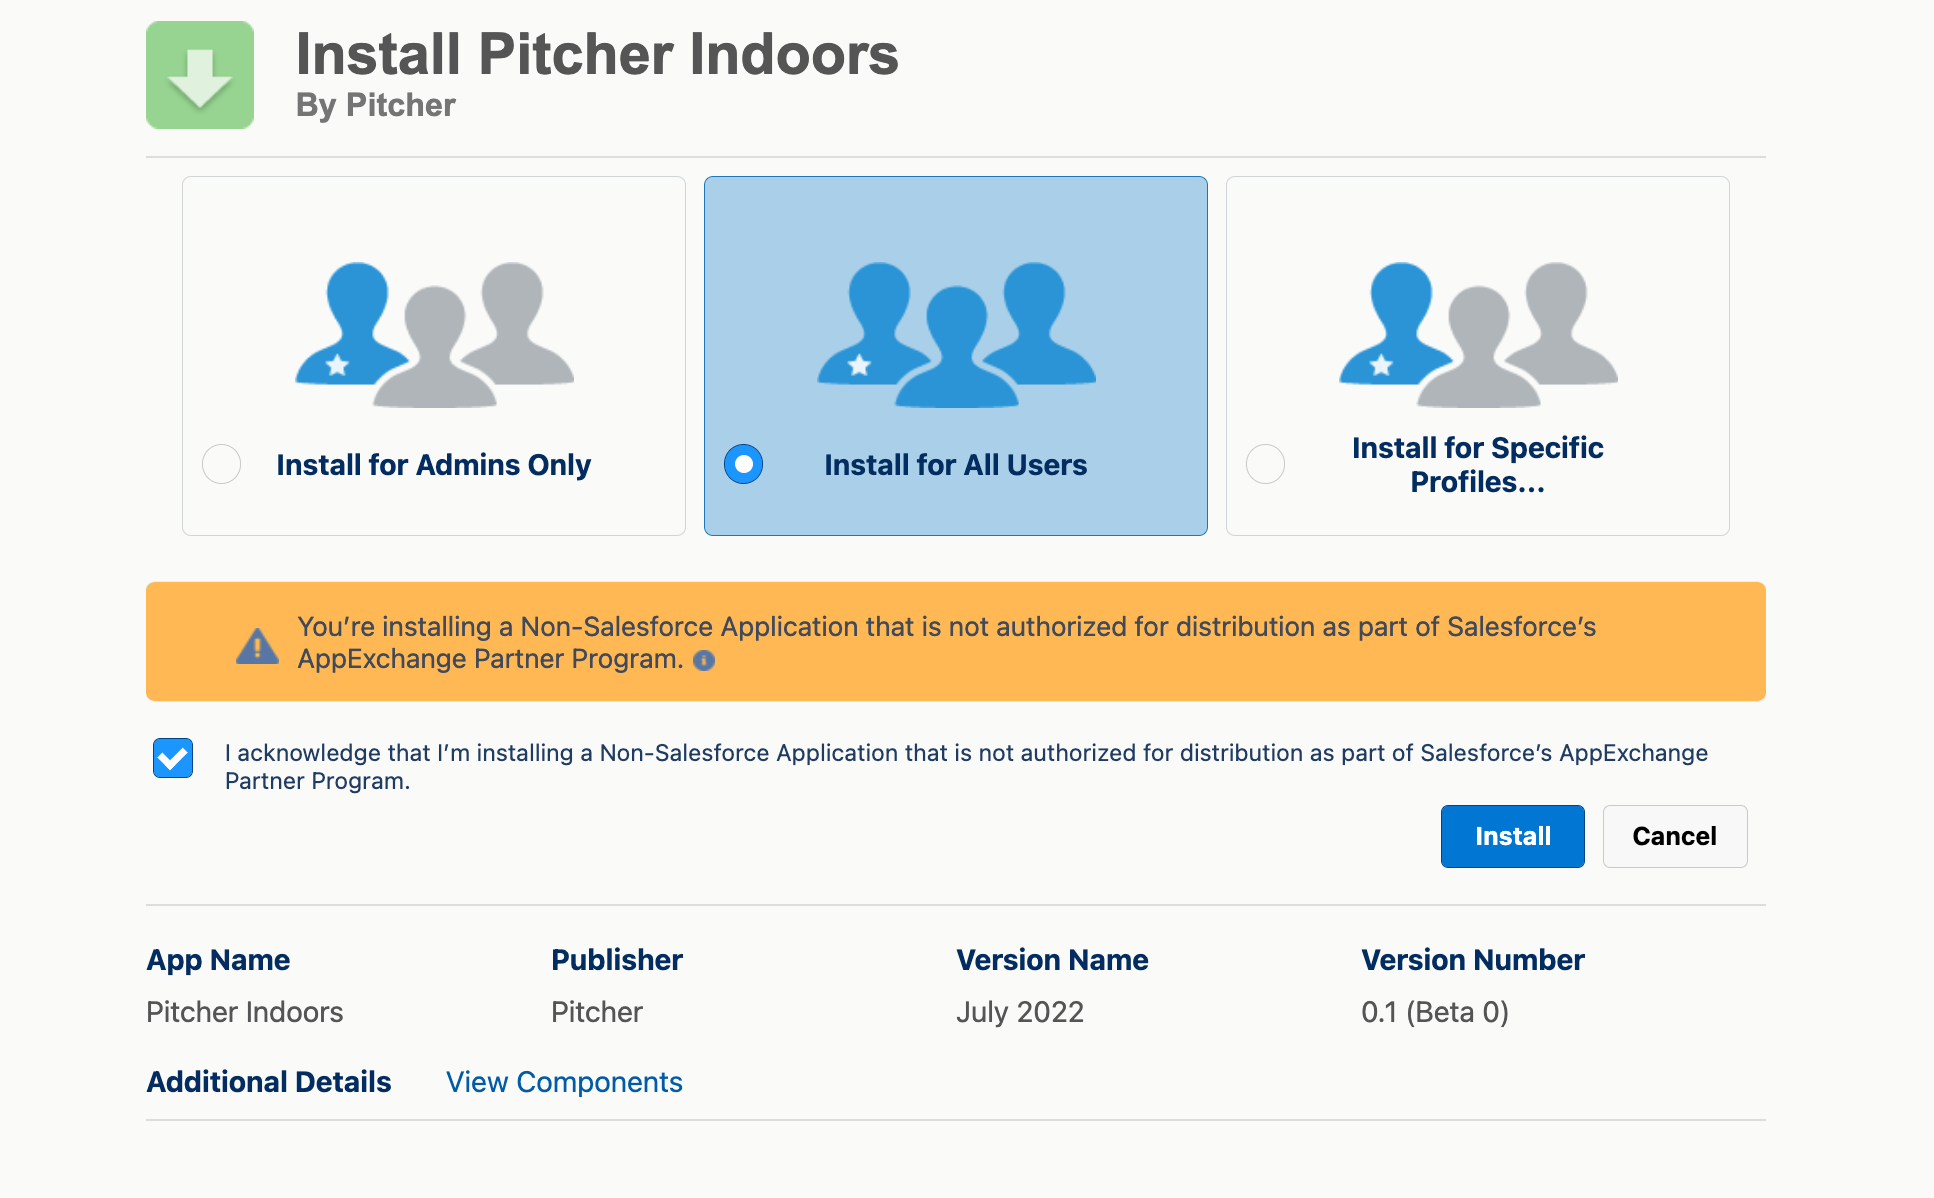
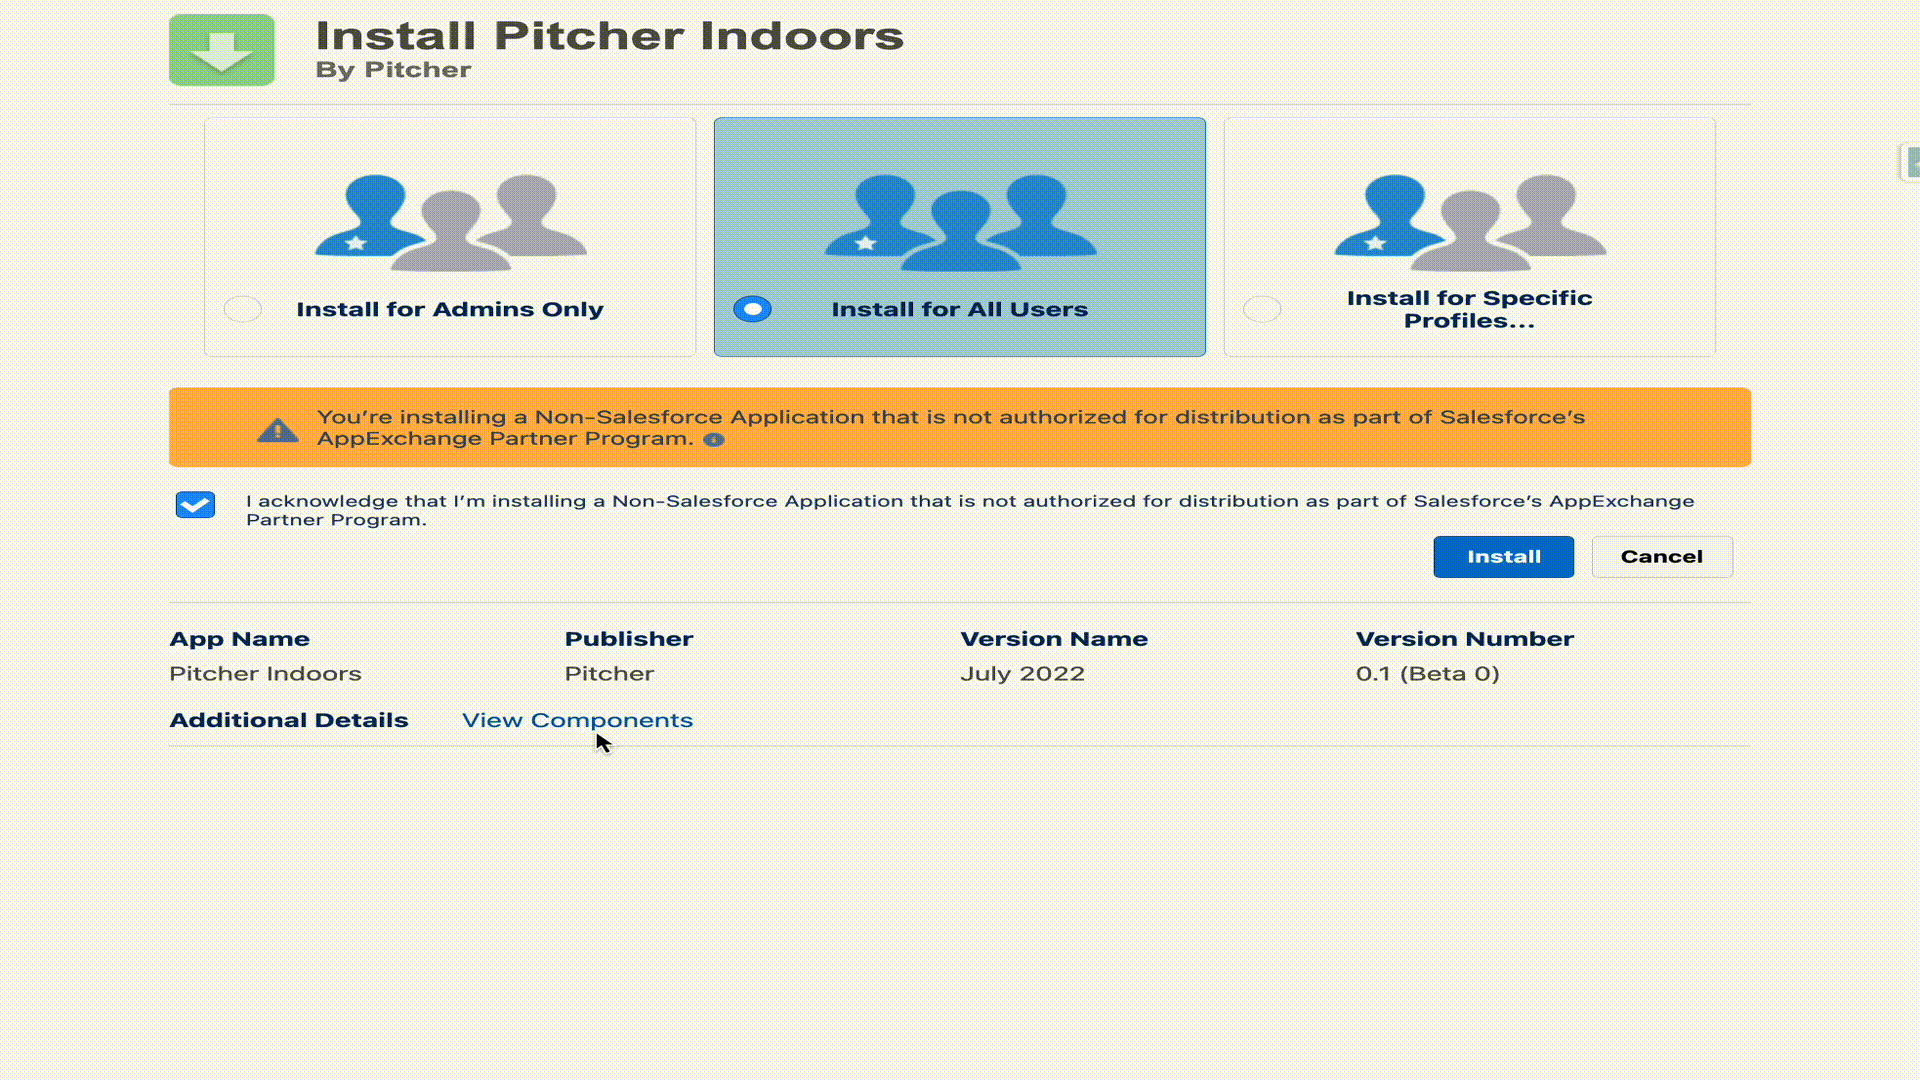
To verify the package components before installation/upgrade, click on the “View Components” link
Check the acknowledgement and click Install to proceed.
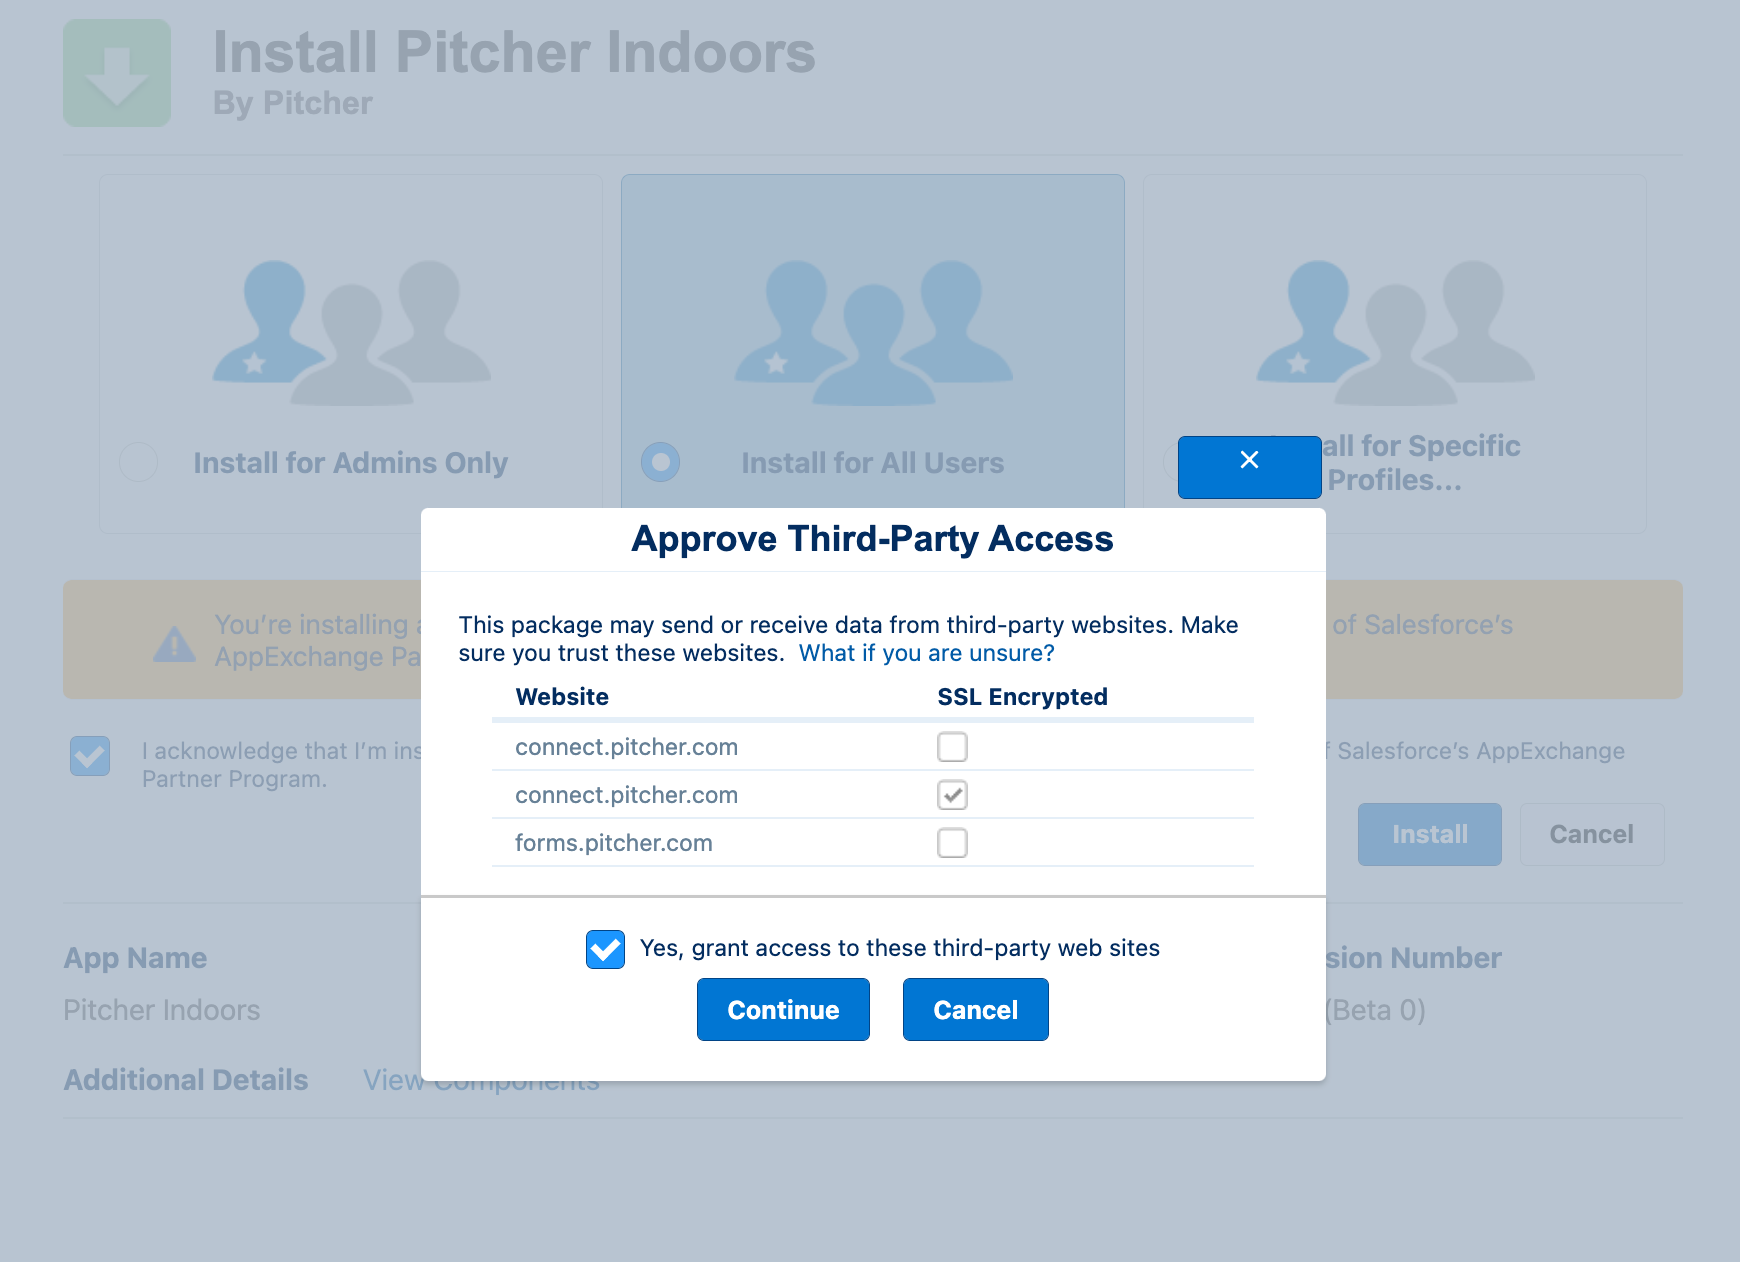
On the Approve Third-Party Access dialogue that appears, use the checkbox to grant access to required websites and click Continue to begin the installation.
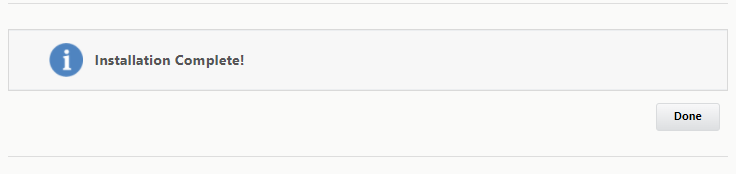
Once installation completes, the following screen appears:
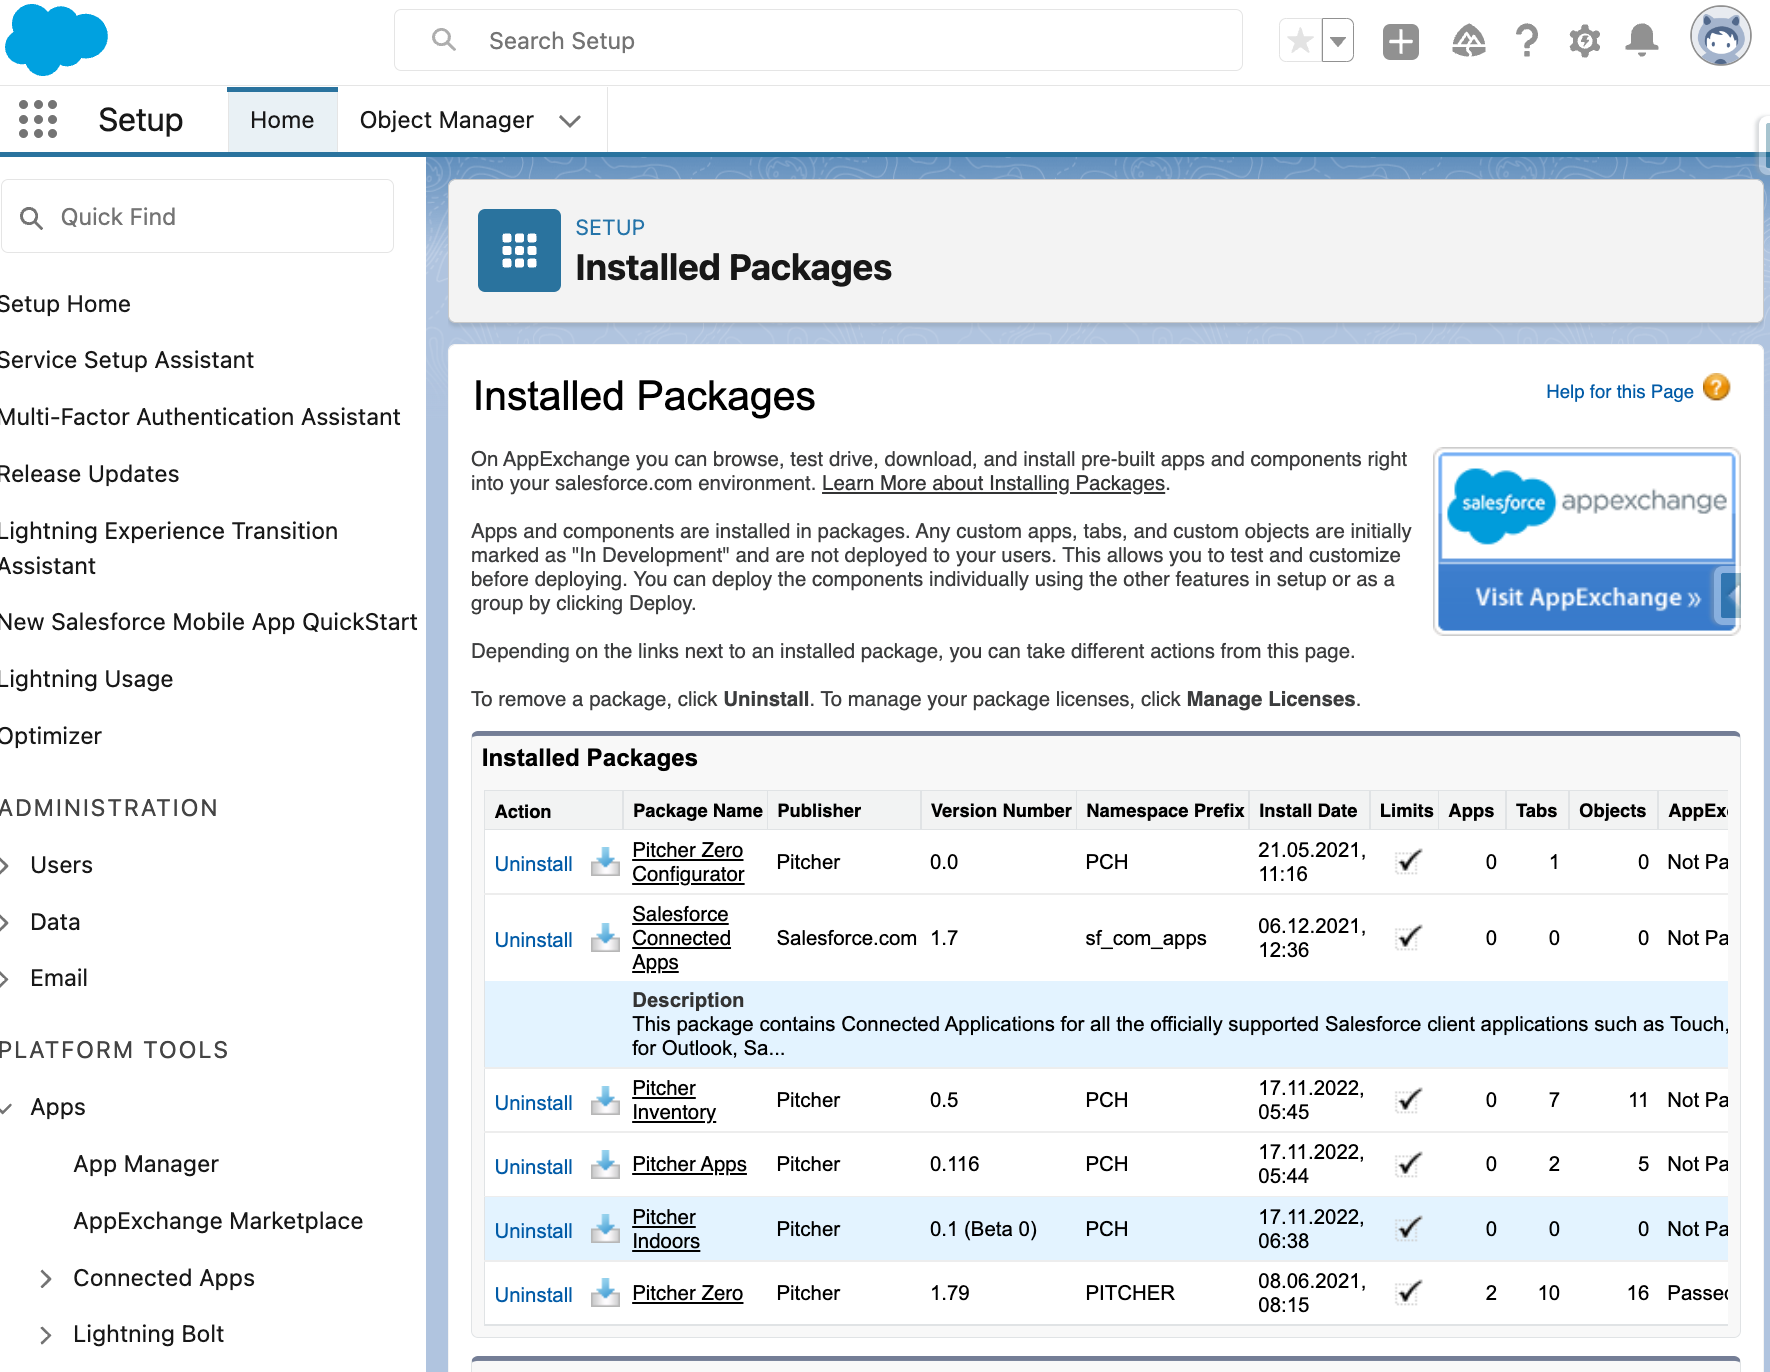
To confirm the successful installation, check the installed packages, on the Setup > Apps > Packaging > Installed Packages page.
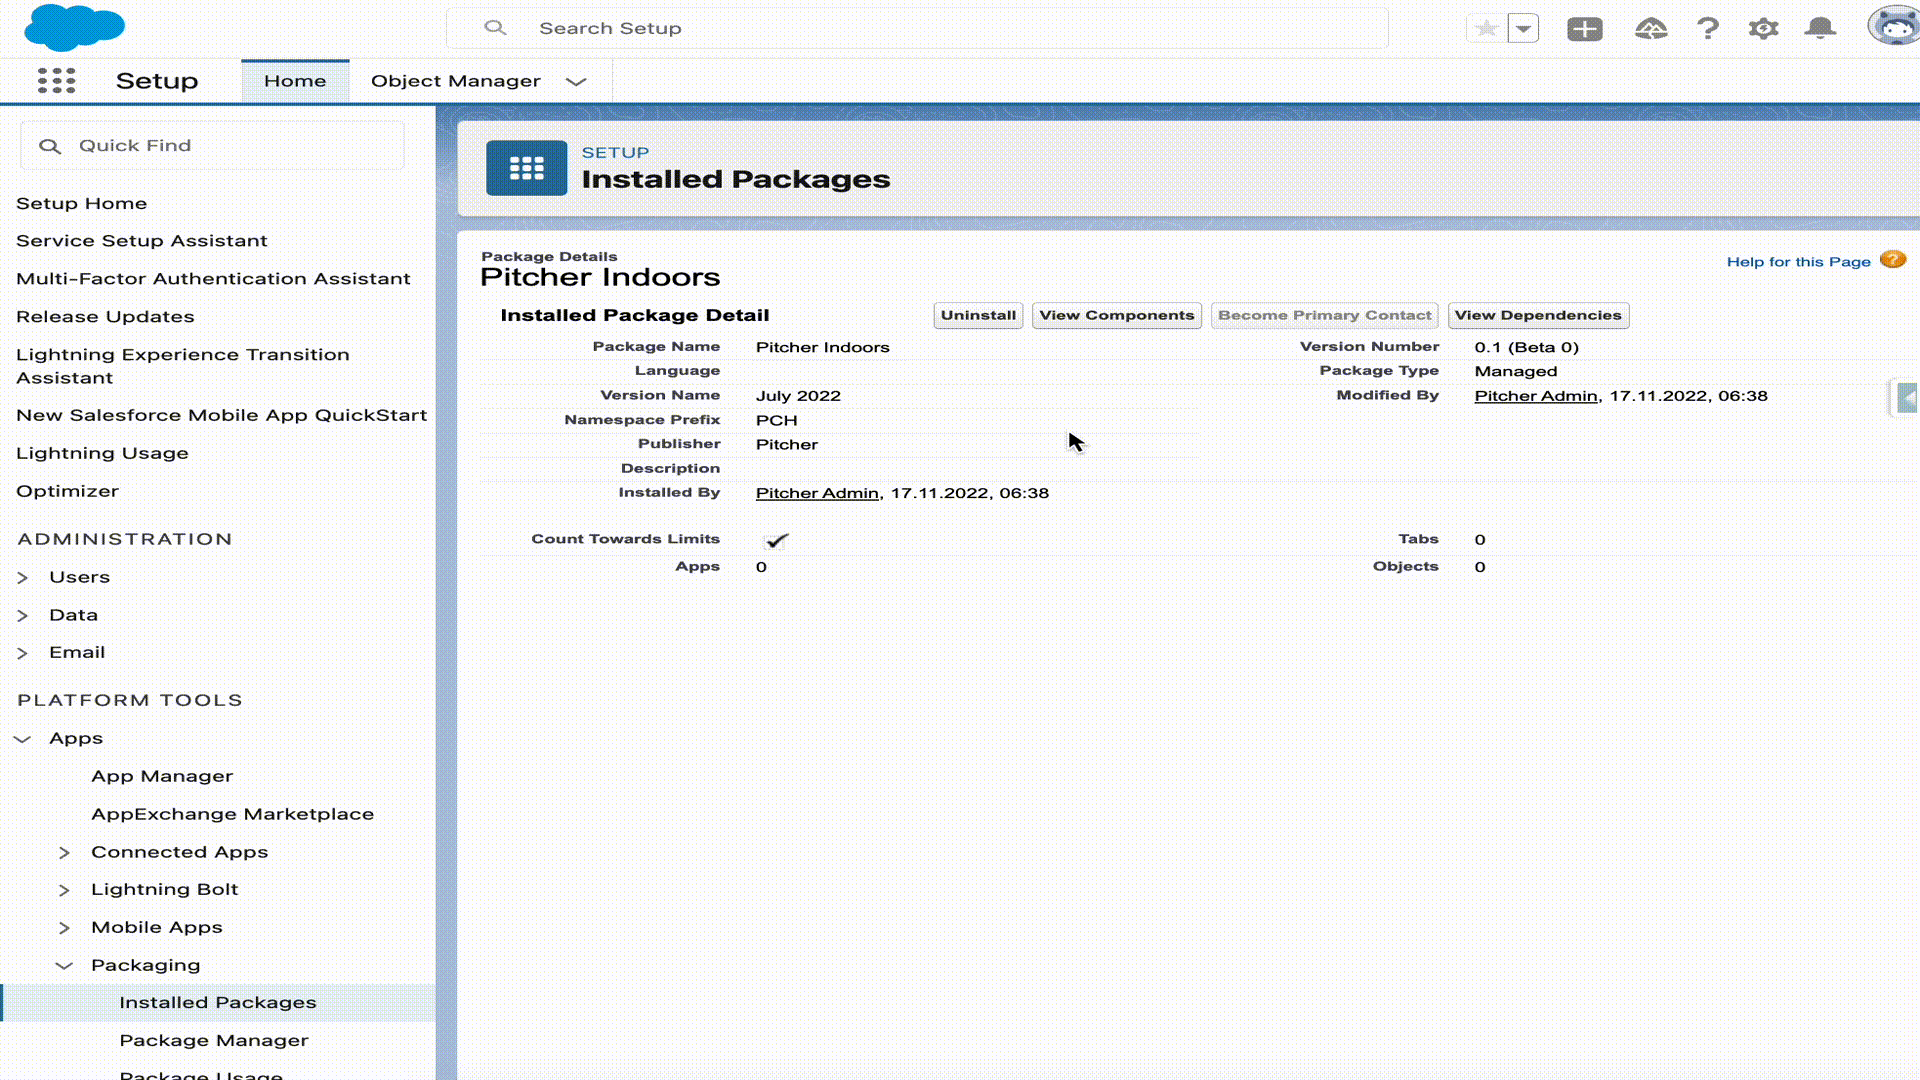
To verify the package components after a successful installation/upgrade, follow the steps shown below -
Post-Installation
Step 1 - Configure Settings
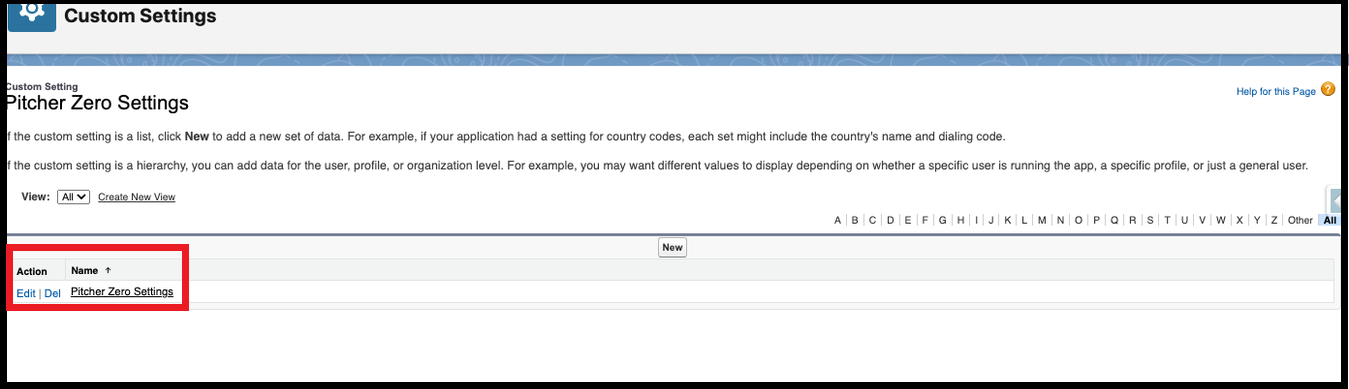
Once the package is installed, the user will be presented with the custom settings where Pitcher Zero Settings can be configured for the account.
Step 2 - Add To The Page Layouts
Next, add the component to the page layout
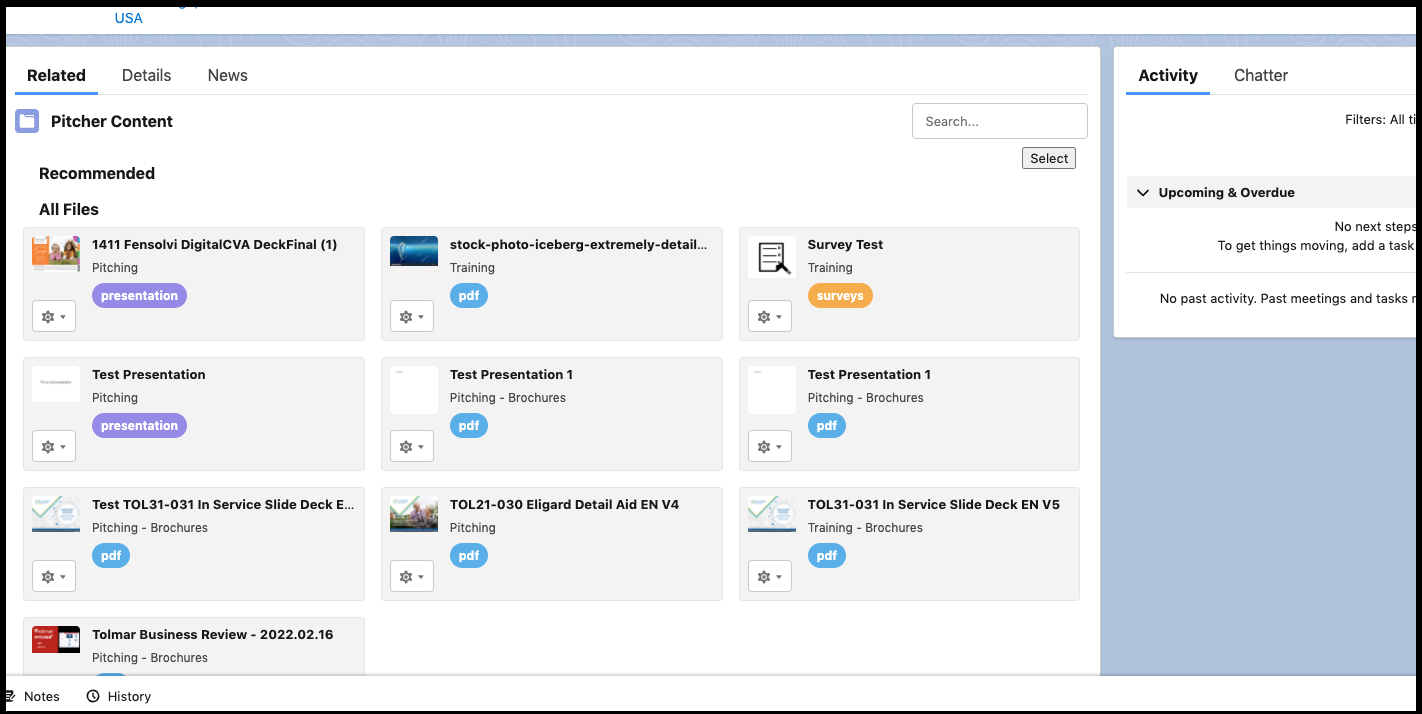
Once added to the page layout, the user can see the Pitcher Content as shown below.