Configuring Tags
Tags are like labels that you allocate to accounts and account segments for filtering purposes. A user can use specific tags in a query to fetch a filtered list of accounts.
The Tags object exists in Salesforce by default and the Apps Managed Package during its installation adds its layer of configuration on it for Pitcher use.
This chapter explains the creation and configuration of tags.
Access Tags Object and Tab
To access the object:
Log in to Salesforce.
In the App Launcher, find and click Tags to navigate to the Tags tab.
Accessing the Tags Object and Tab
The Tags tab provides a grid layout that contains a list of all tags defined in the system. You can click on any of them to view the Tag details.
Create a Tag
To create a tag:
In the Tags tab, click New.
In the Tag Details page that appears, set the following fields to configure your Tag meta-details:
Field | Instruction and Description |
|---|---|
| Enter the name of the tag. |
| Search and select a parent tag during a child tag object definition. |
| Select |
| Select |
| Select |
| Enter an external identifier for the tag. |
| Select the status you would like this tag to display in the system after it gets created. |
| Enter a unique identifier for the tag. |
| Enter the identifier to map a record type to the tag. |
| Select a predefined template if you want map this tag to it. |
| Enter a sharing code that can be used later to share the tag. |
| Enter your user identifier. |
| Enter the identifier of the user who would own this tag. |
| Use this field to enter your user identifier if you are editing the tag post its creation. |
3. Click Next to create the new tag record in the system.
Creating a Tag
4. On the Tag Allocation page, you can either allocate the tag on an individual account level or you can allocate it to a group of accounts (segment) based on certain account attributes.
For individual account allocation:
Either in the Account tab, search and select an individual account in the Account field and set a Rule to either
IncludeorExcludethe tag allocation on the selected account.
Or, go to the Account Hierarchy tab, select an individual account in the Account field and enable inheritance to all its related accounts.Click Save to add the record in the Allocation section below.
Follow these steps again to add another account allocation record, if needed.
Allocating tag on an individual account level
For account segment allocation:
Go to the Segment tab and allocate a tag to accounts based on Account Attribute or a Tag Group.
Click Save to add the record in the Allocation section below.
Follow these steps again to add another segment allocation record, if needed.
Allocating tag on an account segment level
5. Click Next.
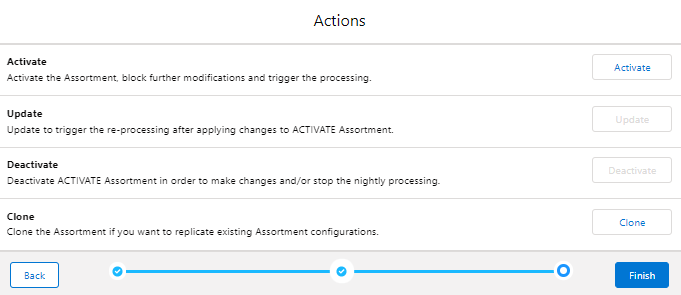
6. On the Actions page, take any necessary actions as needed and click Finish.

The Actions page
Edit a Tag
To edit a Product:
In the Tags tab, click the tag you wish to edit.
On the Tag Details page, click Edit.
Do the required changes and click Save.
Editing a tag
