UI Editor: Bar Level
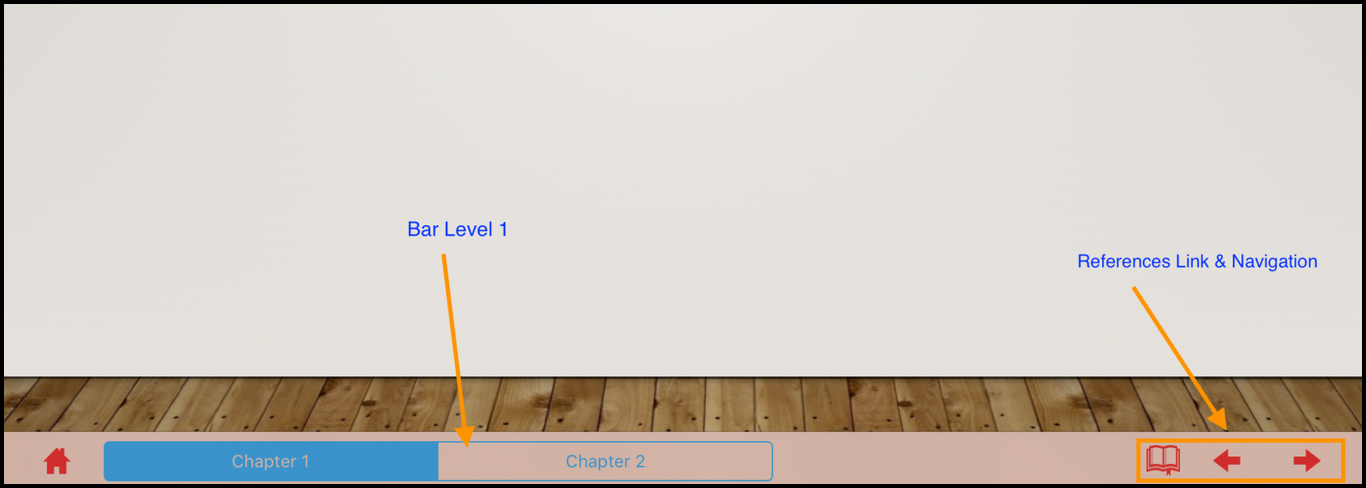
This page explains how to enable bar level navigation in a presentation or document. From Pitcher Admin you can enable the bar level navigation with chapter names or custom navigation in a presentation/document. Bar level navigation provides an easy way to navigate through the chapters in a presentation. It also helps in defining reference links to navigate through the important sections of the presentation.
Note: For further information on Bar Level Navigation refer to Presentations UI and Browsing through the slides section in Presentation Navigation document.
Enable Bar Level Navigation
In order to enable bar level navigation please follow these steps:
Select Document
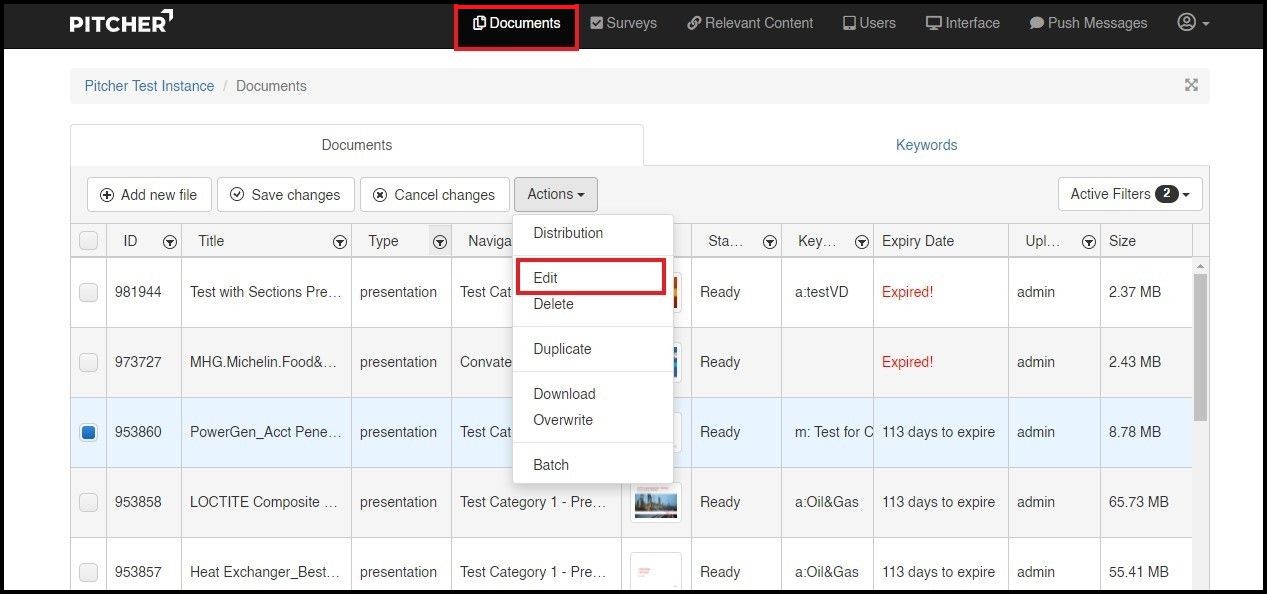
Click on Documents tab in the main navigation and select the file/document to add bar level navigation. Then click on Edit option from the Actions dropdown to edit the file.
Bar Level 1
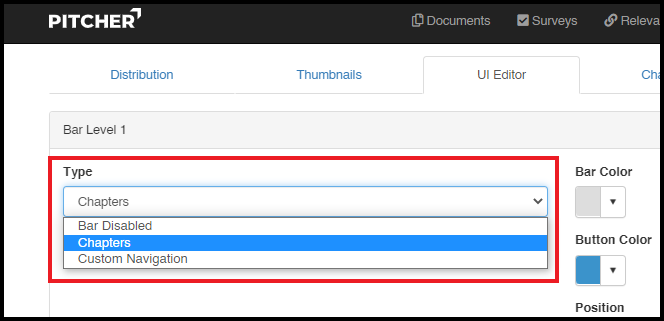
Type - Once on the Edit window select the UI editor tab and you will see options for Bar Level 1 and Bar Level 2. You can select the type of Bar Level from the dropdown. By default, the type will be “Bar Disabled”. Click on the dropdown to select either Chapters or Custom Navigation.
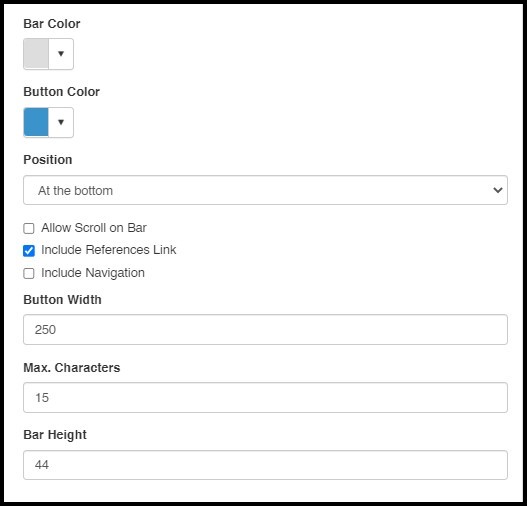
Color & Position - You can define the bar color, button color (Hex color codes) and the position (top or bottom) of the Chapter bar/button.
Allow Scroll on Bar - It enables scrolling on the Chapter bar itself.
Include Reference Link - It enables a reference button in the Chapter bar.
Include Navigation - It enables two additional arrows to navigate through the chapters.
Button Width - With Button Width you can define the width of the button for chapters.
Max. Characters - Define the max. characters to be allowed for chapter name.
Bar Height - Defines the height of the bar.
Bar Level 2
If you want to add another bar then Bar Level 2 can be enabled additionally.
Custom Navigation
If you want to add a Custom Navigation instead of Chapters then select Custom Navigation from the Type dropdown.
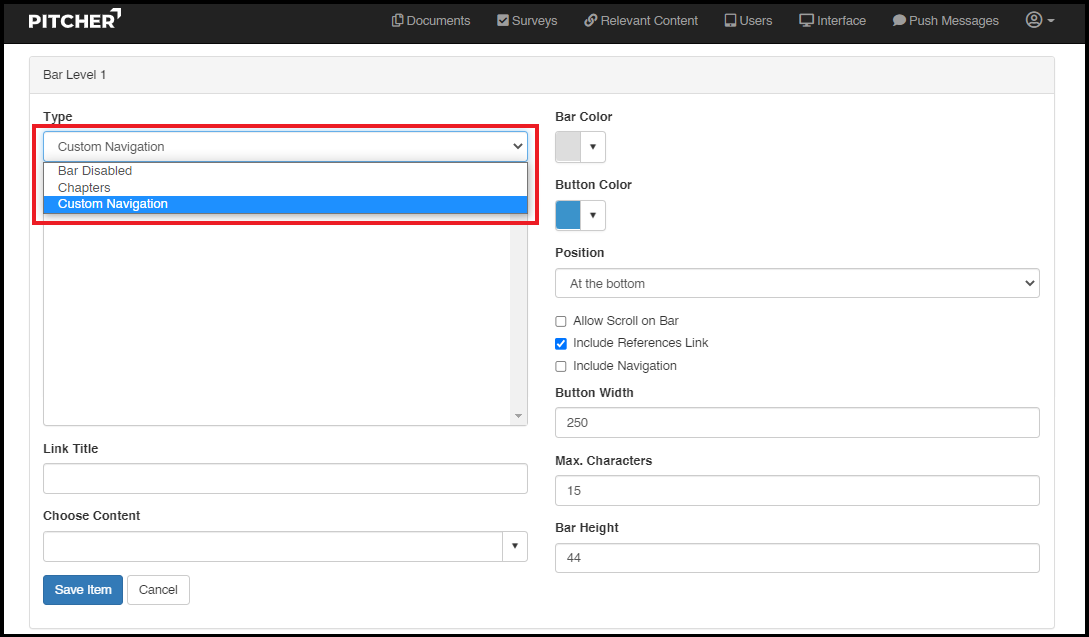
Link Title - You can add links in the Custom Navigation. For each link you can provide a Link Title and add in the Custom Navigation.
Choose Content - When you provide links in the Custom Navigation they can be linked to other documents such as presentation, pdf, video etc. Select a document from the dropdown and add in the Custom Navigation. Make sure to click on Save Item to add the link to the Custom Navigation.
Hide Hotspots - If you need to hide hotspots in the documents then click on the checkbox.
Navigation Mode - Click on the dropdown list to select your navigation type. 2D allows for vertical swiping to delve into chapters and horizontal swiping to go across chapters. While 1D only allows for horizontal swiping to go navigate across chapters.

Once the Chapter Bar and navigation type has been enabled it can appear on the Device (Pitcher Impact) as shown below.
