Route Optimization on iPad
This page gives a walk-through on route optimization for a quick call on iPad.
To optimize the route for a quick call, the user needs to tap on the Quick button.
The UI icons and logos can be different for different instances, but the core services applicable are the same for all the instances, except for a few customized instances.
Quick Call Planning
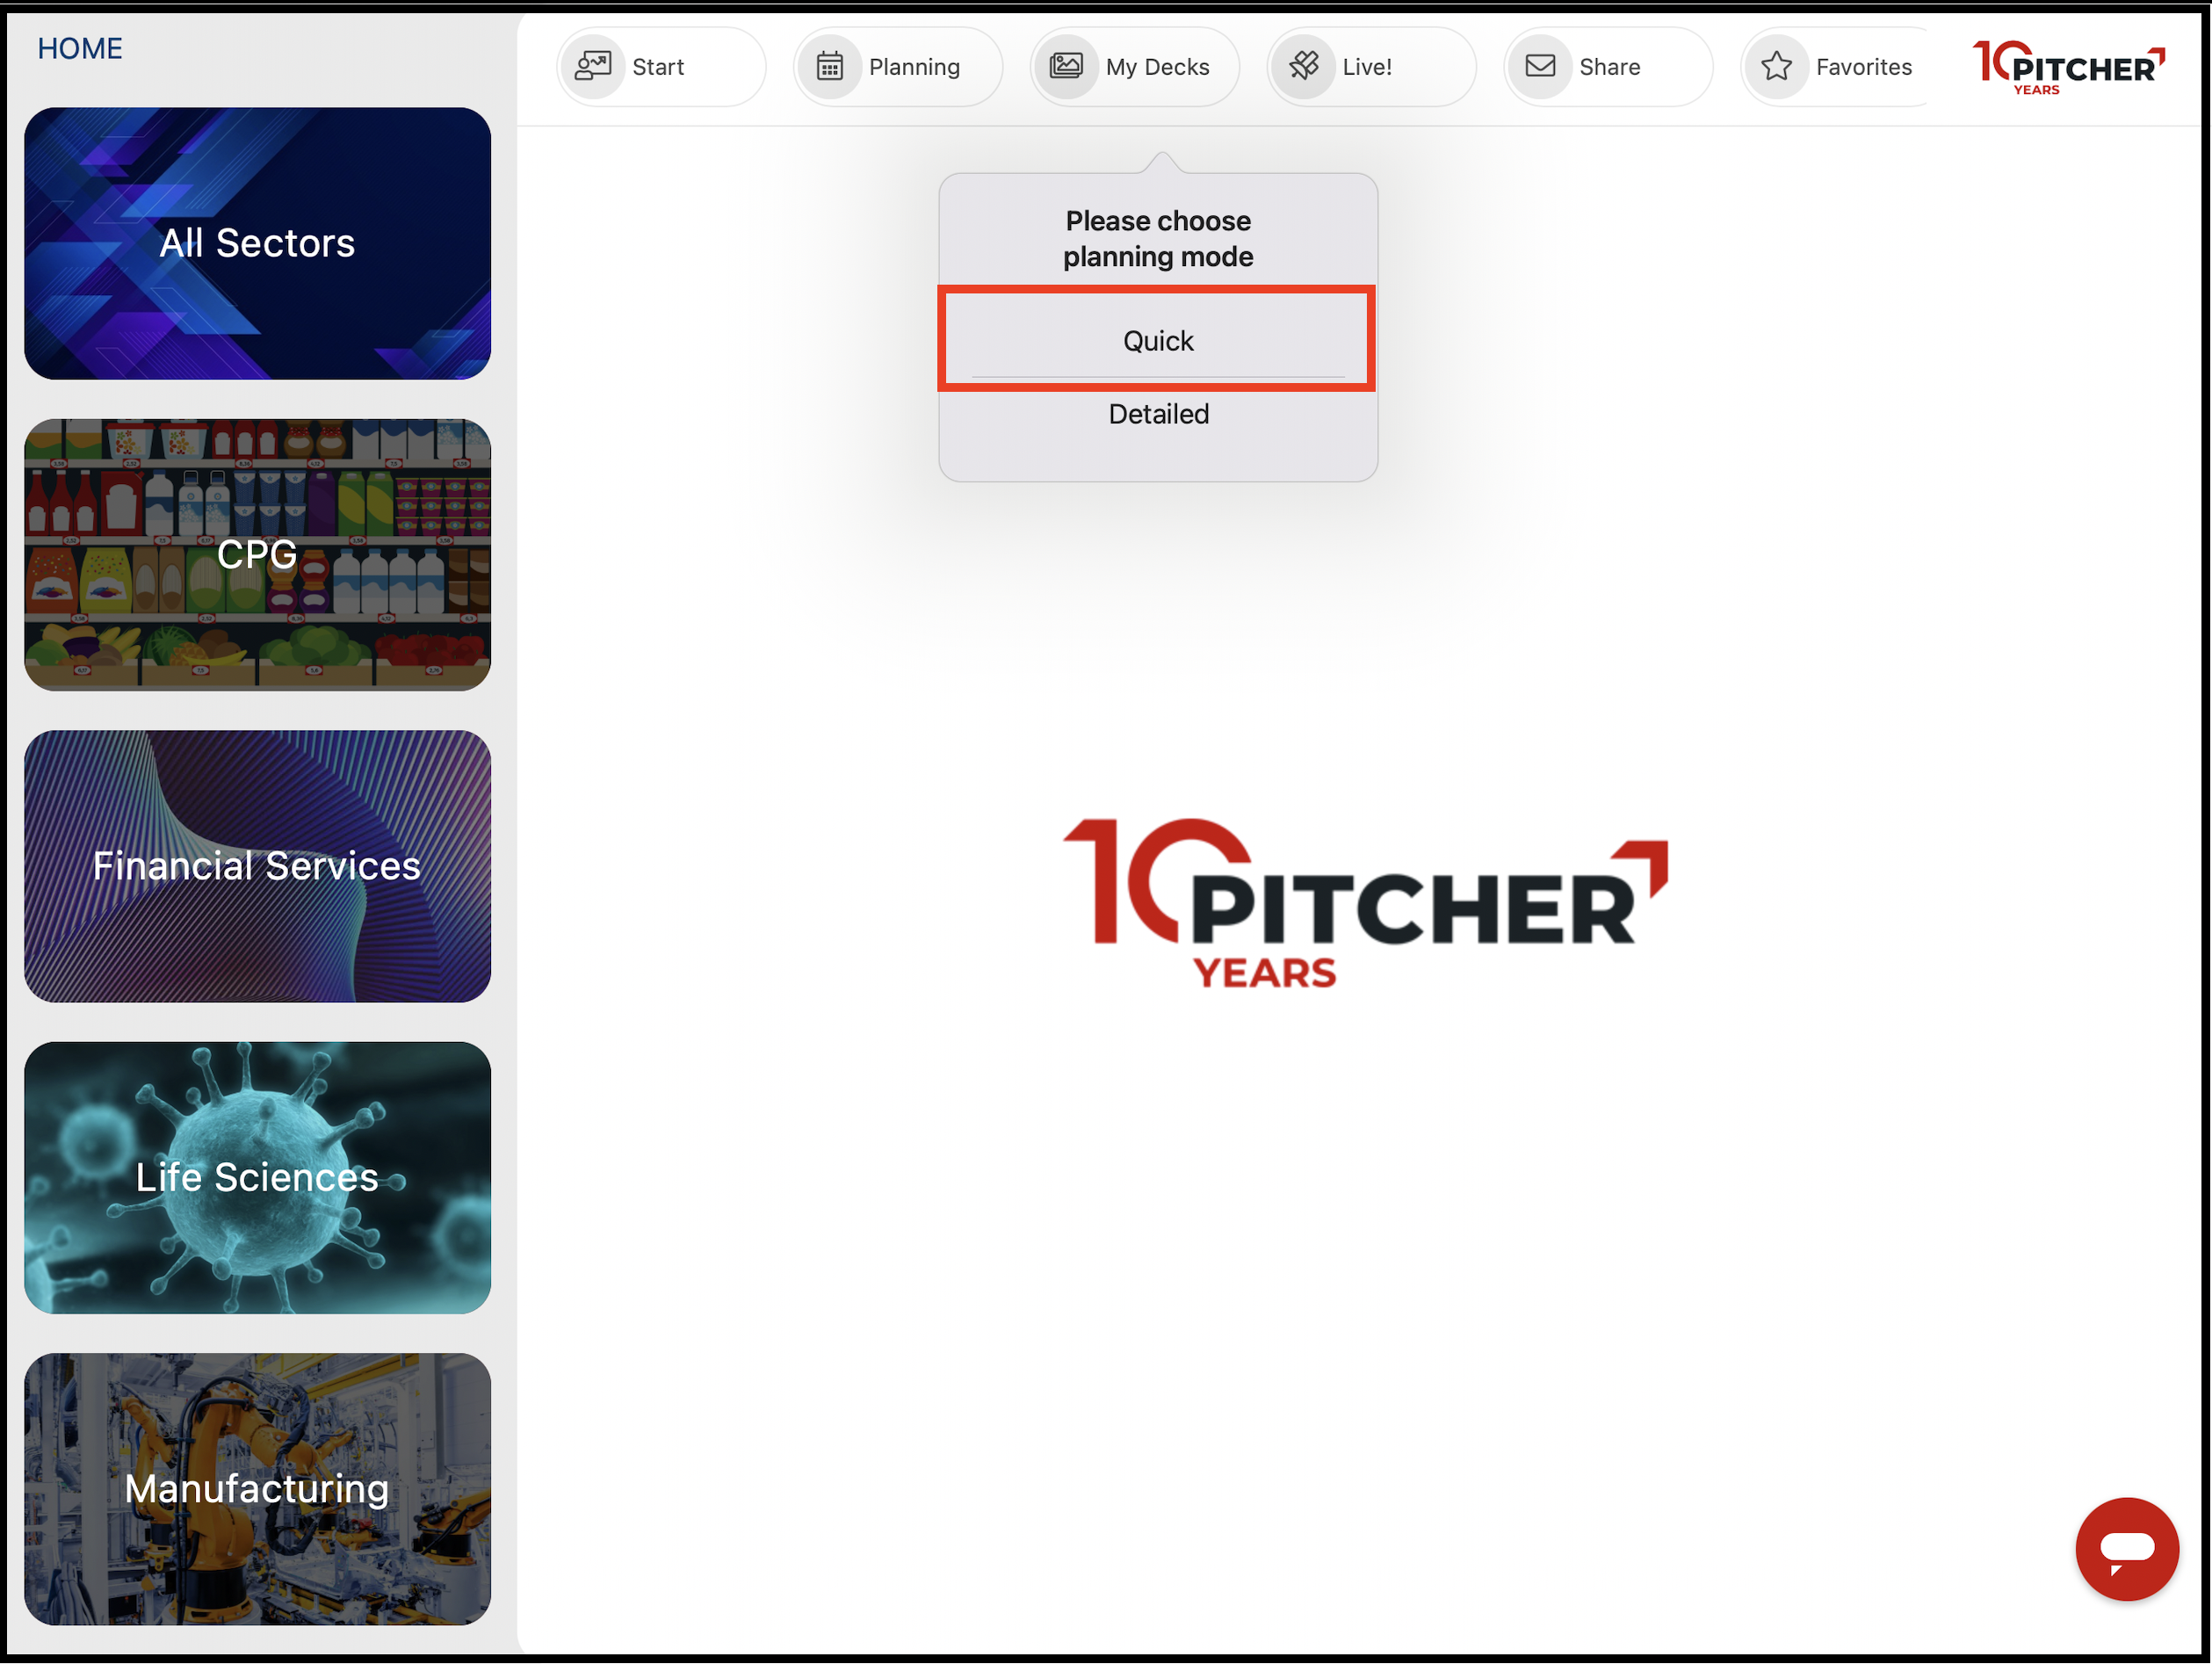
Quick Call option
To know more in detail about quick call planning refer the link.
Calendar Button
On the next screen, the user can select the accounts for multiple visits and then tap the calendar icon in the top right corner. A popup window will appear with the list of selected accounts (that the user intends to visit).
%20(4th%20generation)%20-%202022-08-22%20at%2012.47.31.png?inst-v=70efaf10-97c4-4789-922e-2eeb620e8510)
Popover window showing form controls and pre-optimized routes
Another significant part of the above screen is the form controls at the bottom of the popover window.
Form Controls
The form controls allows the user to set meeting duration, preparation time and date of meetings.
Each Meeting Duration
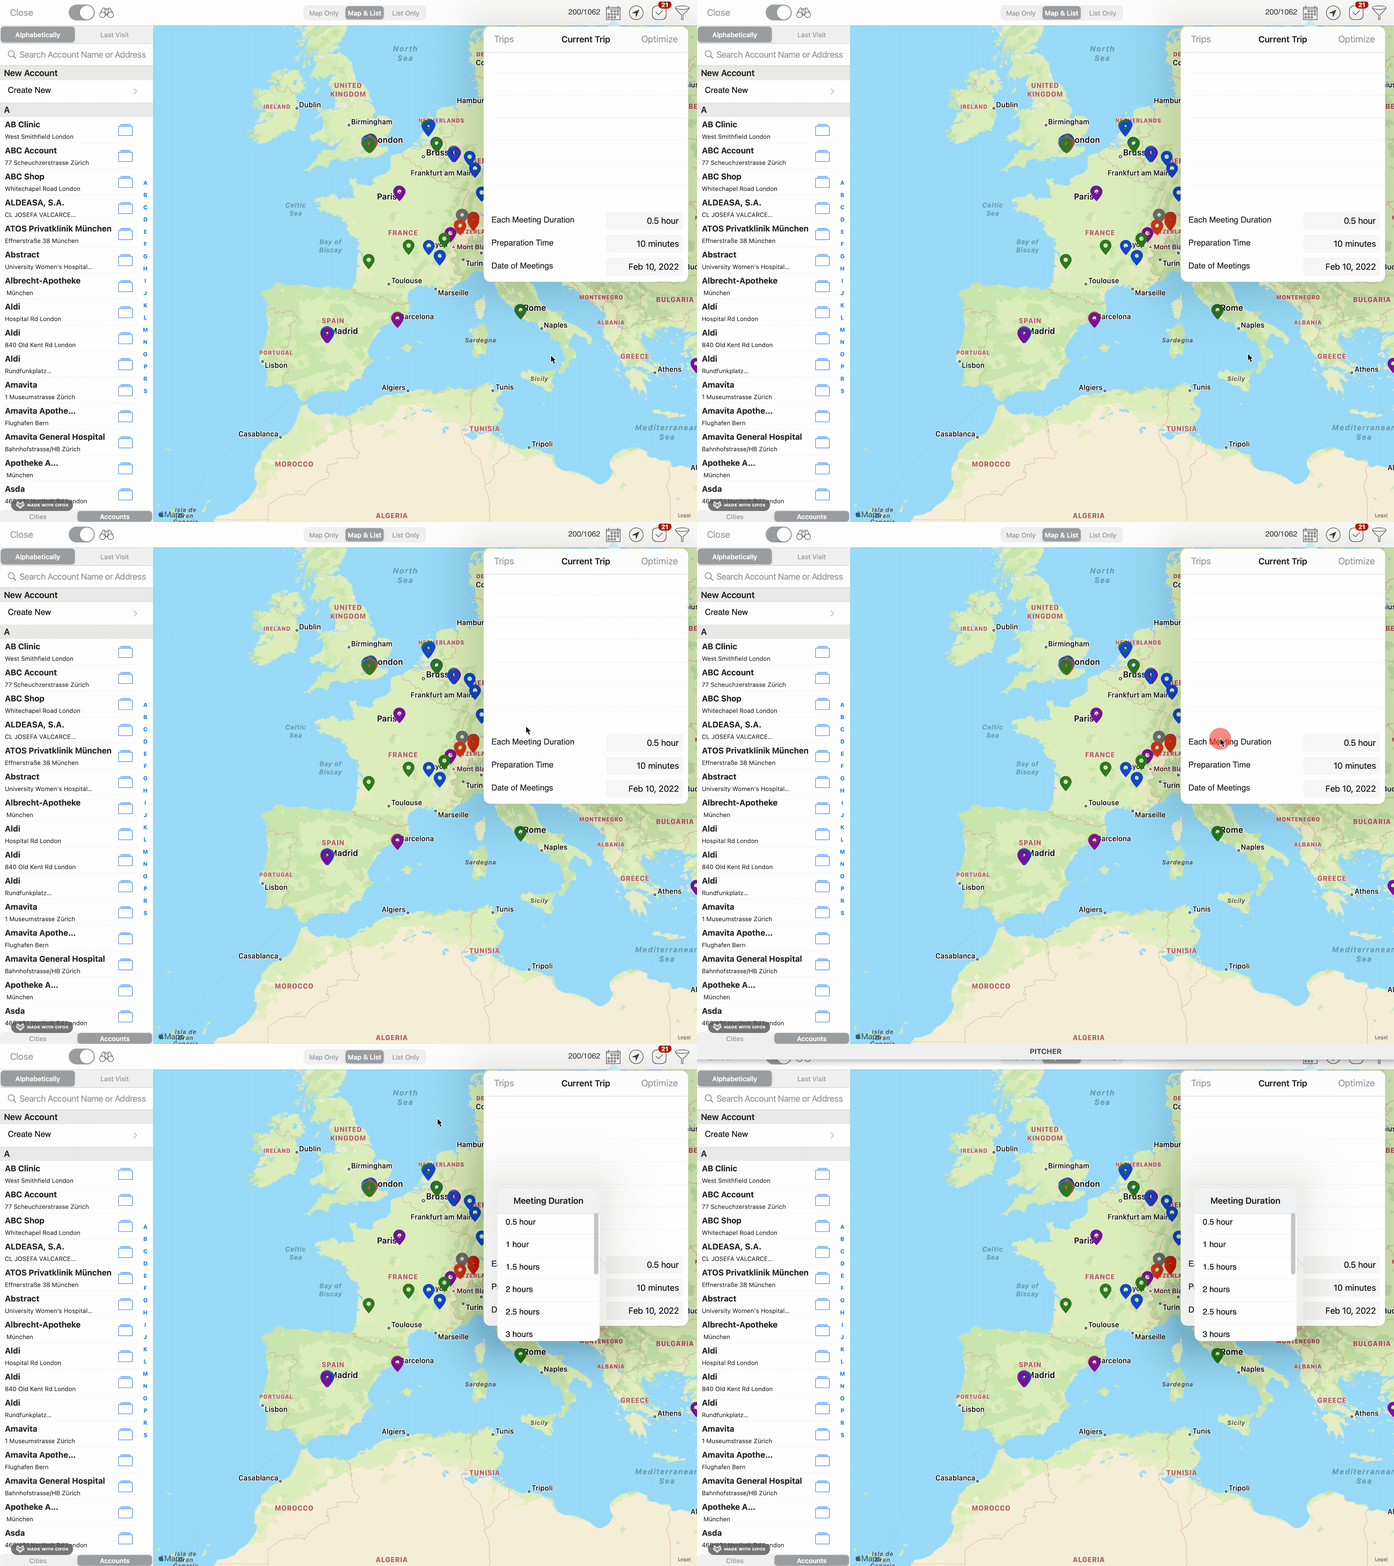
Form controls to adjust duration for each meeting
It lets the user adjust length of the meetings that are to be created. Default is 30 minutes but can be adjusted per instance. Possible values range between 0.5h and 6h with a 0.5h difference.
Preparation Time
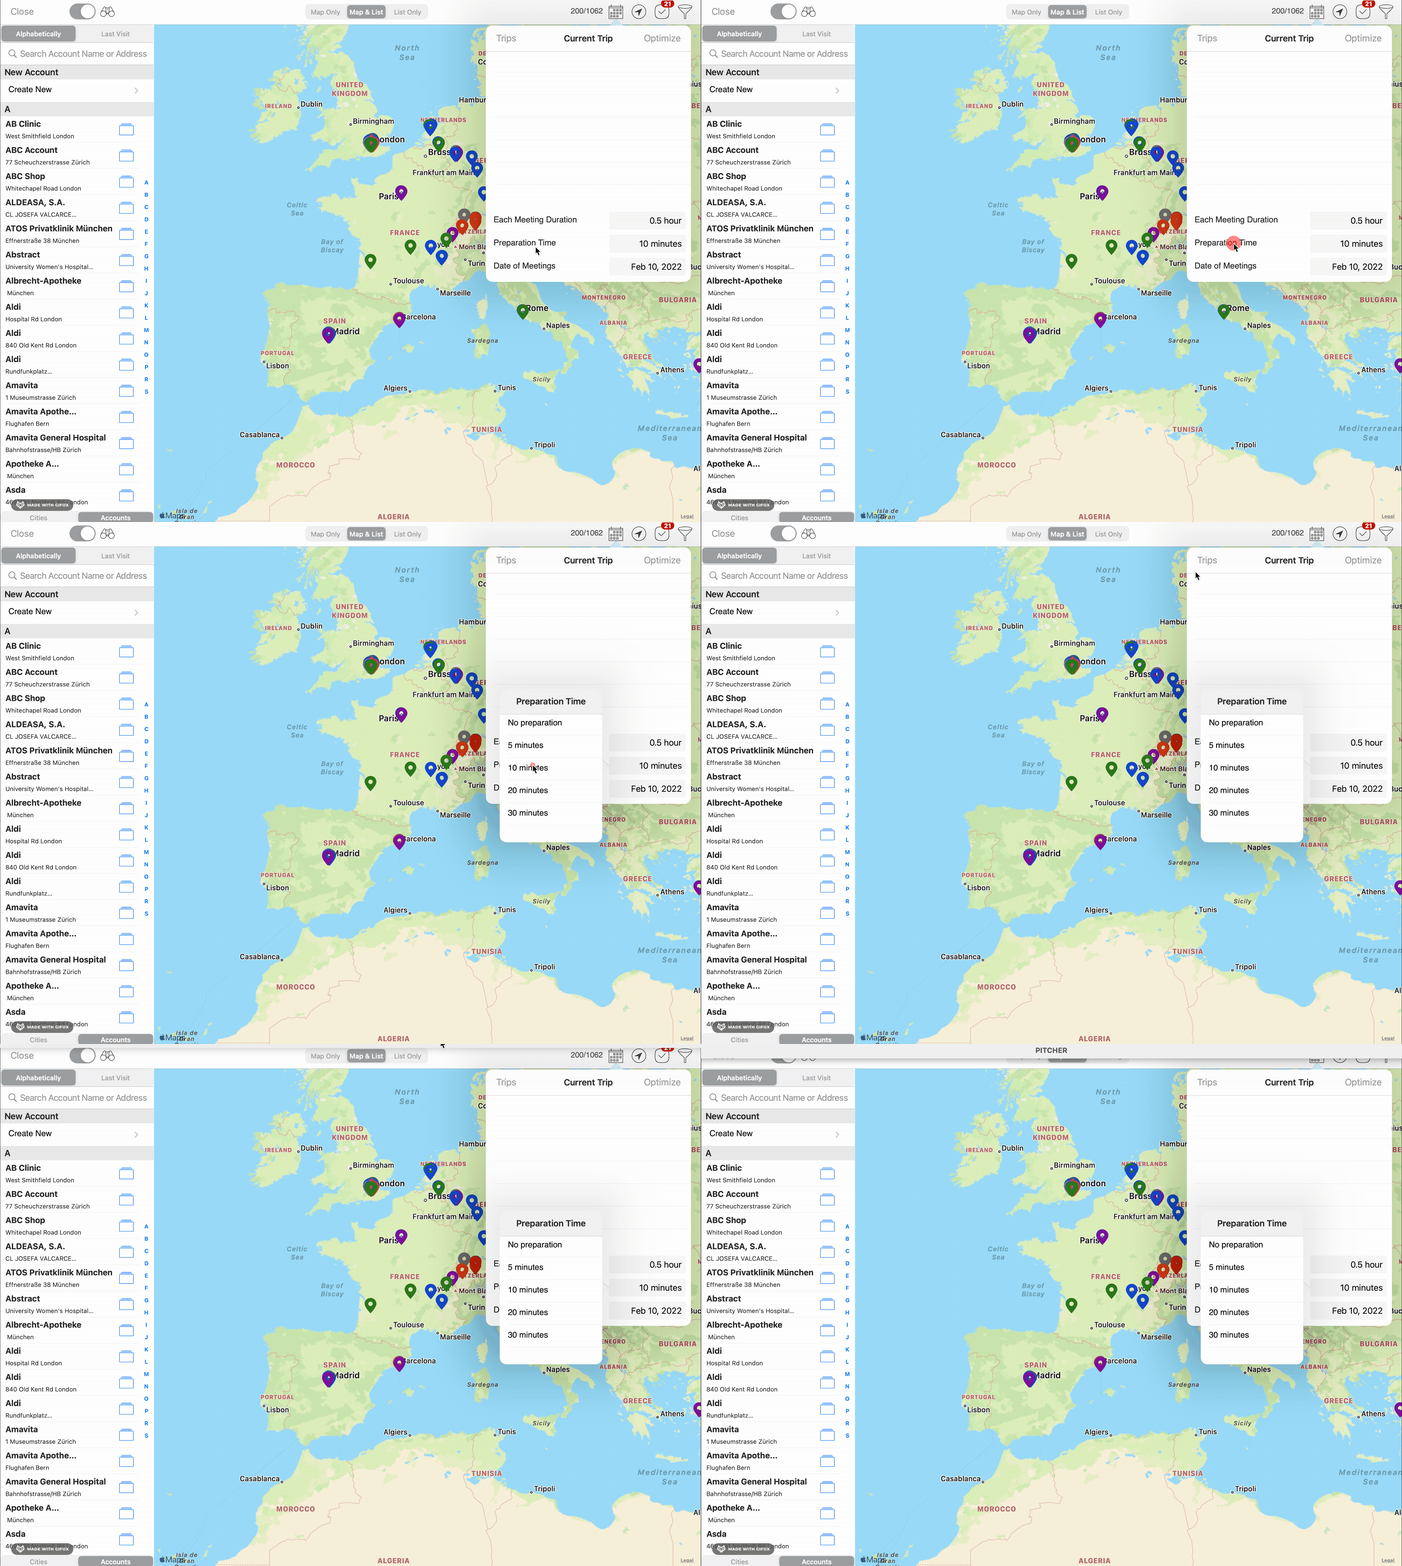
Form controls to adjust preparation time for each call
It lets the user adjust the minimal gap between meetings i.e., time needed to prepare for the meeting before it starts. This preparation time (in minutes) is added before each scheduled meeting, including the first one.
Default is 10 minutes but can be adjusted per instance. Possible values are: No preparation (0 minutes), 5, 10, 20 and 30 minutes.
Date of meetings
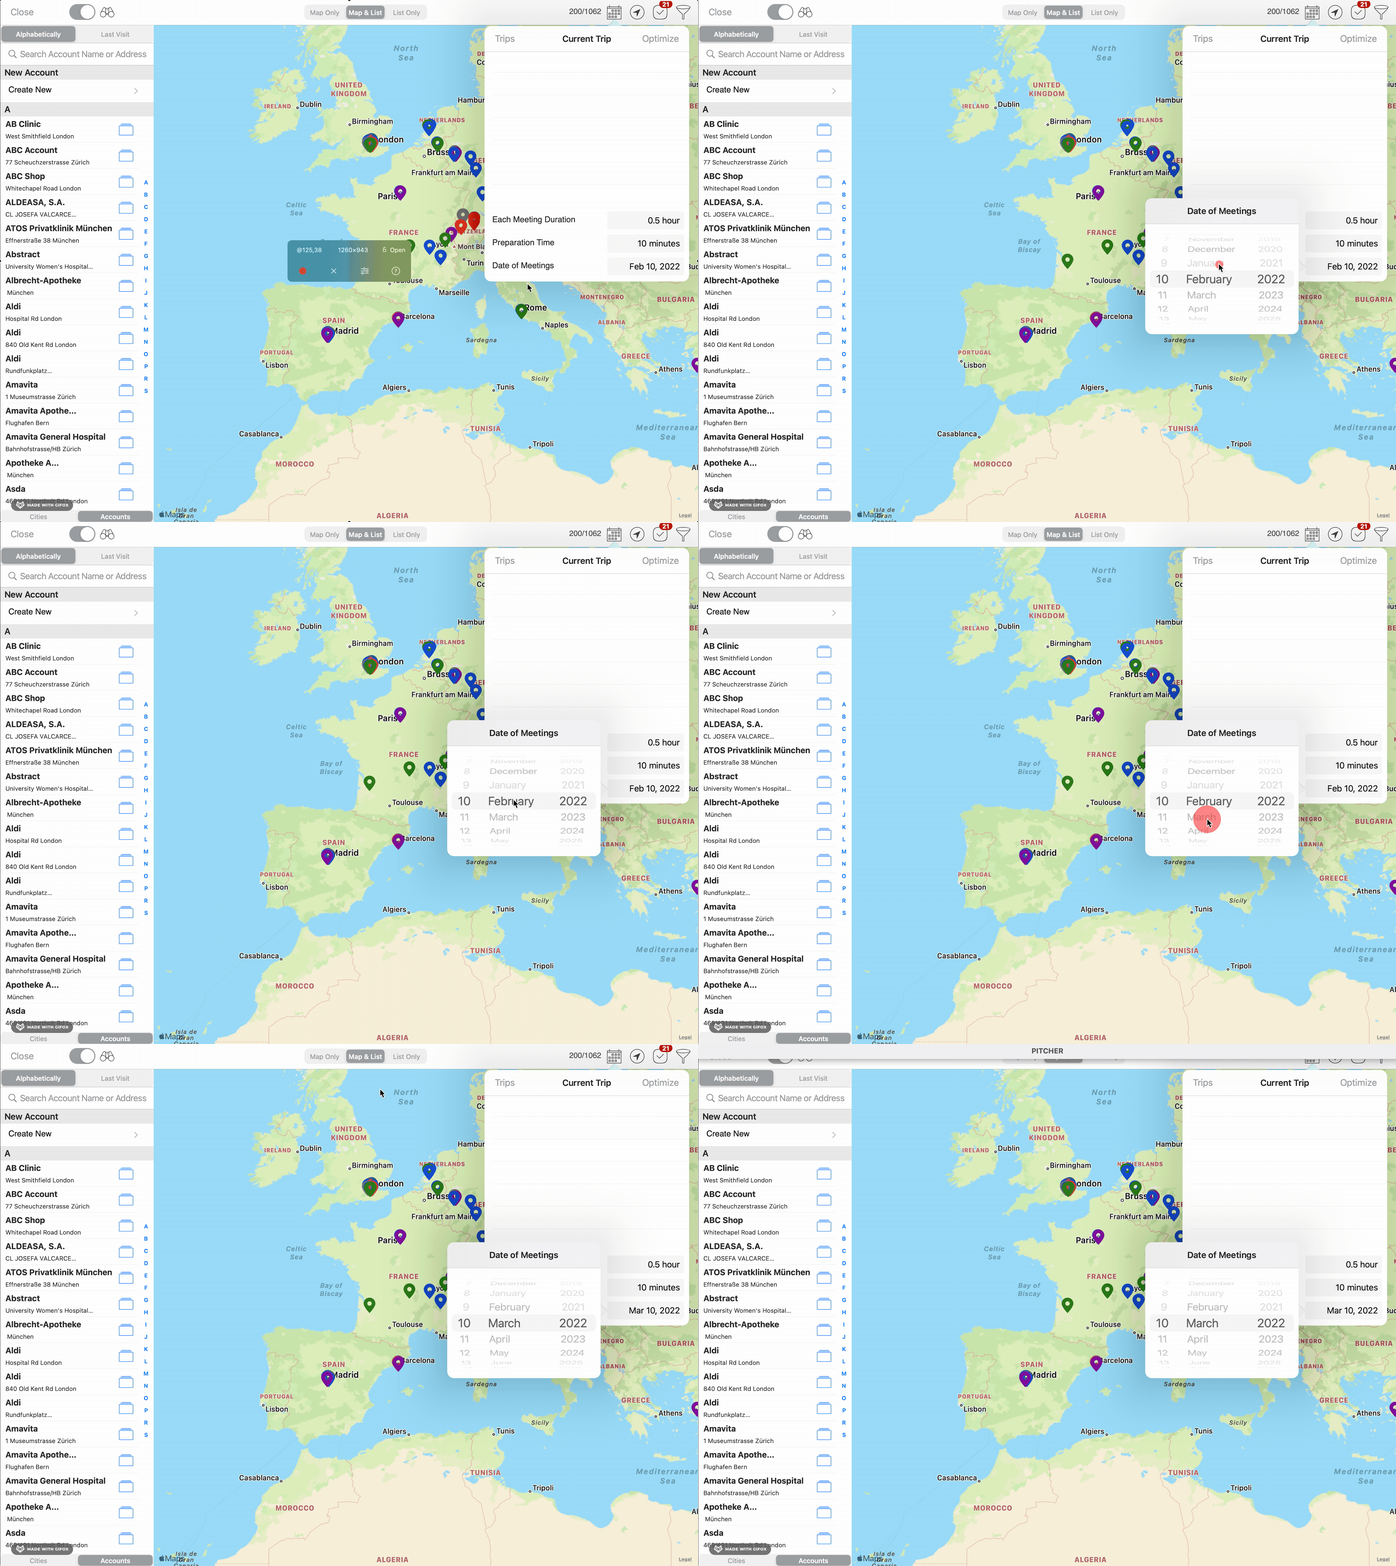
Form controls to adjust date of meetings
Lets the user select the day on which meetings should be scheduled. If the current day is selected the first meeting will be scheduled with the current time as starting point.
If other day is selected then the start time of the scheduling process will be 8:00 by default. Default starting hour can be adjusted as per instance. It supports 24 hours format.
Route Optimization
In order to optimize the route, user has to select at least one account and tap the Optimize button in the top right corner of the popover window.
The map fetches the user’s current location from the device. The user’s current/selected location is marked with a red balloon marker on the map. It is the start and finish of the user’s trip. Markers with numbers mean the accounts to be visited in the order of appearing numbers. Tapping on each of the markers shows account name.
At the bottom the user can also see the total travel time and the distance of the trip.
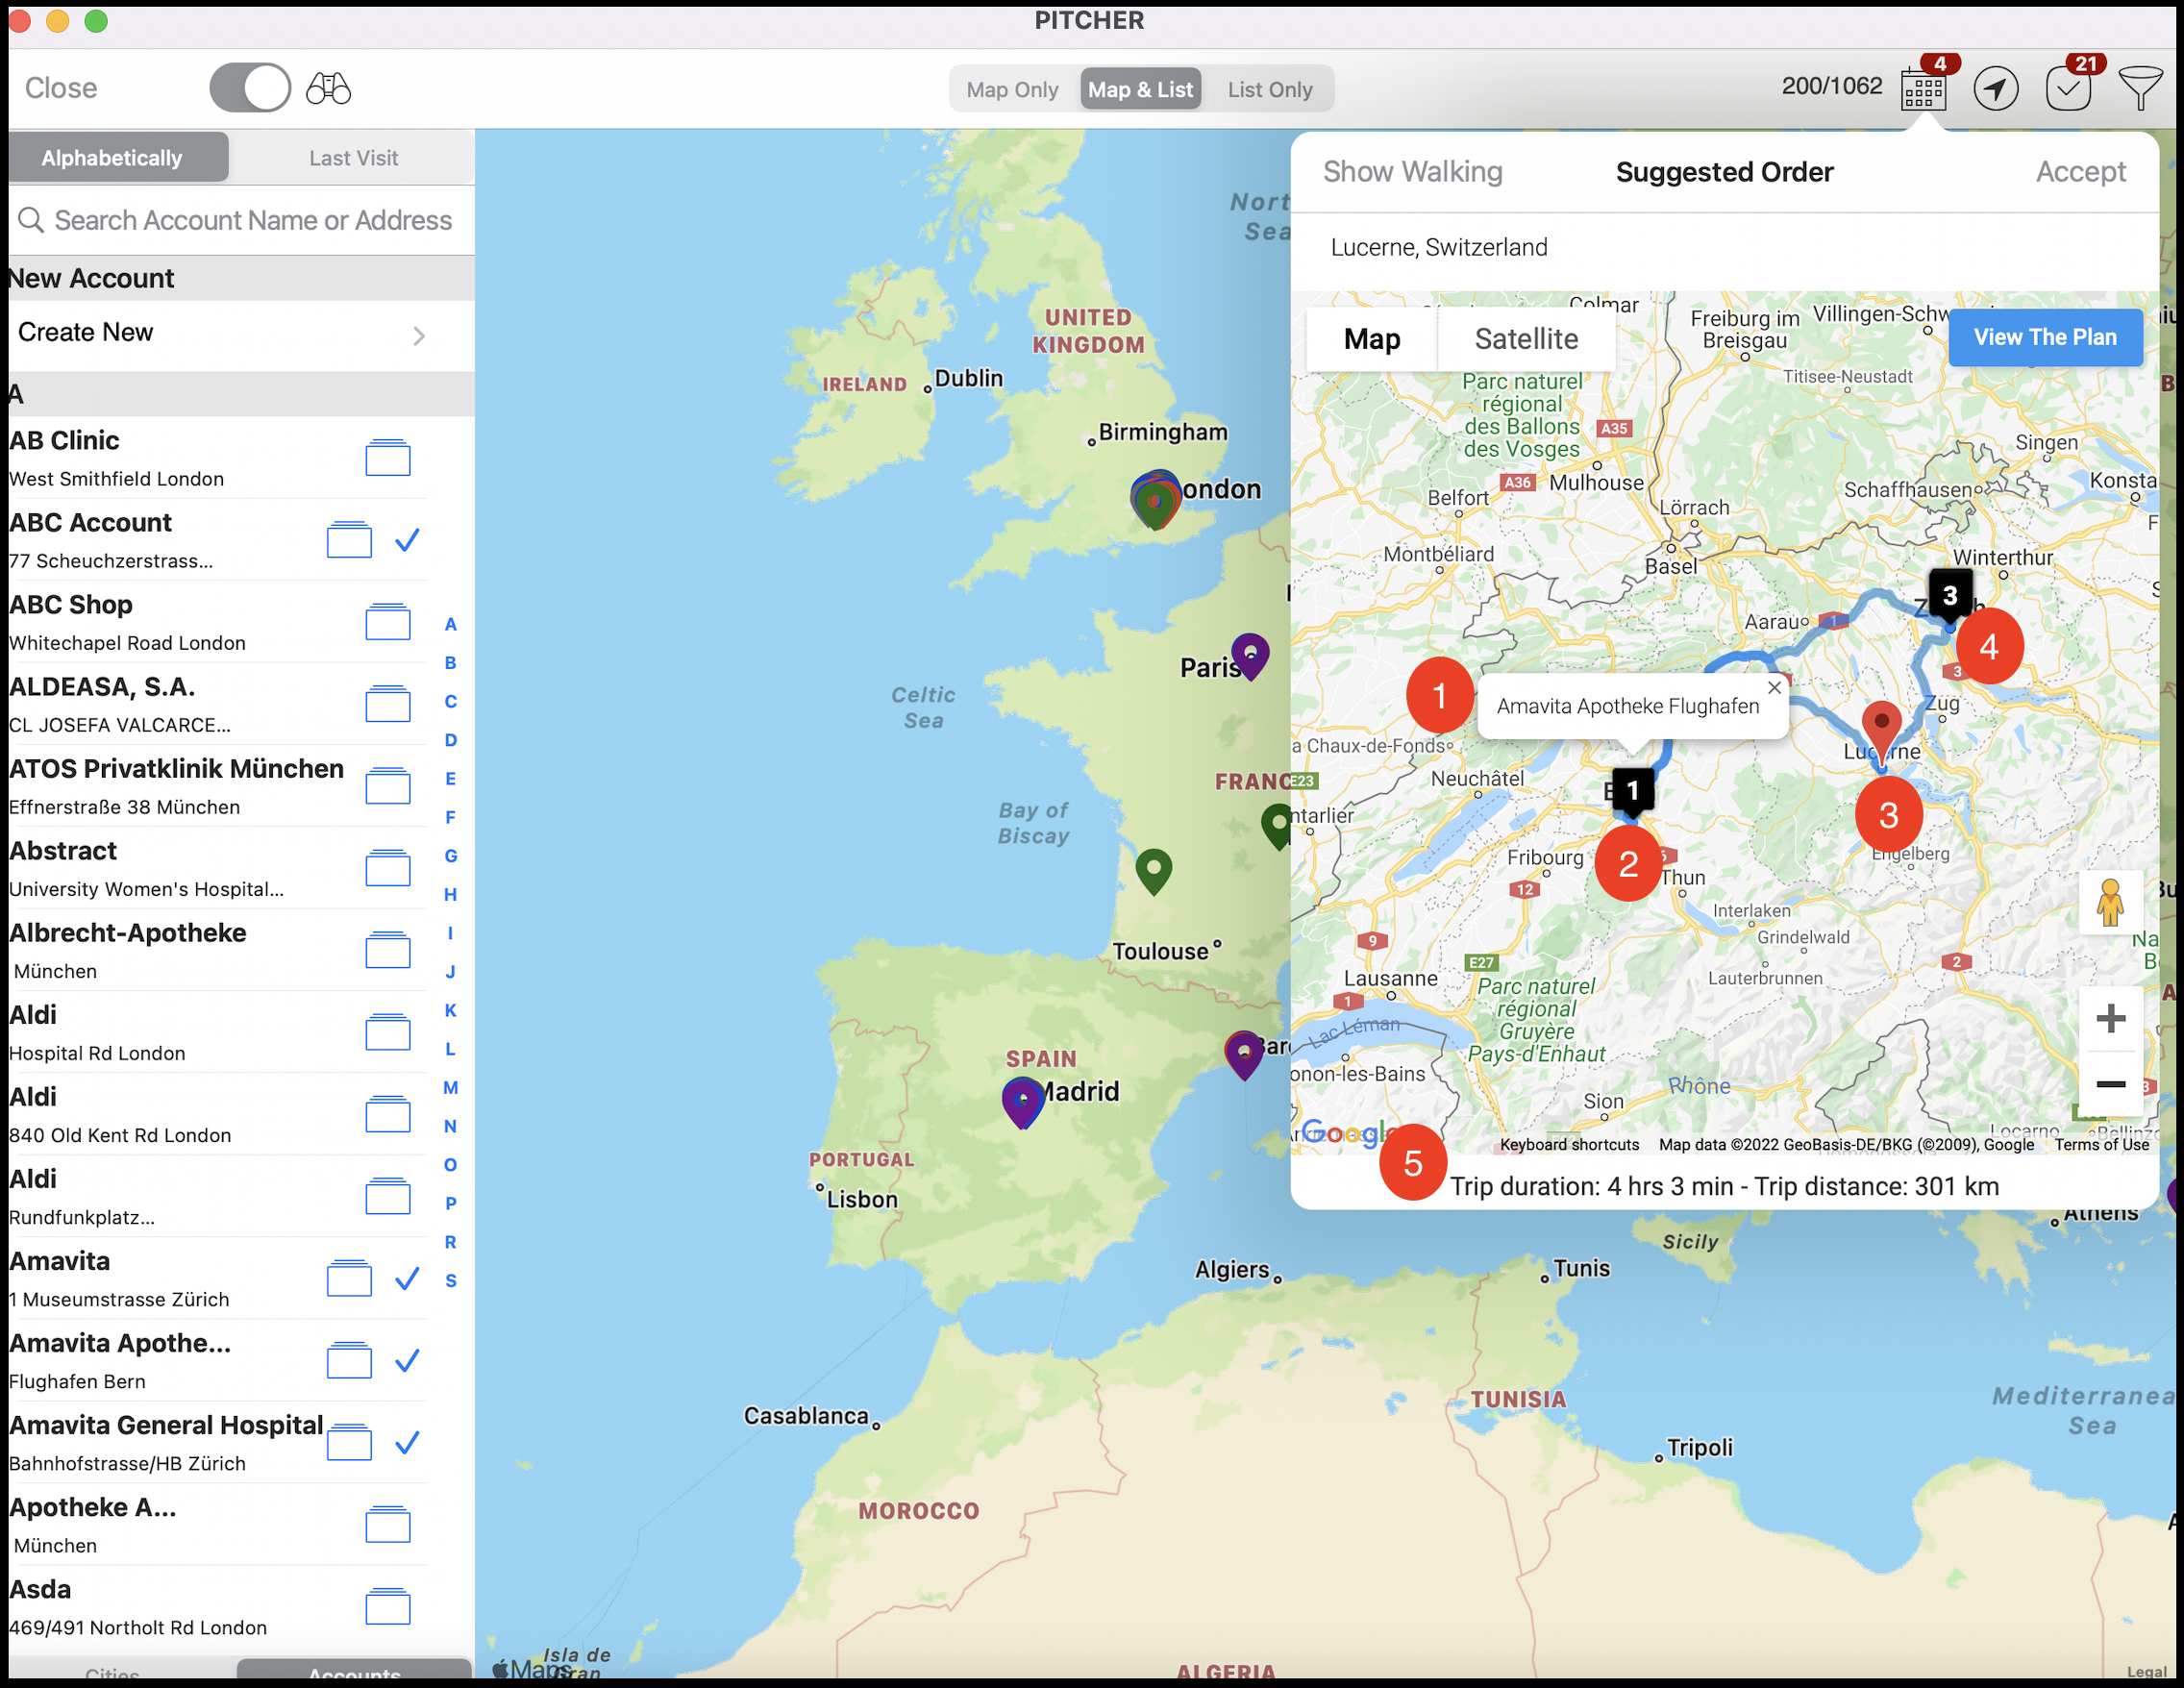
Optimized route map
Account Name - It appears after clicking on the number shown in the map which indicates the account to be visited.
Account Number - It shows the order of the visit.
Current Location/selected Origin - The user’s current location based on GPS or selected origin by the user (after the user changes the origin of the trip).
Route - Suggested route between the user’s location and the account/accounts.
Trip Duration - Total trip duration between the accounts including the trip distance.
After seeing the suggestions the user has to tap Accept. Map will hide and the list of accounts will get reordered to assure the shortest travel time. Also, right over each of the account’s name the user can see Estimated Travel Time for reaching that account.
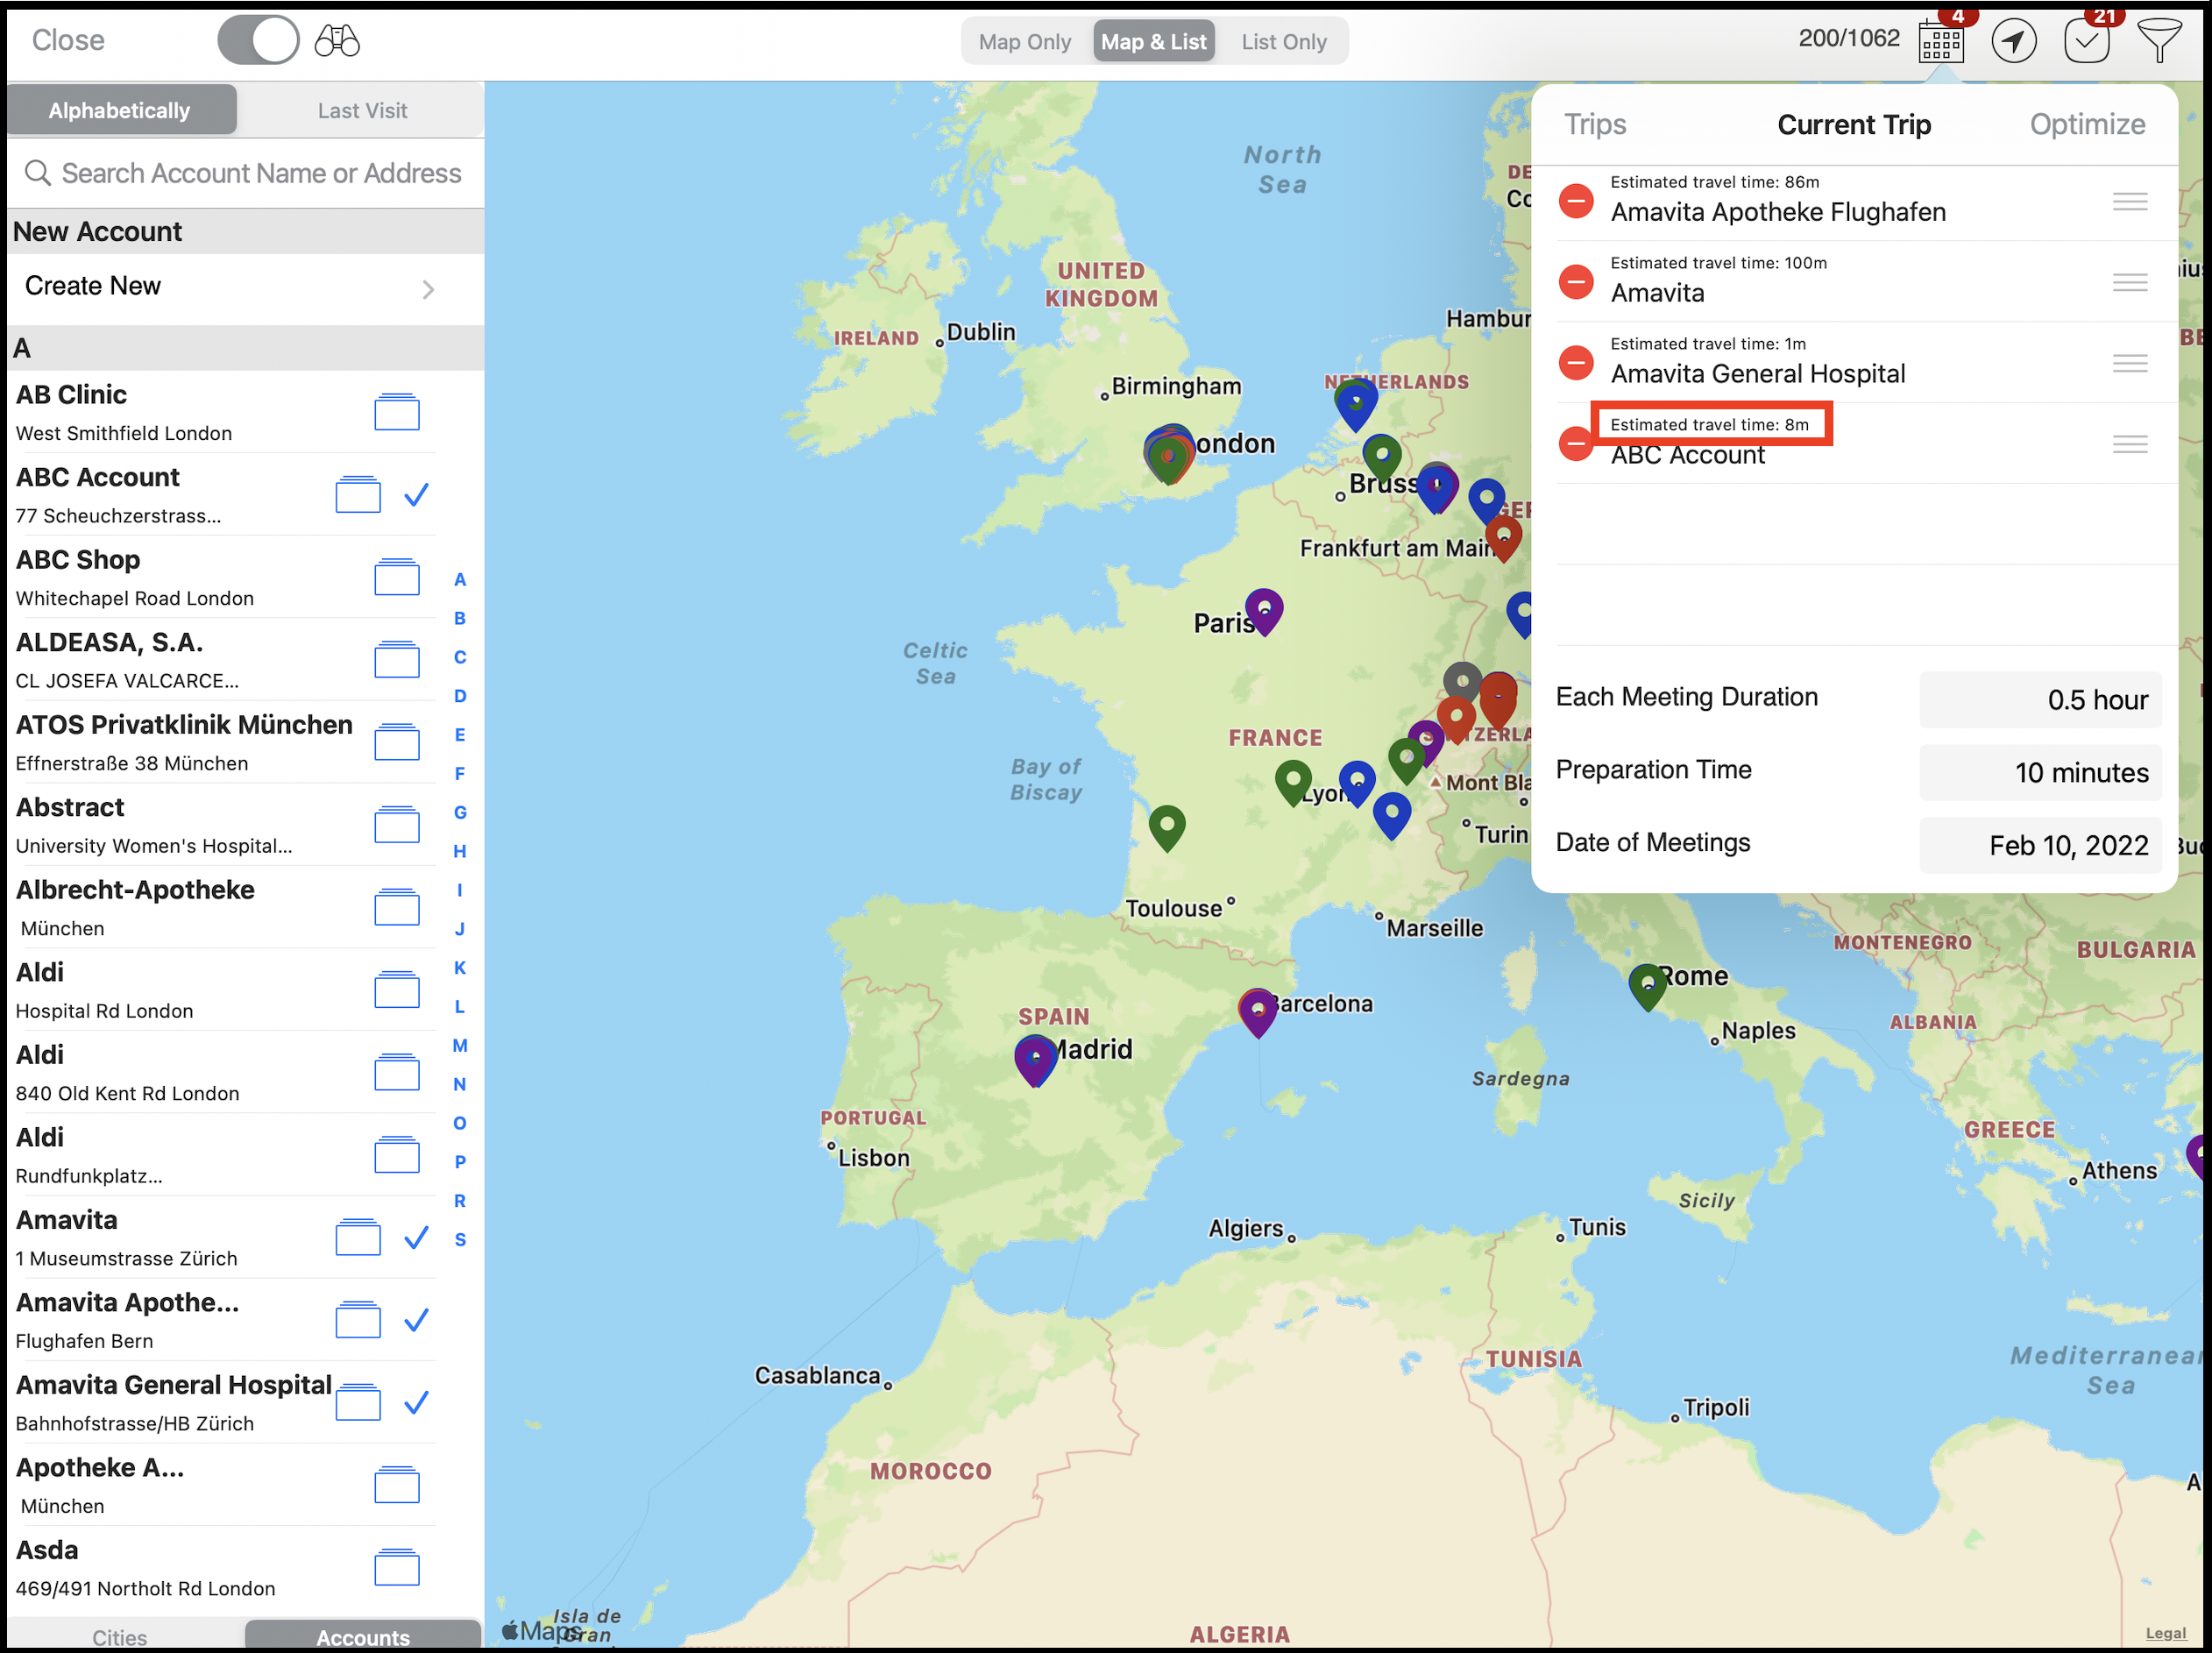
Estimated travel time for each account
The accounts can be reordered and the travel times will get updated accordingly. Accounts can also be removed from the list. However if new accounts are added to the list, they won’t have the travel time information for commuting from and to other accounts. In order to get that information the user needs to tap on optimize button on the popover window again.
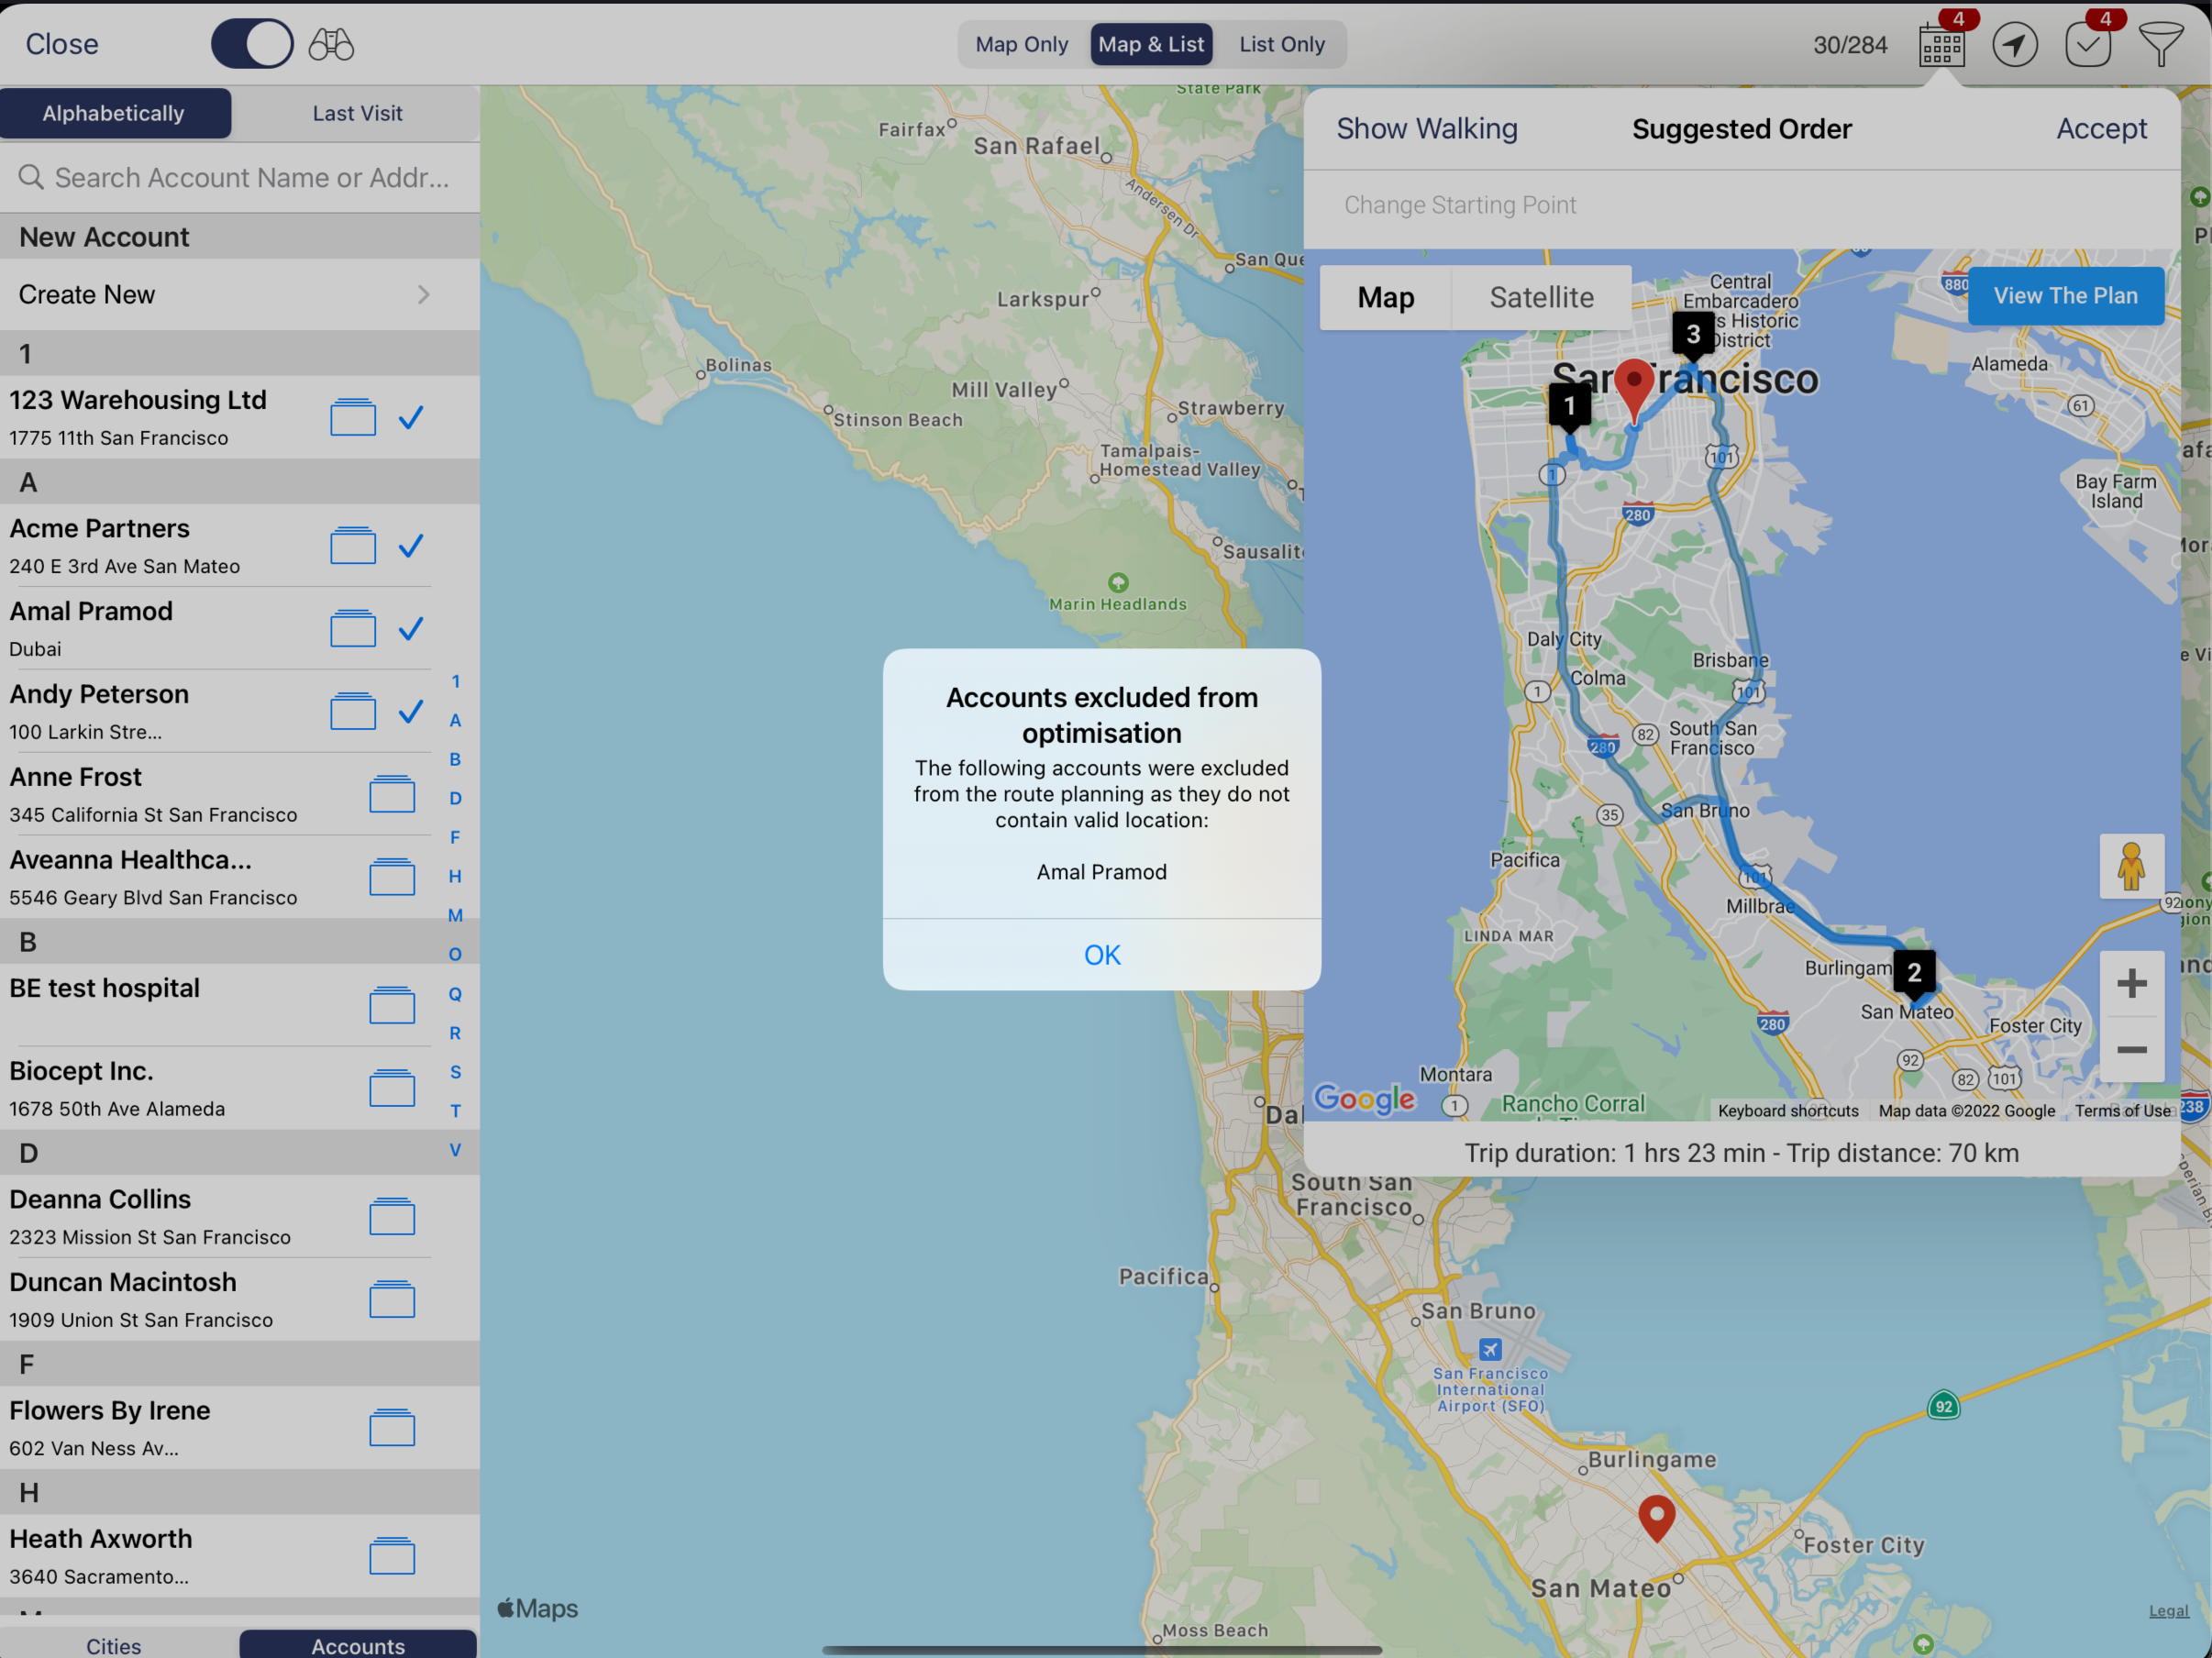
Alert for accounts with missing locations
When accounts don’t have location data attached to them, they can’t be included in the route optimisation algorithm. If this is the case, an alert depicting accounts with missing location data is displayed to the user and such accounts are excluded from the route optimisation and placed at the end of the account list.
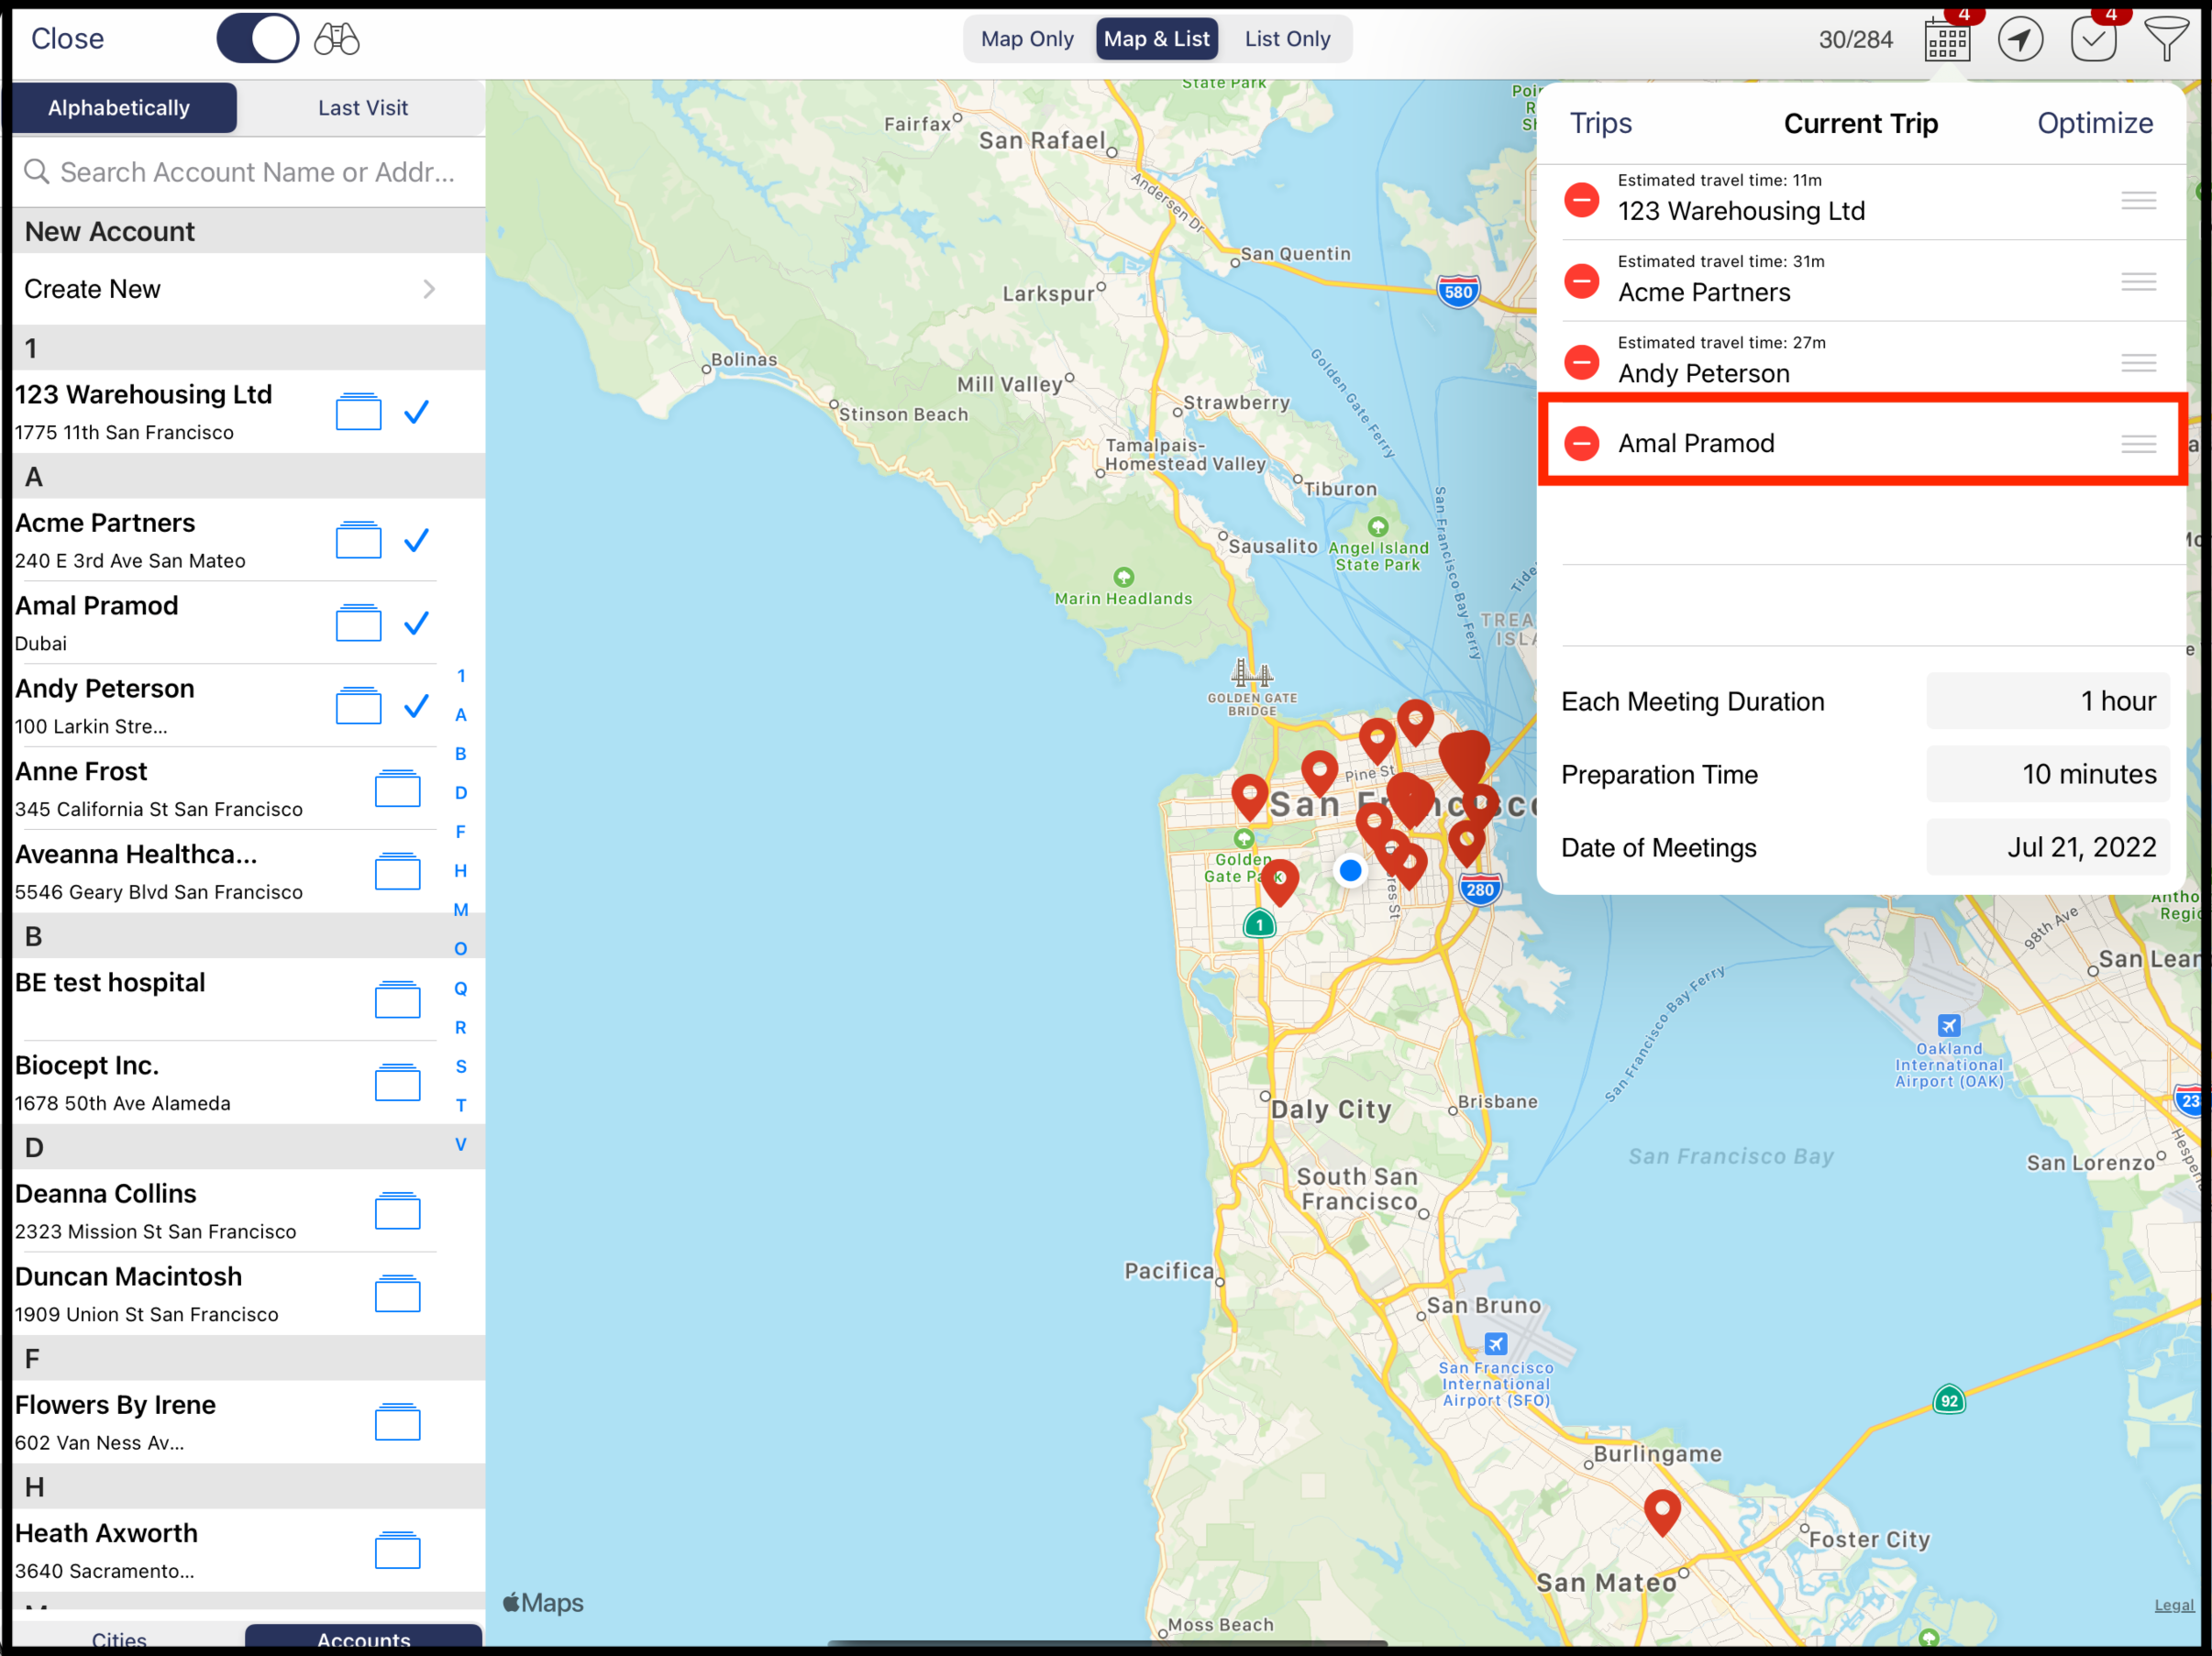
Estimated travel time not available for account without location
Also, the estimated travel time won’t be added for such account(s).
Change The Origin of The Trip
The user can also change their origin of their trip to another address. In the below example Outer Richmond, San Francisco, CA, USA has been defined as the new starting location for the trips.
%20(4th%20generation)%20-%202022-08-22%20at%2014.16.34.png?inst-v=70efaf10-97c4-4789-922e-2eeb620e8510)
Change the origin point
Tap Accept to save the trip.
Optimized Map mode
There are two modes which user can alternate to see the optimized map.
Optimized map for walking
Optimized map for driving
It is possible to toggle between these two modes as per the convenience of the user.
%20(4th%20generation)%20-%202022-08-22%20at%2014.20.20.png?inst-v=70efaf10-97c4-4789-922e-2eeb620e8510)
Tap on Show walking for optimized map based on walking
If Show Walking is tapped then user is shown the optimized route based on walking.
%20(4th%20generation)%20-%202022-08-22%20at%2014.20.28.png?inst-v=70efaf10-97c4-4789-922e-2eeb620e8510)
Tap on Show Driving for optimized map based on driving
View The Plan on Google Map
This feature will open a google map on the browser and show the plan.
%20(4th%20generation)%20-%202022-08-22%20at%2014.41.34.png?inst-v=70efaf10-97c4-4789-922e-2eeb620e8510)
View the plan on google map
For viewing the plan on google map the View The Plan option needs to be tapped and this will open a new browser with a map and the plan.
%20(4th%20generation)%20-%202022-08-22%20at%2014.20.52.png?inst-v=70efaf10-97c4-4789-922e-2eeb620e8510)
Google map with the plan
Saving a Route
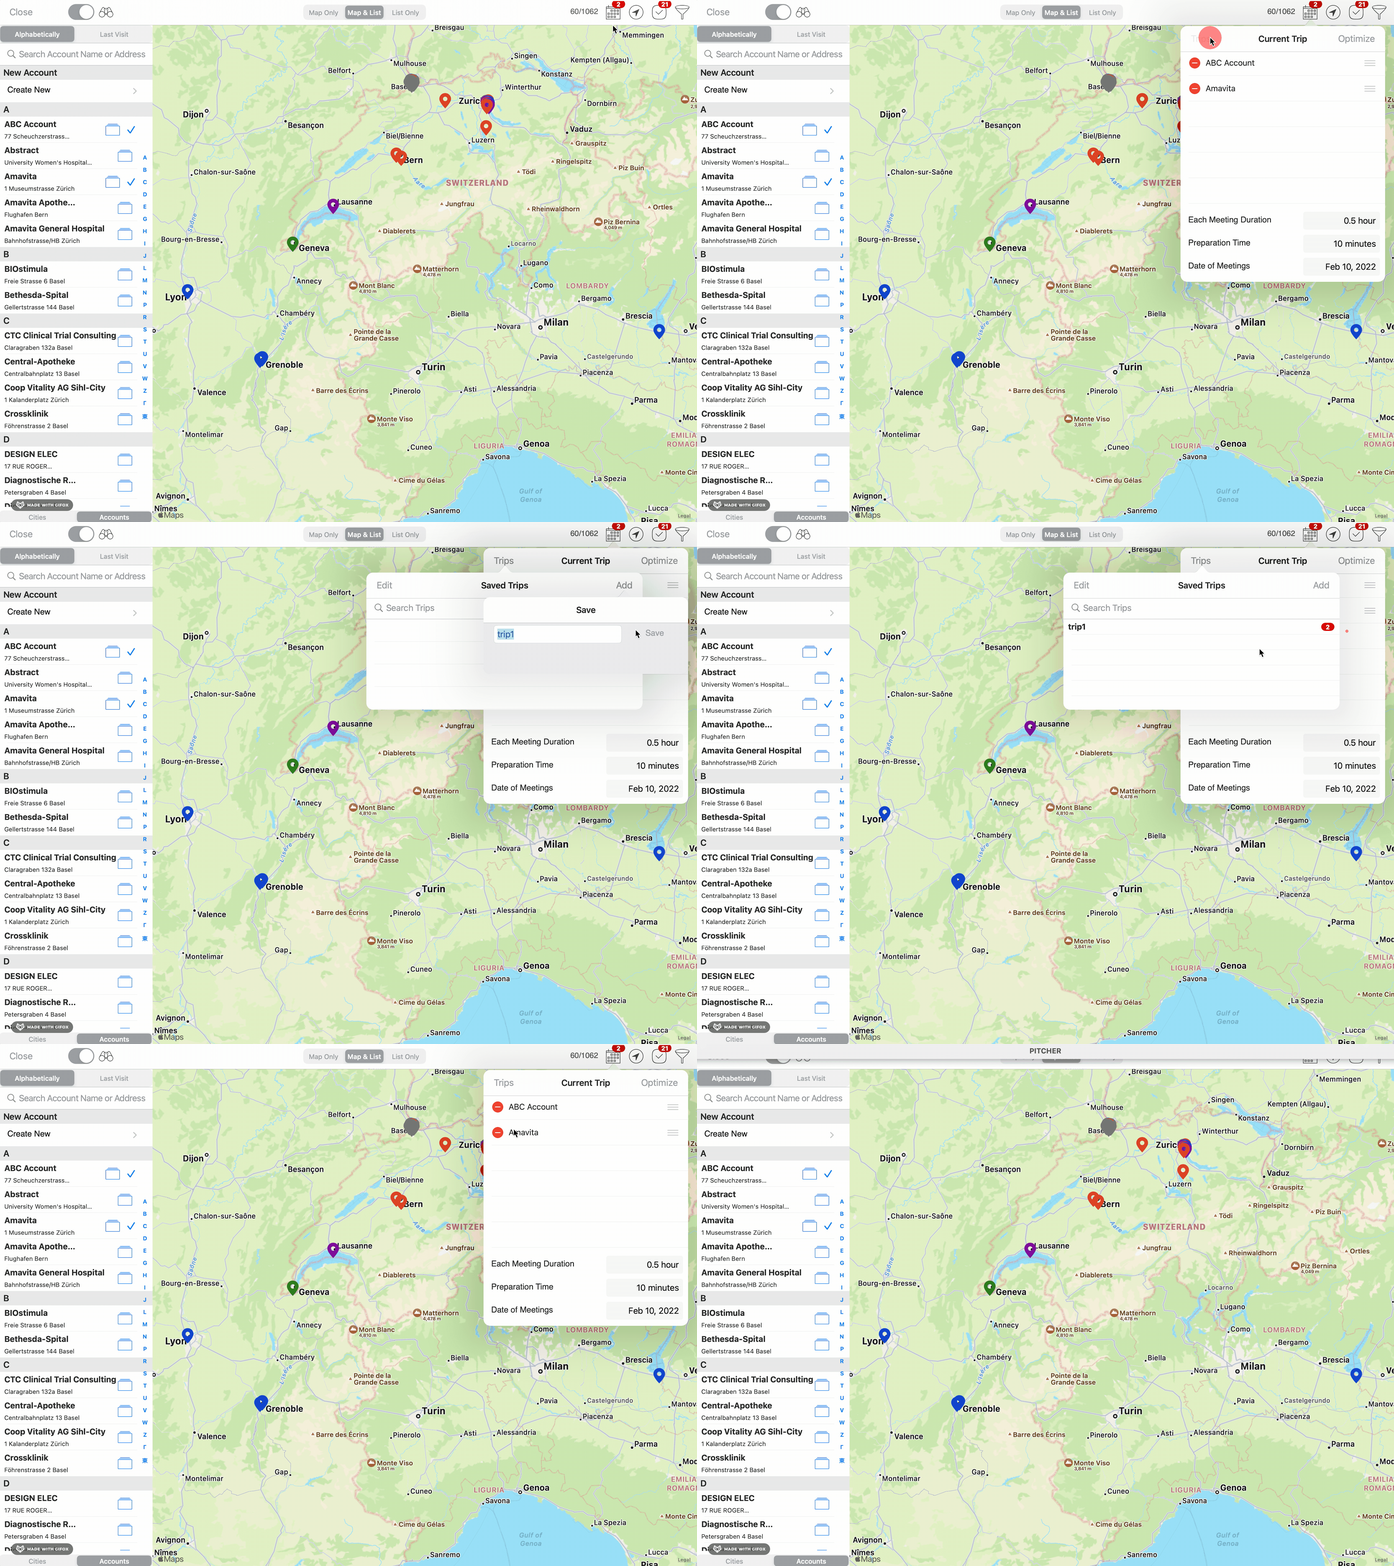
The user can also save their trips for future. To save a trip Tap on Trips option on the popover menu and tap on Add to give the name for future trip and tap the save option.
