Installing the Conga Managed Package
This document describes the steps required to install and configure the Pitcher Conga Managed Package.
Pre Installation
Install dependent packages
Pitcher Zero
Pitcher Apps
Installation
Follow these steps to install/upgrade the package:
Enter the package installation link obtained from your Pitcher representative. This should redirect you to the login page of Salesforce.com. For Sandbox organizations, swap http://login.salesforce.com with http://test.salesforce.com in the URL.
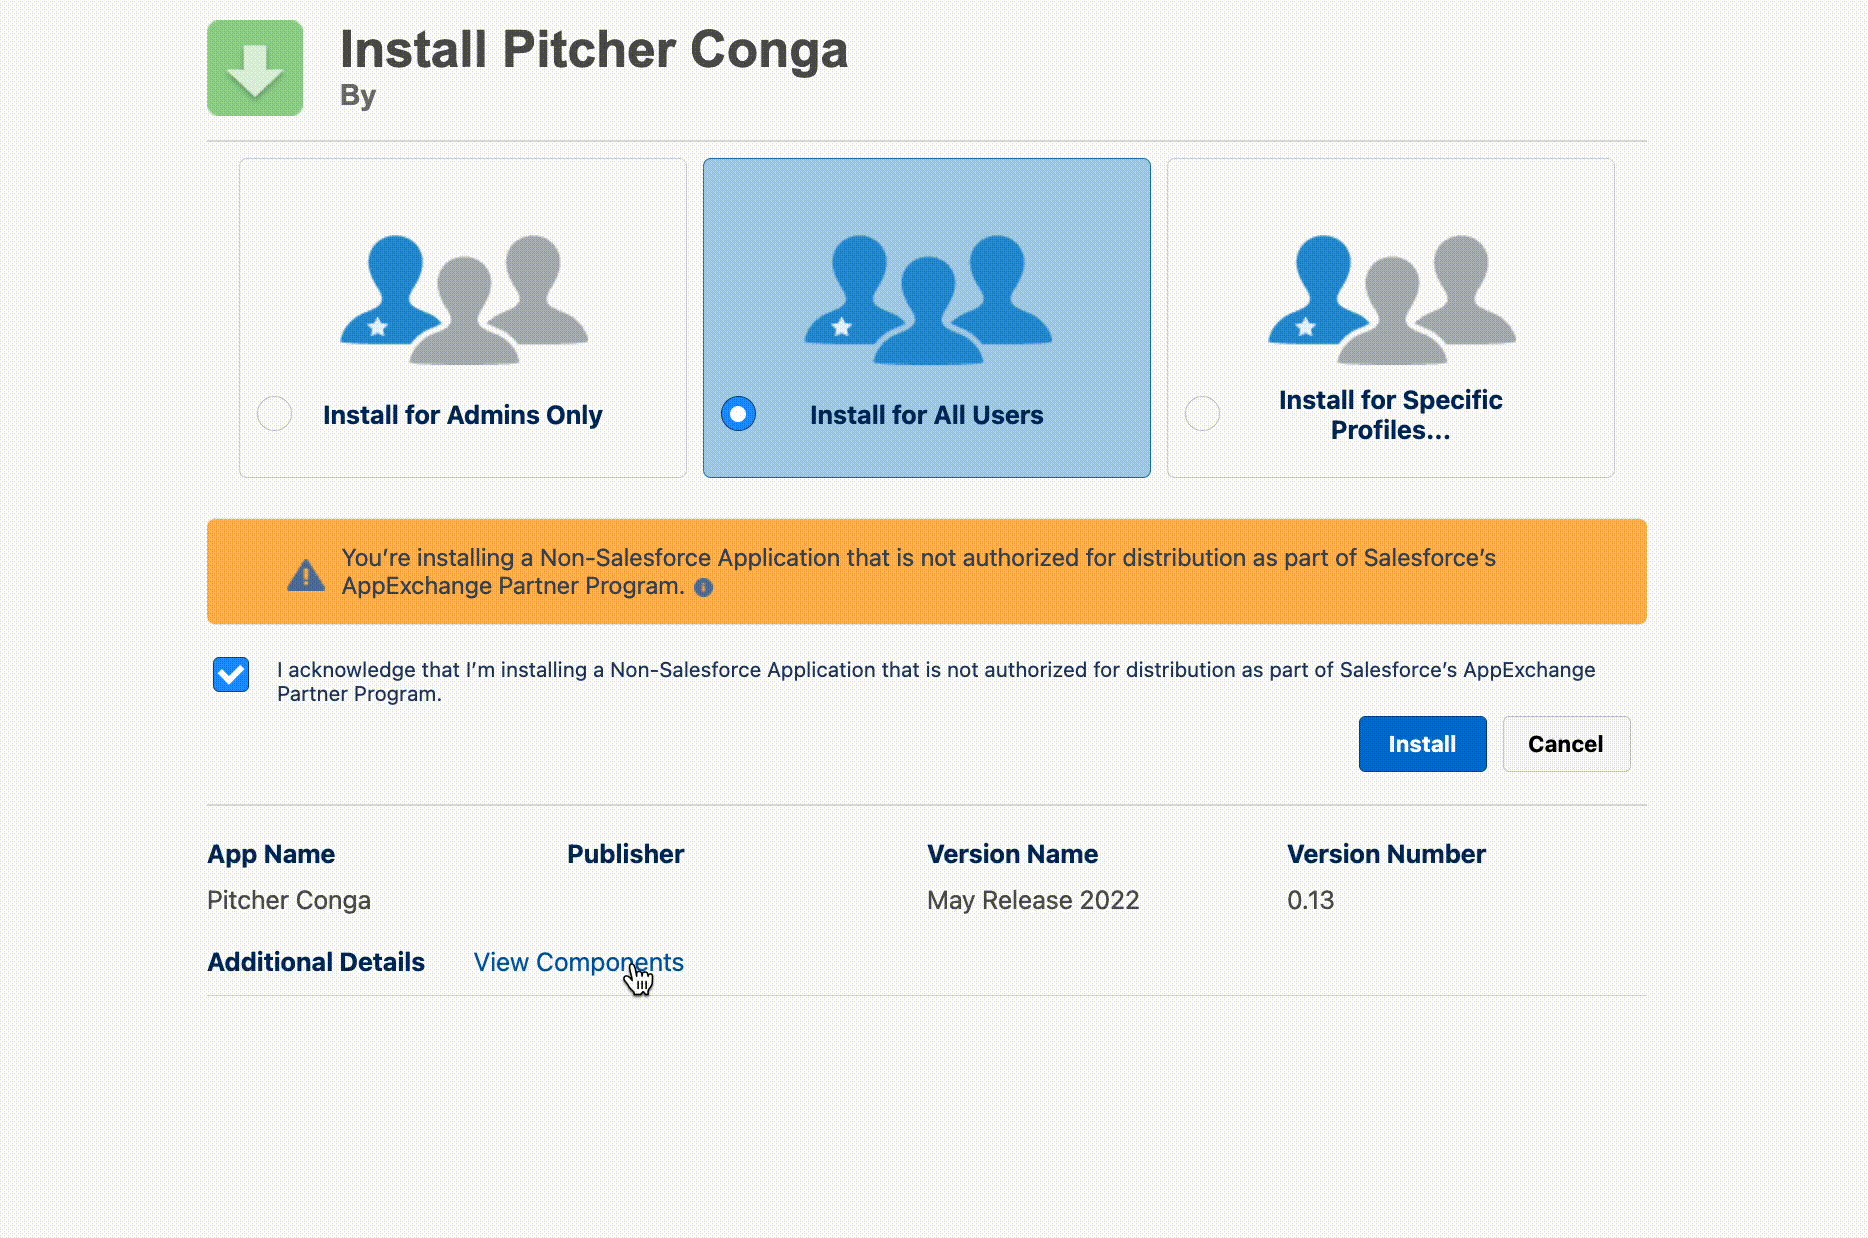
Select Install for Admins Only, Install for All Users, or Install for Specific Profiles, depending on the need.
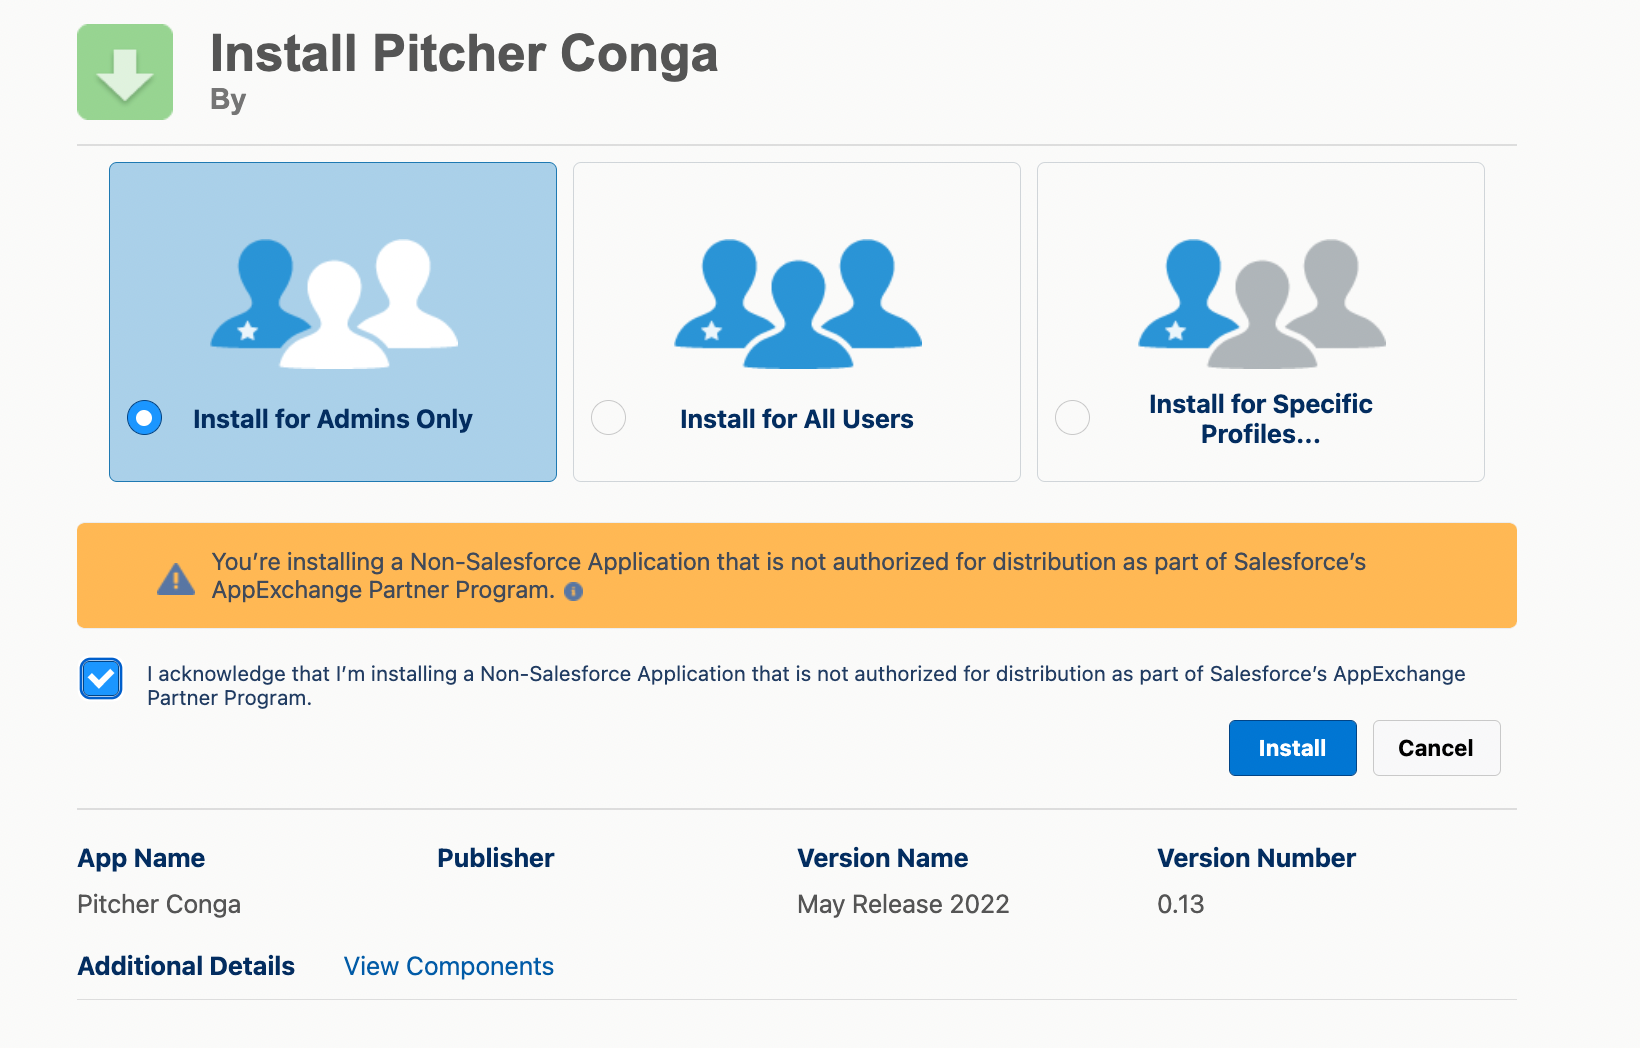
To verify the package components before installation/upgrade, click on the “View Components” link.
Check the acknowledgement and click Install to proceed.
Once installation is completed, the following screen appears:
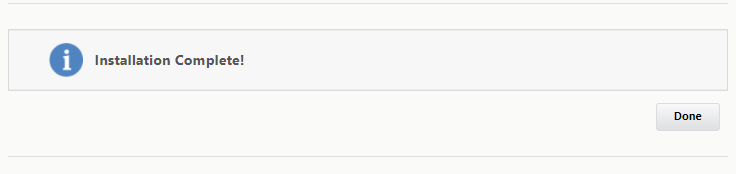
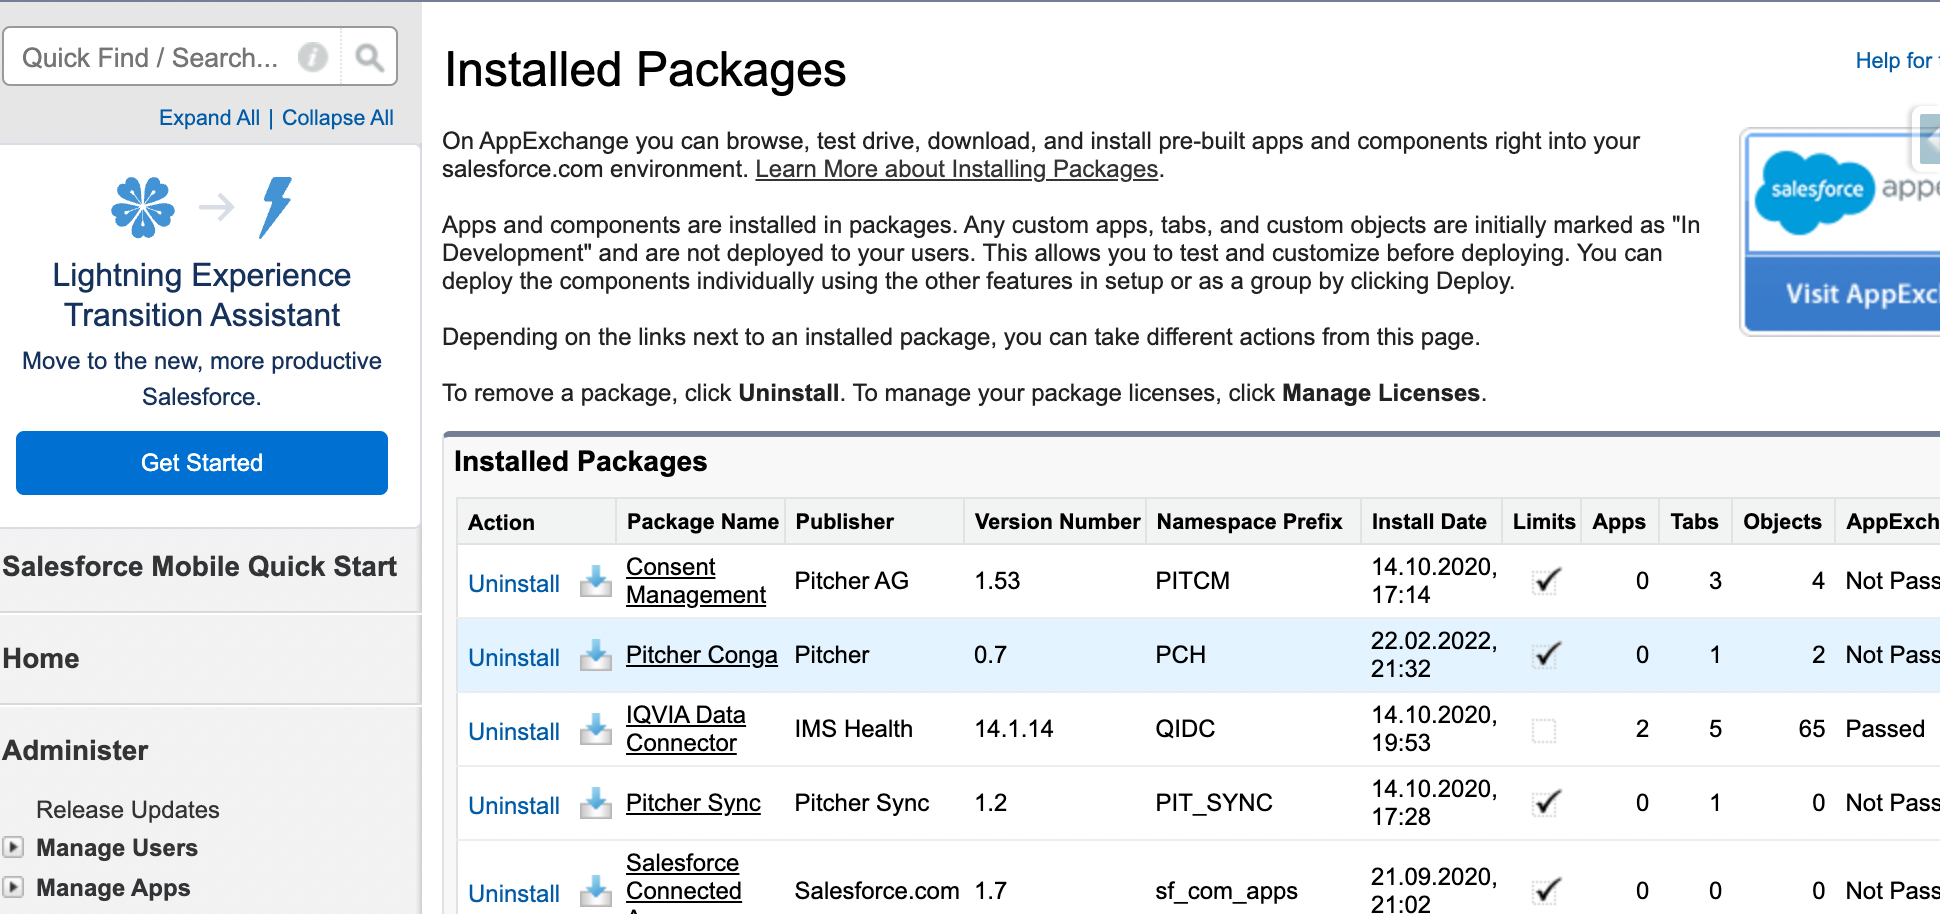
Check the installed packages on the Setup > Apps > Packaging > Installed Packages page to confirm the successful installation.
To verify the package components after a successful installation/upgrade, follow the steps shown below -
.gif?inst-v=973f3c37-d617-4a1c-9816-b97ed52324dd)
Post Installation Step
Step 1 - Assign Permission Sets
After the Pitcher’s Engage Managed Package gets installed in the org, use the following steps to assign permissions to users:
Assign the
PITCHER-Conga Adminpermission set to users managing the Pitcher Conga.Assign the
PITCHER-Conga Reppermission set to the users who access Pitcher at the field.
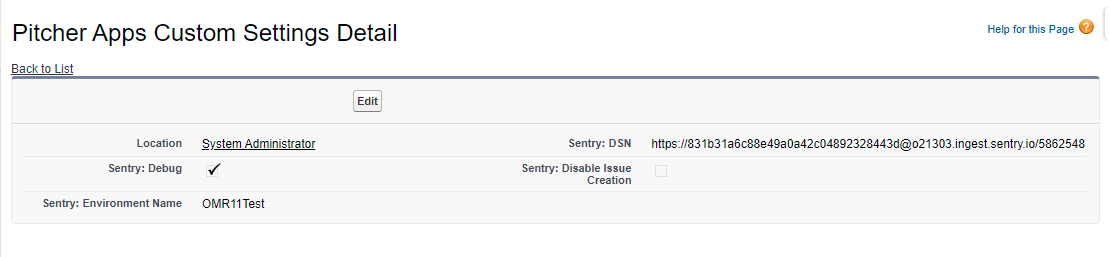
Step 2 - Configure Custom Setting | Pitcher Apps Custom Settings Detail
After the Pitcher Conga Managed Package is installed in the org you need to perform the following steps in Pitcher Apps Custom Settings Detail:
Need to create entries for Org Wide Default or System Administrator and the Sales Rep profile who will be using the Pitcher Application for Order creation.
Add Sentry: Environment Name as the current Environment Name
Check the Sentry: Debug checkbox as "checked"
Add Sentry: DSN URL
For reference here are the values that need to be added to the custom setting.
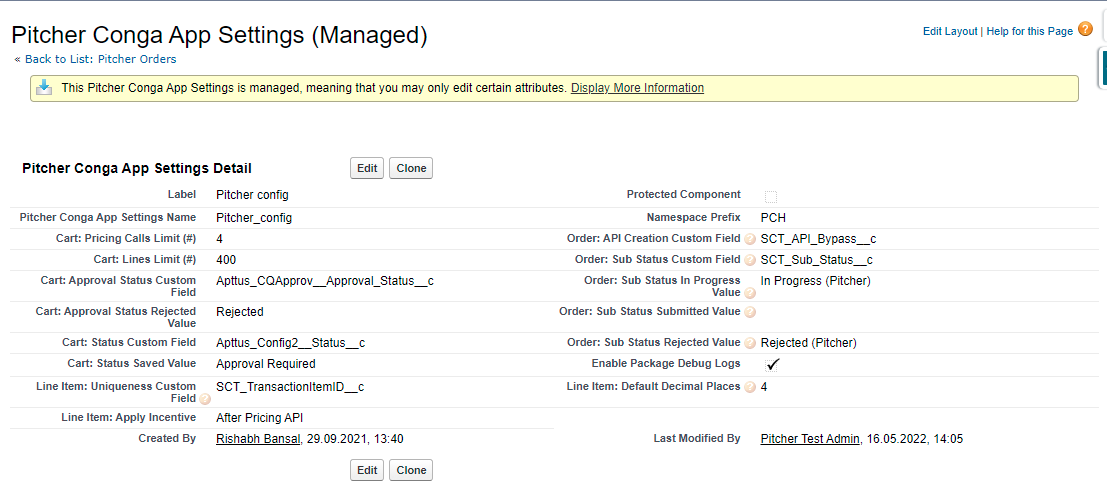
Step 3 - Configure Custom Metadata | Configure Pitcher Apps Settings
After the Pitcher Conga Managed Package is installed in the org, you need to perform the following steps in Pitcher Conga App Settings Custom Metadata:
Need to create a custom text field on Conga Line Item object to be used by Pitcher for uniquely identifying line items on a cart for compare price functionality.
Add the API name of the newly created field from the above step into the custom metadata field Line Item: Uniqueness Custom Field.
Add the Decimal Place value for the Pricing fields used in the package in the custom metadata field Line Item: Default Decimal Places. We suggest having a default value of 1.
Add the other values to the Pitcher Conga App Settings Metadata per the business requirement.
Assign the permission set PITCHER-Conga Rep to the Pitcher users in the field.
Assign the permission set PITCHER-Conga Admin to the users handling Admin operations.
For reference, here are the values that must be added to the custom metadata.