Installing Samples 2.0 (Inventory) Managed Package
Pre-Installation Steps
Install dependent packages
Pitcher Zero- Install the dependent or higher version by referring to this https://pitcher-ag.atlassian.net/wiki/spaces/PDOC/pages/301400076/Inventory+Samples+2.0+Managed+Package+Details#Version-Control section.Pitcher Apps- Install the dependent or higher version by referring to this https://pitcher-ag.atlassian.net/wiki/spaces/PDOC/pages/301400076/Inventory+Samples+2.0+Managed+Package+Details#Version-Control section.
Installation
Follow these steps to install the package:
Enter the following address in your browser:
https://login.salesforce.com/packaging/installPackage.apexp?p0=04t5p000000258FAAQ(This link is just an example. Use the respective installation link from https://pitcher-ag.atlassian.net/wiki/spaces/PDOC/pages/301400076/Inventory+Samples+2.0+Managed+Package+Details#Version-Control section). This should redirect you to the login page of Salesforce.com. For Sandbox organizations, swap http://login.salesforce.com with http://test.salesforce.com in the URL.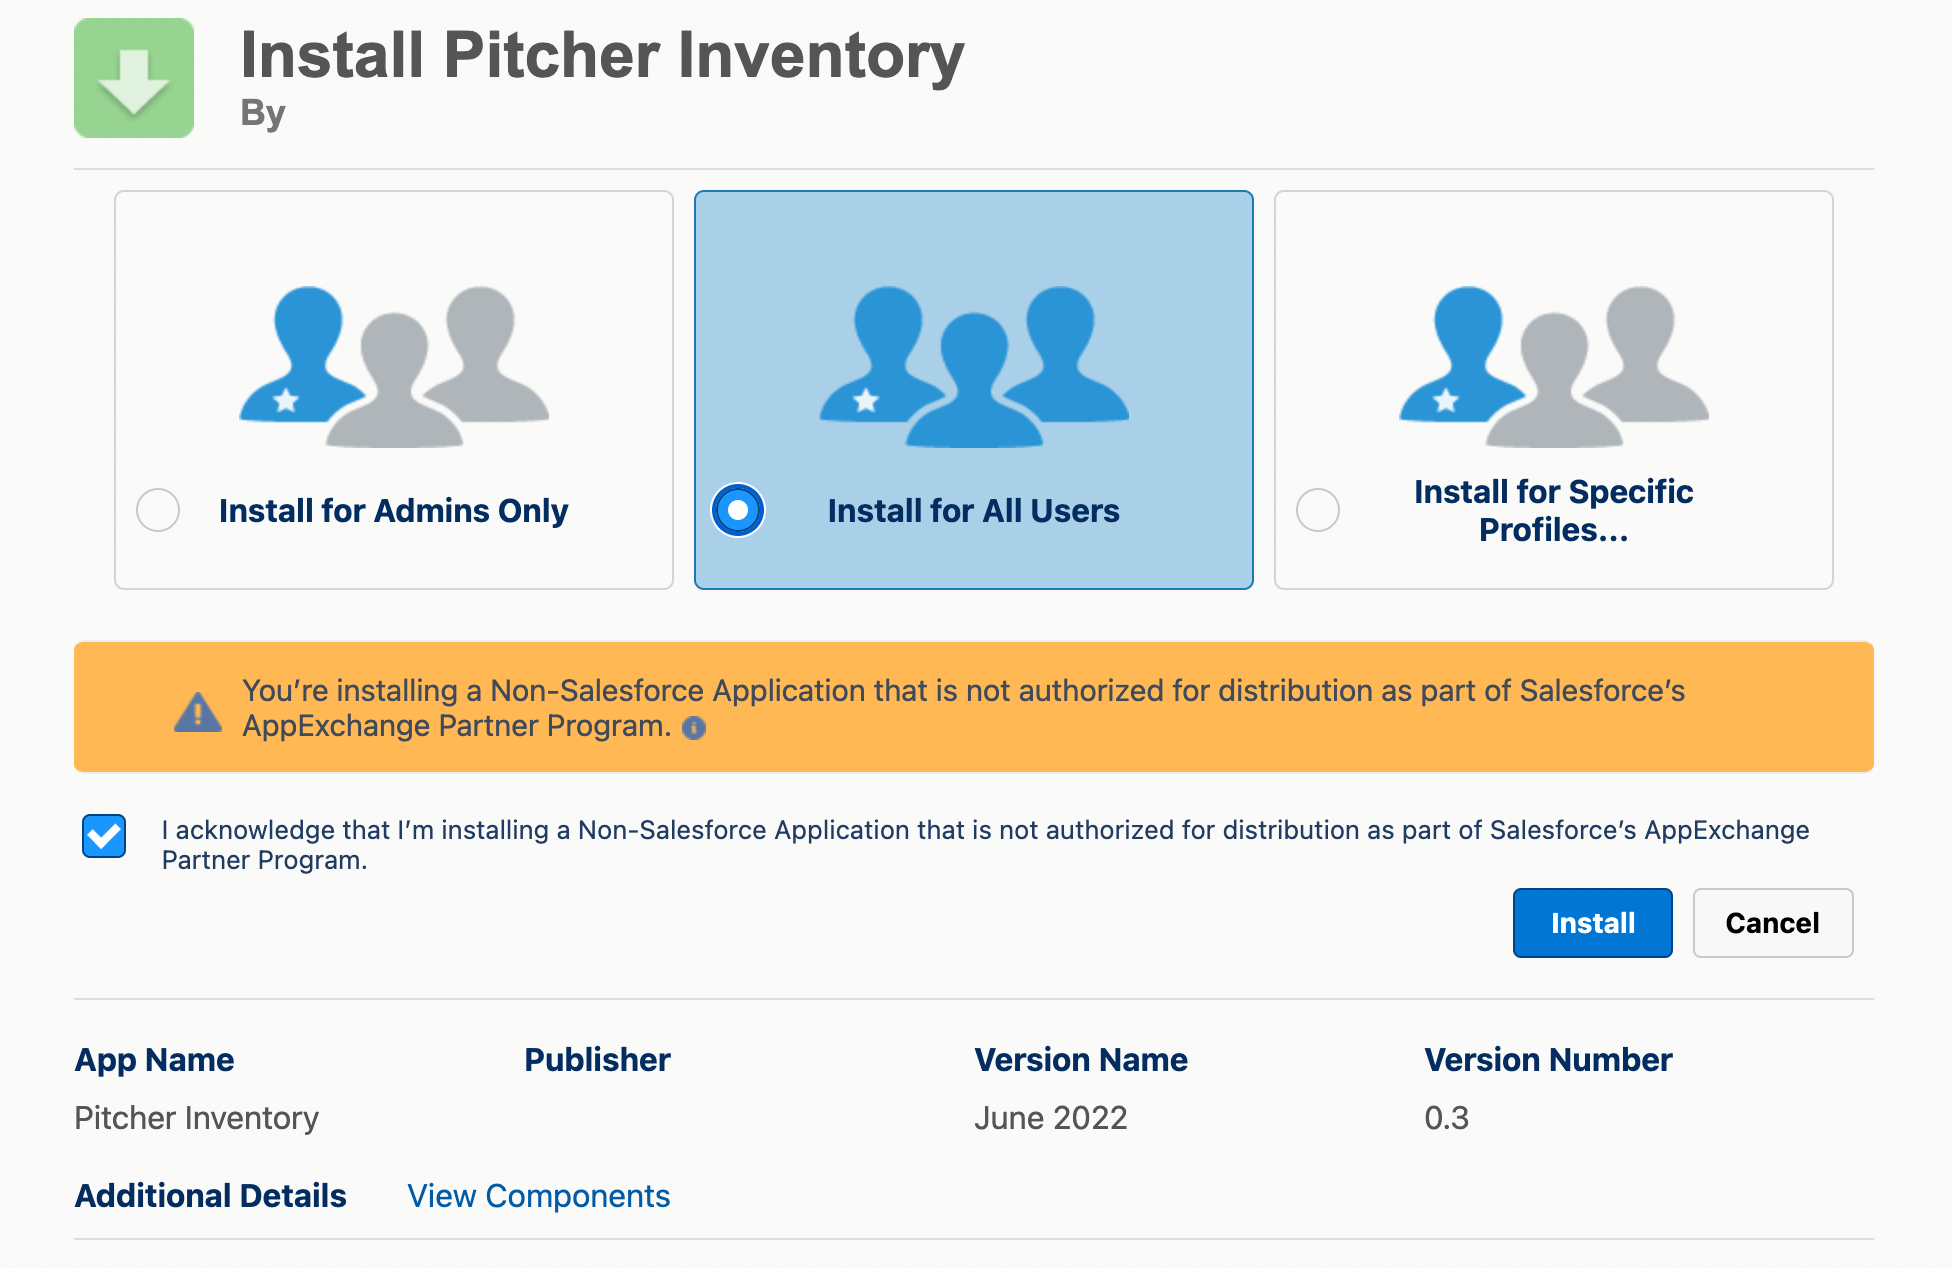
Select Install for Admins Only or Install for All Users or Install for Specific Profiles depending on the need.
To verify the package components before installation/upgrade, click on the “View Components” link.
Check the acknowledgement and click Install to proceed.
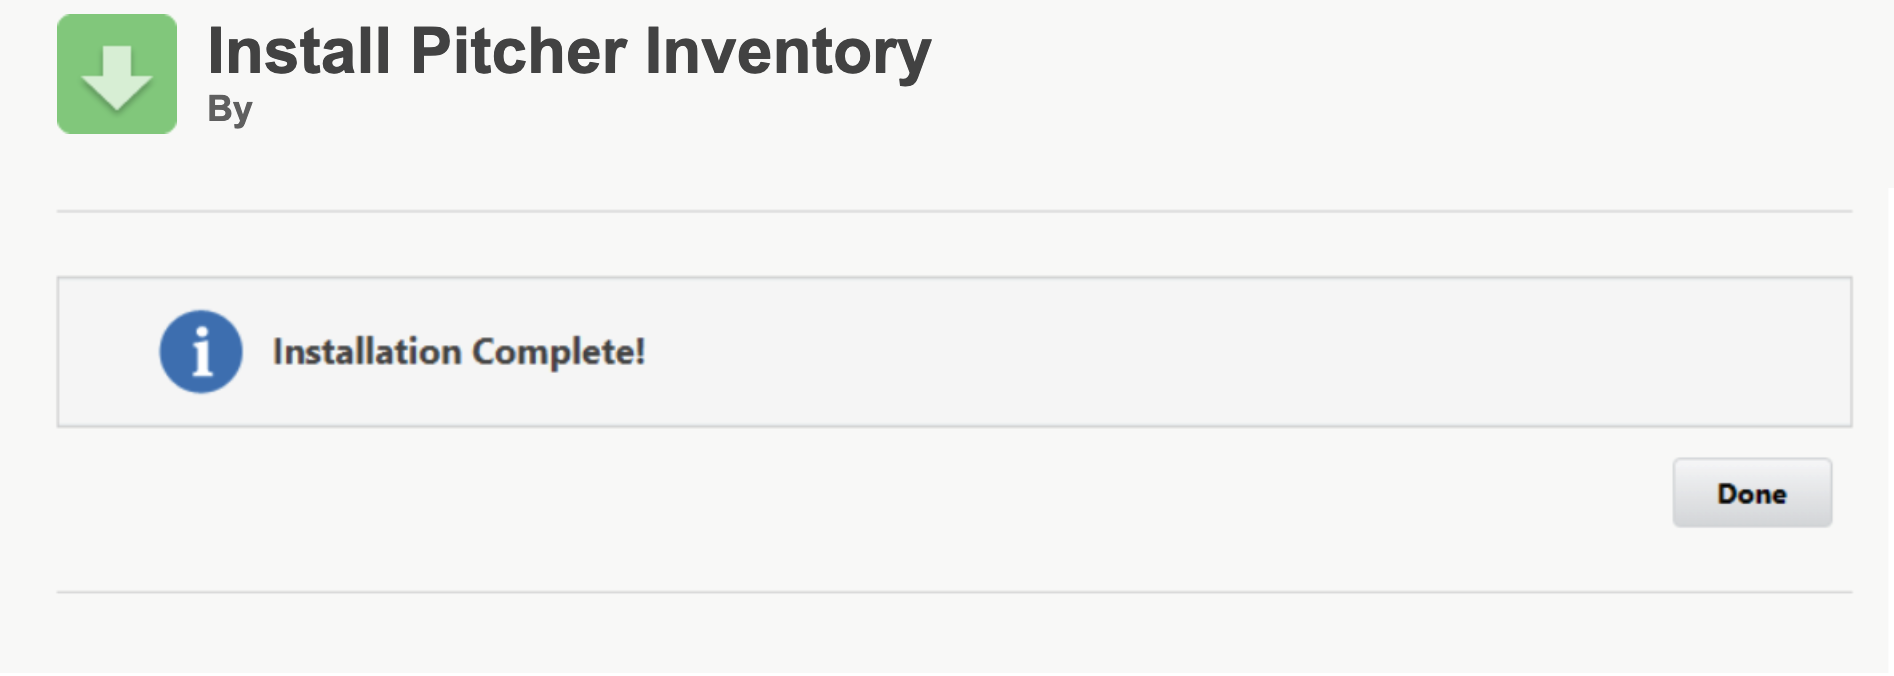
Once the installation completes, the following page appears:
Check the installed packages on the Setup > Apps > Packaging > Installed Packages page to confirm the successful installation.
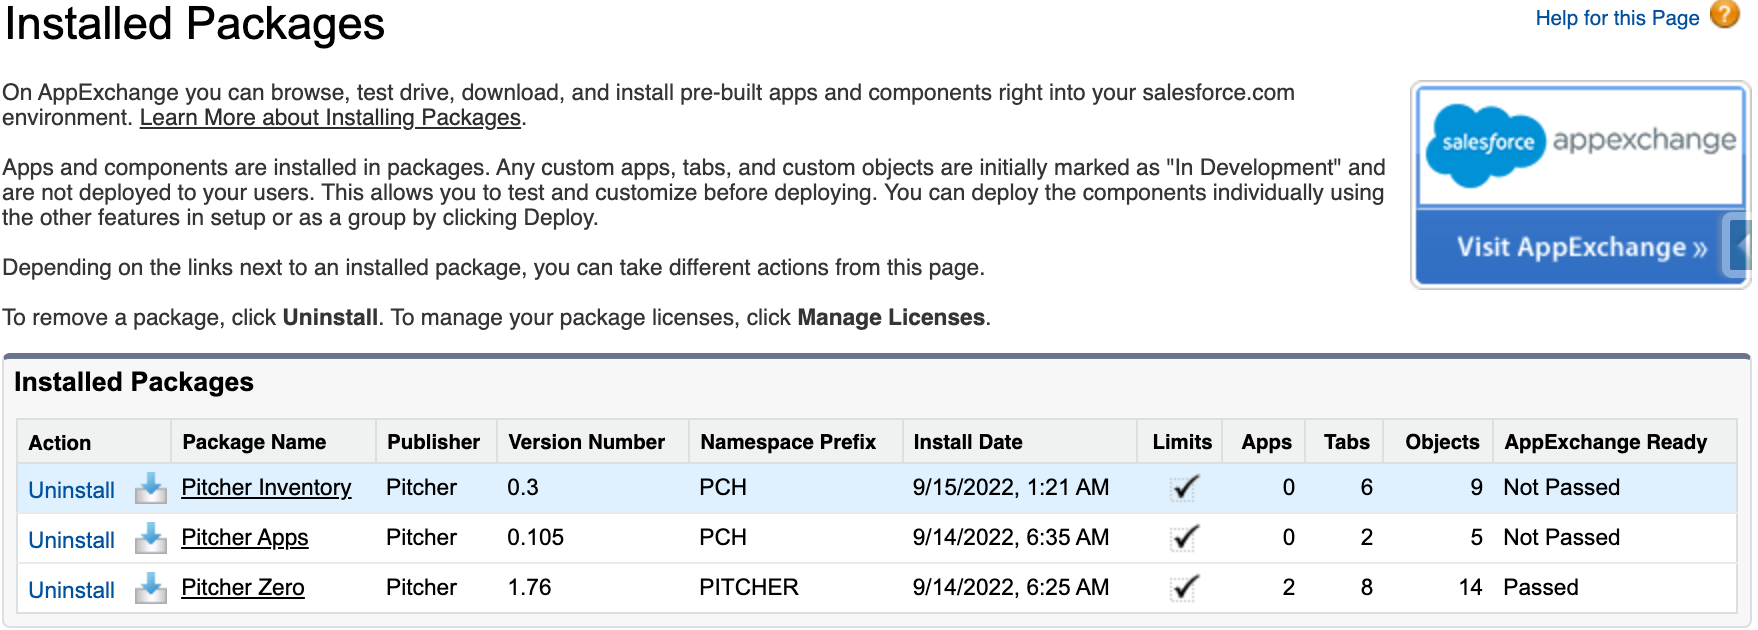
To verify the package components after a successful installation/upgrade, follow the steps shown below -
Post-Installation Steps
Step 1 - Assignment of Page Layout and Records Types
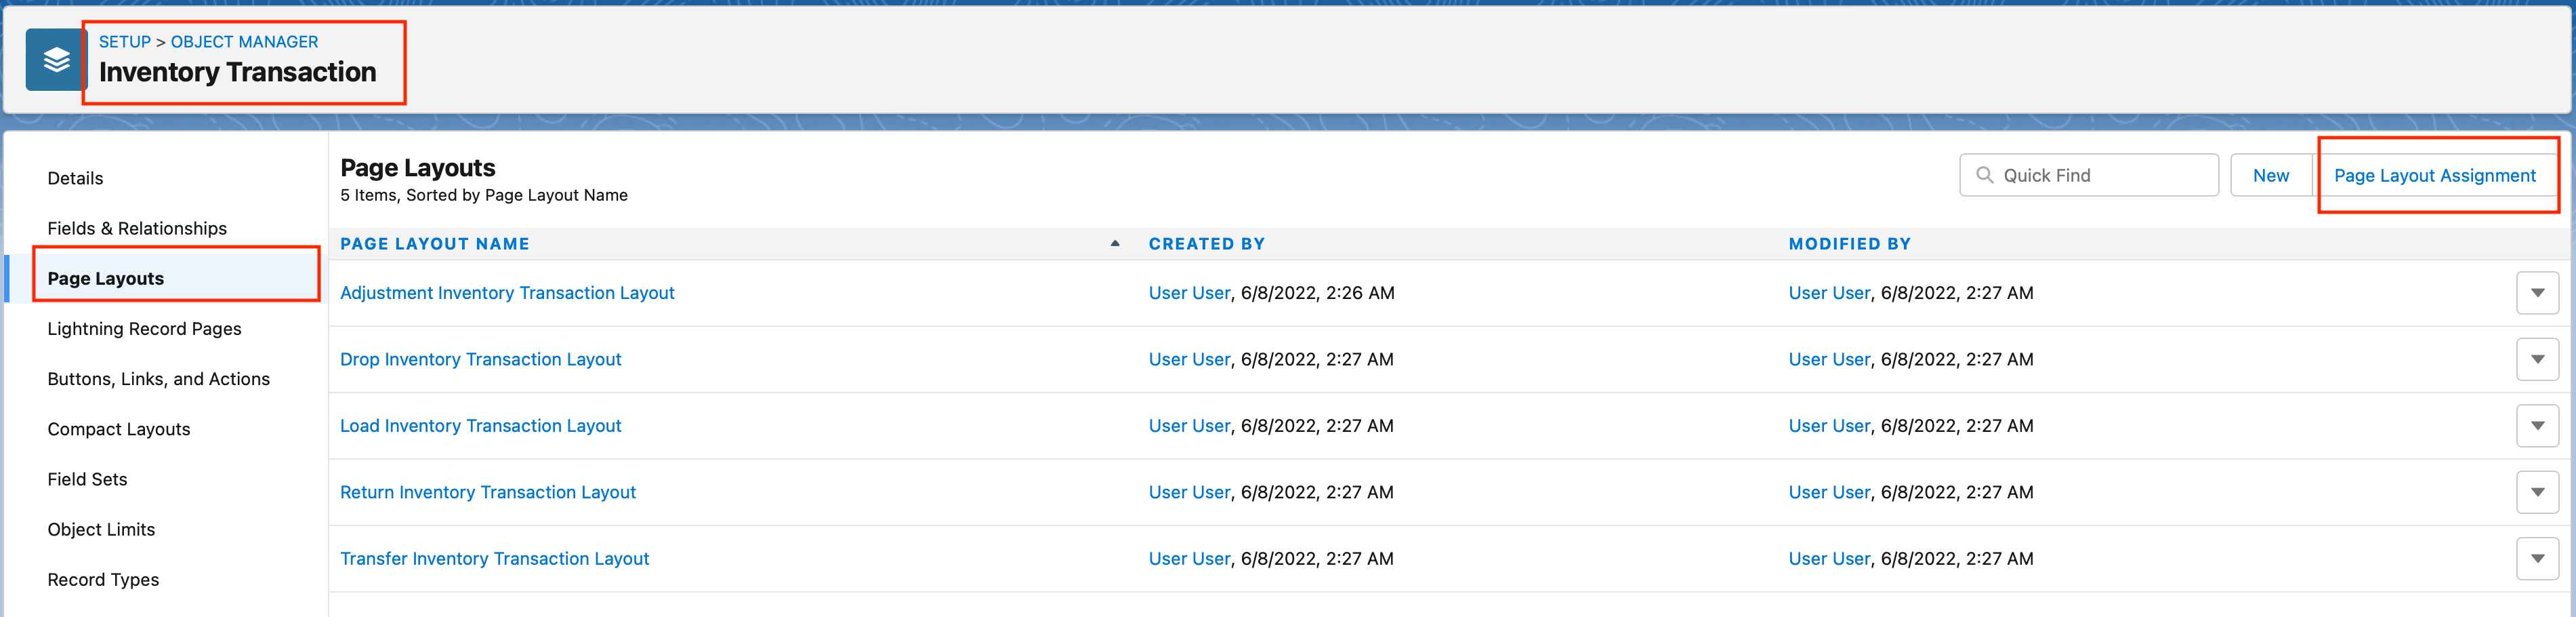
Inventory Transaction Object
Setup → Object Manager → “Inventory Transaction” Object → Page Layouts
Click on “Page Layout Assignment”
Click “Edit Assignment”
Select the respective layout for the respective record type as below -
For the Adjustment record type, select “Adjustment Inventory Transaction Layout.”
For the Load record type, select “Load Inventory Transaction Layout.”
For the Transfer record type, select “Transfer Inventory Transaction Layout.”
For the Drop record type, select “Drop Inventory Transaction Layout.”
For the Return record type, choose “Return Inventory Transaction Layout.”

Click “Next” and select other respective layouts
Click “Save”
Inventory Order Object
Follow this step only for Inventory 0.4 or higher versions.
Setup → Object Manager → “Inventory Order” Object → Page Layouts
Click on “Page Layout Assignment”

Click “Edit Assignment”
Select the respective layout for the respective record type as below -
For the Master record type, select “Inventory Order Layout.”
For the Customer Request record type, select “Customer Request Layout.”
For the Employee Request record type, select “Employee Request Layout.”
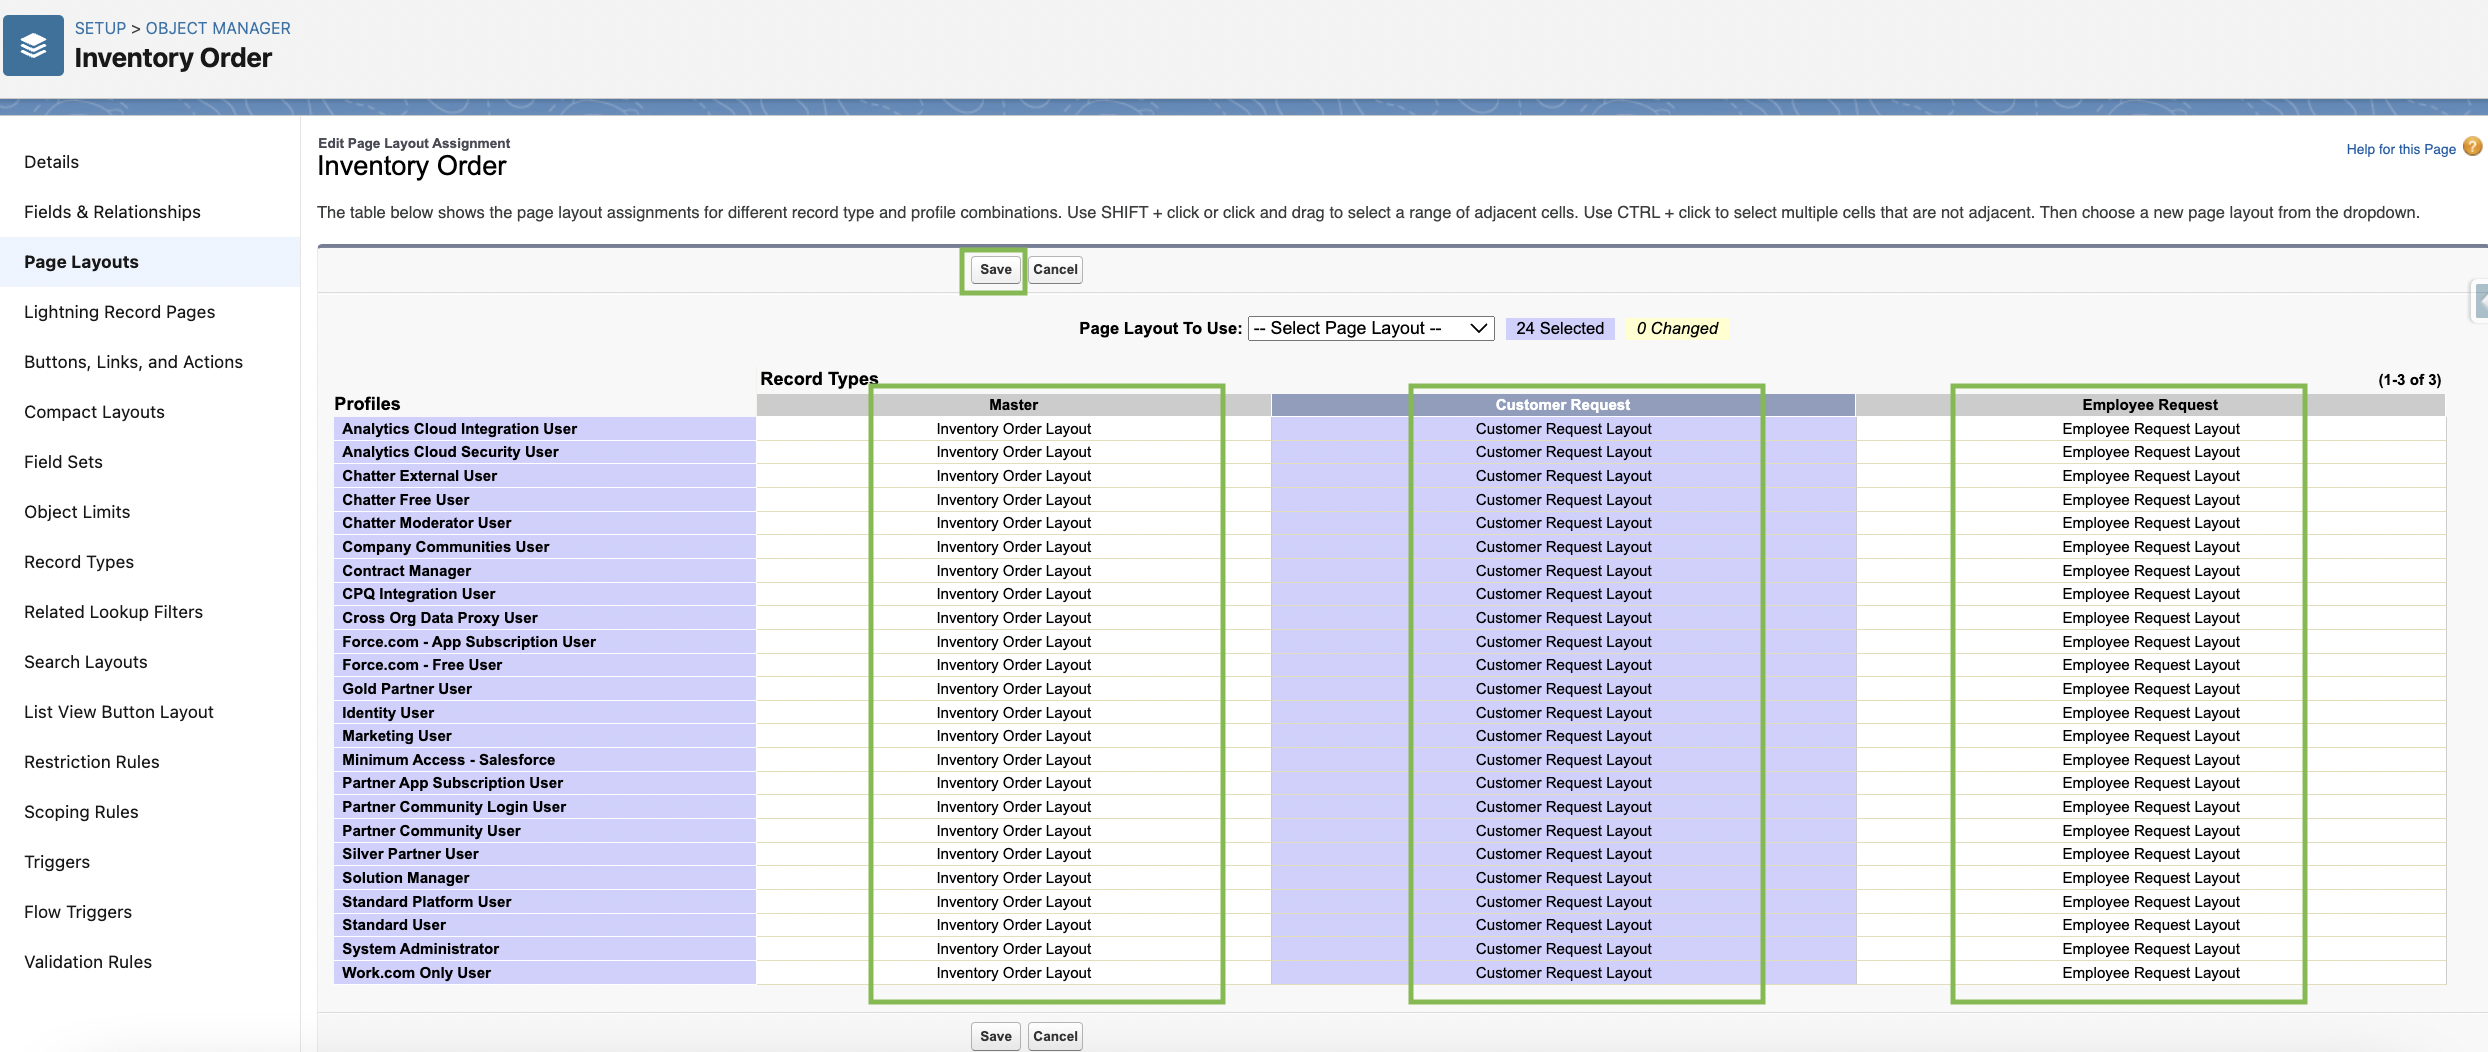
Click “Save”
Step 2 - Setting up Visibility/Sharing
Follow this step only if you want to set up visibility/sharing for
Product Limit Summary
Product Limit Rules
The responsibility for visibility/sharing is taken care of by the subscribers, but this step can suggest some ideas.
Go to setup → Sharing Setting → Edit → Set the Internal Access to “Private” and save for -
Product Limit Summary
Product Limit Rules

Now sharing rules can be set up for the Product Limit Rule object
Sharing Code (PCH__Sharing__Code__c) field can be leveraged for
This field is part of the Inventory package, but we are not using it and left it only for subscribers to use for setting up sharing.
Product Limit Summary records are created automatically through the package if not present already, hence to set up sharing for Product Limit Summary -
Go to the object detail page
Open Sharing Code (PCH__Sharing__Code__c) field
A default value as a formula field can be used. Example -
$User.CountryPCH__Account__r.BillingCountry
Step 3 - Add Record Types to Profiles
Pre-Step -
From Setup, in the Quick Find box, enter User, and then select User Management Settings.
Disable Enhanced Profile User Interface (skip if already disabled)
Go to the Profiles page by navigating to the “Setup” > “Users” > “Profiles” page or by searching for “Profiles” in the Quick Find search box from the Setup page.
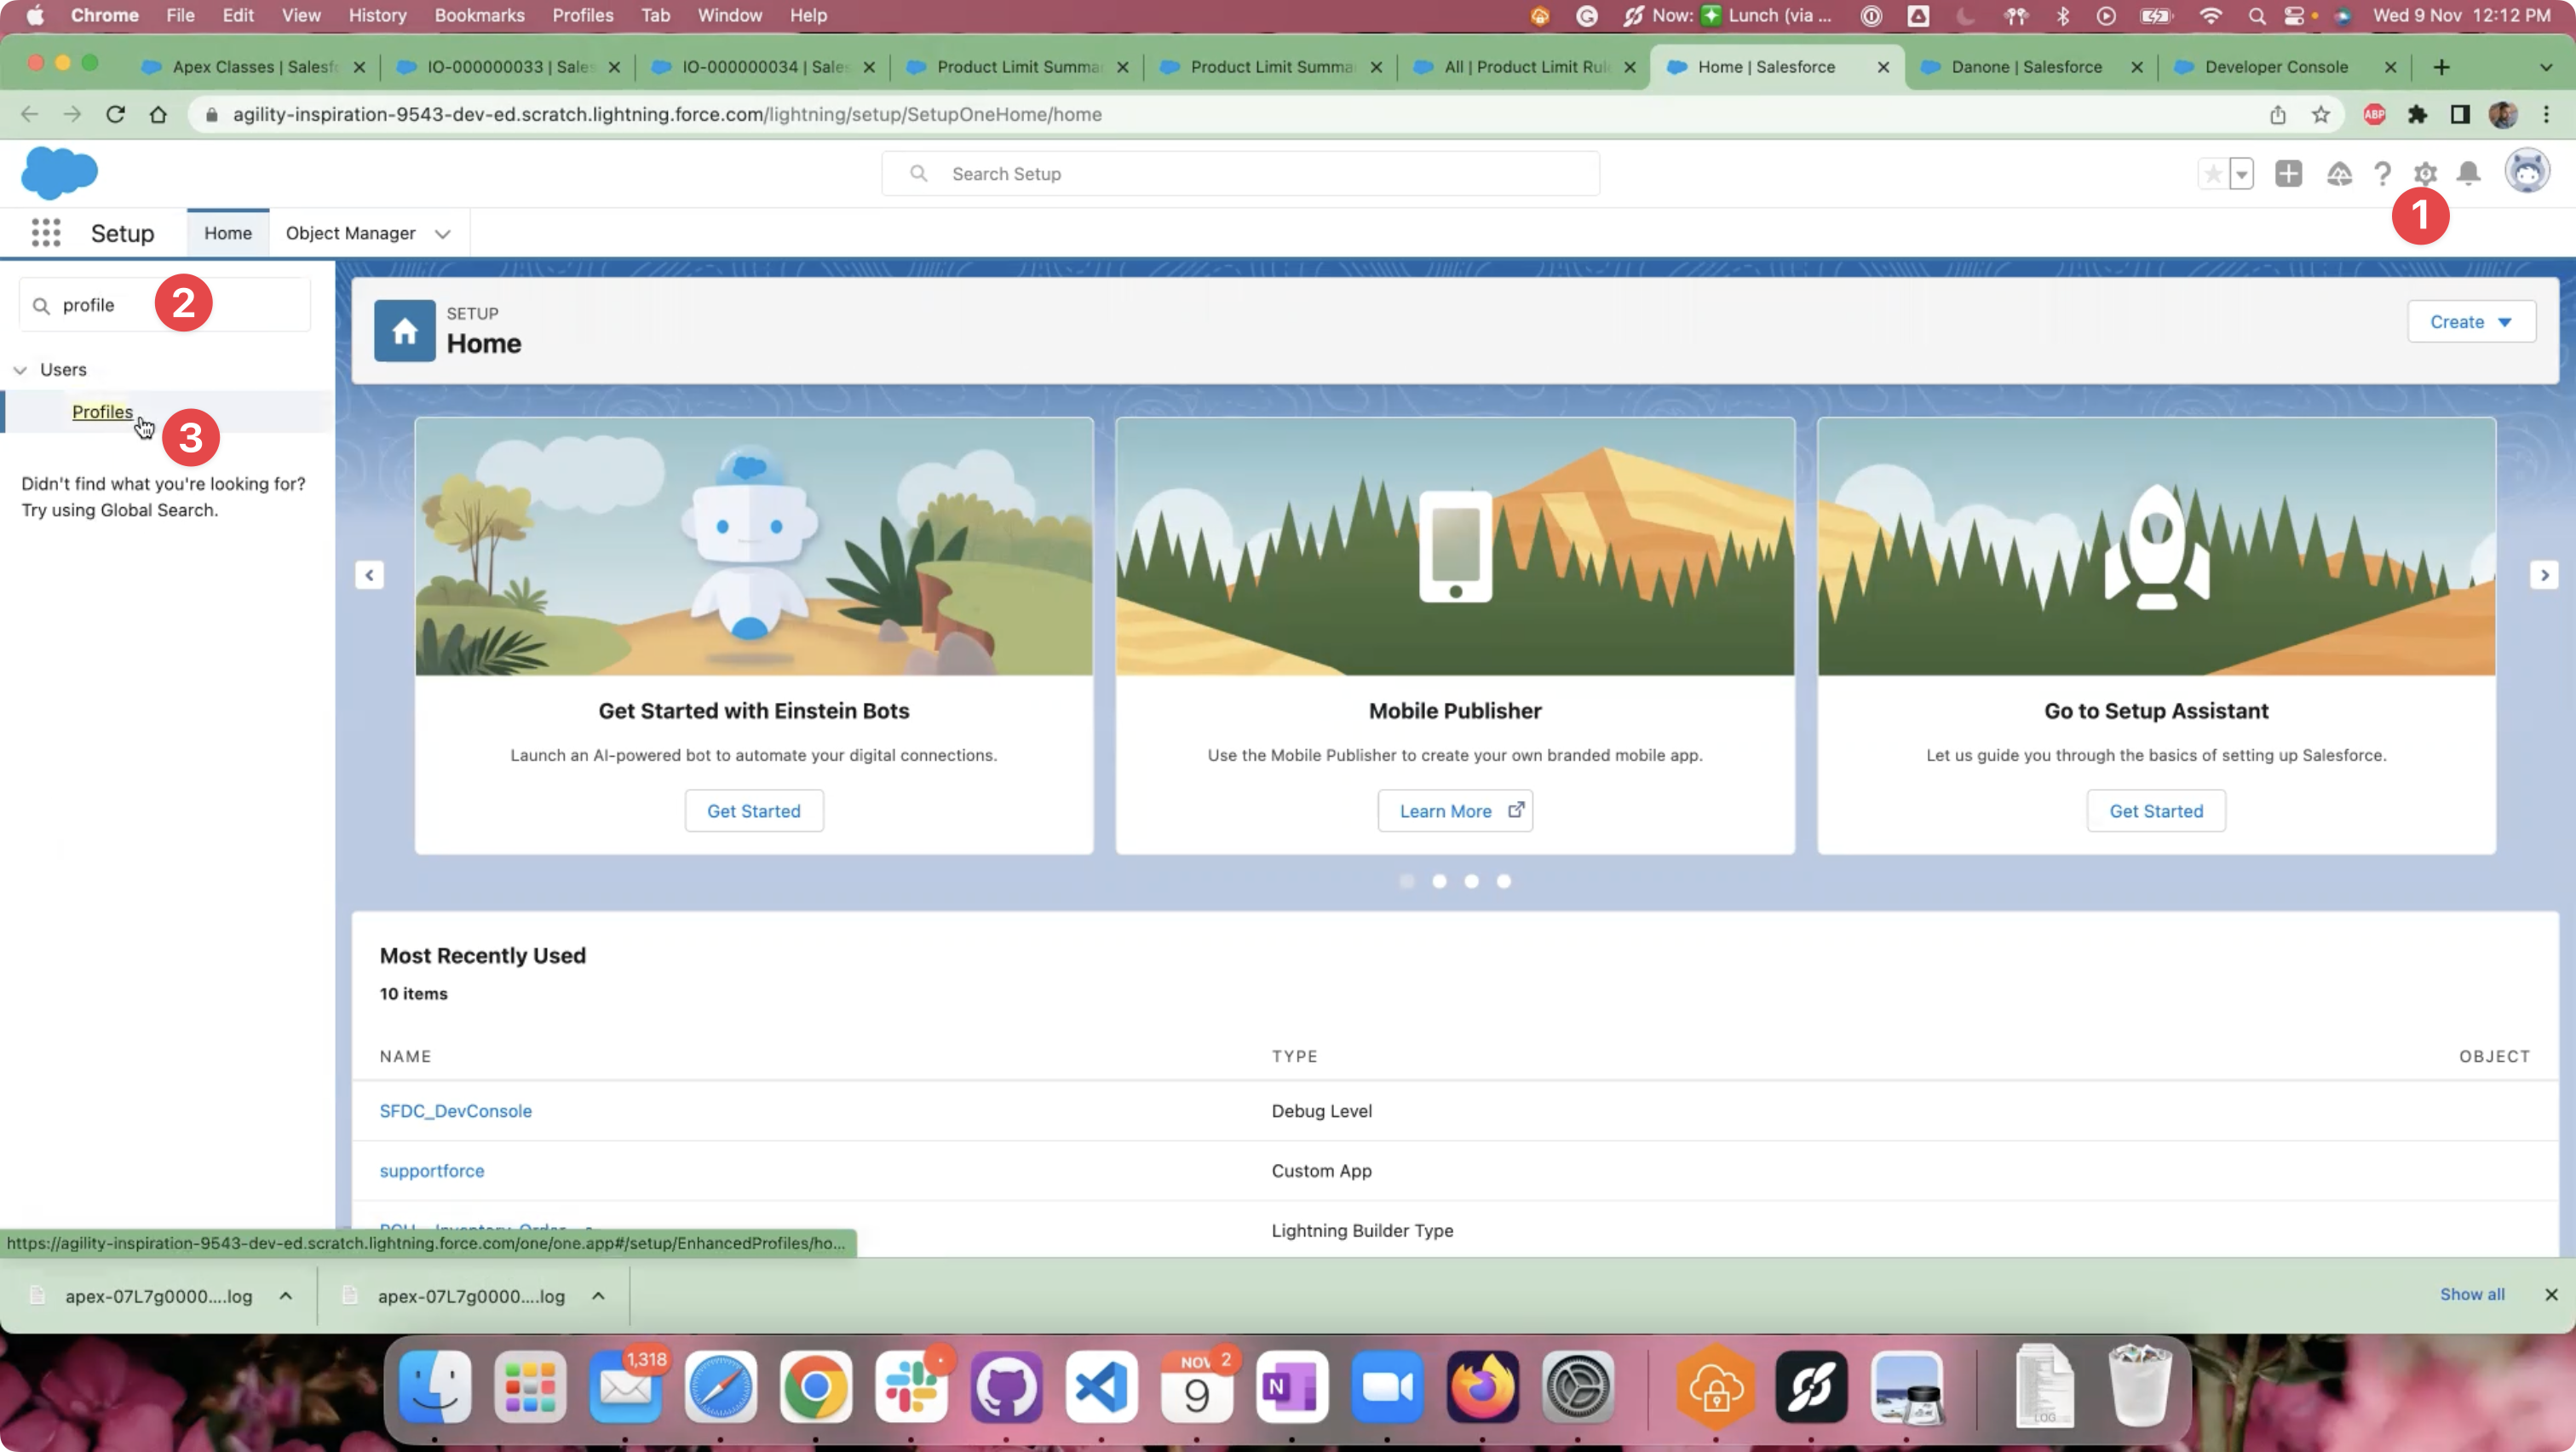
Navigate to the Profiles page.
Select the required Profile from the Profiles page. Here, we select the “Standard User” profile as an example. Please make sure to choose the Profile as per your requirement,
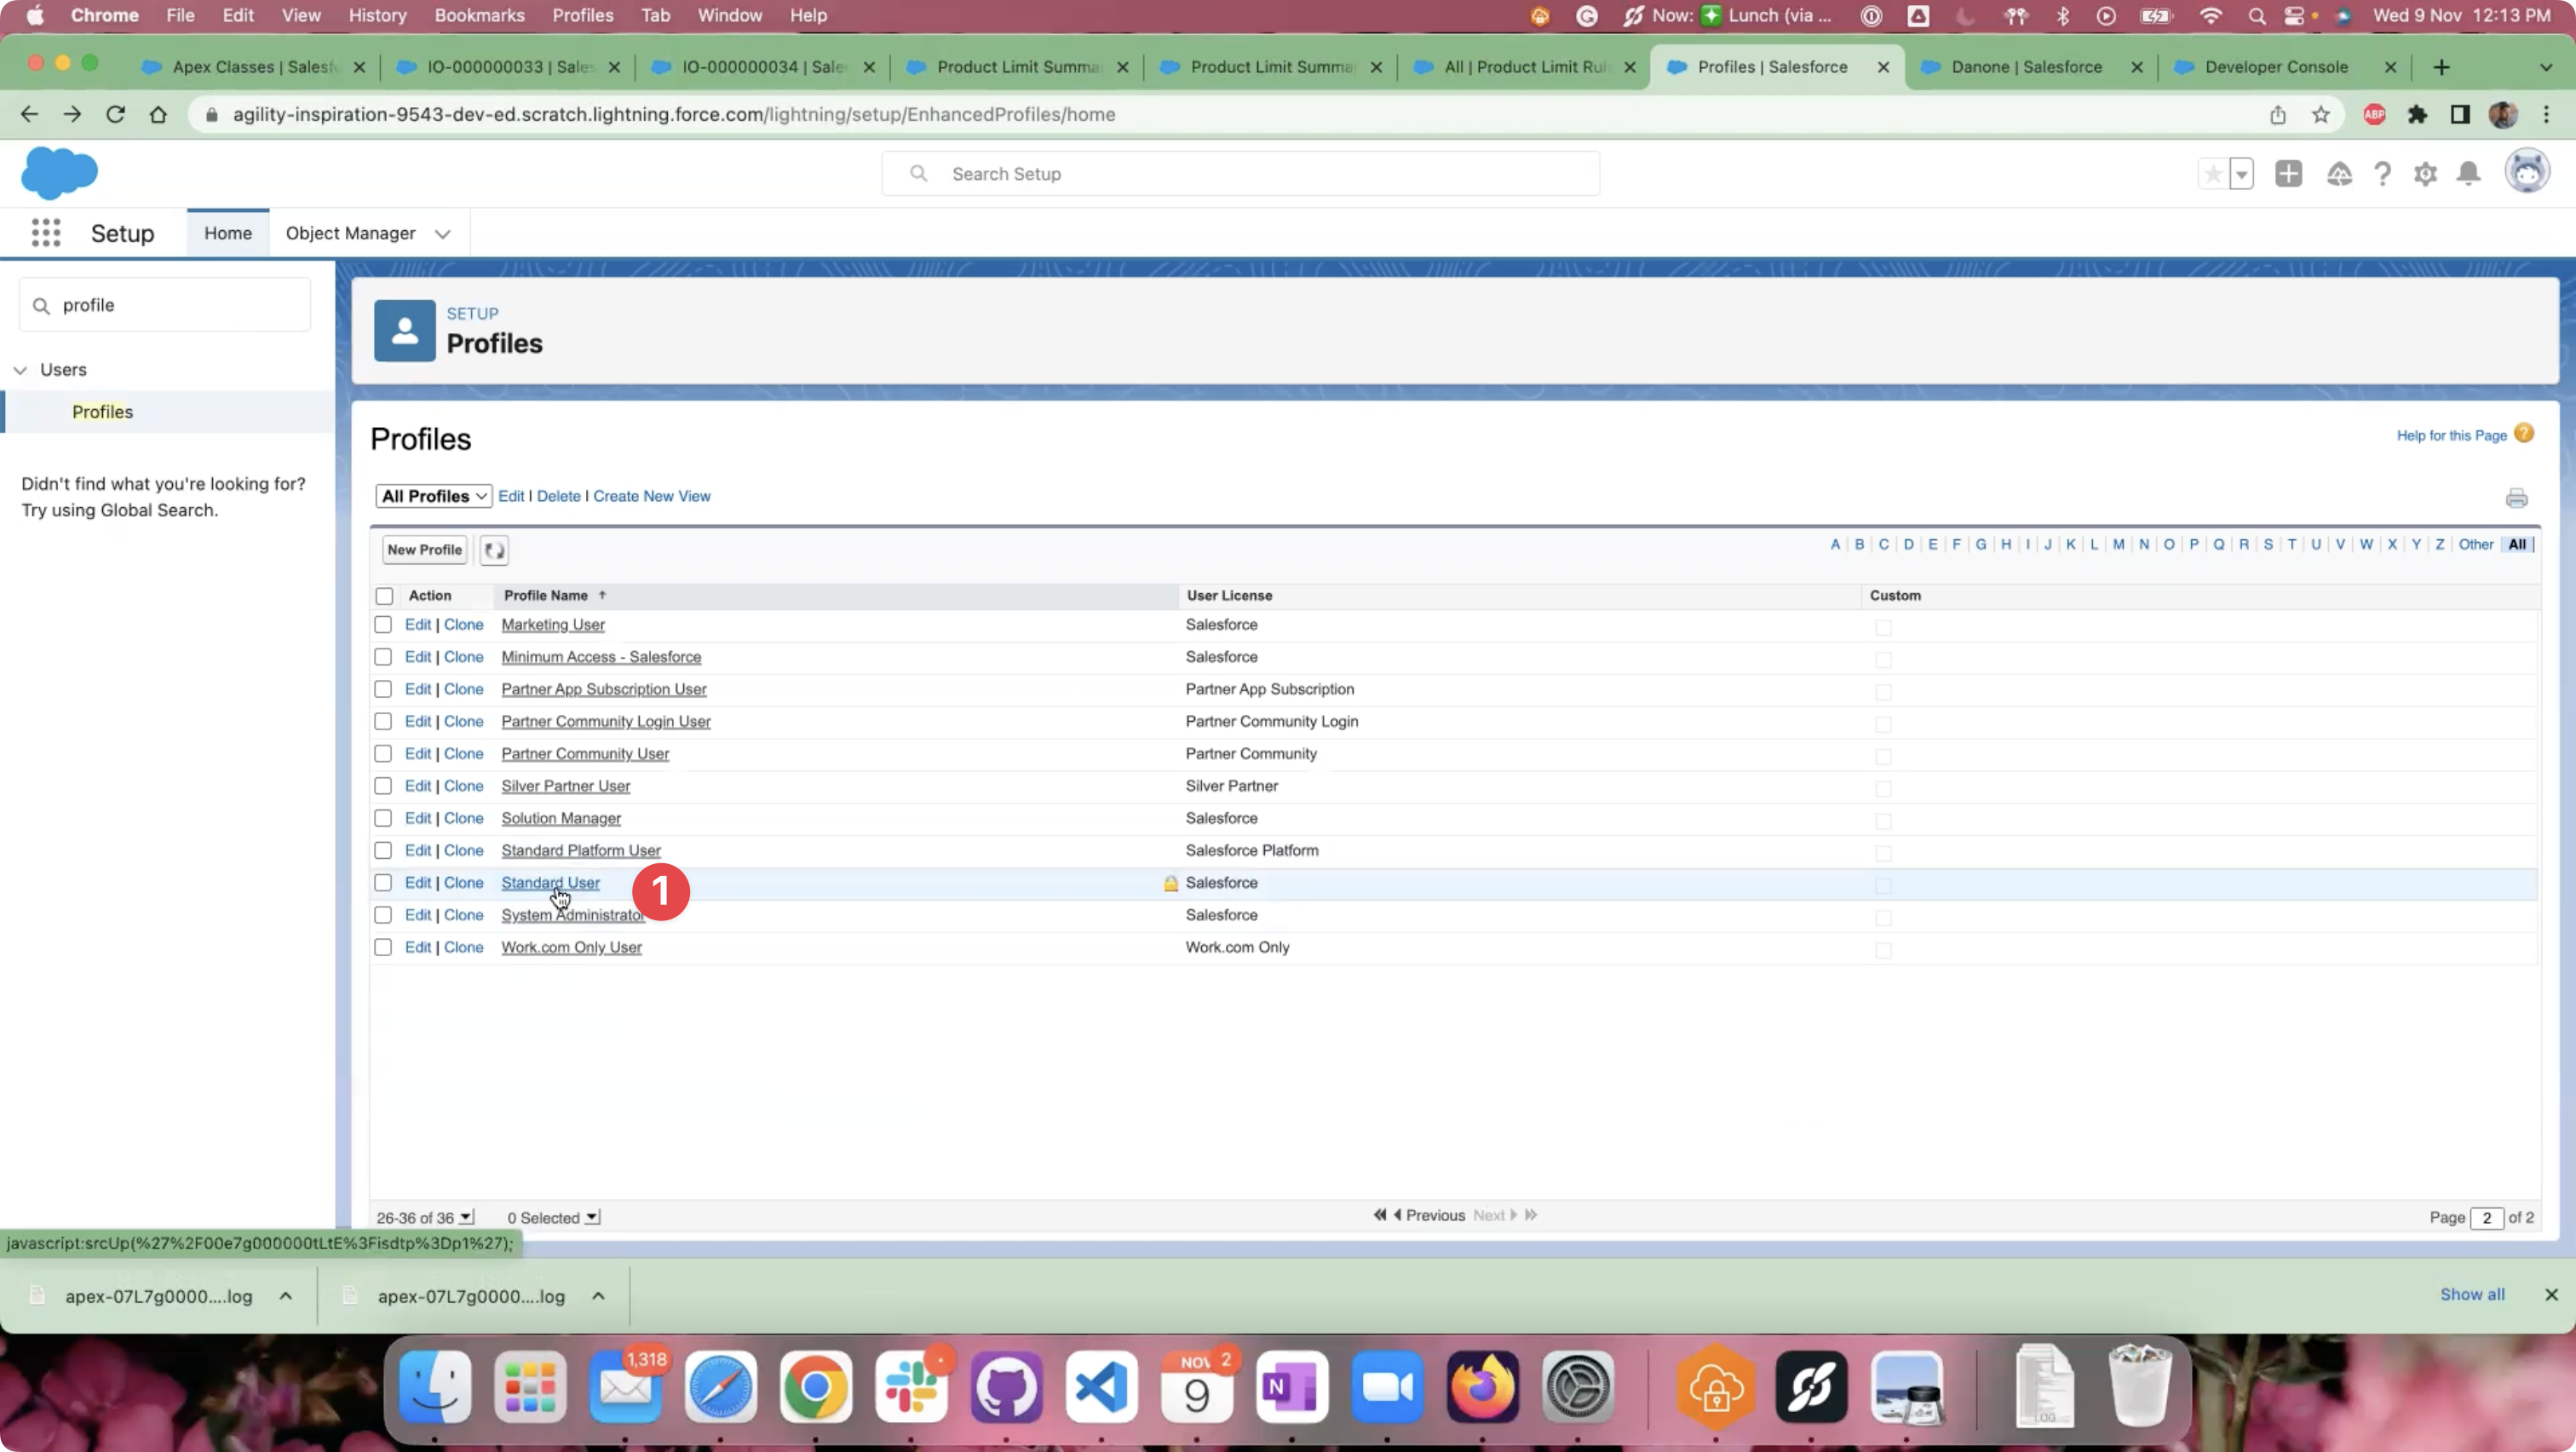
Select required Profile
On the Profile page, scroll down to the “Record Type Settings” > “Custom Record Type Settings” section. Assign the following Record Types to these objects by clicking on the “Edit” link for the respective object.
Inventories: Employee (Default), Warehouse.
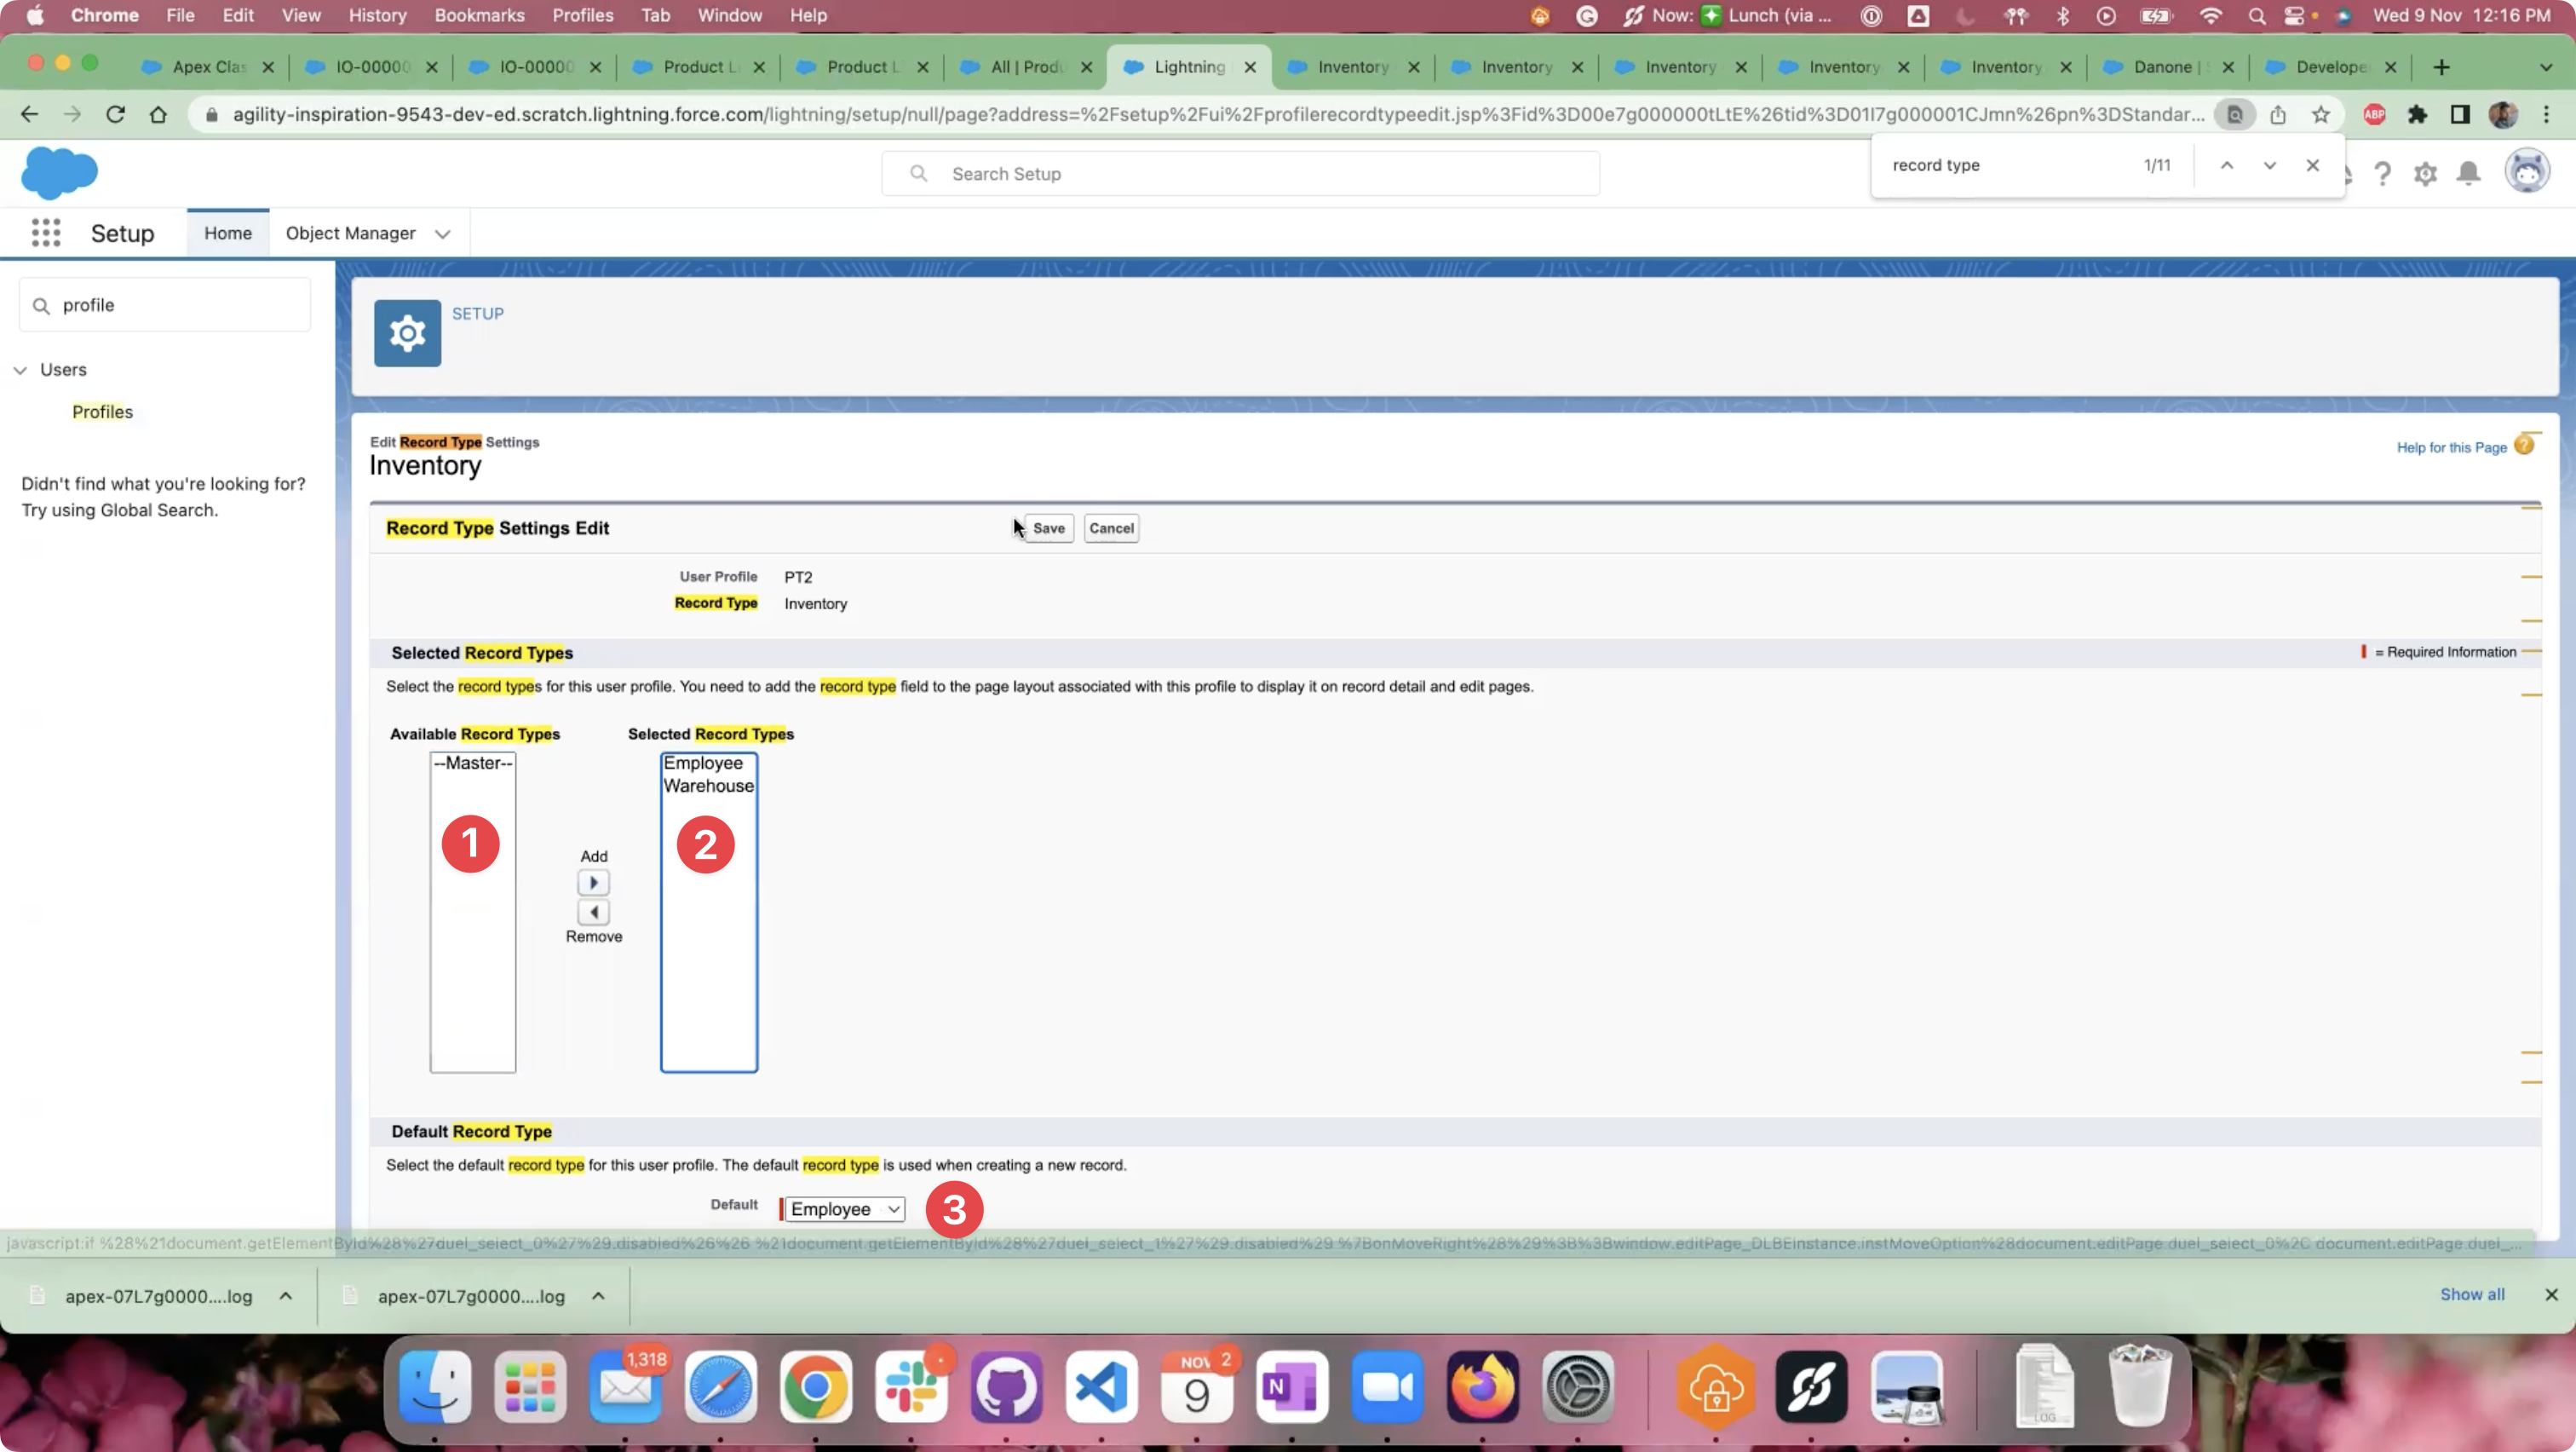
Assign Record Types to Inventories
Inventory Orders: Customer Request (Default), Employee Request.
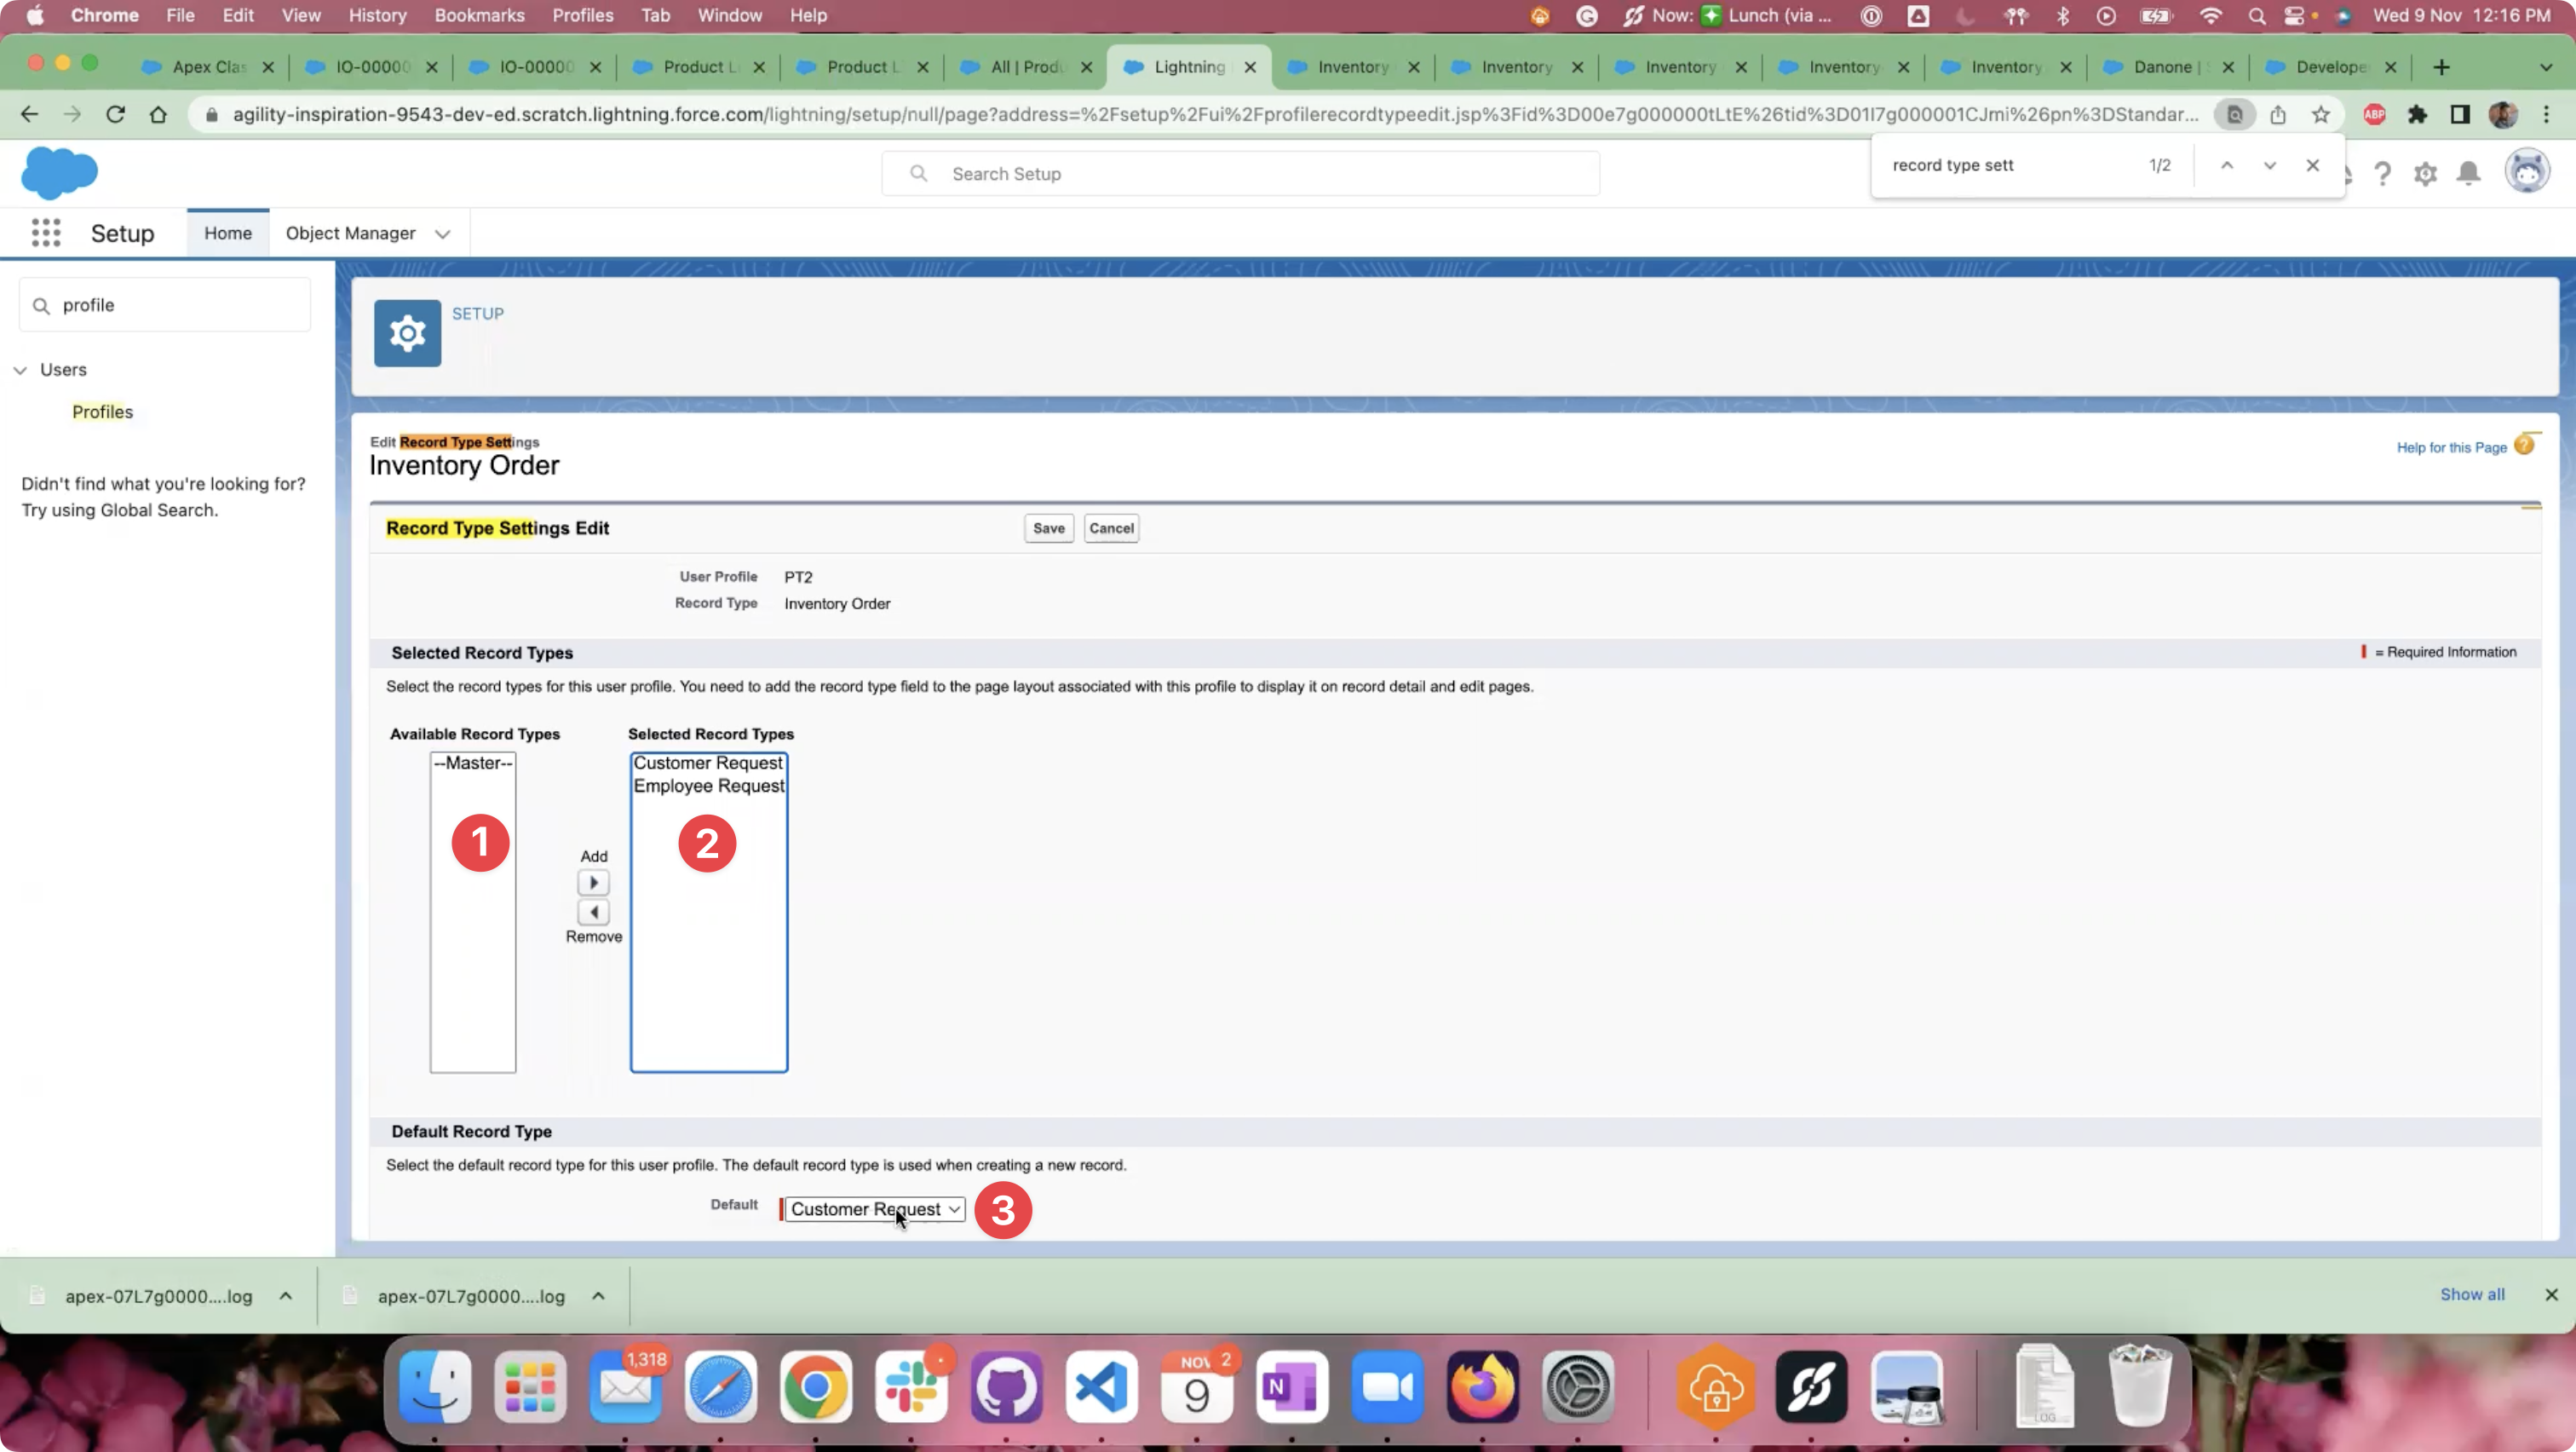
Assign Record Types to Inventory Orders
Inventory Transactions: Adjustment, Drop (Default), Load, Return, Transfer.
Note: Please select “Drop” Record Type as default.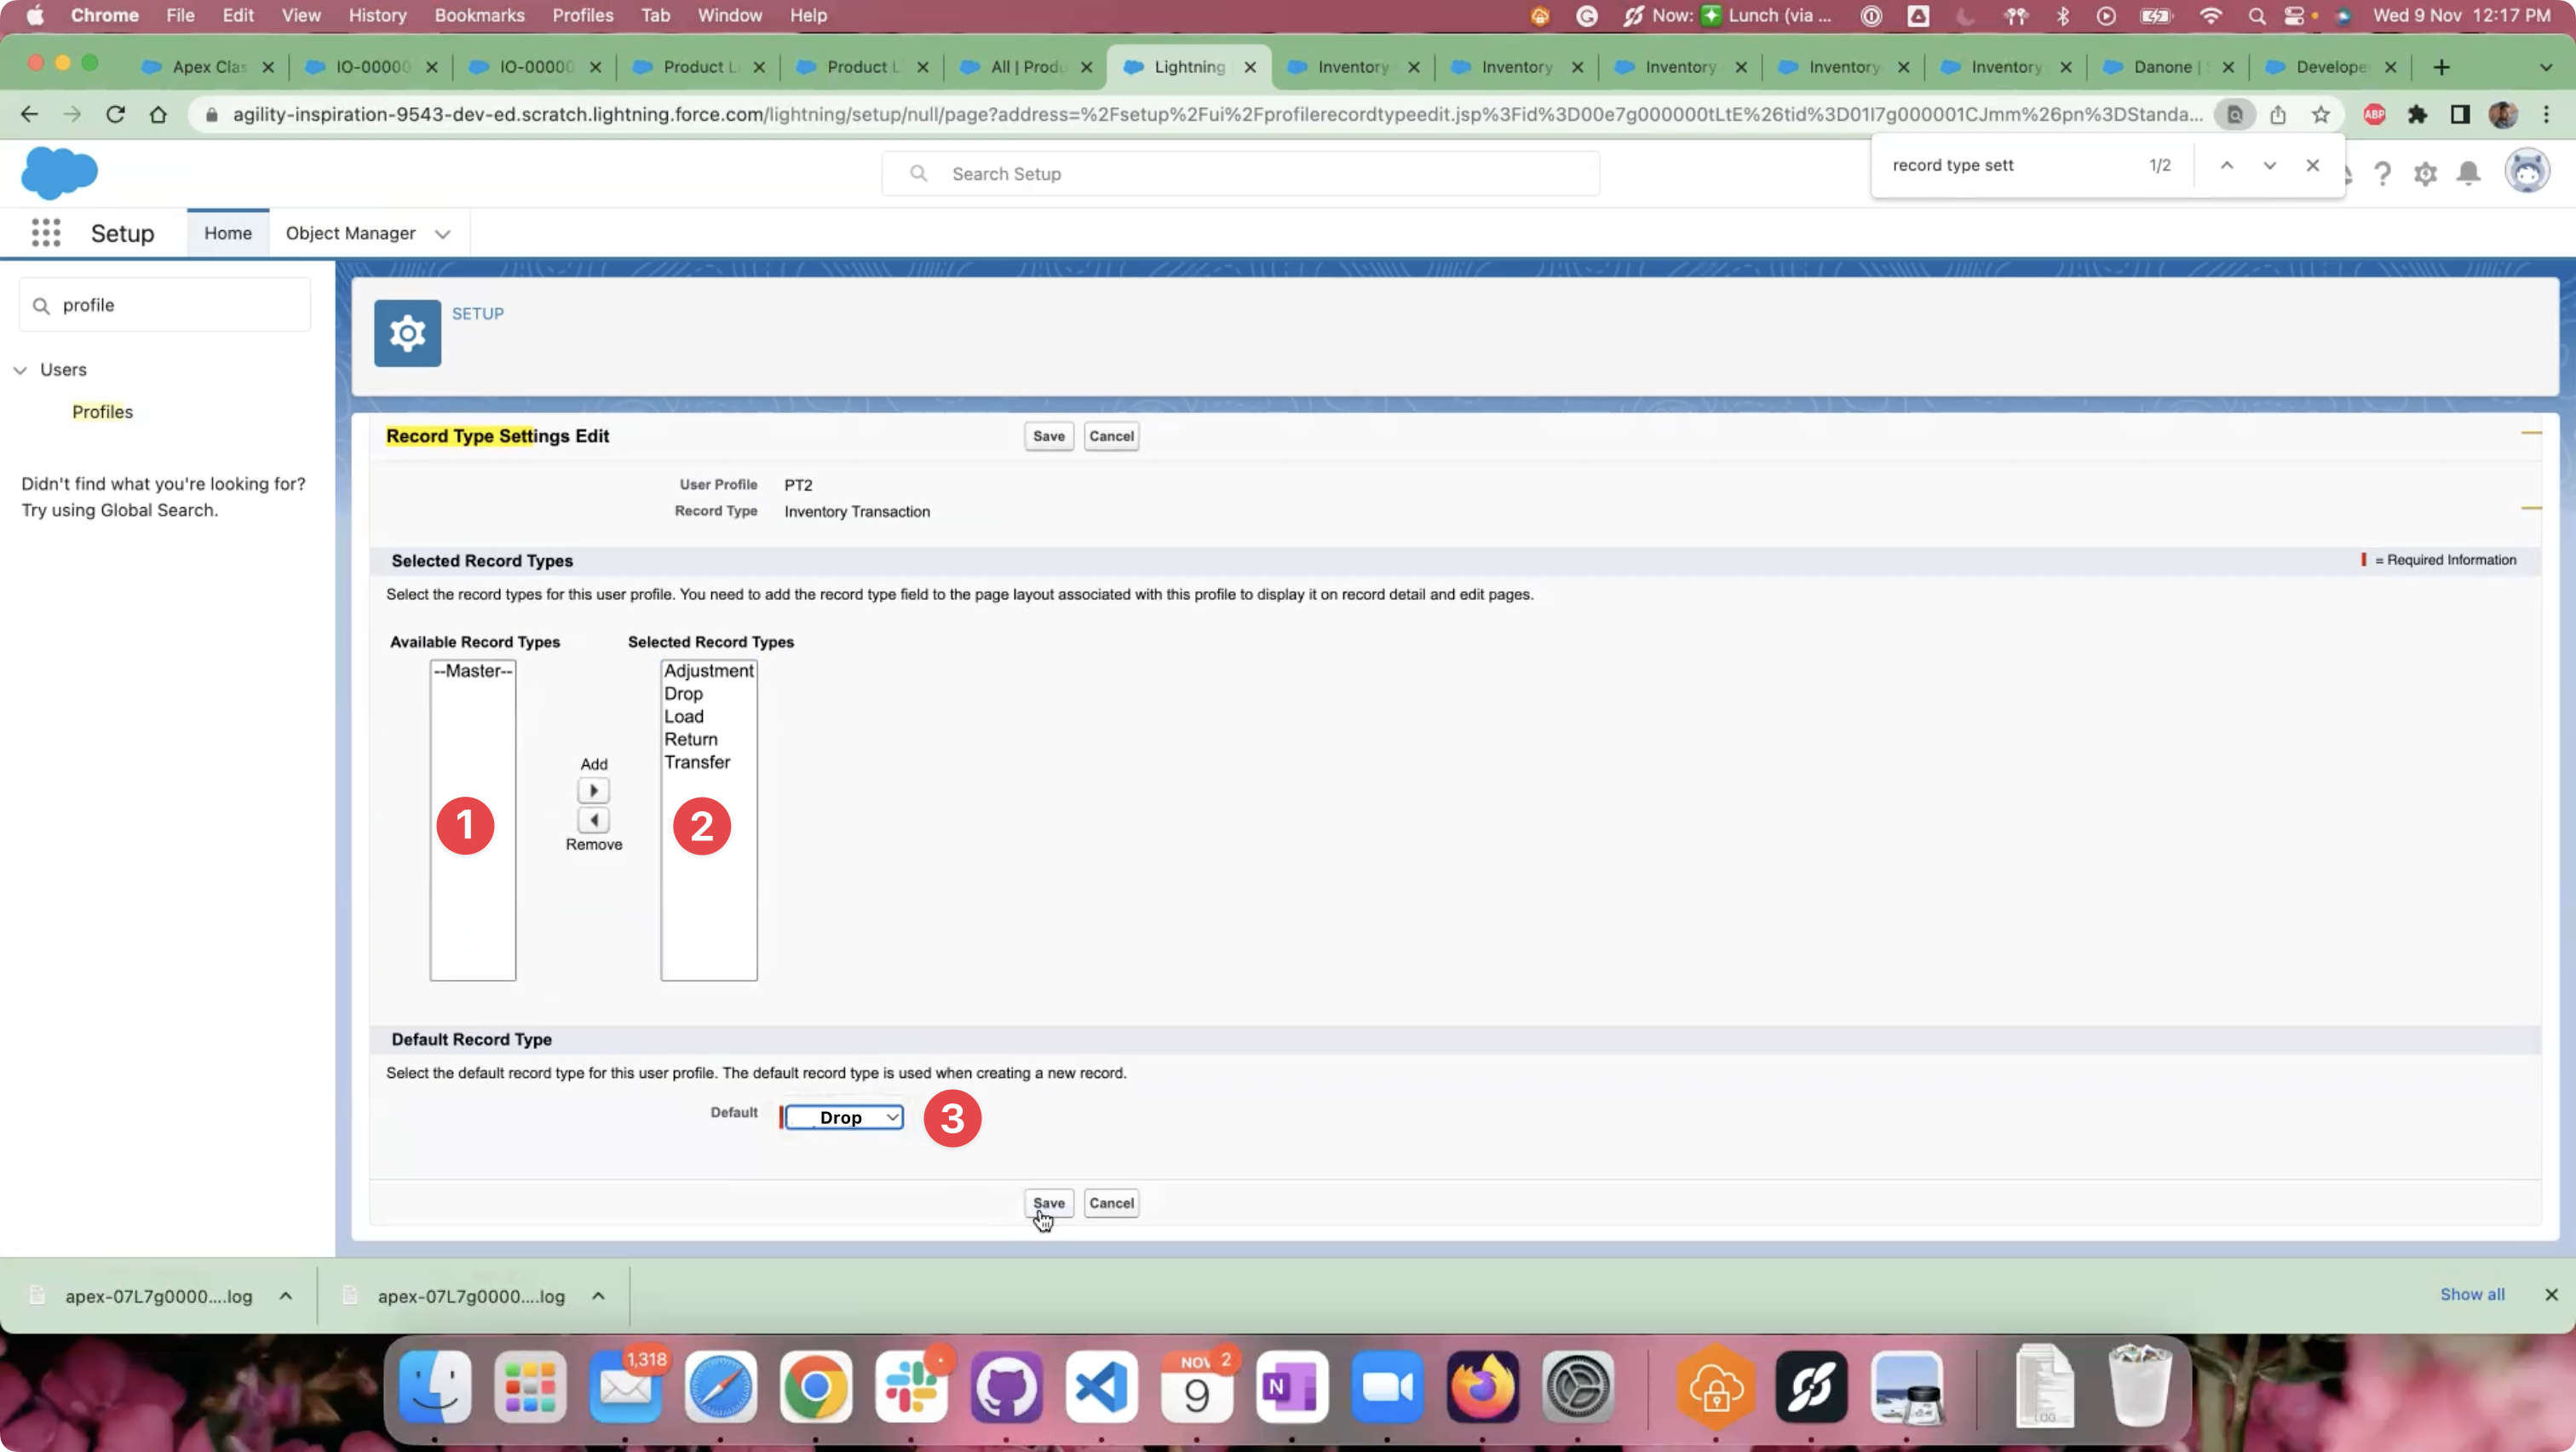
Assign Record Types to Inventory Transactions
Finally, the Record Type allocations should look something like this.
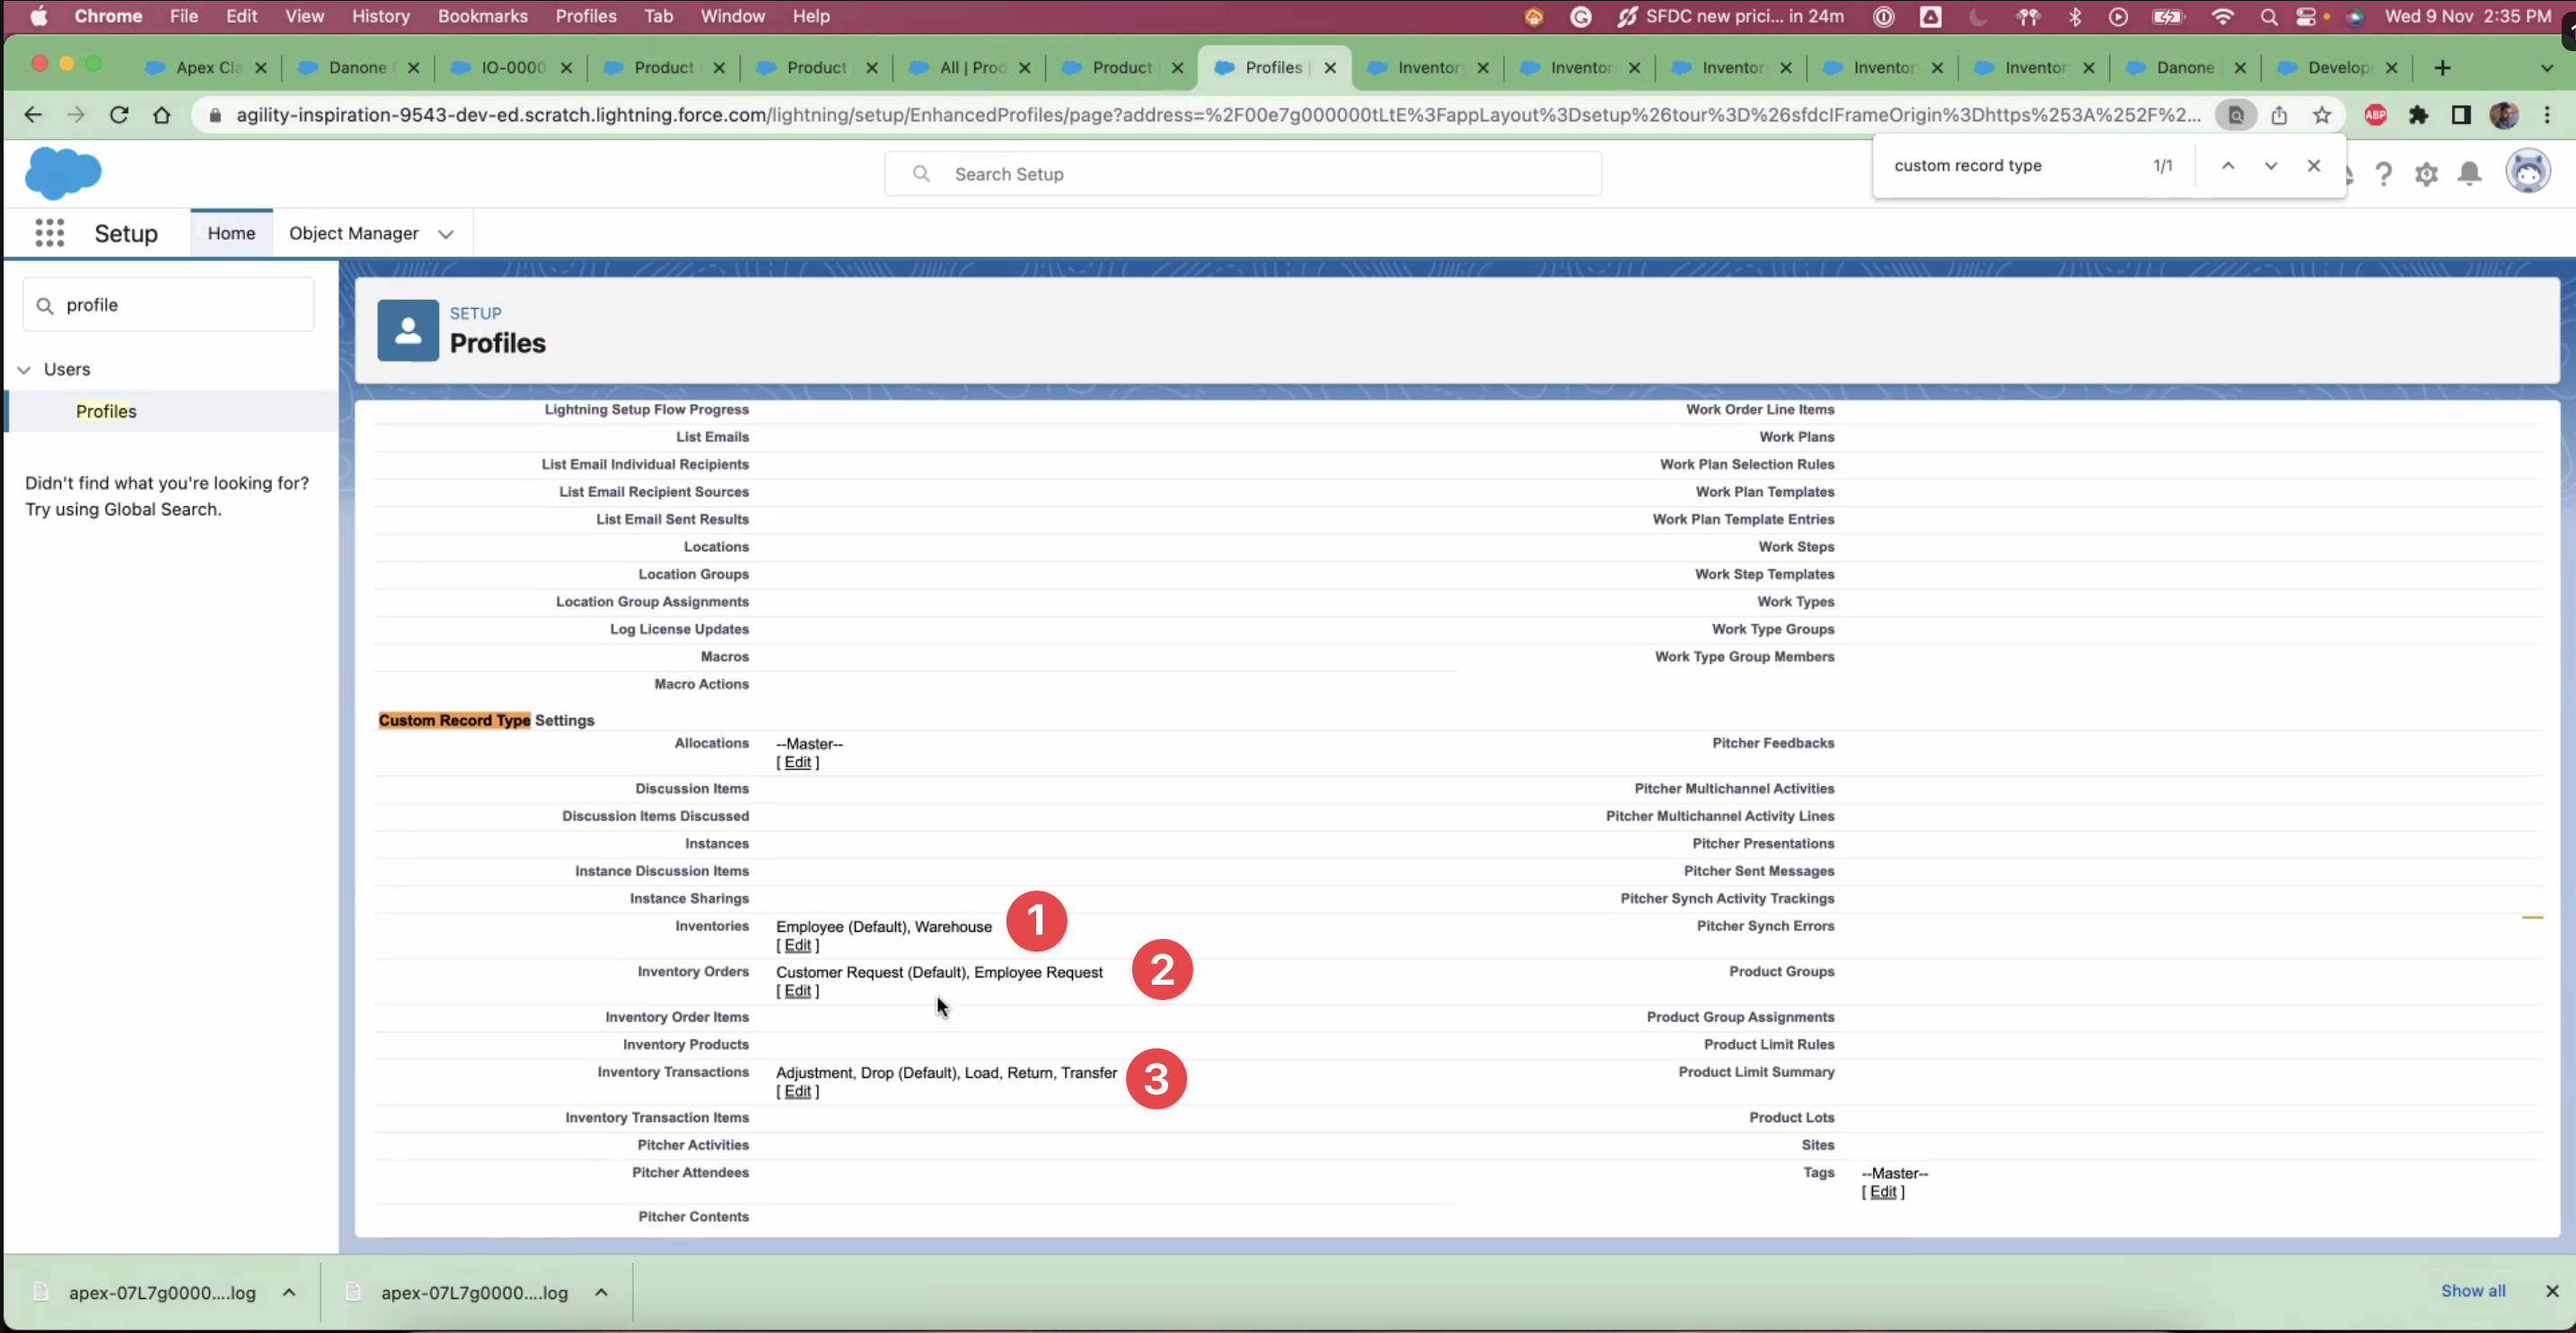
Custom Record Type assignment
Step 4 - Assign Permission Sets to Users
Here, we assign the following Permission Sets to our users:
PITCHER-Inventory Admin - Assign this Permission Set to the users performing administration activities for Sample Management.
Important Note: Every user with PITCHER-Inventory Admin should also have PITCHER-Apps Admin assigned
PITCHER-Inventory Operations - Assign this Permission Set to the users performing operational activities for Sample Management.
Important Note: Every user with PITCHER-Inventory Operations should also have PITCHER-Apps Operations assigned
PITCHER-Inventory Rep - Assign this Permission Set to the sales representatives for Sample Management.
Important Note: Every user with PITCHER-Inventory Rep should also have PITCHER-Apps Rep assigned
Make sure to select your required users to assign permission sets.
Go to the Users page by navigating to “Setup” > “Users” > “Users” or by searching for “Users” in the Quick Find search box from the Setup page.
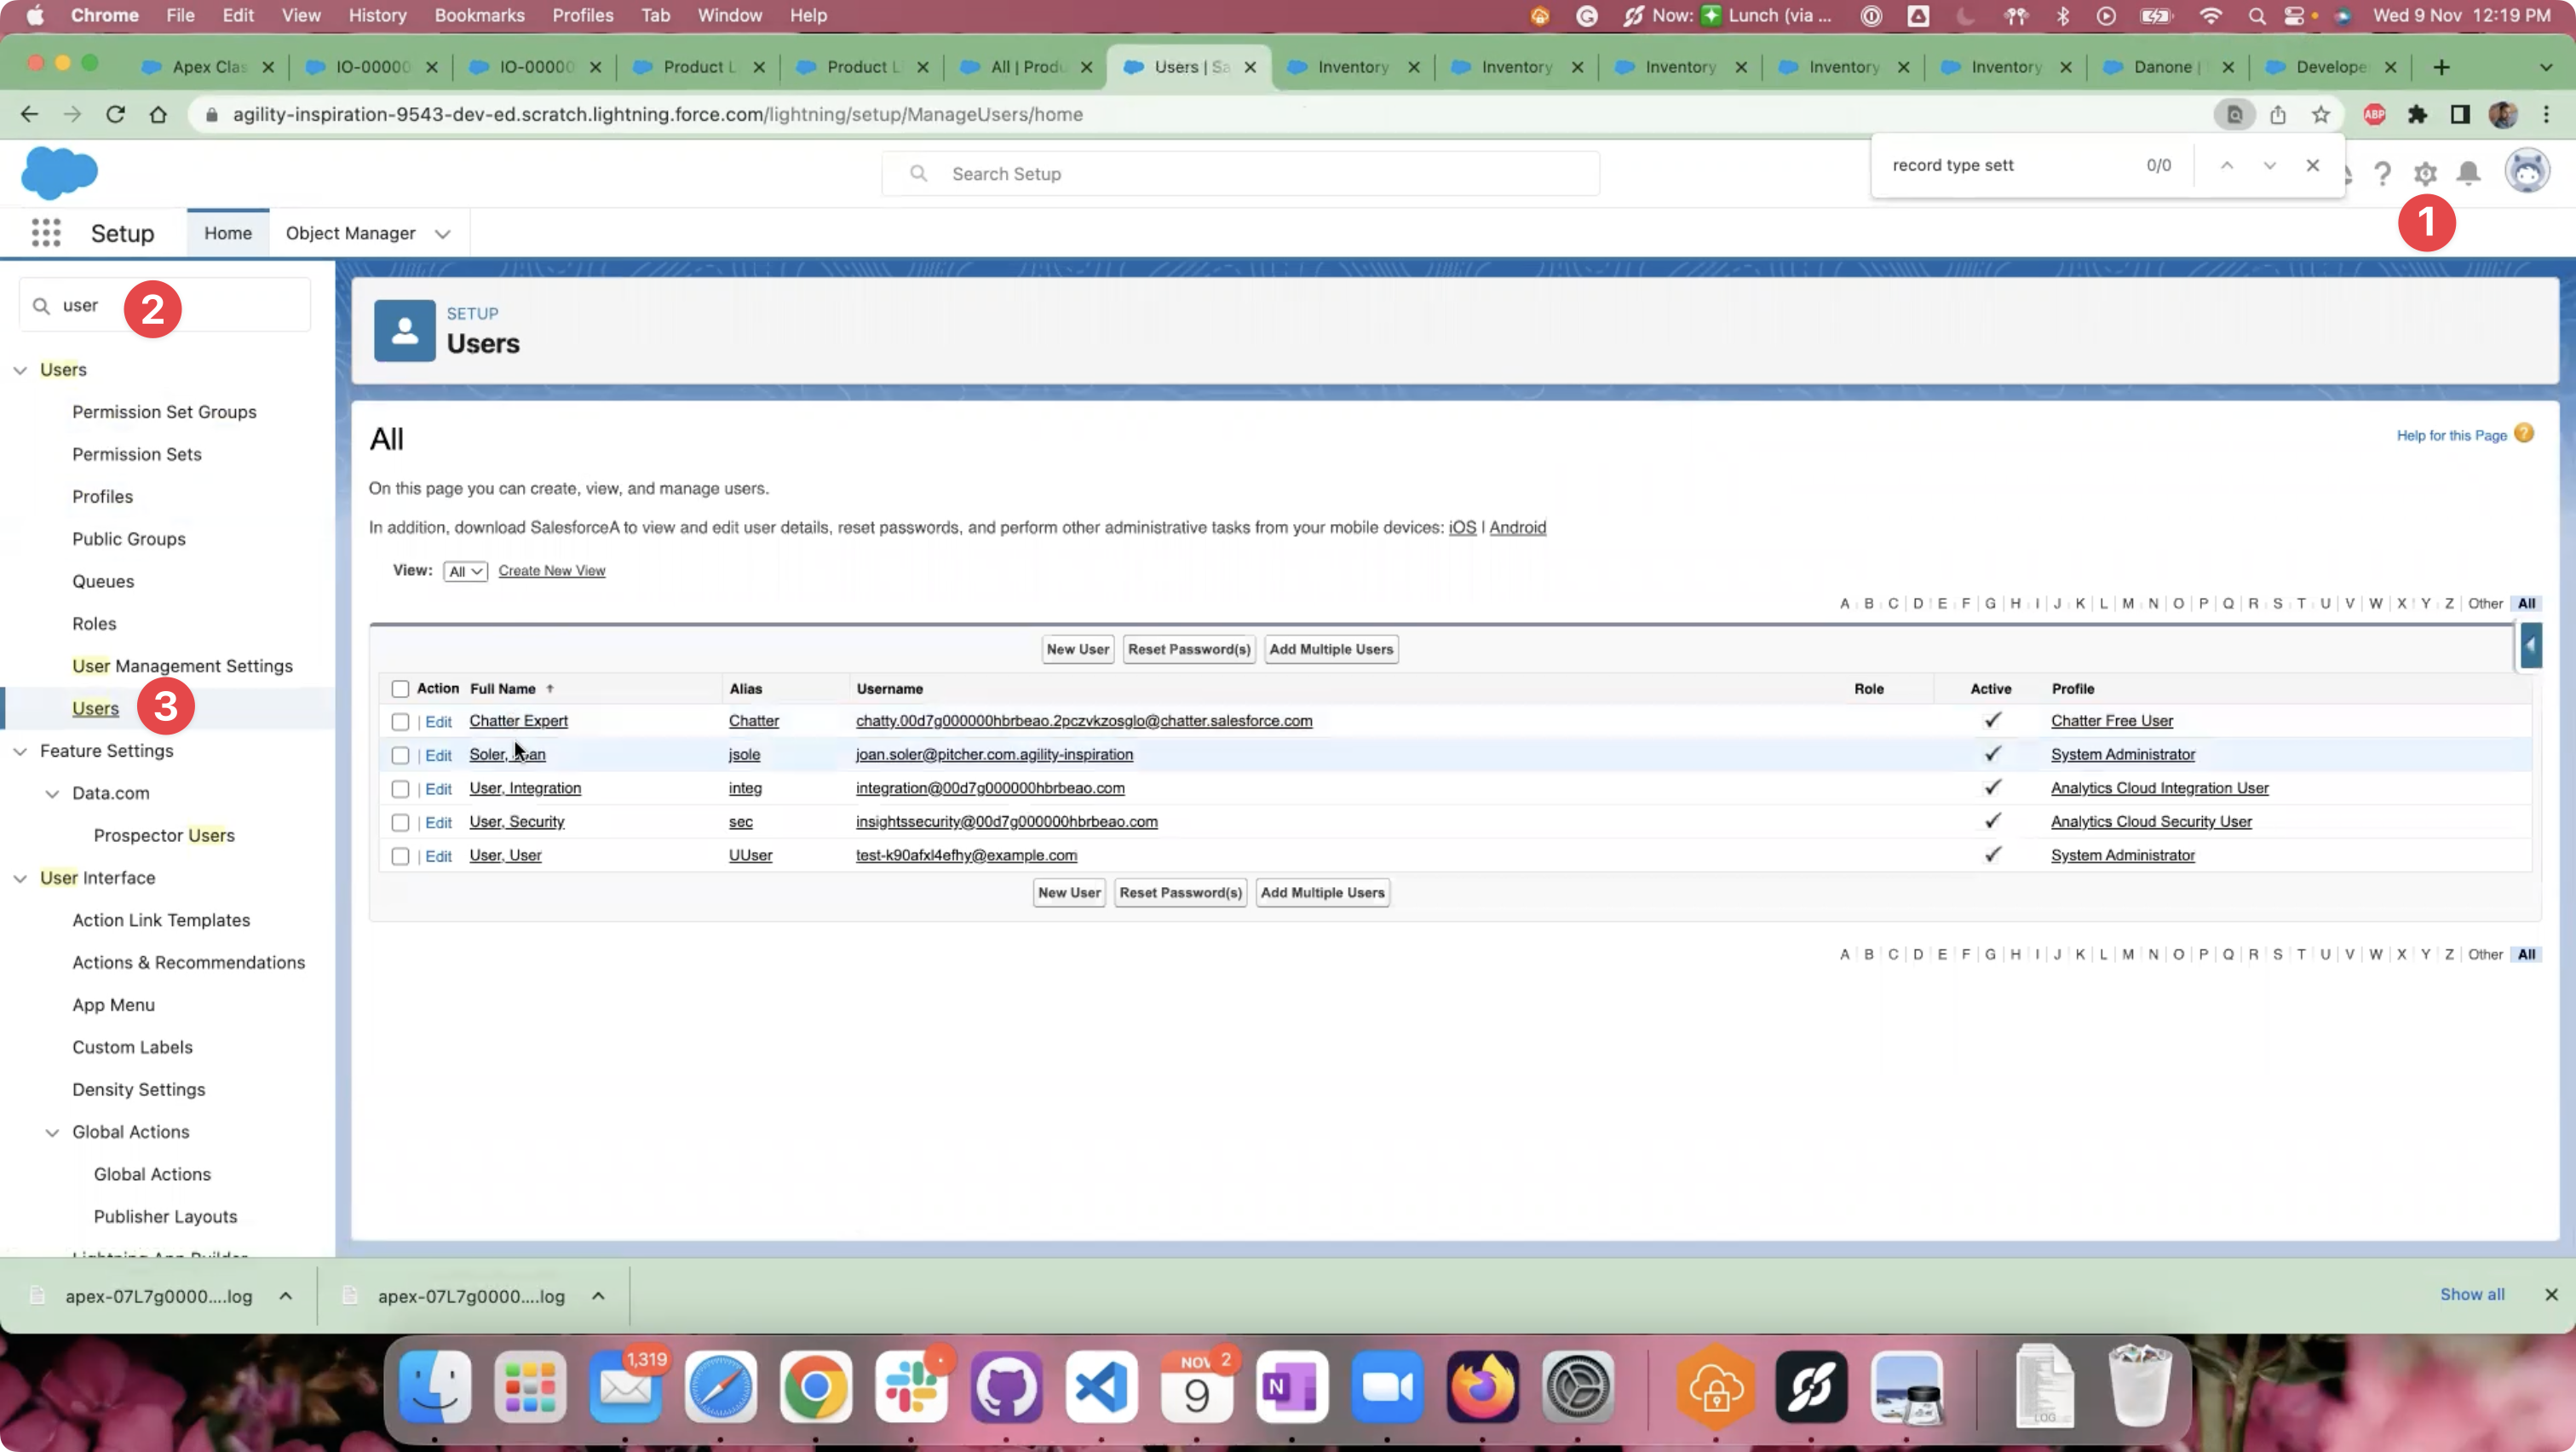
User listing page
Select the required User and click on the “Permission Set Assignments” related link or scroll down to the “Permission Set Assignments” section.
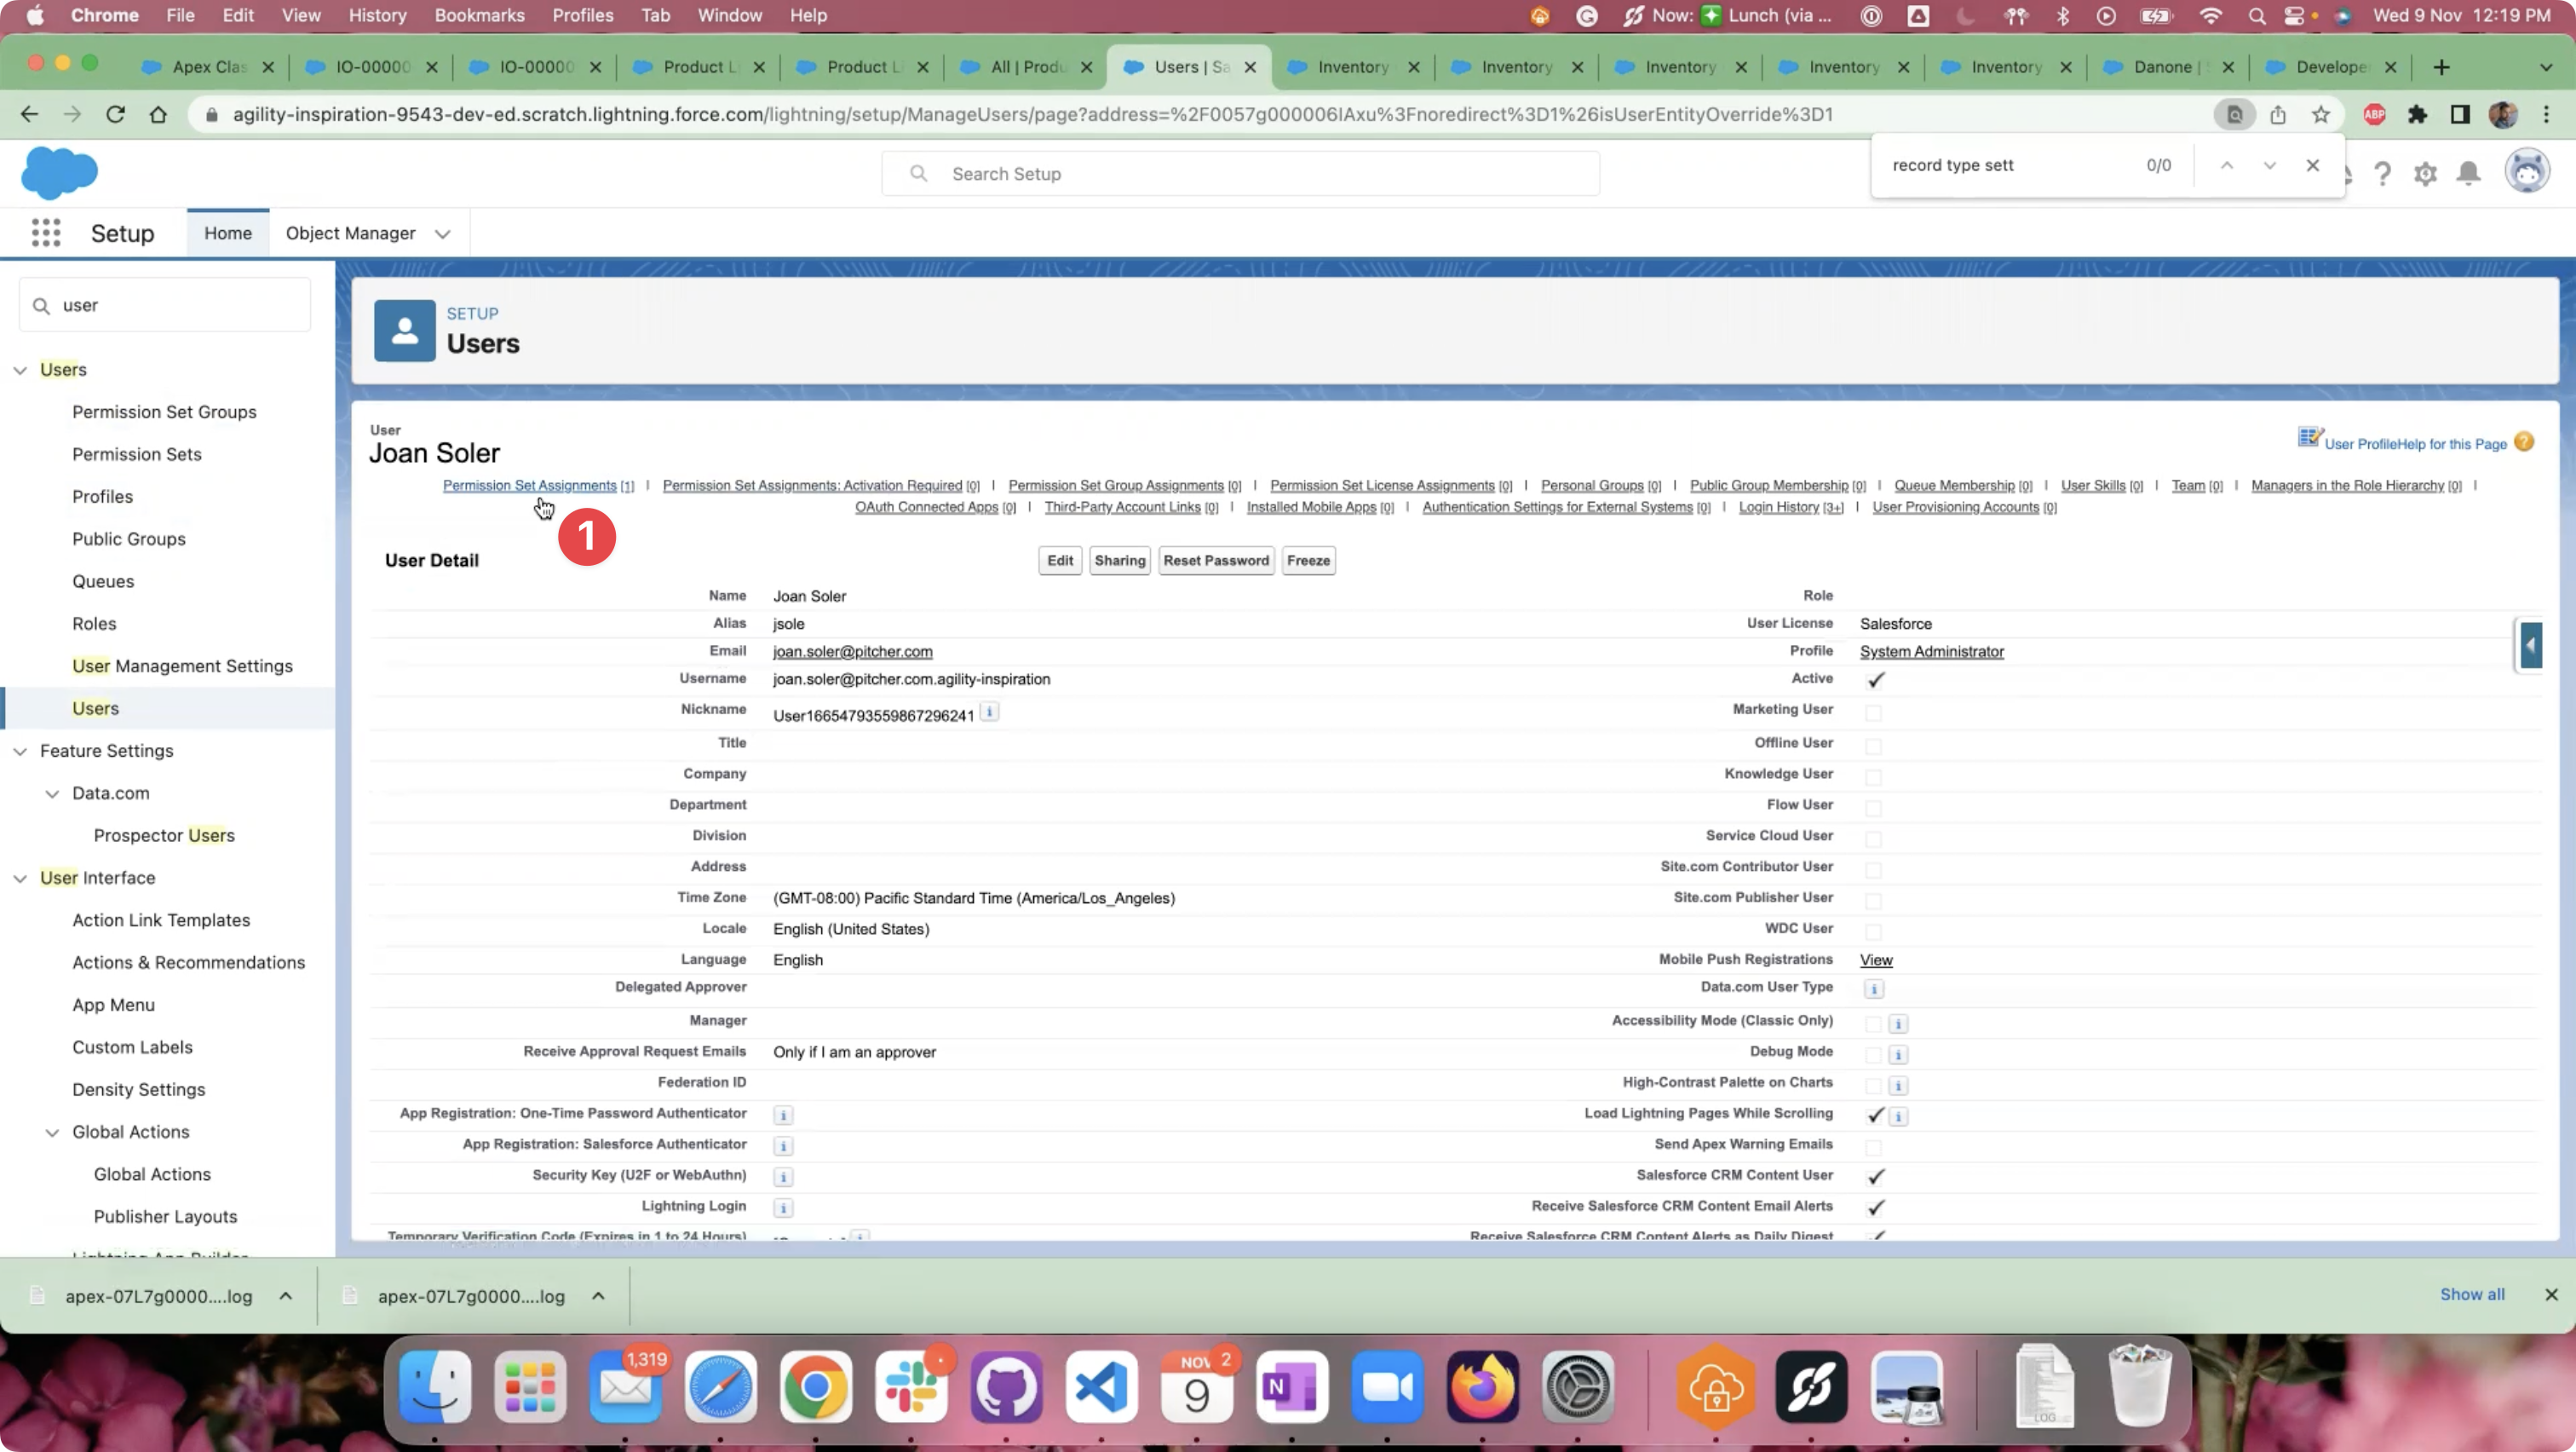
User detail page
Click on the “Edit Assignments” link in the “Permission Set Assignments” section.
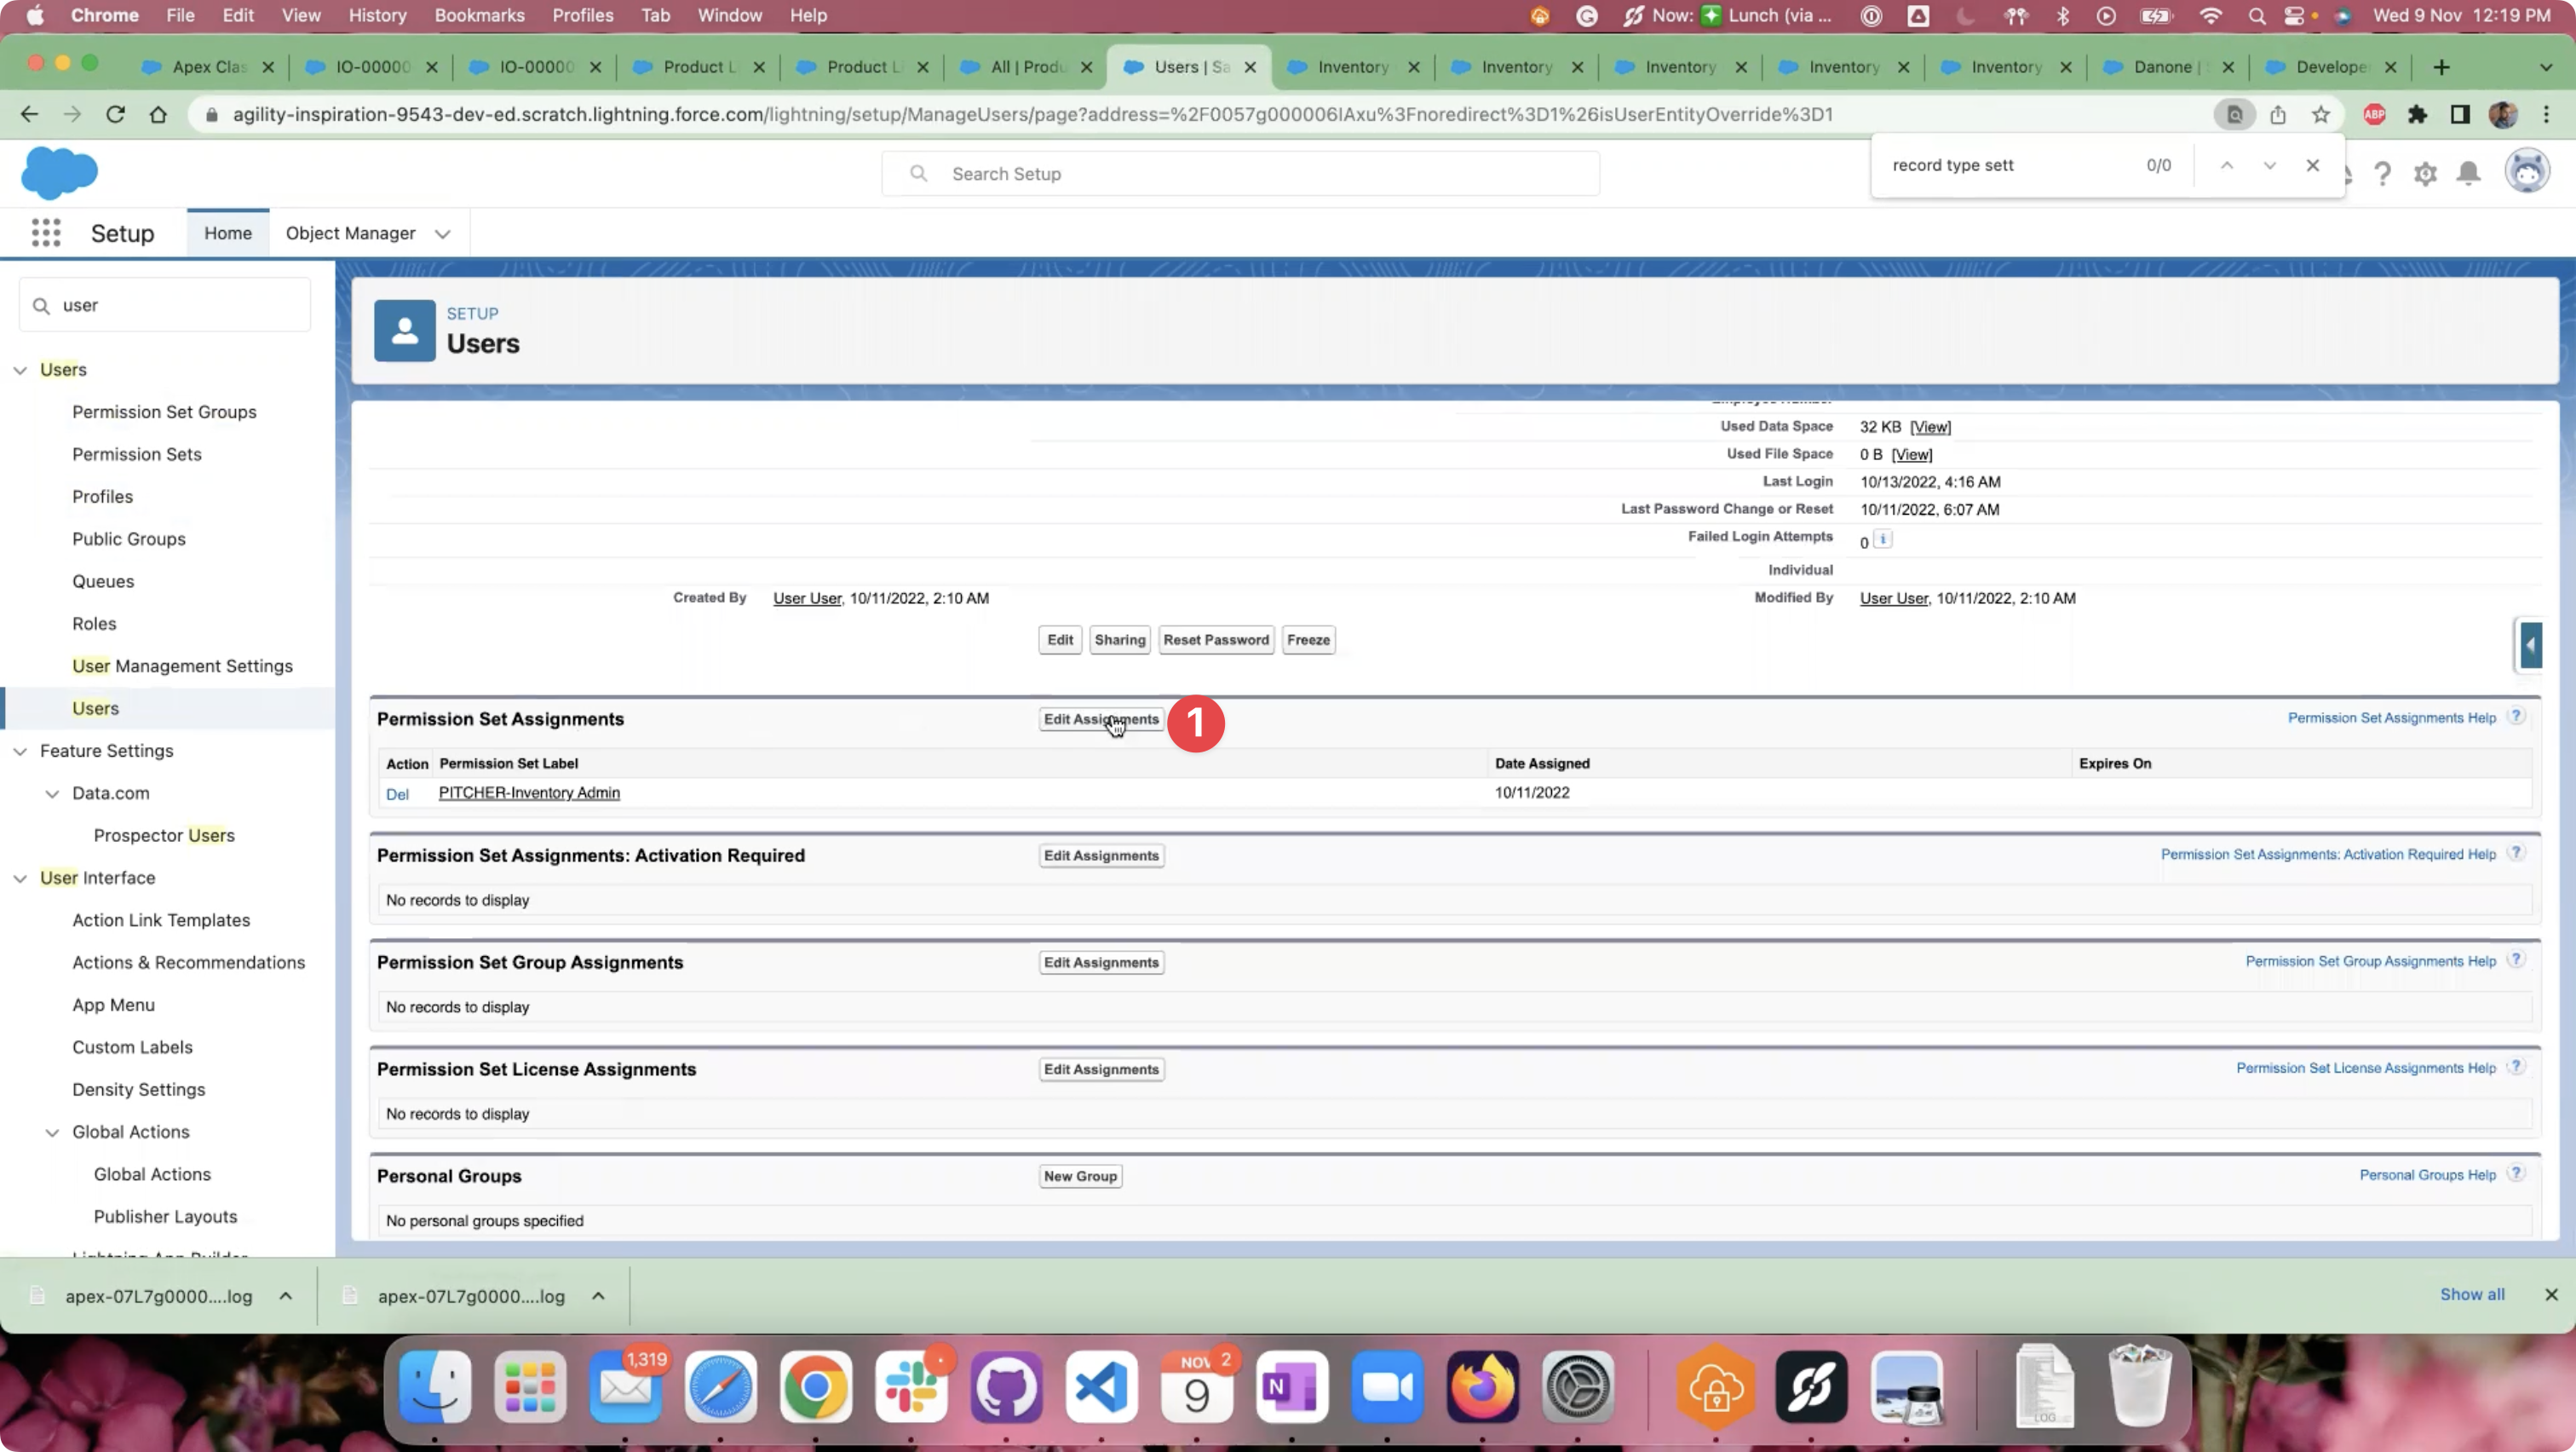
Edit Permission Set Assignments
Assign one of the required Inventory Permission Set to the user and click “Save”.
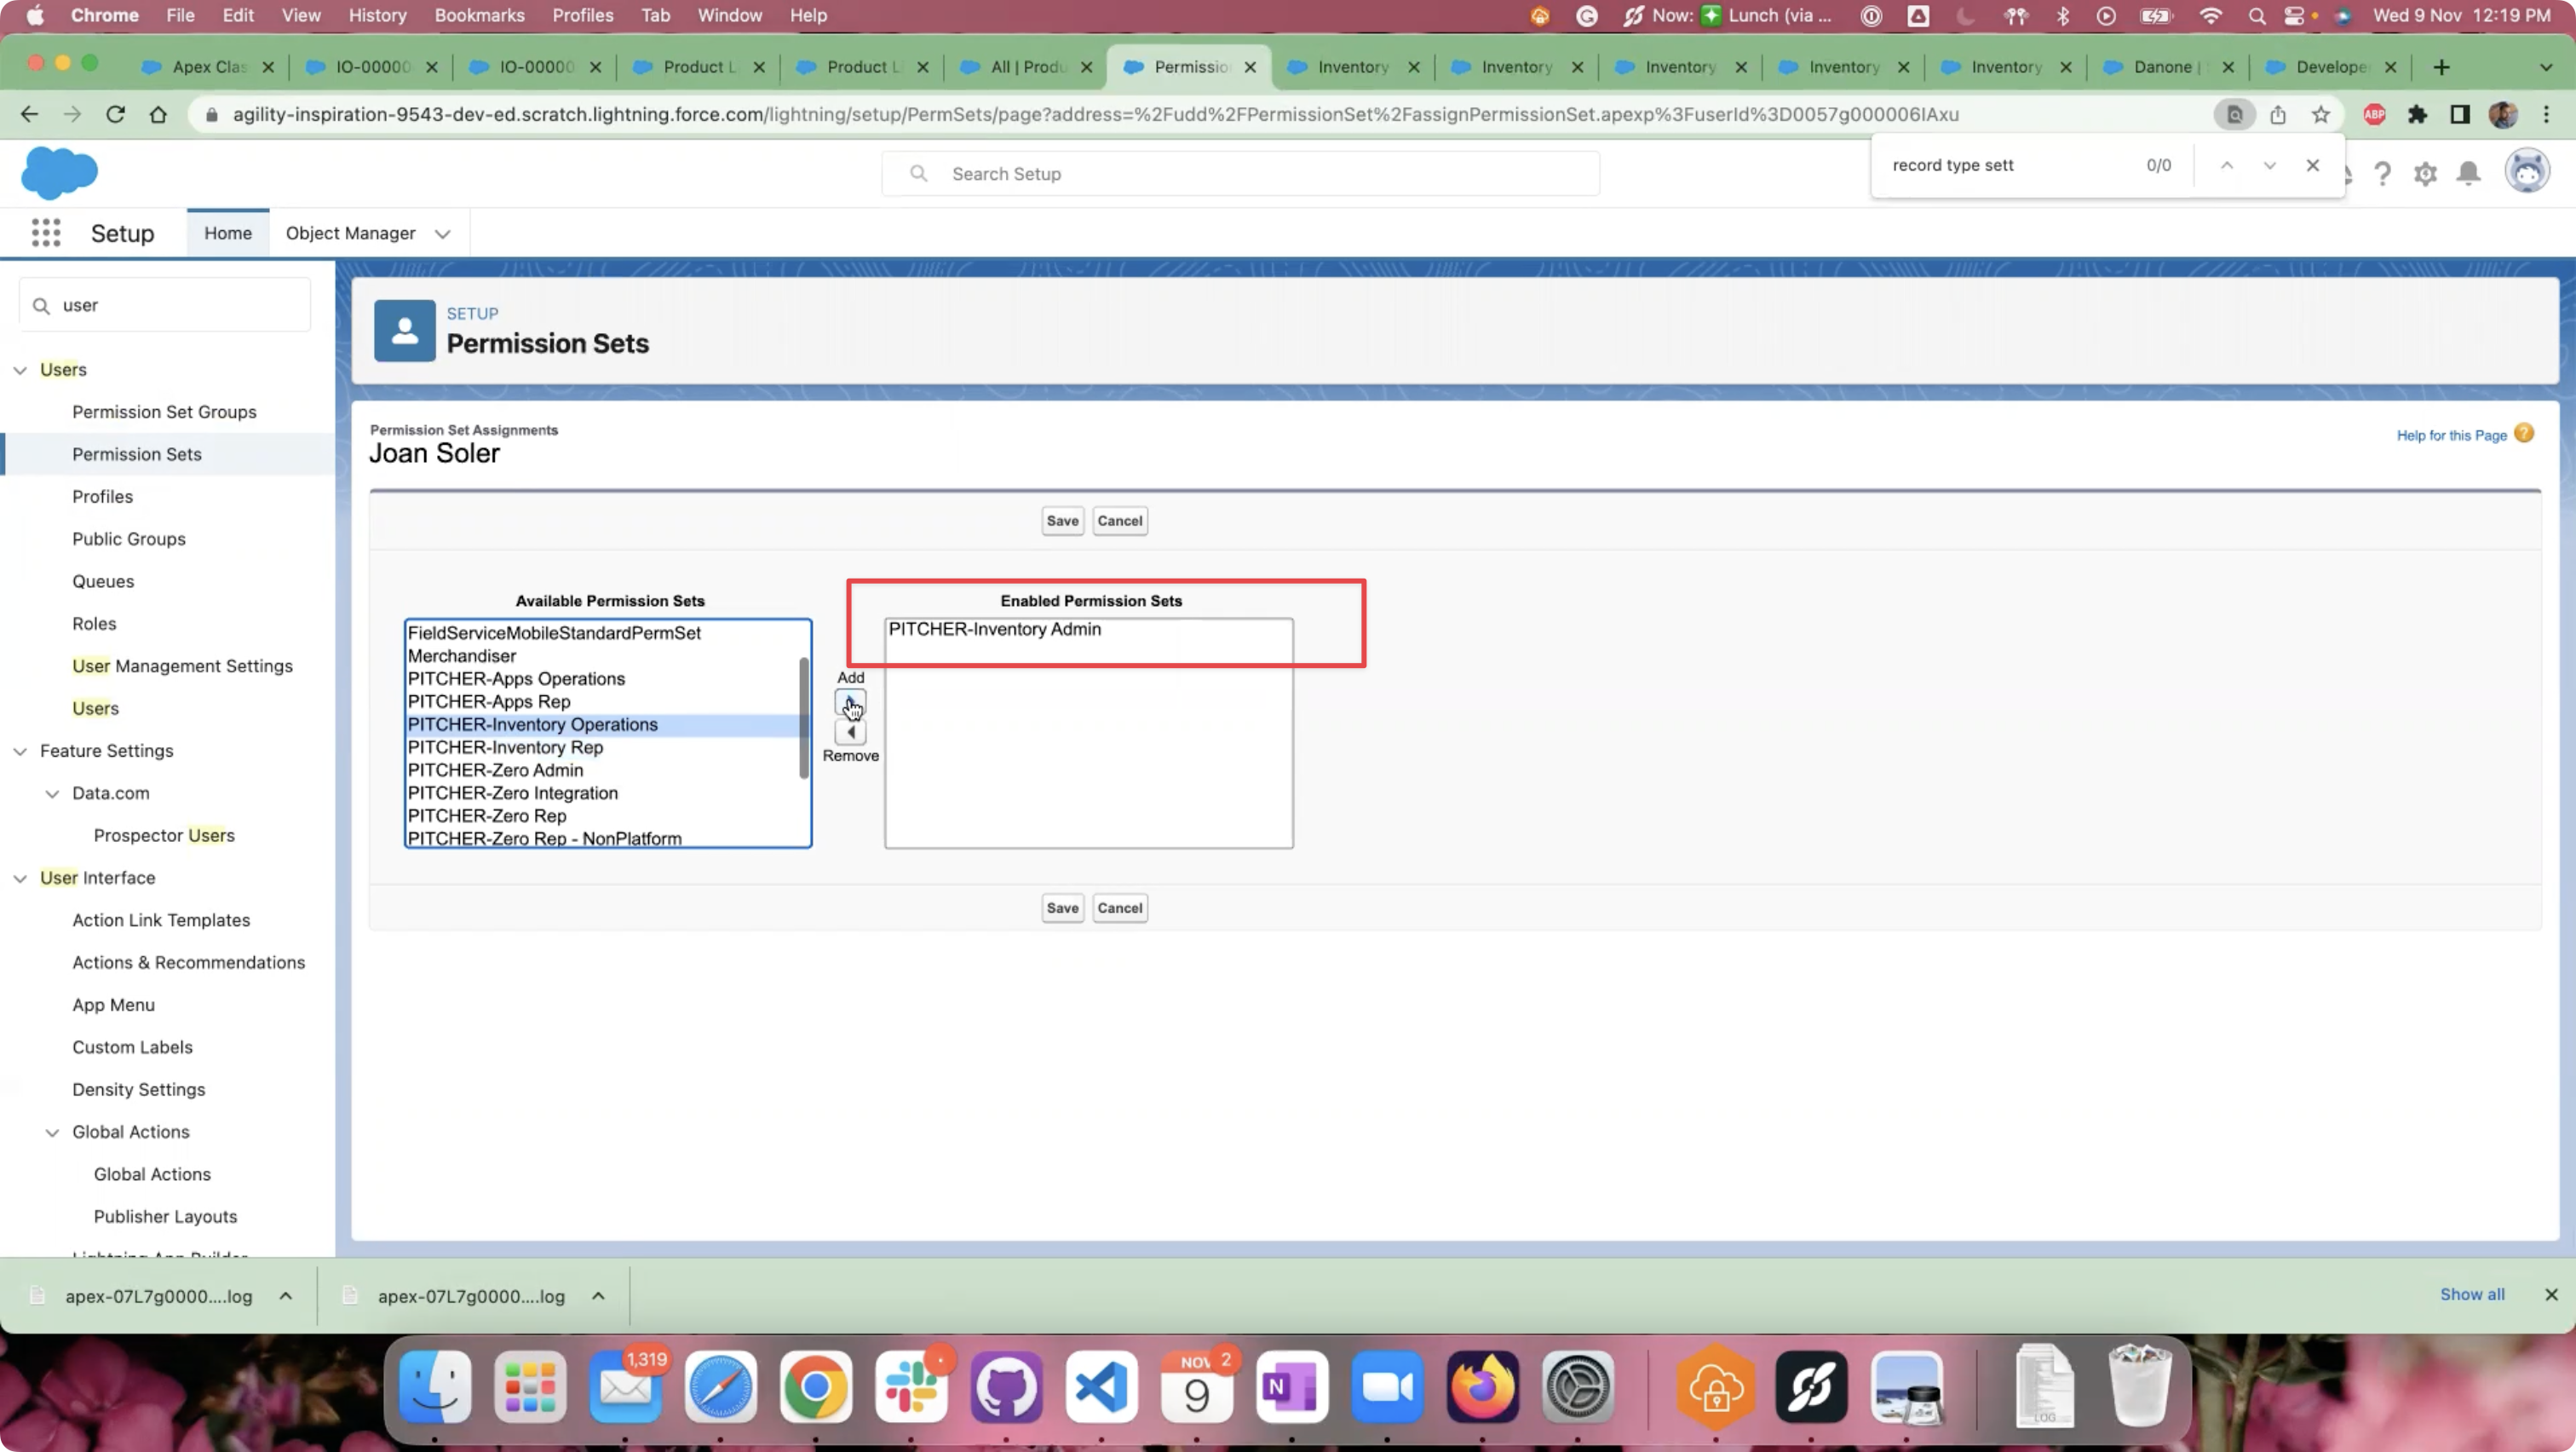
Assign Permission Sets
Step 5 - Updating Page Layout for Custom Objects
Product
Go to Object Manager and click on the “Product” object.
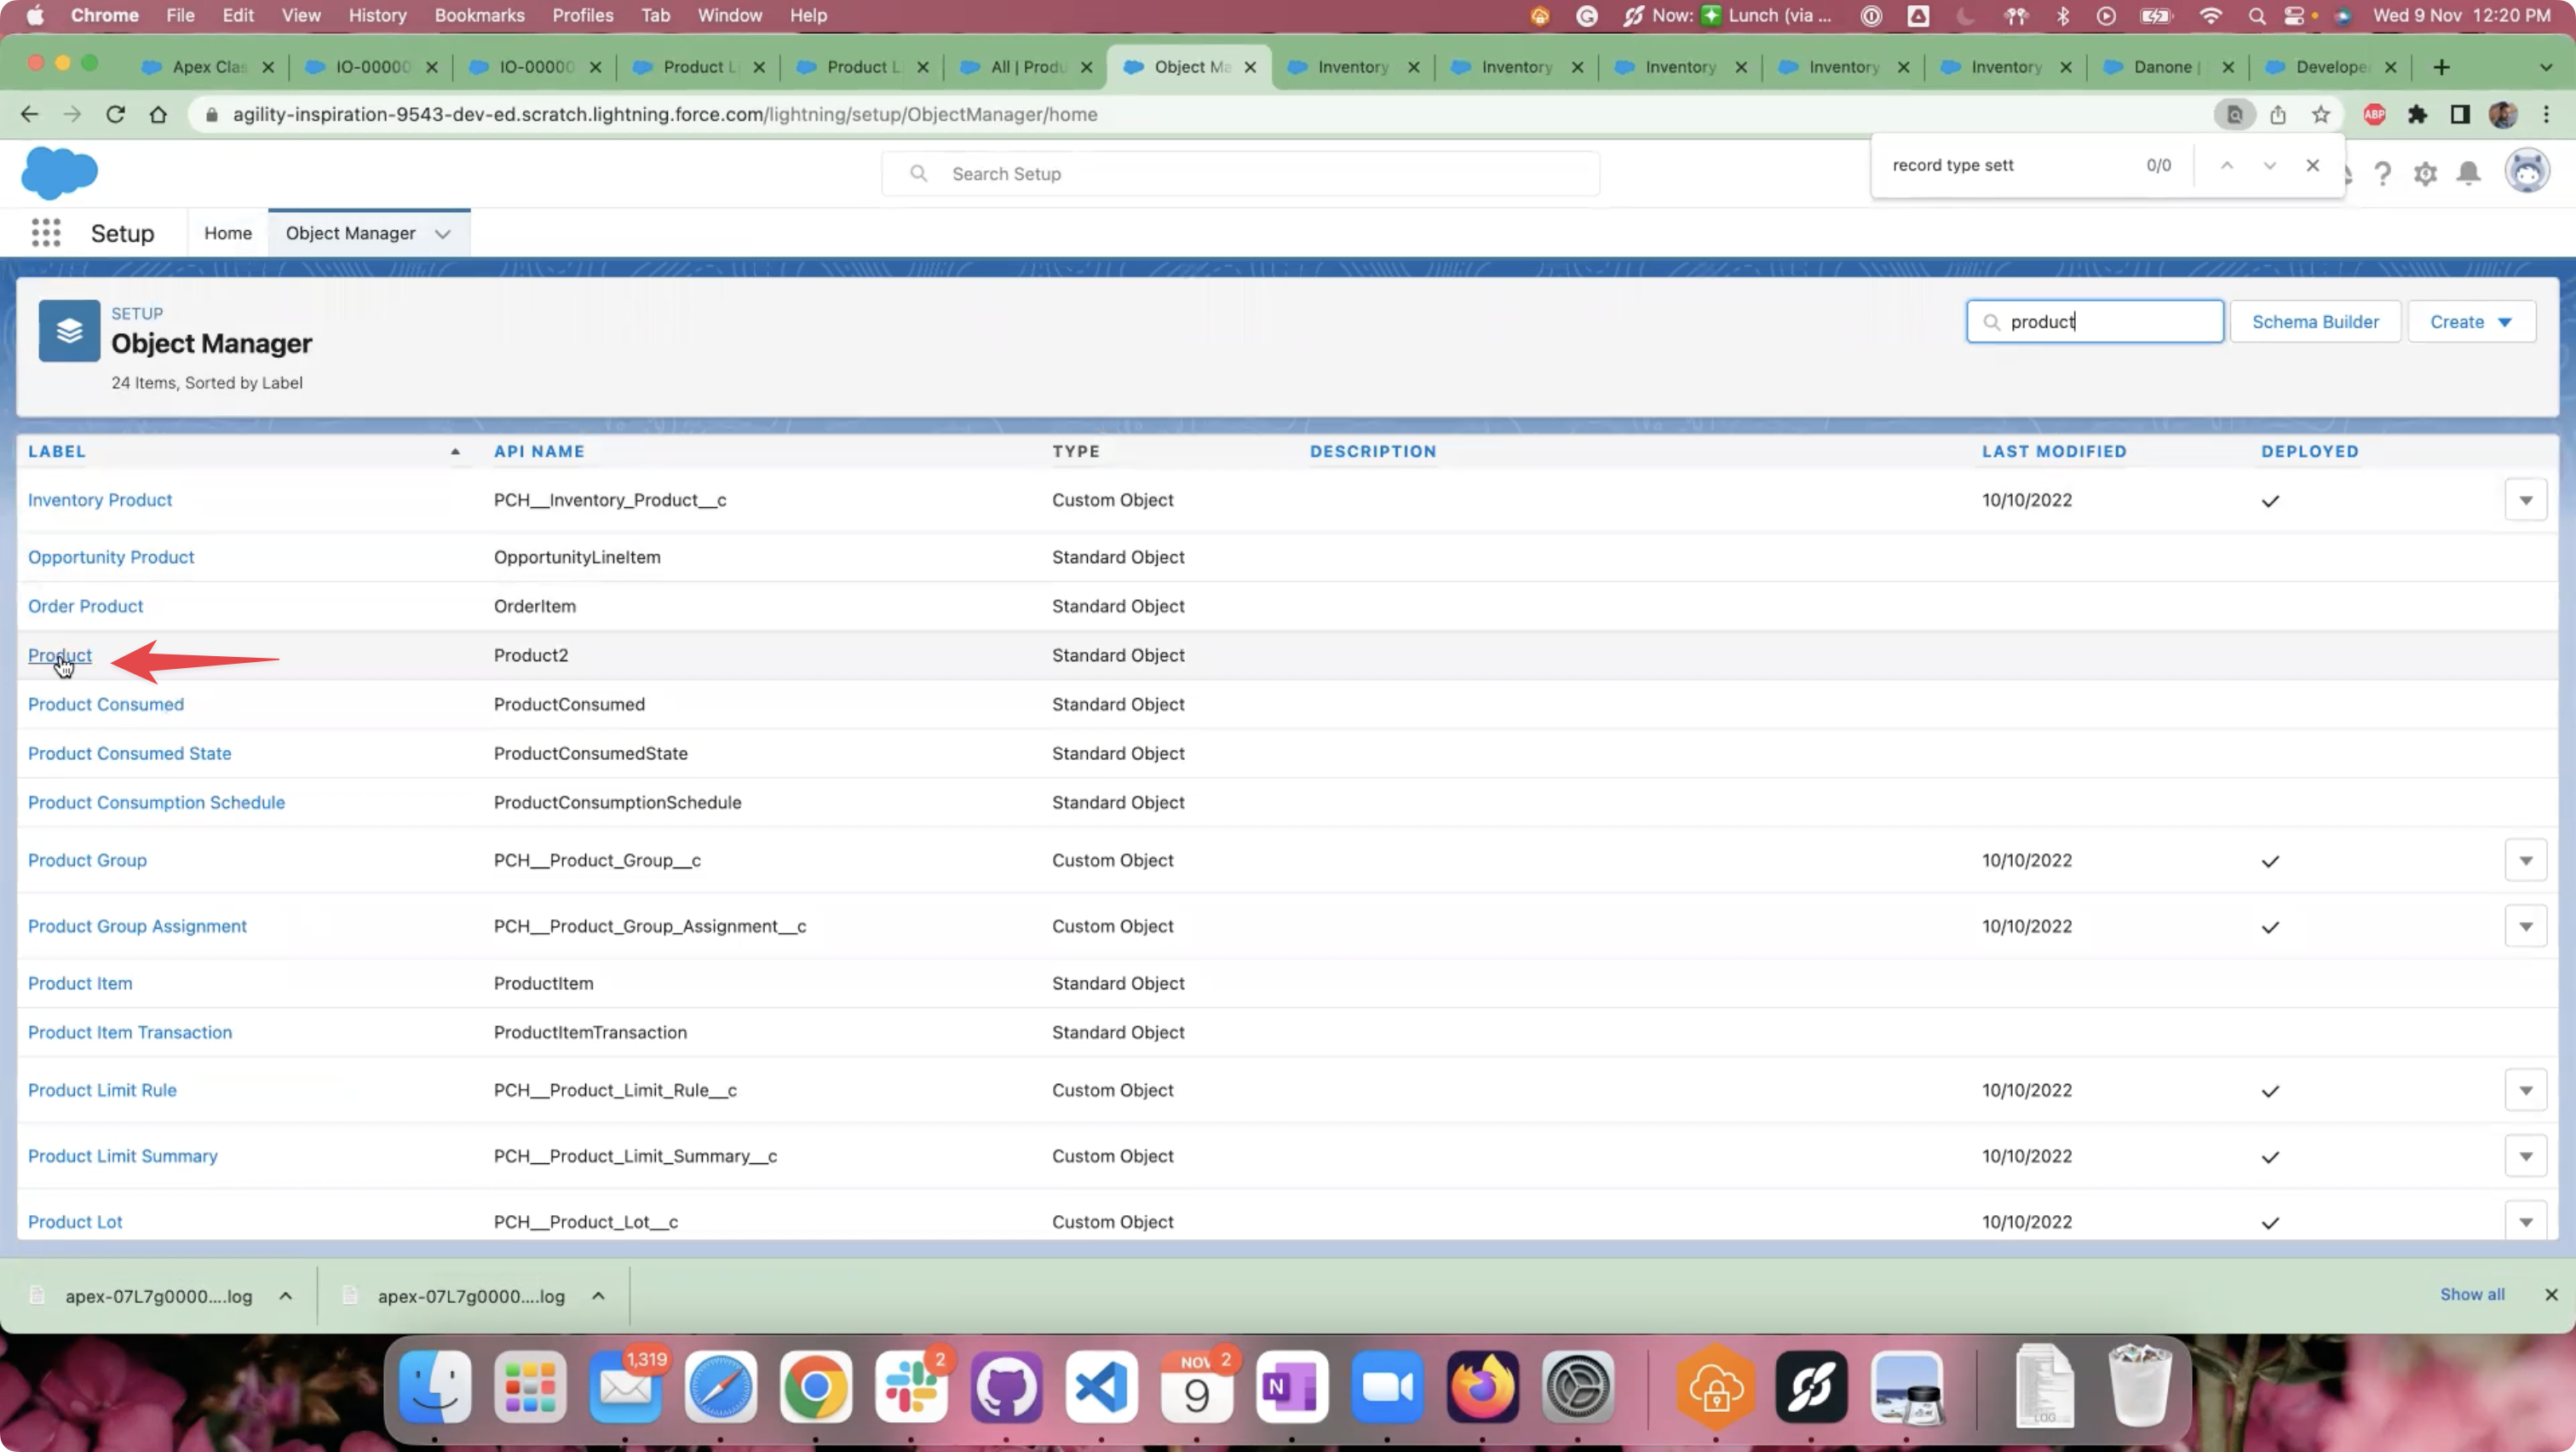
Open the “Product” object details page from the Object Manager.
Navigate to the “Page Layouts” section on the object page.
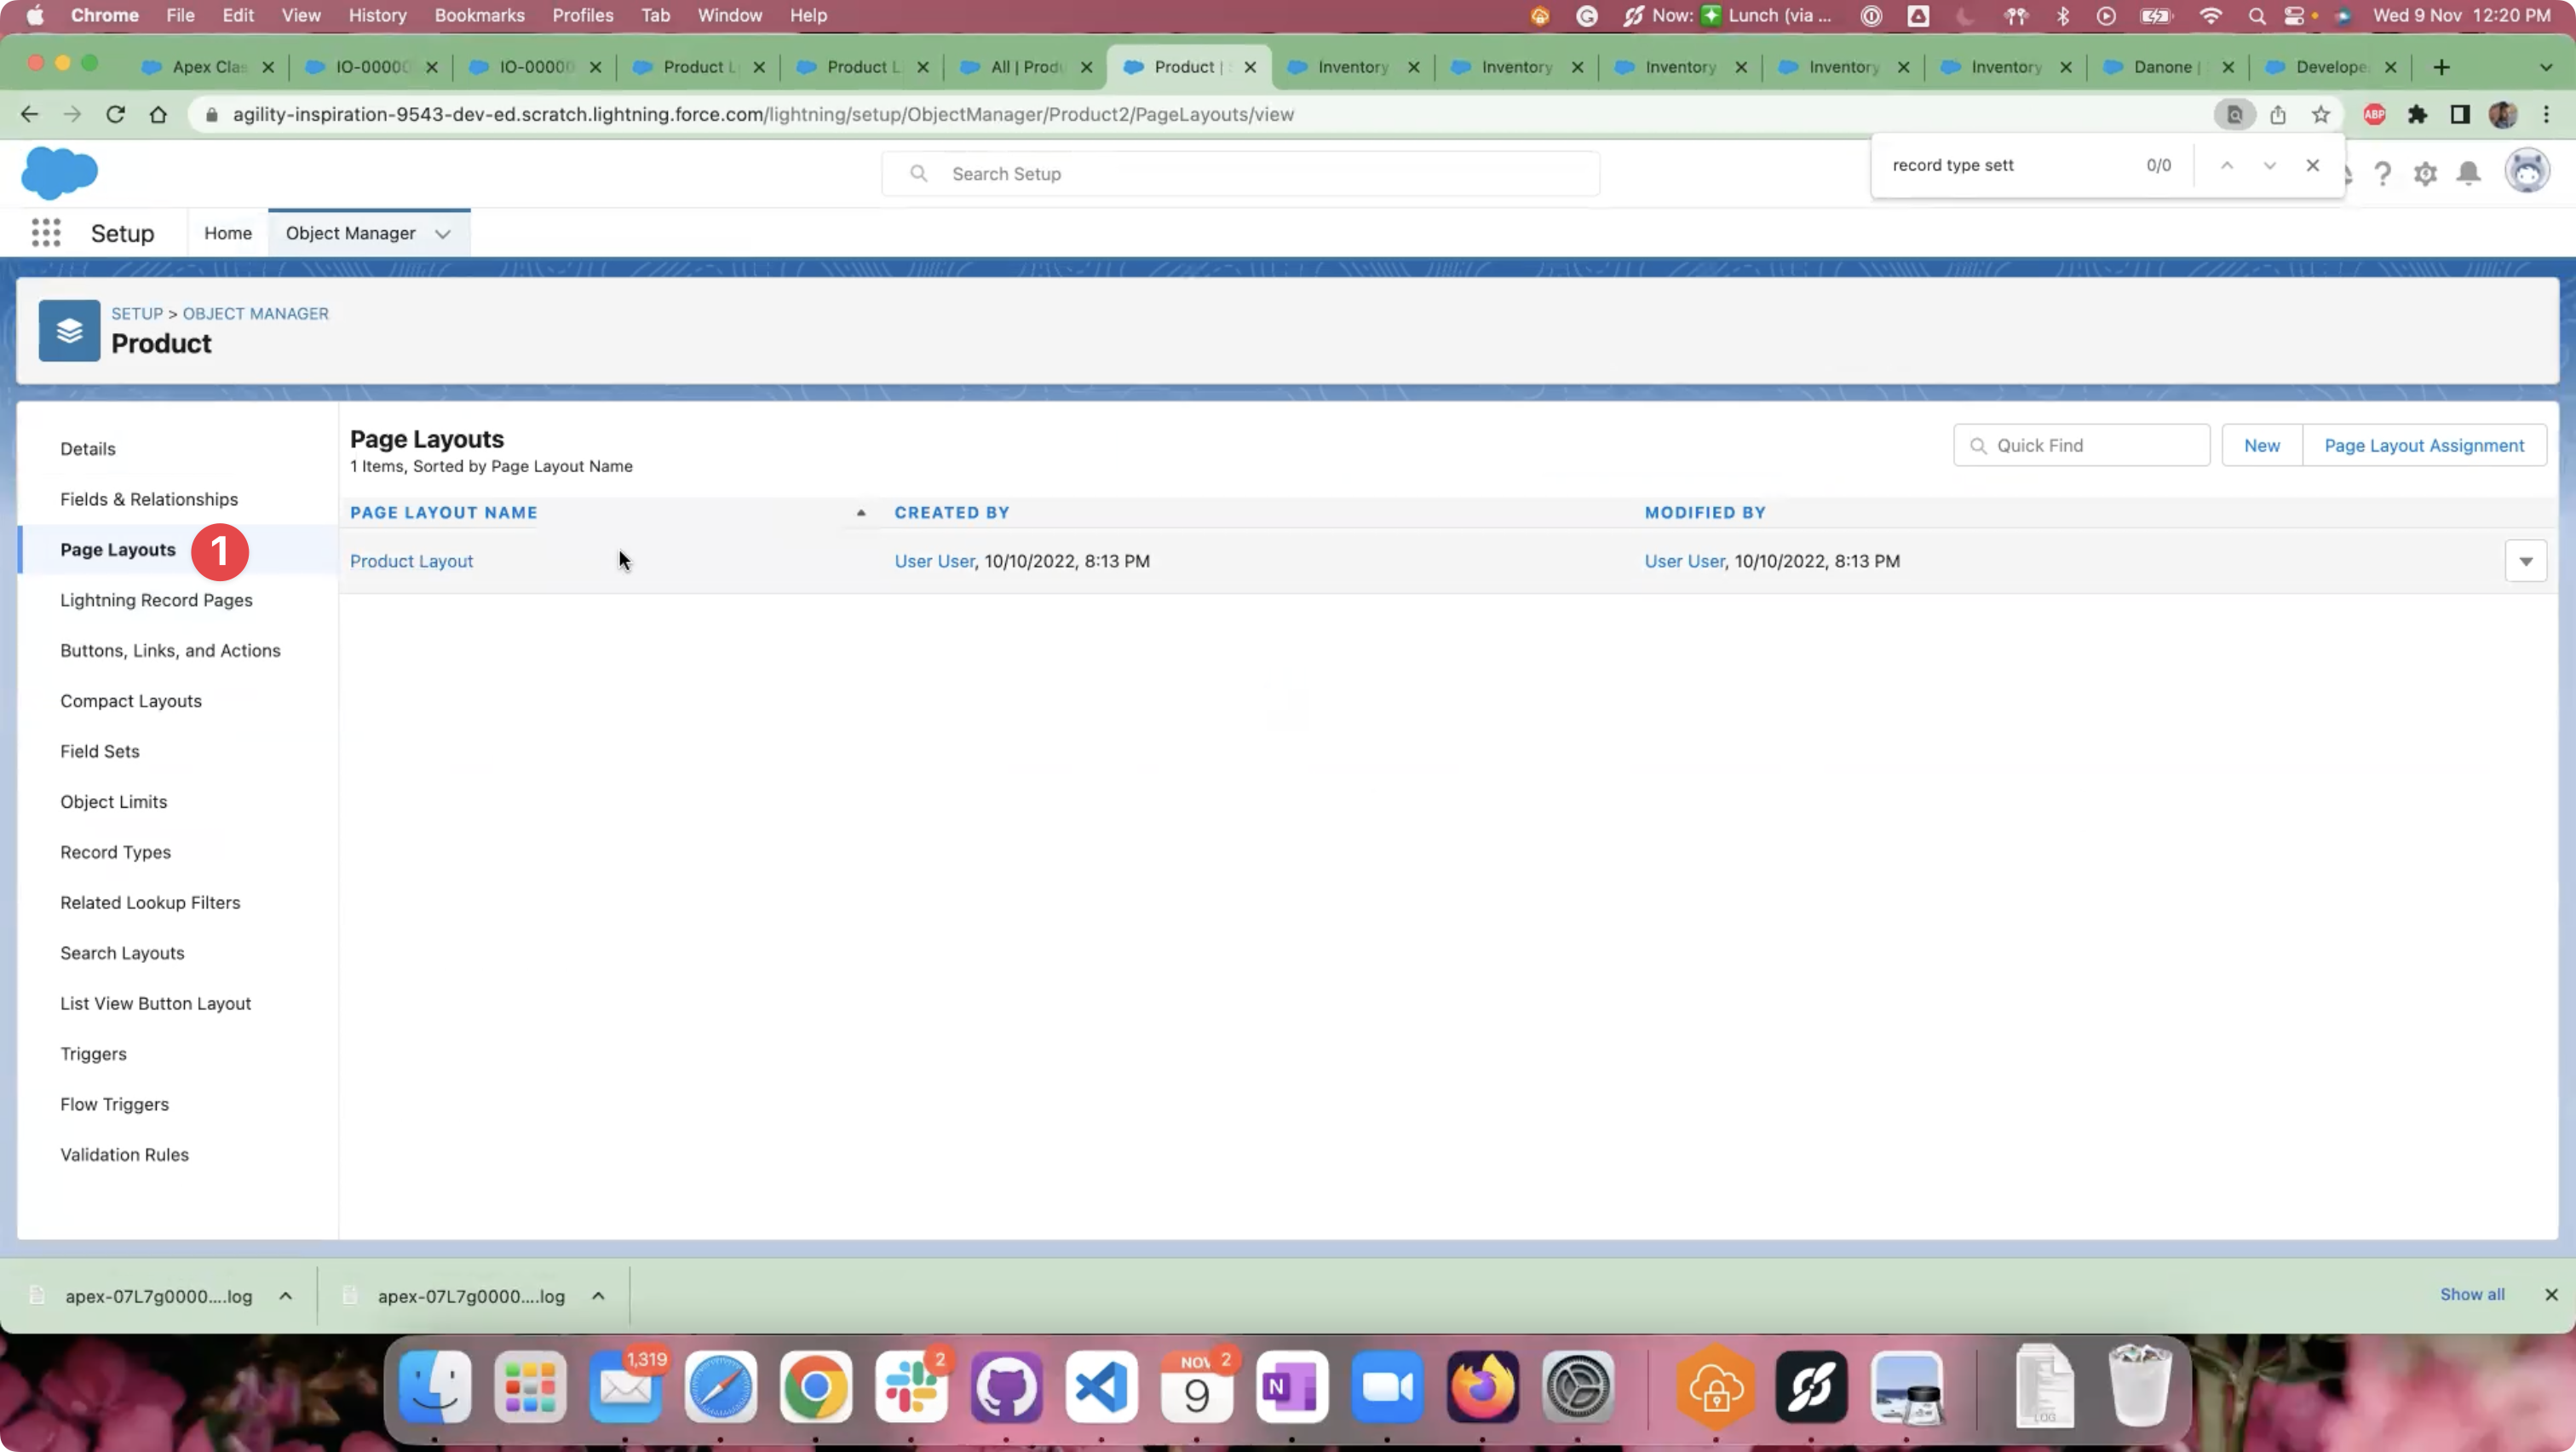
Product object - Page Layouts
Click on the required Page Layout from the Page Layouts listing page.
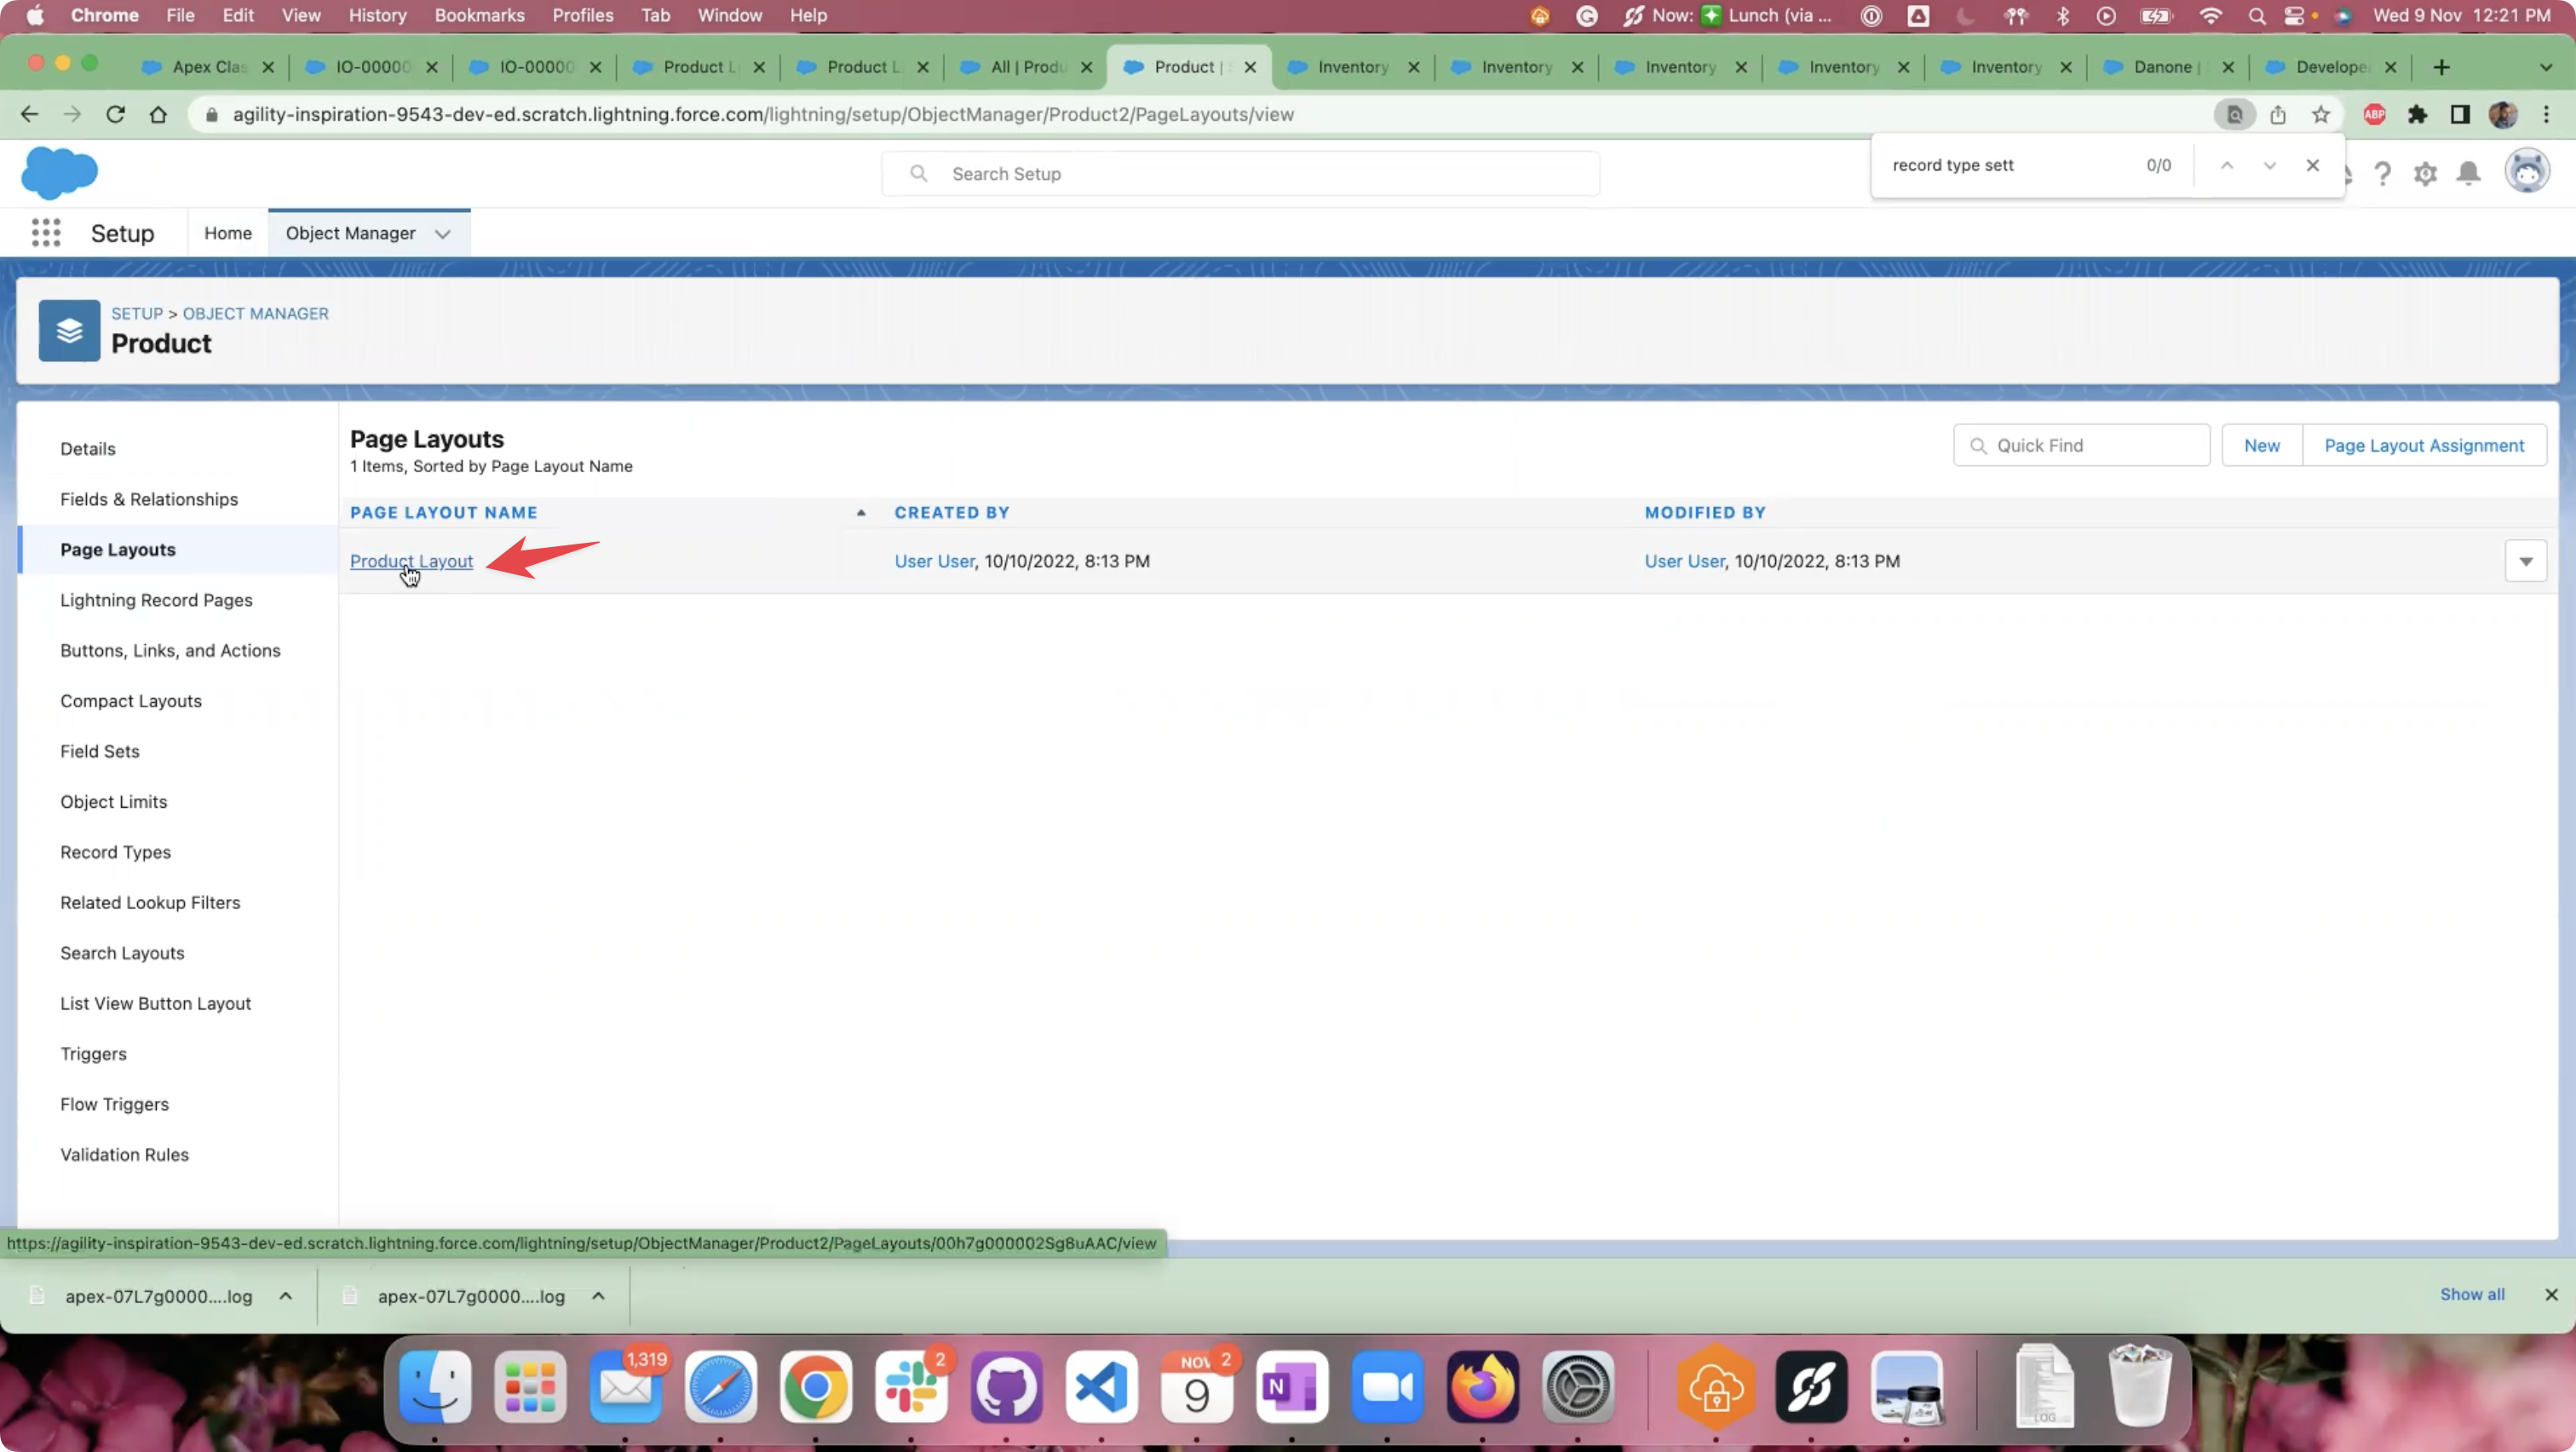
Select a Page Layout.
Assign the “Launch Date”, “Allow Order”, and “Inventory Type” fields to the Page Layout by dragging fields from the Fields section and dropping it in the Product Detail section.
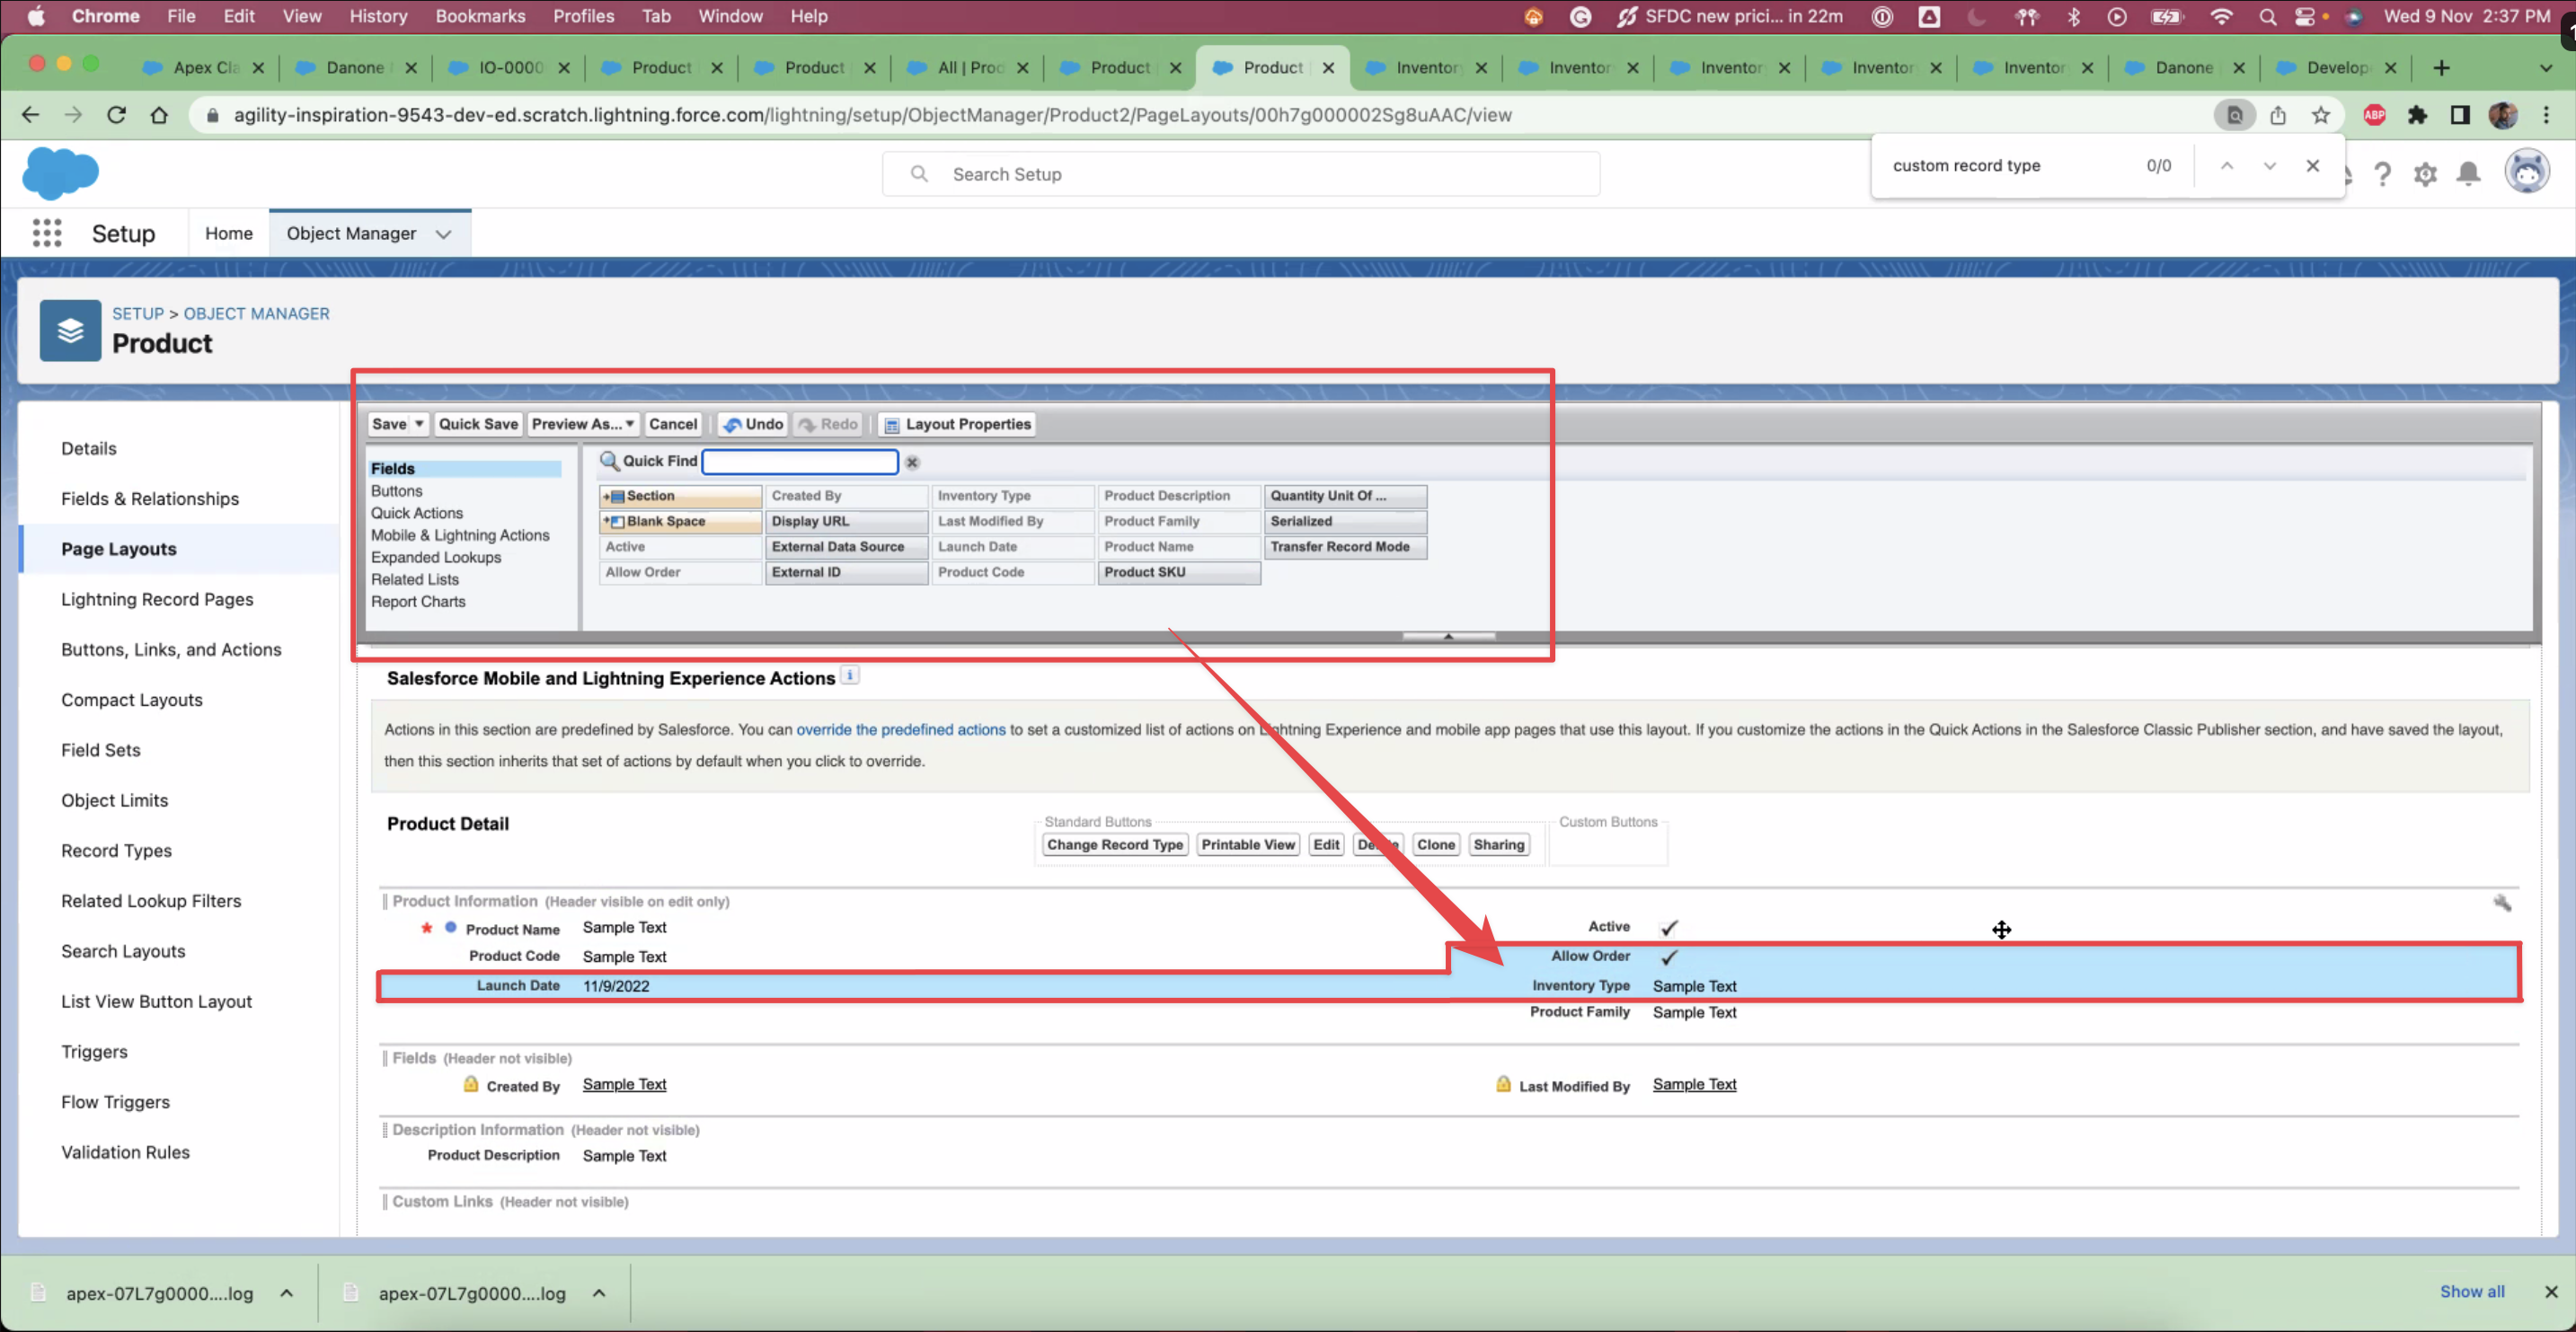
Assign fields to the “Product” object page layout
Note - You can assign these fields to one or more page layouts per your requirement.
Product Name
Product Code
MSRP
Inventory Type
Inventory Scan Mandatory
Product Description Product Family
Active
Allow Order
Launch Date
Paper Form Mandatory
License validation
Priorit
Step 6 - Migrate data to Remaining Value (New Currency Field)
If you are installing (first time) any higher version than v0.11.0.0 then skip this step
If you are upgrading to v0.11.0.0 or the higher version only then follow this step
New field on object
PCH__Product_Limit_Summary__c-New -
PCH__Remaining_Value2__cOld -
PCH__Remaining_Value__c
Update all the Page Layouts using above old field and replace with new field
Update all the List View using above old field and replace with new field
Update the new field with the same value as old field on
PCH__Product_Limit_Summary__crecords.
Step 7 - Update action settings
If you are installing (first time) any higher version than v0.12.0.0 then skip this step
If you are upgrading to v0.12.0.0 or the higher version only then follow this step
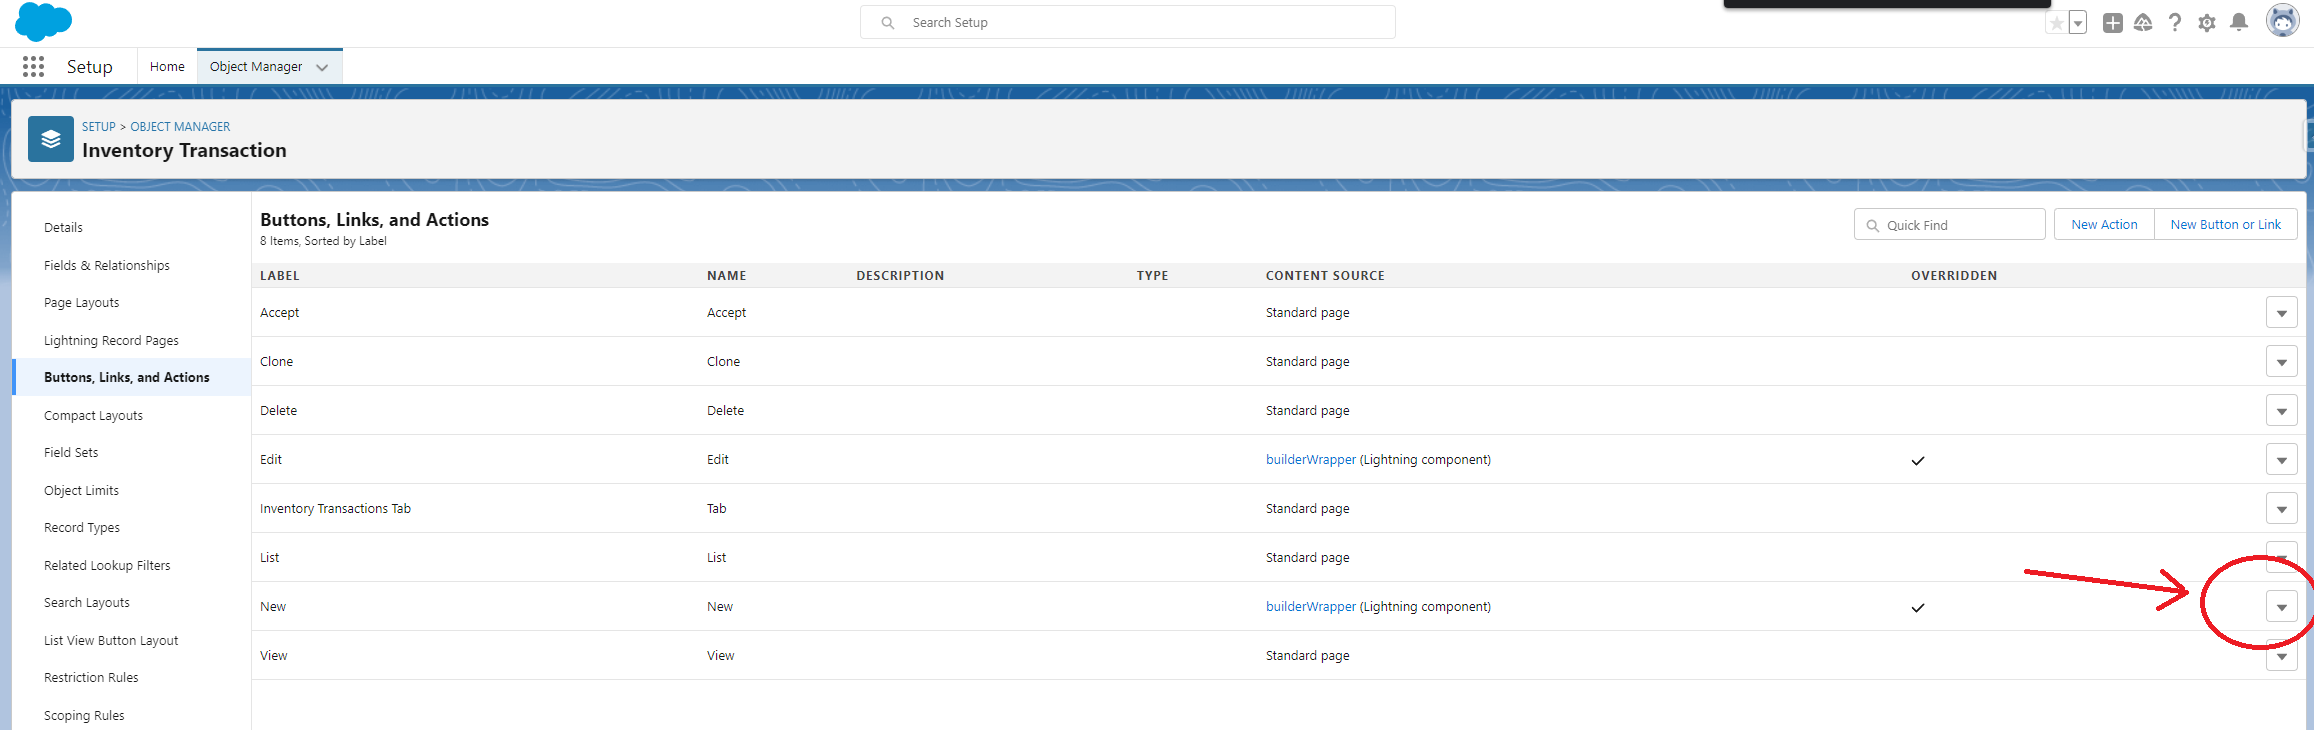
Go to the setup → object manager → Inventory Transaction → buttons links and actions
Click on the triangle next to New and click Edit
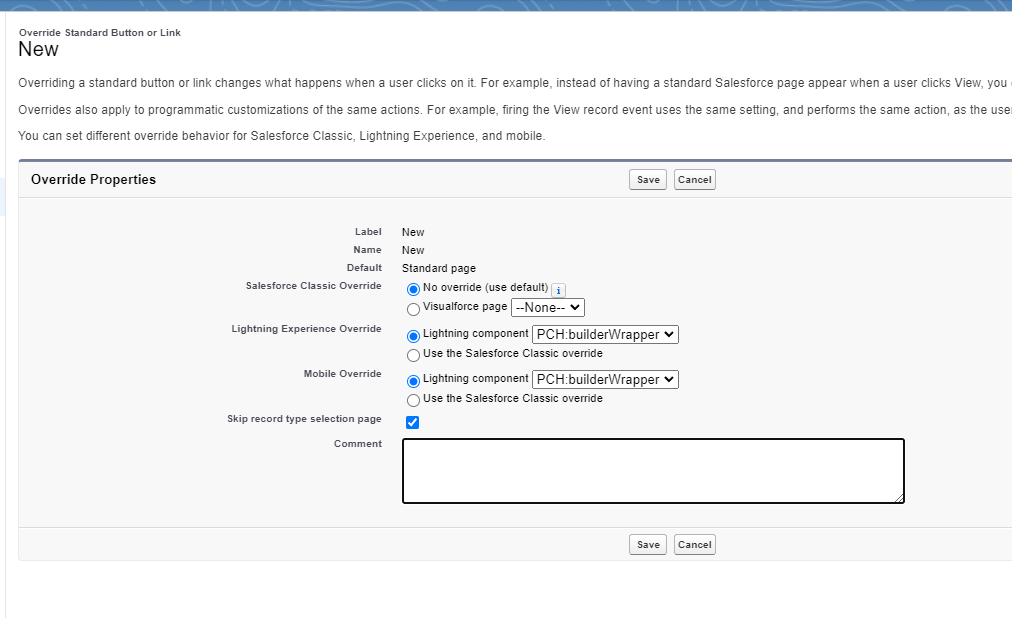
On next screen make sure that “Skip record type selection page” checkbox is CHECKED. Click Save.
Repeat same for Inventory Order object.
Step 8 - Updating record type names in metadata configuration
If you are installing (first time) any higher version than v0.12.0.0 then skip this step
If you are upgrading to v0.12.0.0 or the higher version only then follow this step
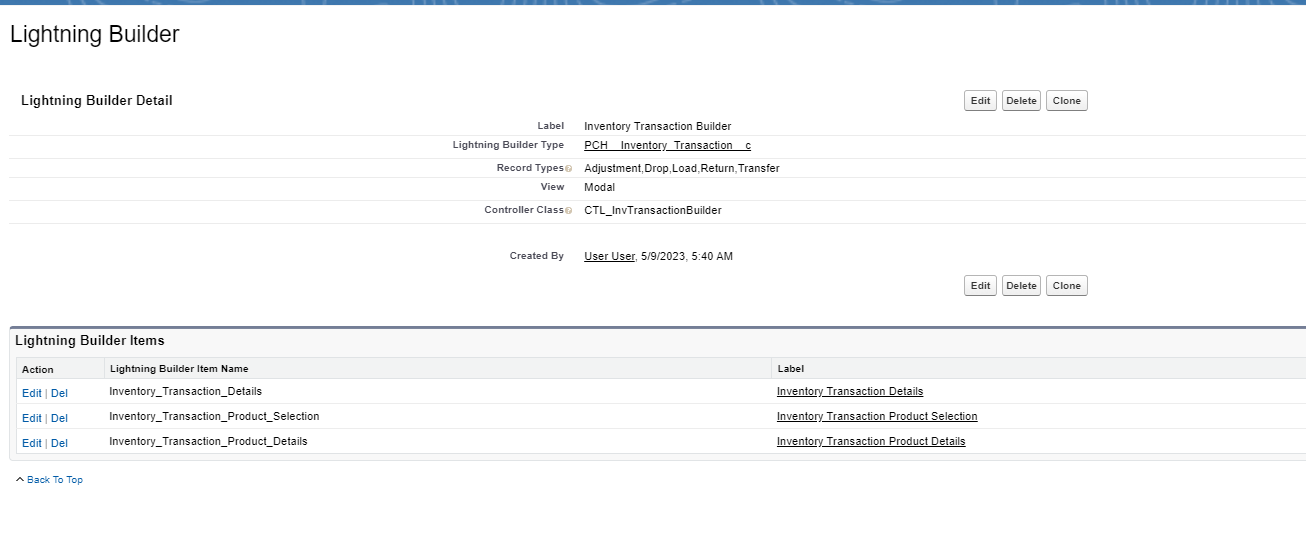
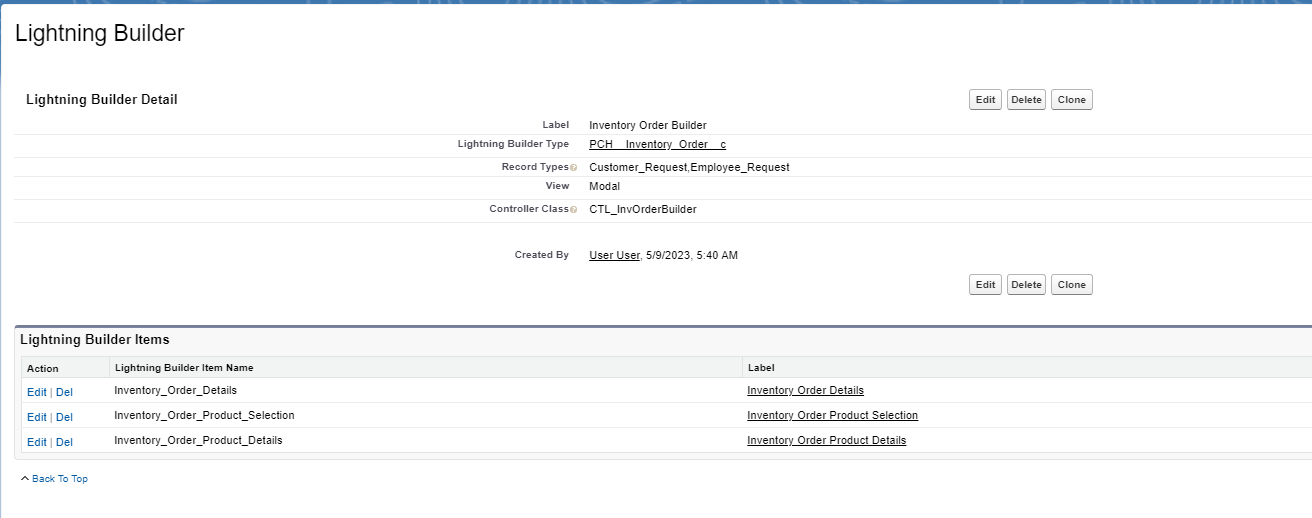
Go to the Setup → Custom Metadata Types → click “Manage Records” next to “Lightning Builder”
Click “Edit” next to “Inventory Transaction Builder”
In the Record Types field enter Adjustment,Drop,Load,Return,Transfer and Save the record:
In similar way modify “Inventory Order Builder” and enter Customer_Request,Employee_Request in the record types
Step 9 - Updating Page Layout for Custom Metadata Types
Inventory Market Settings
Go to the Setup → Custom Metadata Types → Inventory Market Settings
Go to Page Layouts
Edit
Inventory Market Settings LayoutAdd all the missing fields to the page layout.
Inventory Disclaimer Settings
Go to the Setup → Custom Metadata Types → Inventory Disclaimer Settings
Go to Page Layouts
Edit
Inventory Disclaimer Settings LayoutAdd all the missing fields to the page layout.
Inventory Org Wide Settings
Go to the Setup → Custom Metadata Types → Inventory Org Wide Settings
Go to Page Layouts
Edit
Inventory Org Wide Settings LayoutAdd all the missing fields to the page layout.
Step 10 - Schedule Apex Jobs
SCB_ExpiredLicenses
Go to the Developer Console
From the debug menu click Open Execute Anonymous Window
Paste the following code:
PCH.SCB_ExpiredLicenses b= new PCH.SCB_ExpiredLicenses();
System.schedule('PCH.SCB_ExpiredLicenses|| Everyday 1 AM', '0 0 1 * * ? *', b);
Click Execute
Verify under Setup > Scheduled Jobs that apex job SCB_ExpiredLicenses is scheduled
Step 11 - Enable the “Create Inventory Load” action
If you are installing (first time) version v0.32.0.0 or higher then skip this step
If you are upgrading to v0.32.0.0 or the higher version only then follow this step
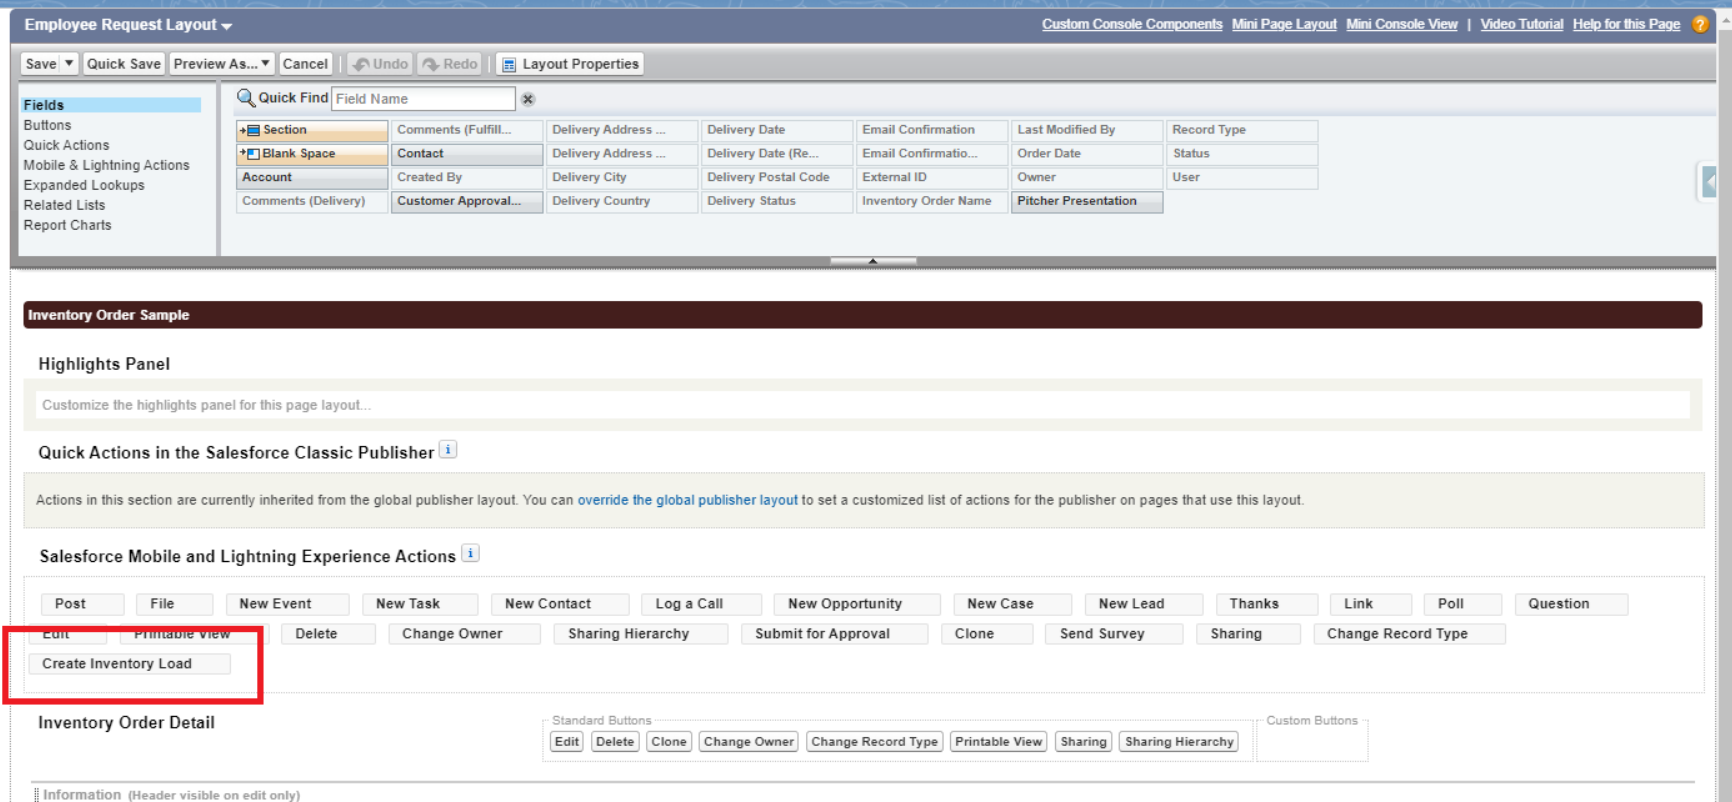
Go to Setup → Object Manager → Inventory Order → Page Layouts
Click on the Employee Request page layout.
Make sure that Create Inventory Load is added to the layout (see screenshot below)
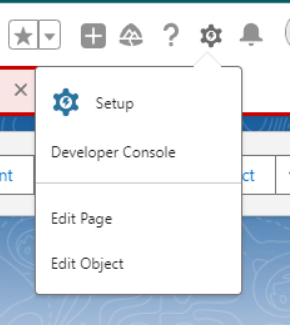
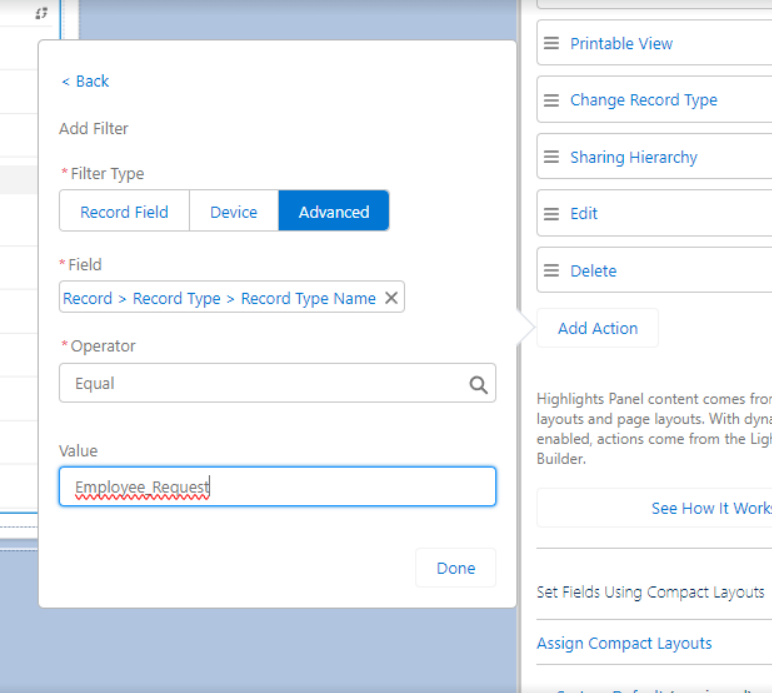
Check if the action is displayed on any Employee Request record. If not, the customer may have Dynamic Actions enabled. On the record page, click the cogwheel in the top right corner and click Edit Page.
In the app builder, click the header component. If you see in the right sidebar the list of actions it means dynamic actions have been enabled.
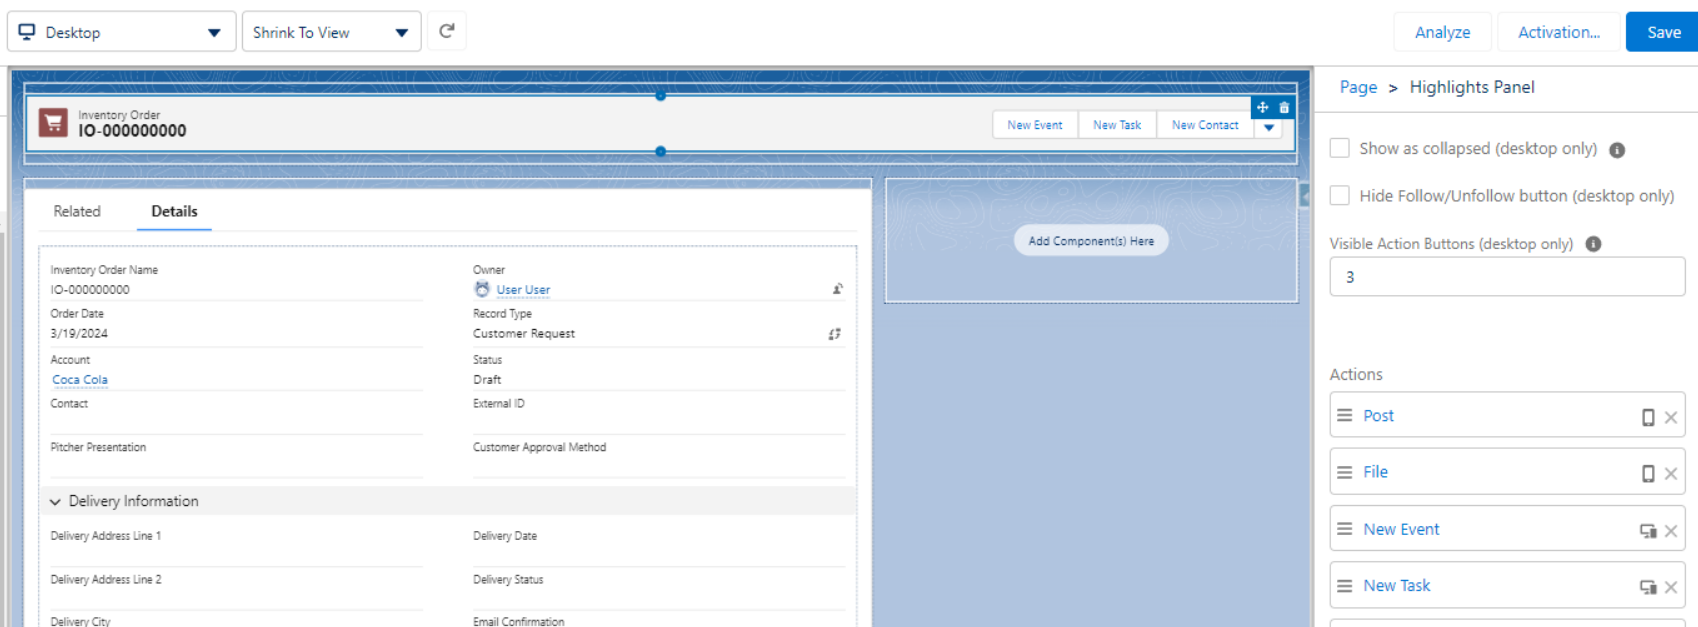
Scroll the sidebar and click Add Action. You can set the Advanced visibility to show the action only on the Employee Request, but it’s not mandatory - the action validates the record type and displays error message anyway.
Step 12 - Modify the Lightning Builder Layout and Inventory Transaction Item metadata
If you are installing (first time) version v0.32.0.0 or higher then skip this step
If you are upgrading to v0.32.0.0 or the higher version only then follow this step
Go to Setup → Custom Metadata → Lightning Builder Items
On the edit page, modify the layout of Lightning Builder Item and add Controller Class Buttons
Get back to the custom metadata tab and click “Manage Records”
Click Edit next to the Inventory Transaction Product Details
Enter
EXT_InvTransSelectionDetailsButtonsinto Controller Class Buttons fieldSave the record
Click Edit next to the Inventory Order Product Details
Enter
EXT_InvOrderSelectionDetailsButtonsinto Controller Class Buttons fieldSave the record