UI Setup and App Configuration
This page provides an overview about UI Setup and App configuration. In the Interface tab you can make basic changes to your User Interface such as template, UI color, logo etc. It is useful if you want to change the basic UI of your instance. Depending on the design/configuration of your Pitcher Instance this feature might be disabled.
Editing Template & UI Color
Here you can select from a list of templates available for your instance. Follow these steps to change the template:
1. Click on Interface tab to view the User Interface Manager.
2. Click on the dropdown and select from a list of templates.
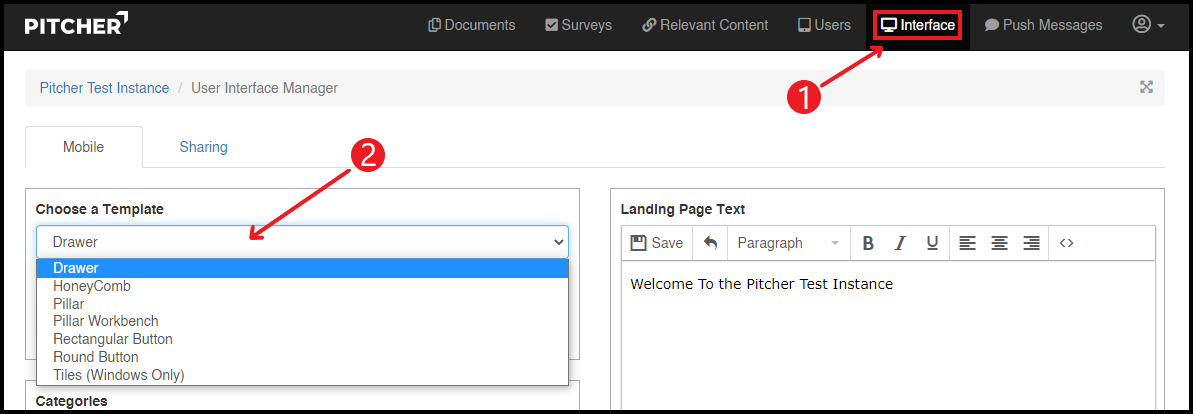
3. Click on UI color and select the color of your choice.
4. Click on Save button to save the template.

Categories
In the Categories tab you can create / edit / delete Categories and their logos or images. Follow these steps to edit or add new categories:
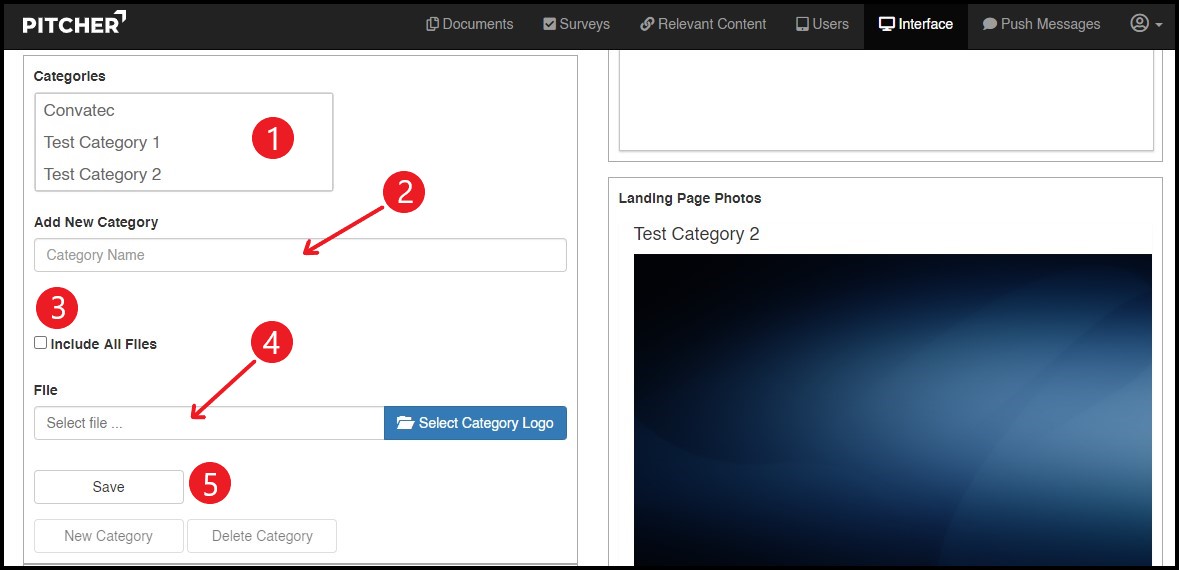
1. Categories box displays all the categories created for the instance.
2. To add a new category click on Add New Category field and add the category.
3. "Include all files" checkbox allows a category to include all file types to be uploaded to the instance.
4. To select a specific file click on File field and type the file name. You can also select the Category Logo by clicking on the Select Category Logo button.
5. Click on Save button to save the categories.
Sub Categories
In Sub Categories you can create / edit / delete Sub Categories and their logos or images. To add/edit Sub Categories follow these steps:
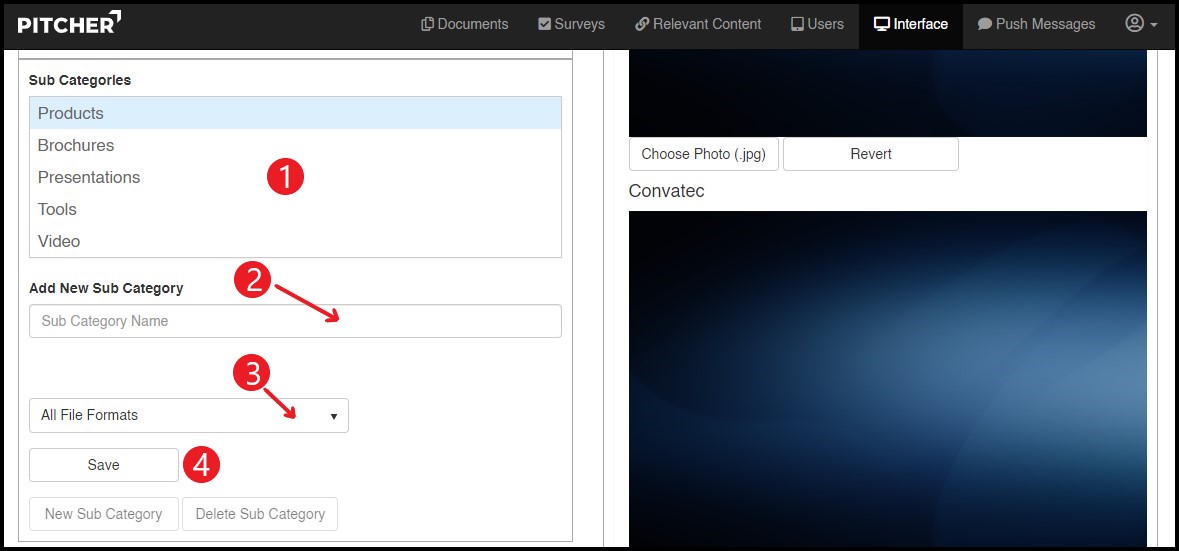
1. Sub Categories box displays all the sub categories created for the instance.
2. To add a new sub category click on Add New Sub Category field and add the category.
3. Select the file formats by clicking on the dropdown. The default option is “All File Formats”.
4. Click on Save button to save the sub categories.
Landing Page Text
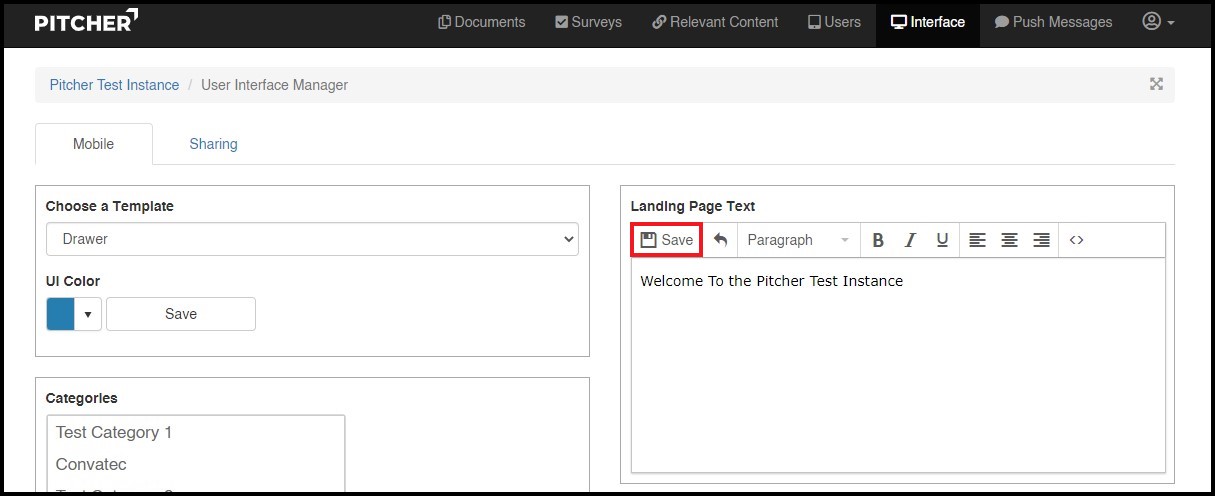
In the Landing Page Text window you can update the text to be displayed in the instance. It can be a intro text or a welcome message. Just type in the text in the WYSIWYG editor and click on Save button to save the text.
Landing Page Photos
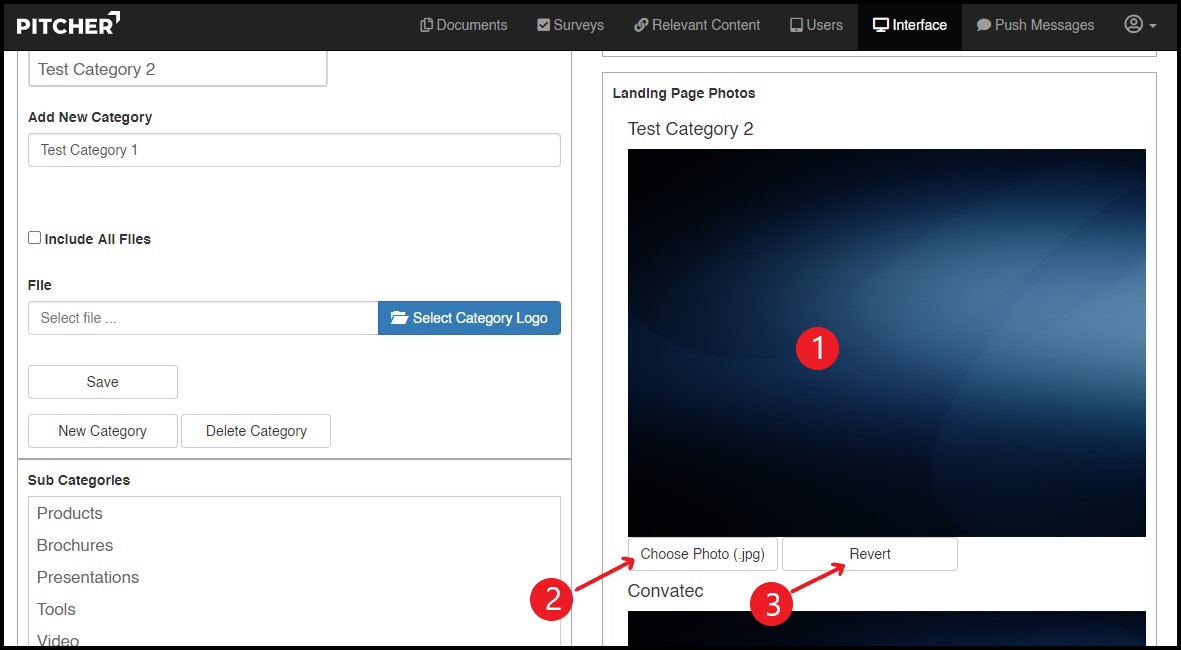
In the Landing Page Photos section you can update Category photos. For every category created there is a default image which can be updated and saved.
1. Default image for the category
2. Select image for the category
3. Revert to the default category image
Changing the Logo
You can also change and update a custom logo for the instance. Follow these steps to update the logo:
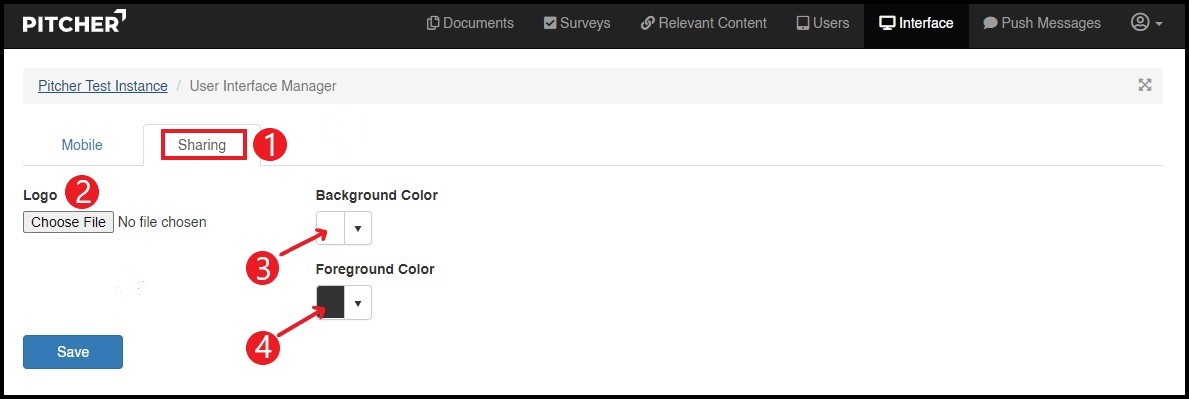
1. Click on Sharing tab.
2. Select a logo file to be updated.
3. Select the background color of the logo.
4. Select the foreground color of the logo.
5. Click on Save button to save the changes.
