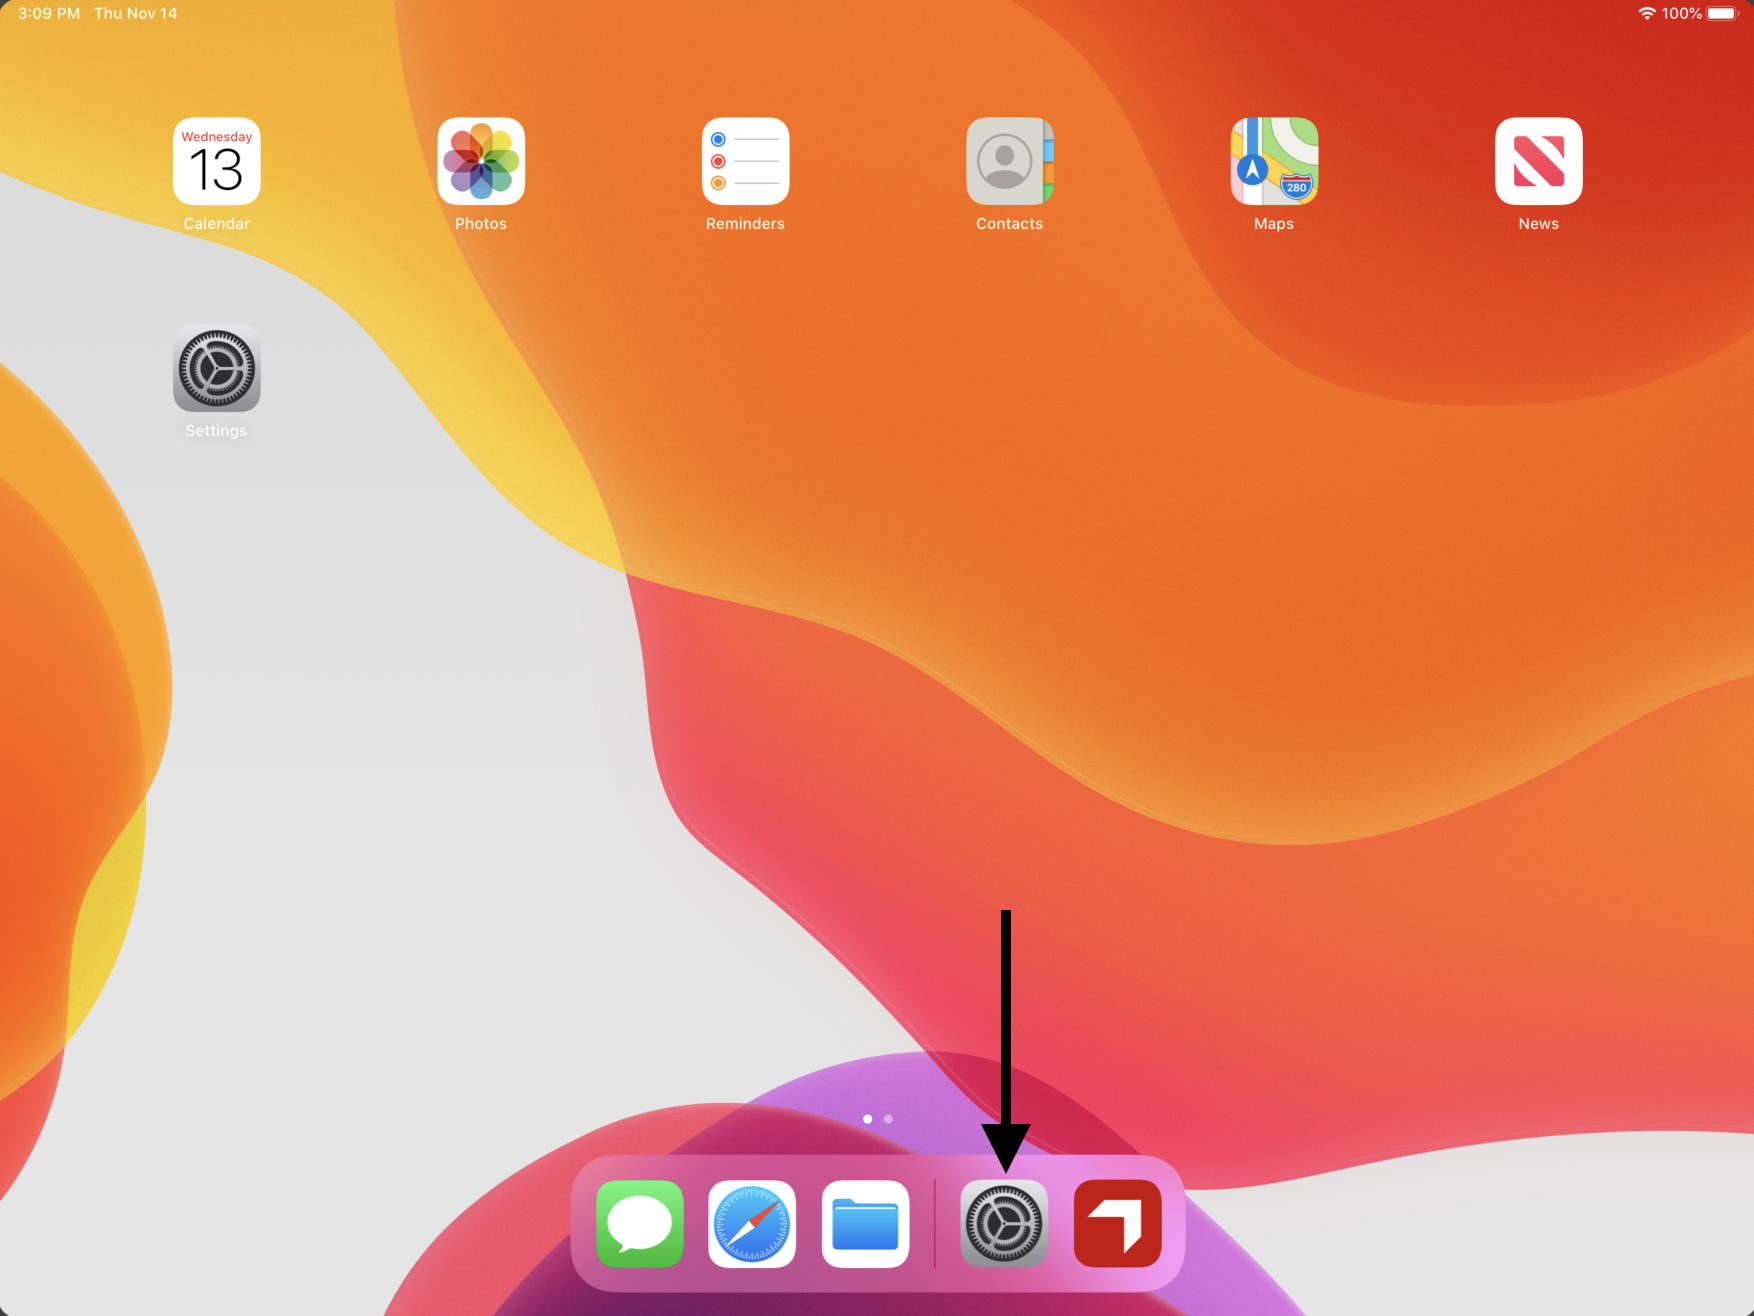
Installation, Login, And Instance Selection on iOS
The Pitcher Impact application can be installed on Apple Devices. These devices include the iPad and iPhone. This tutorial will provide a walkthrough of installing the application on these devices and also explain the instance access in detail.
Pitcher Impact iOS Supported Devices:
iOS 16 and above for iPhone and iPad devices.
iPad
The most common device used by the users is the iPad, and the below section provides detailed steps to install the application.
Download & Install the App
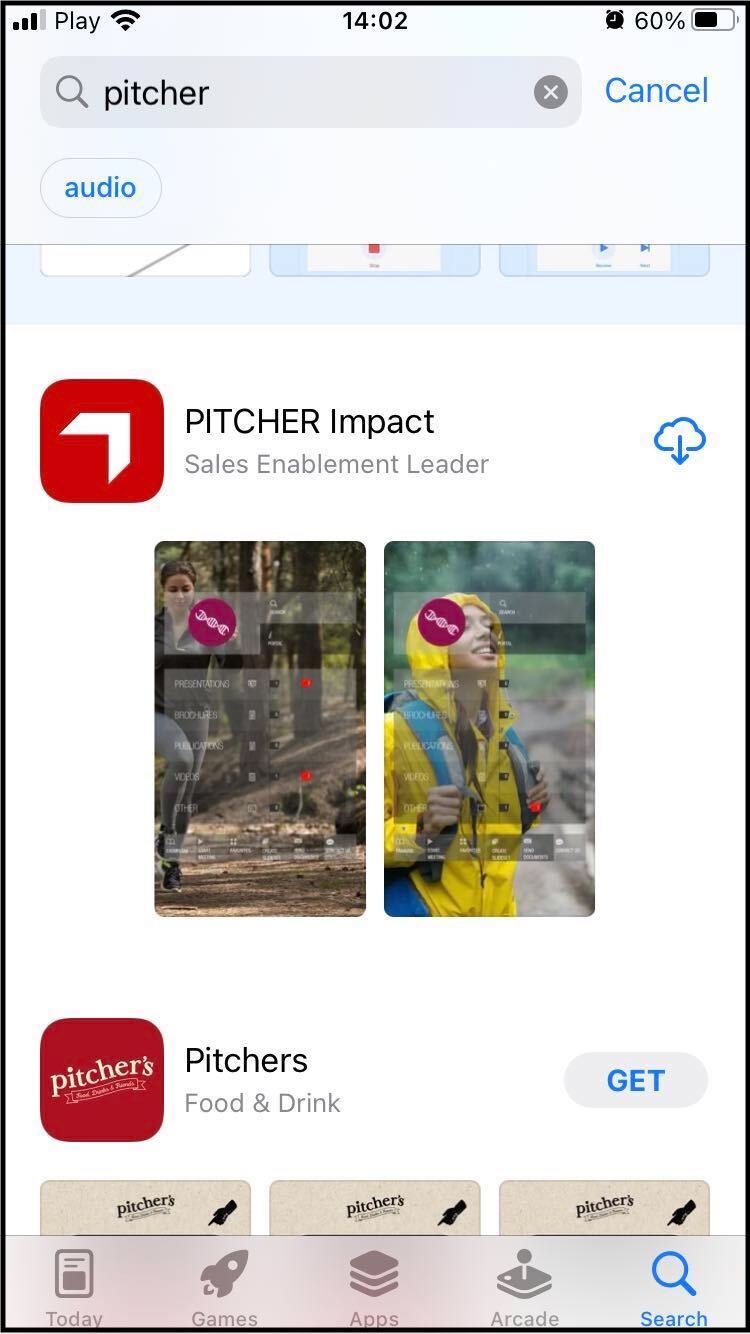
Please login to the App Store to download and install the Pitcher Impact application.
Open the App Store
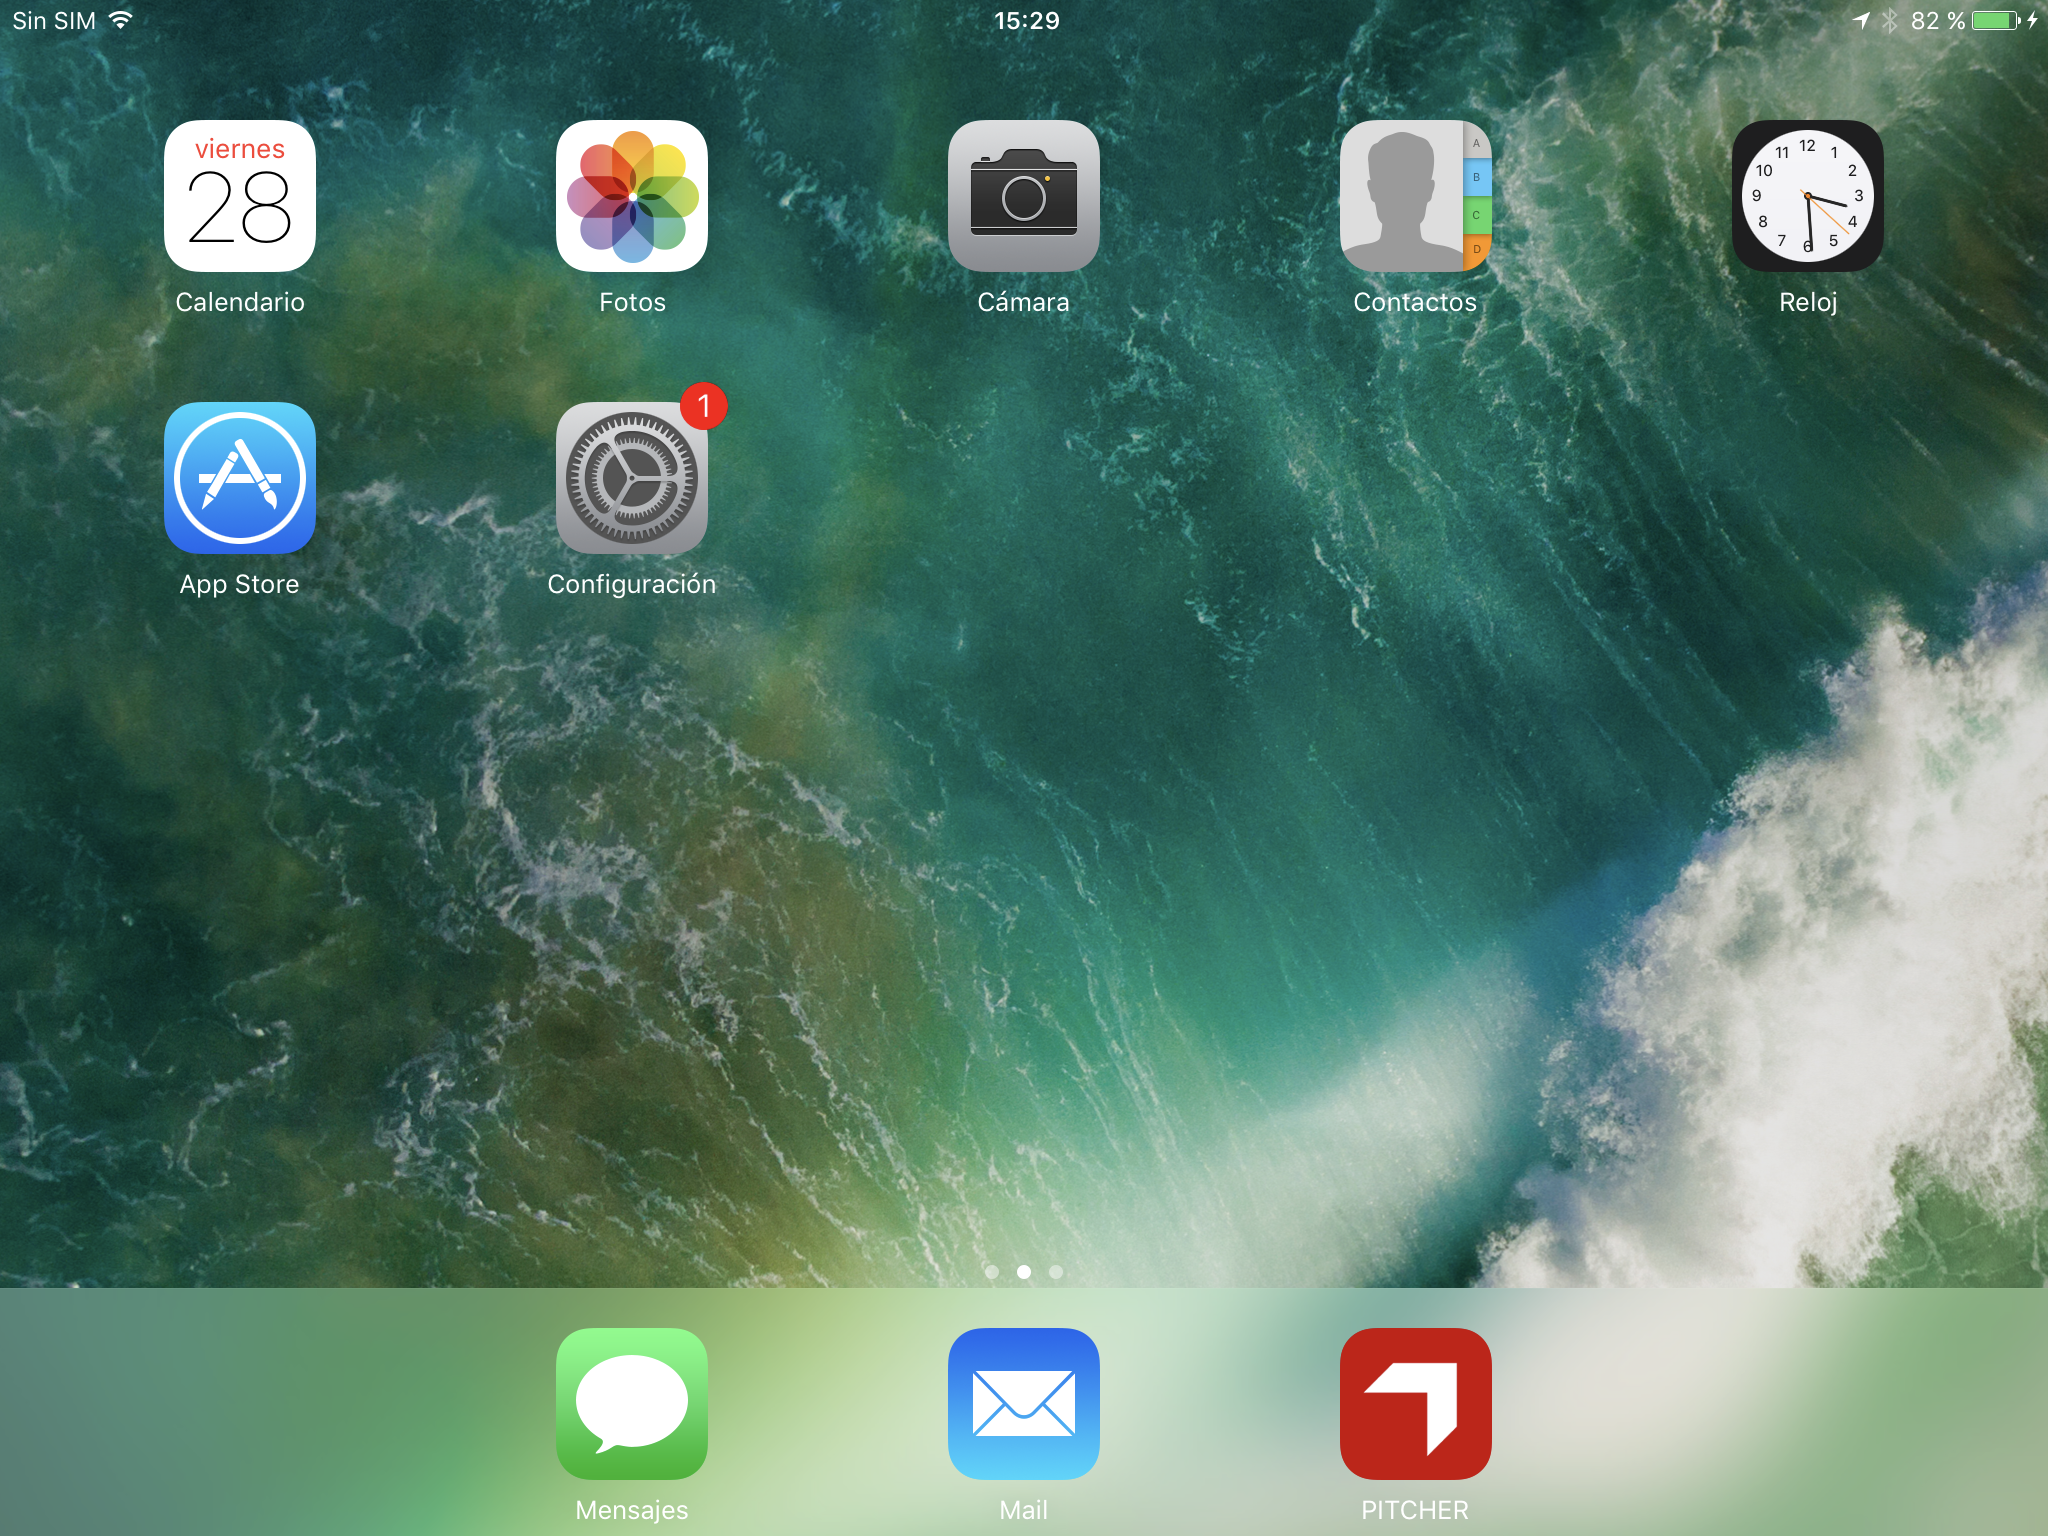
Home Screen of the iPad
Search for Pitcher Impact application in the App Store
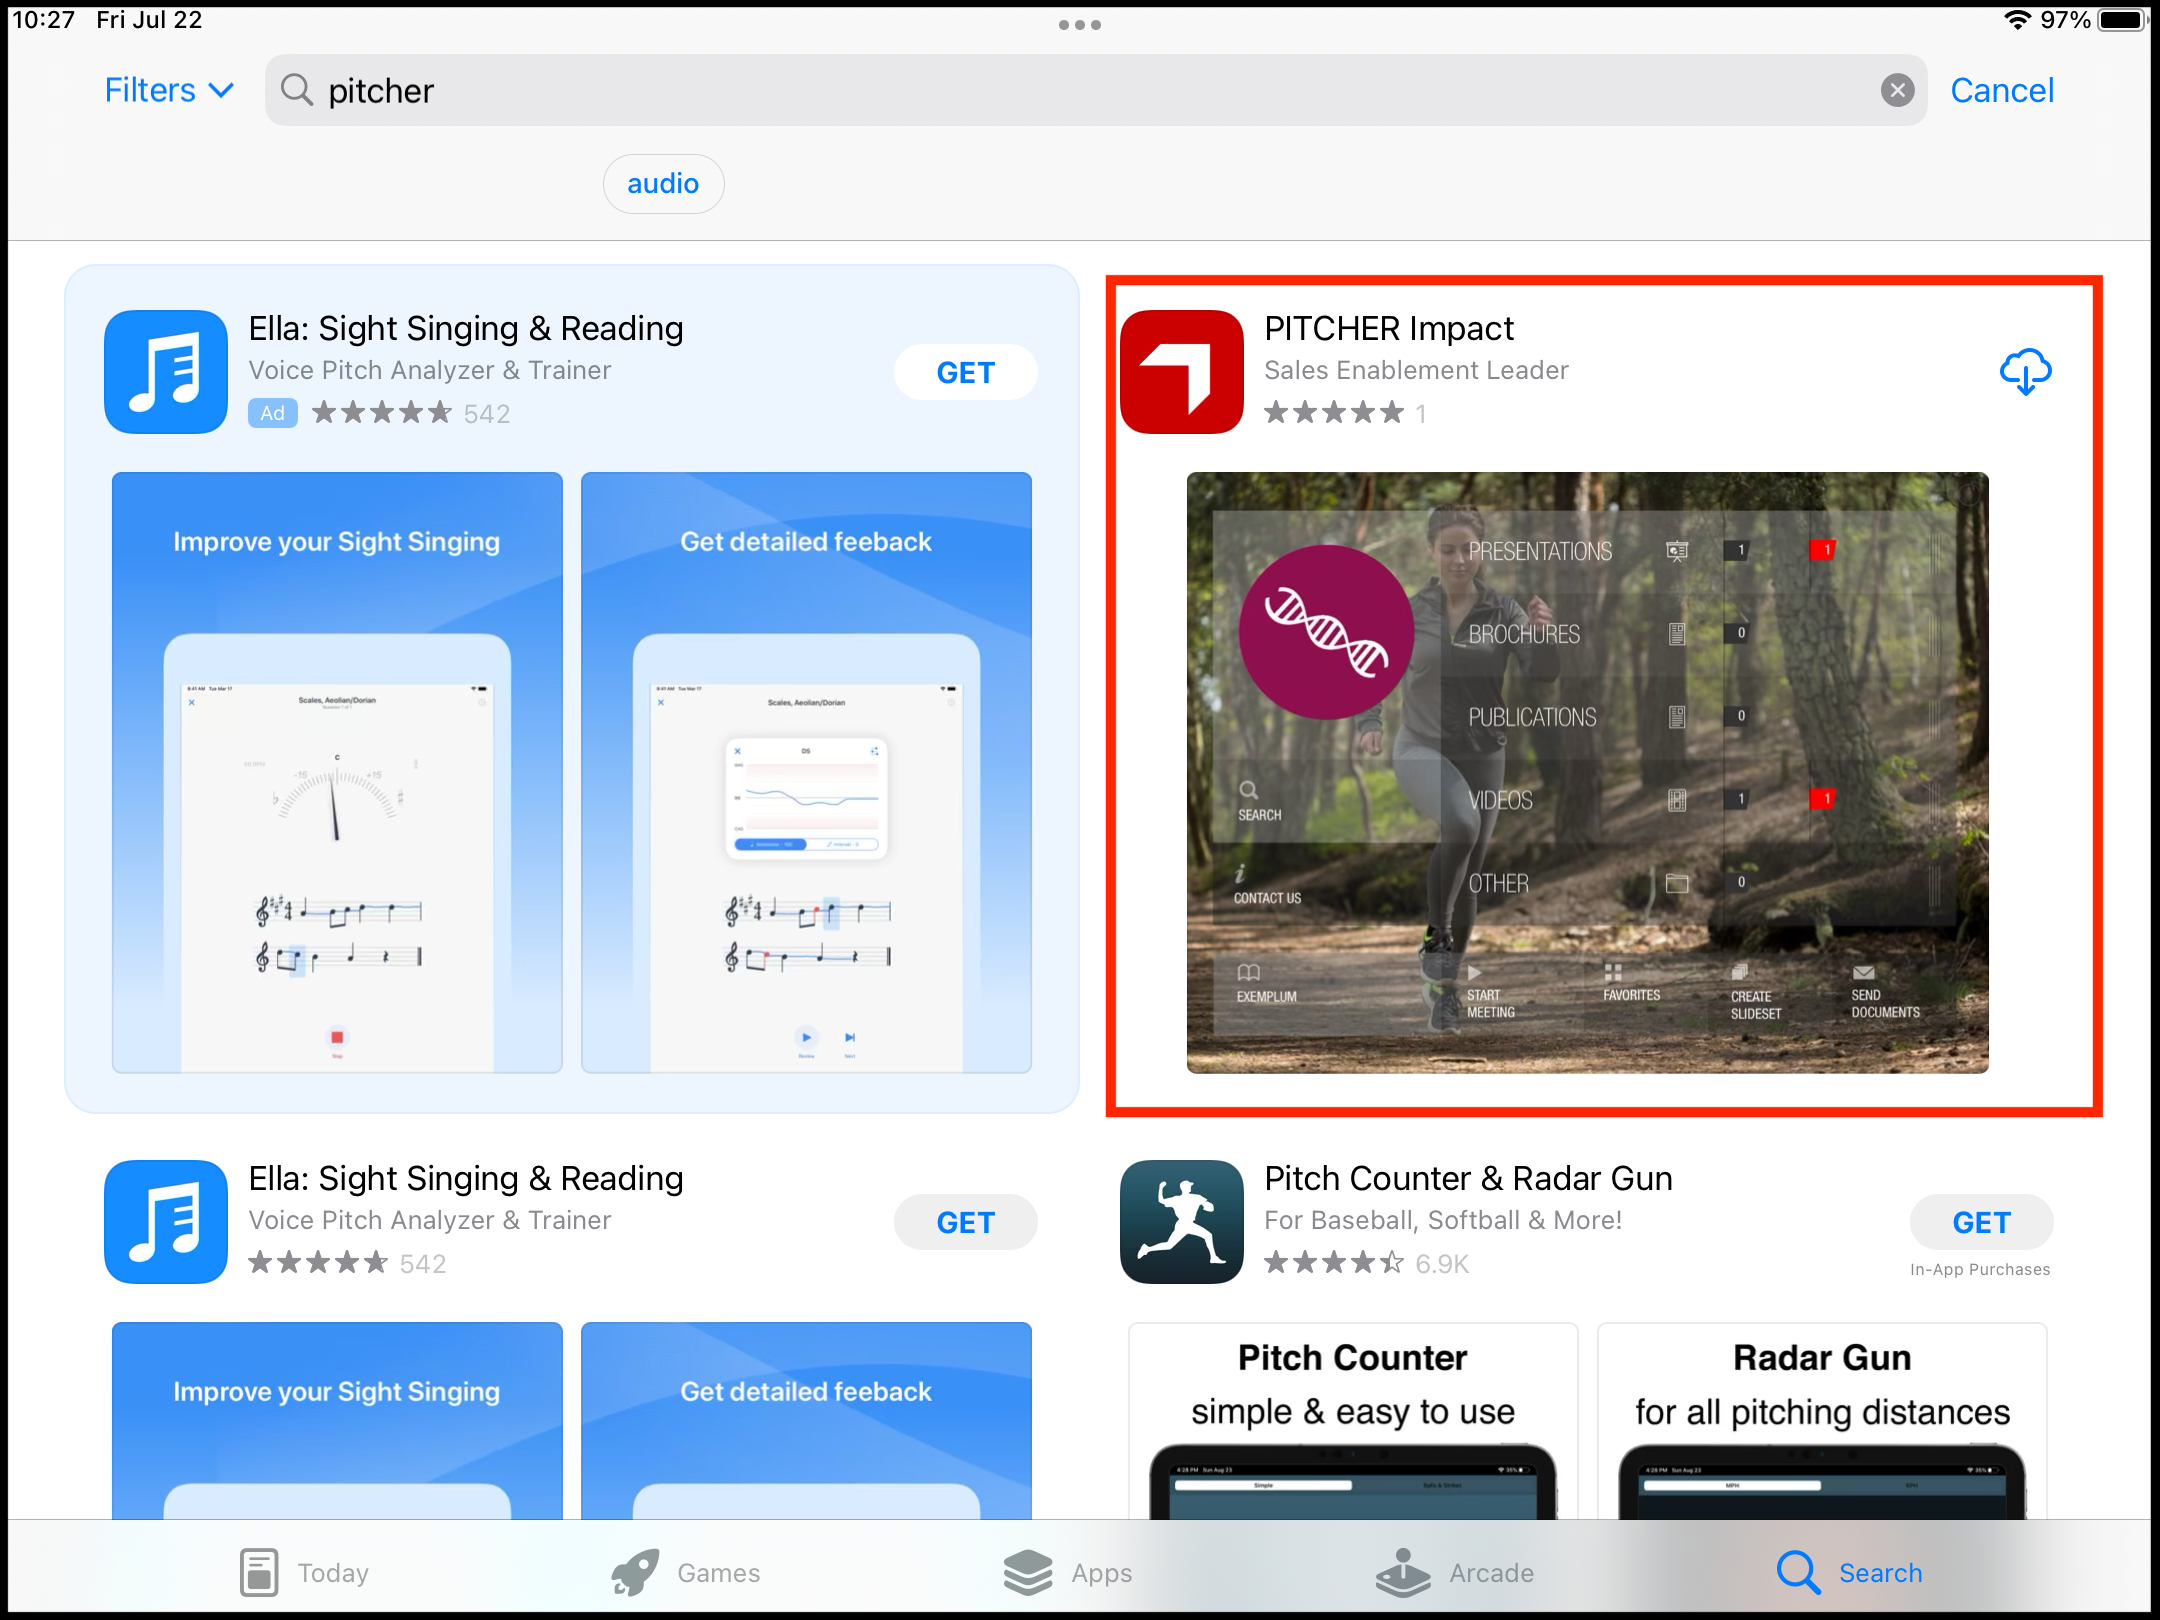
App Store Screen in iPad
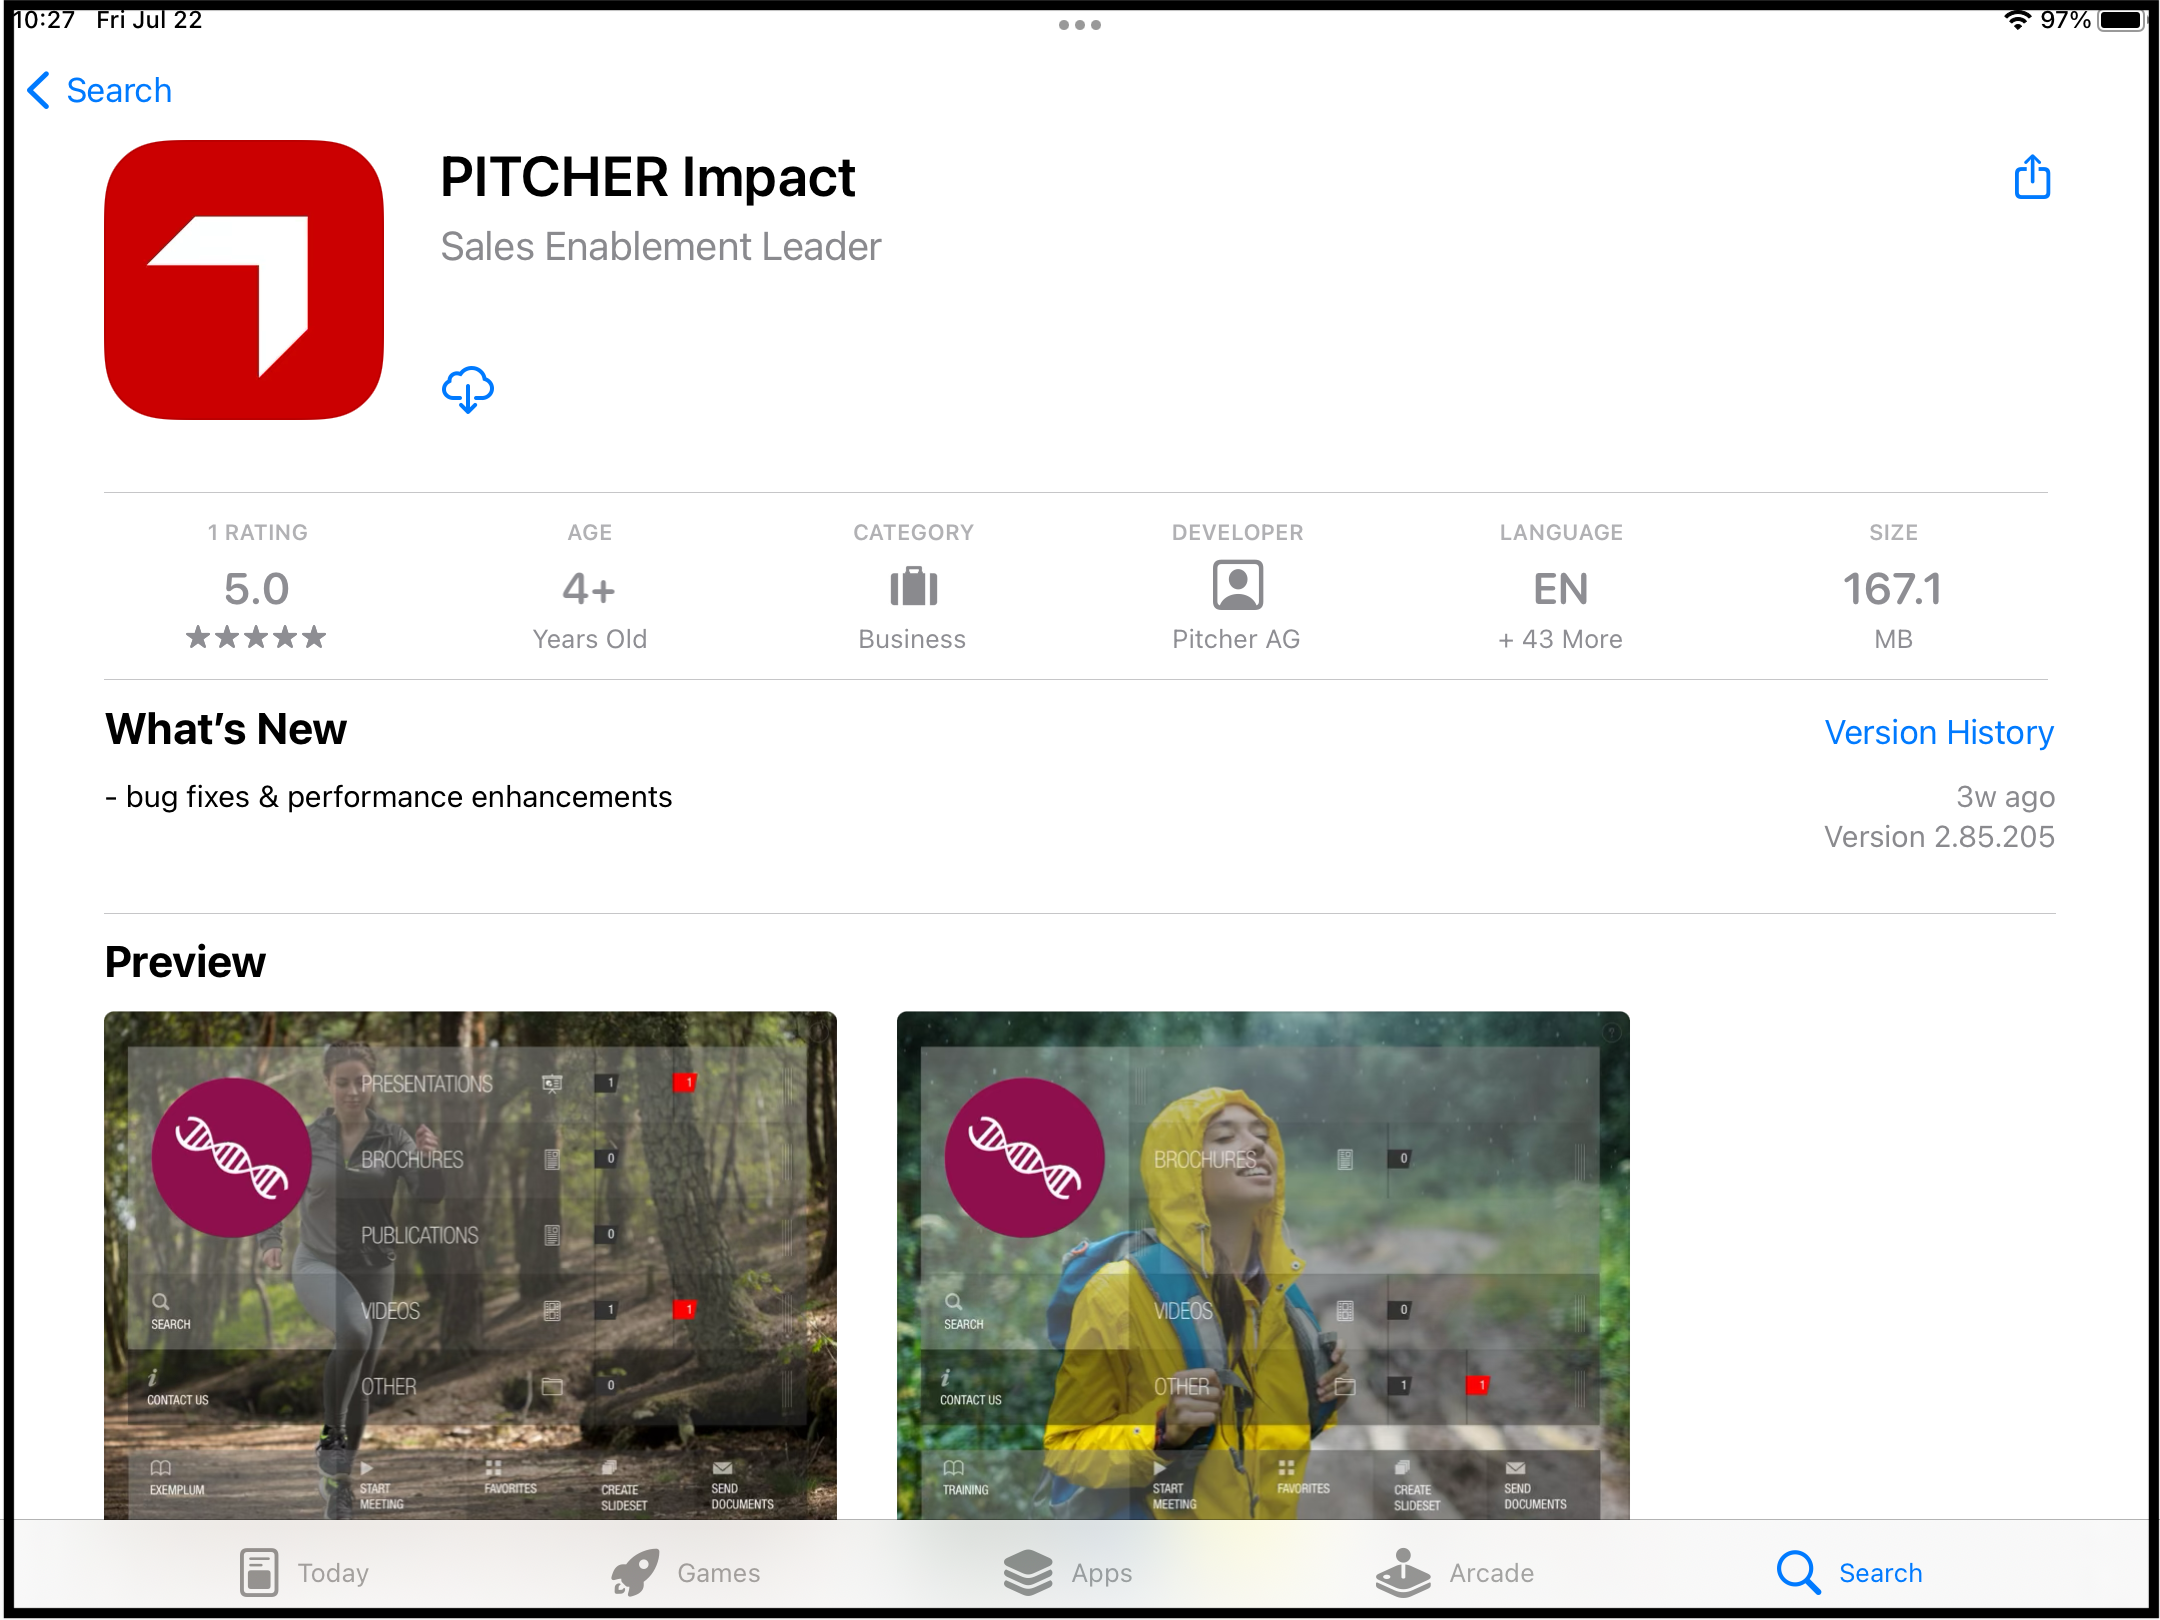
Application in the App Store
Run the Application
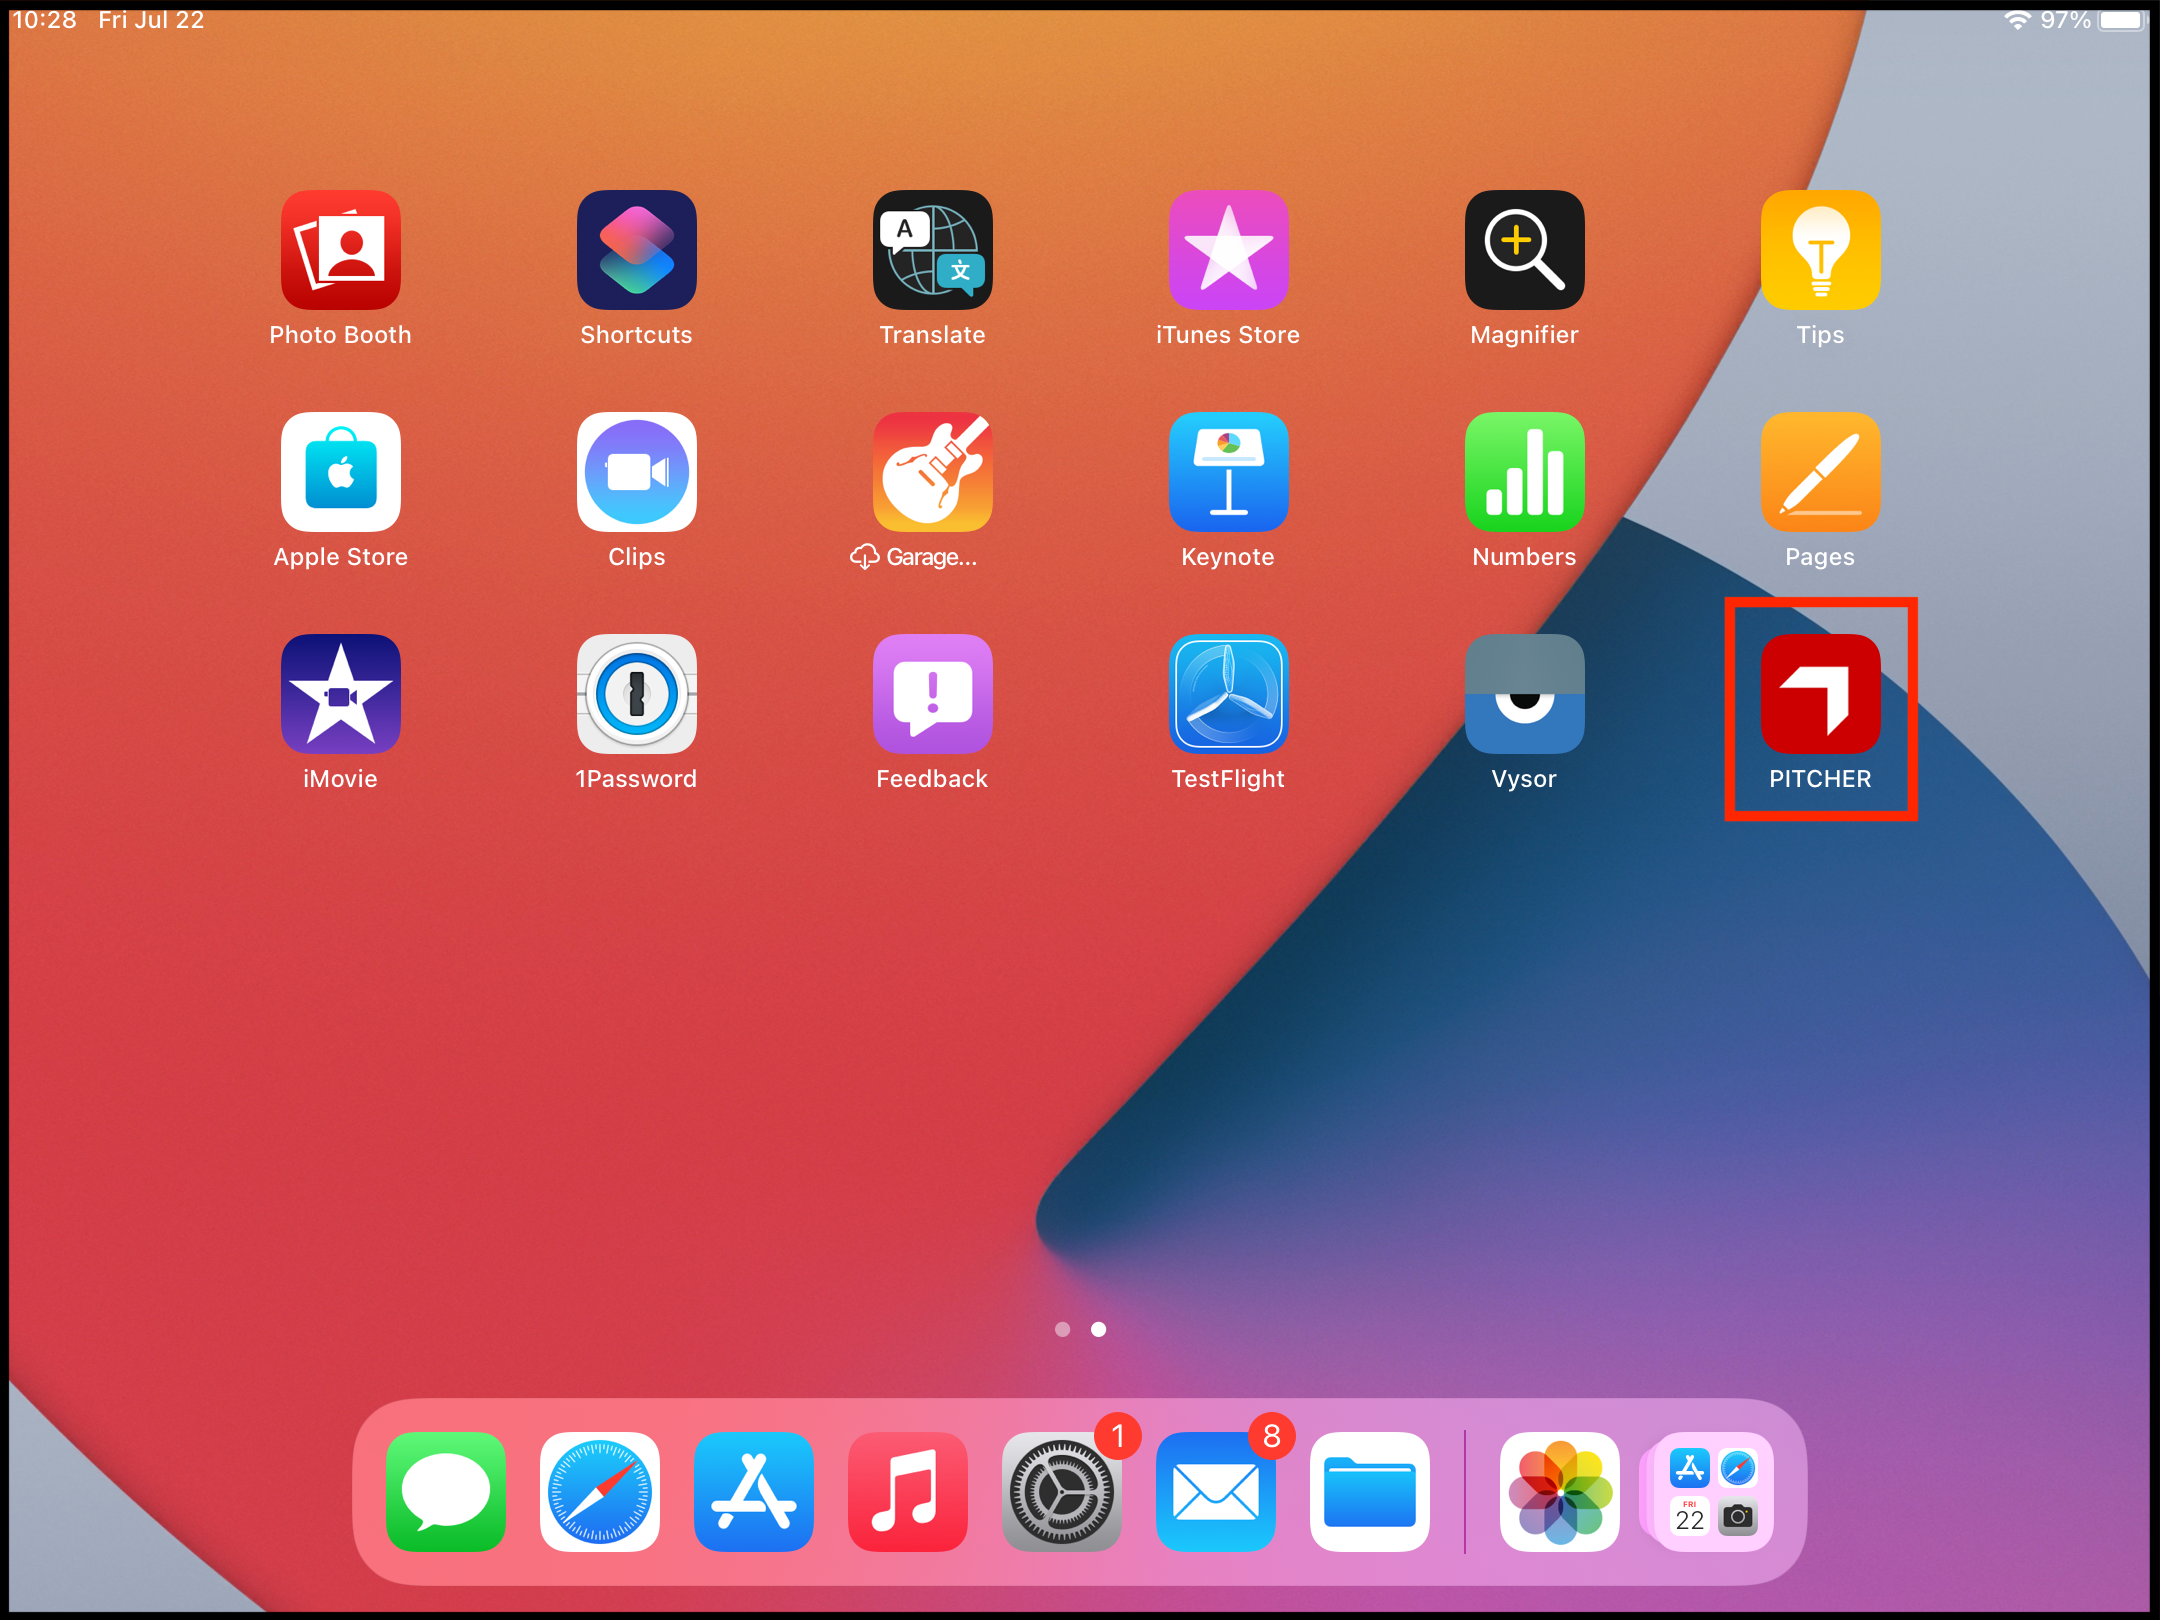
Application on the iPad home screen
After installation, please click on the Pitcher icon to launch the app.
Initial Launch Screen
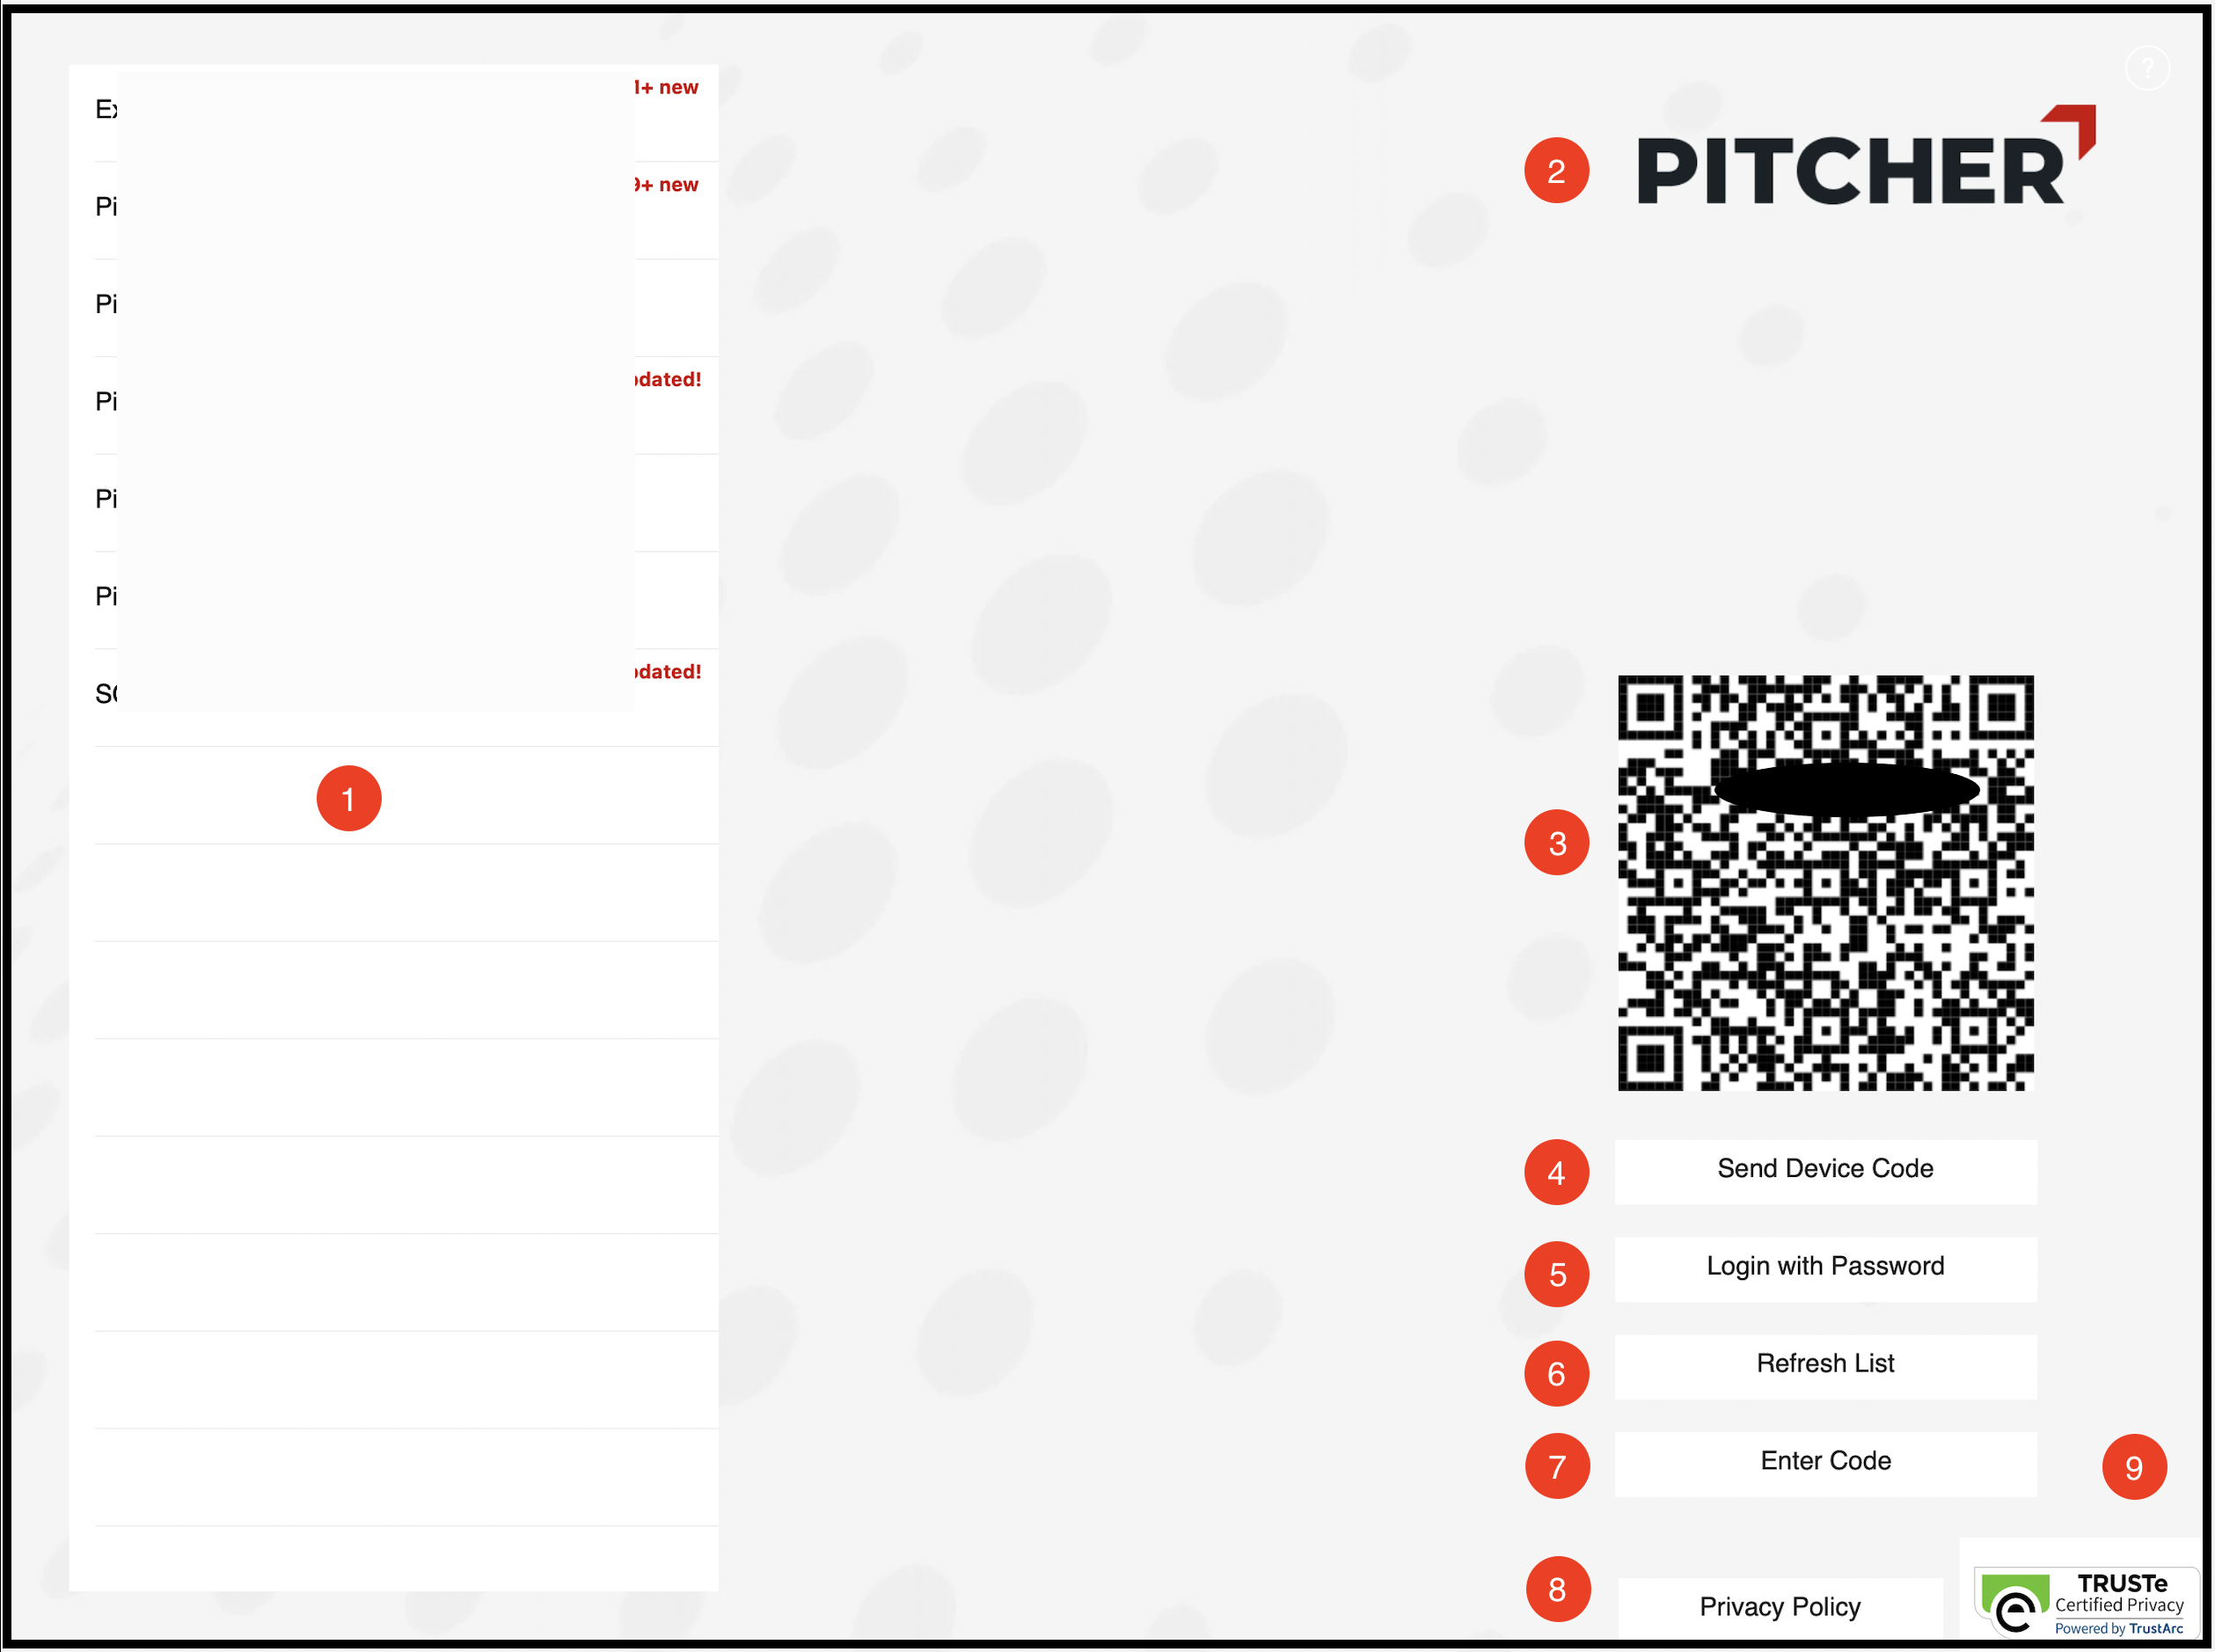
Initial Launch Screen
Description of the Initial Launch Screen
Instance Display Area - Displays the list of all the instances available or accessible to the user.
Pitcher Logo
QR code - Allows the user to scan using mobile device and obtain the device code for iPad
Send Device Code- Alternate option to QR code where user can directly send the device code either using default email client provided by iPad or copying it to the clipboard
Login with Password - Provides the option to the user to login either via providing username/password or login via SSO.
Refresh List- Provides the user a walkthrough on the home screen navigation and also refreshes the list of instances in the instance display area.
Enter Code - Allows the user to provide the code provided by the admin along with the Meta Data.
Privacy Policy - Opens the Pitcher’s privacy policy in the device’s default browser.
TRUSTe logo
Getting Access to the Instance
Instances
Instances are small apps within Pitcher. Each app can have its own user interface, features, and own content. A User of Pitcher can have access to multiple instances, that needs to be cross checked with the system administrator. There are various ways to access the instance(s).
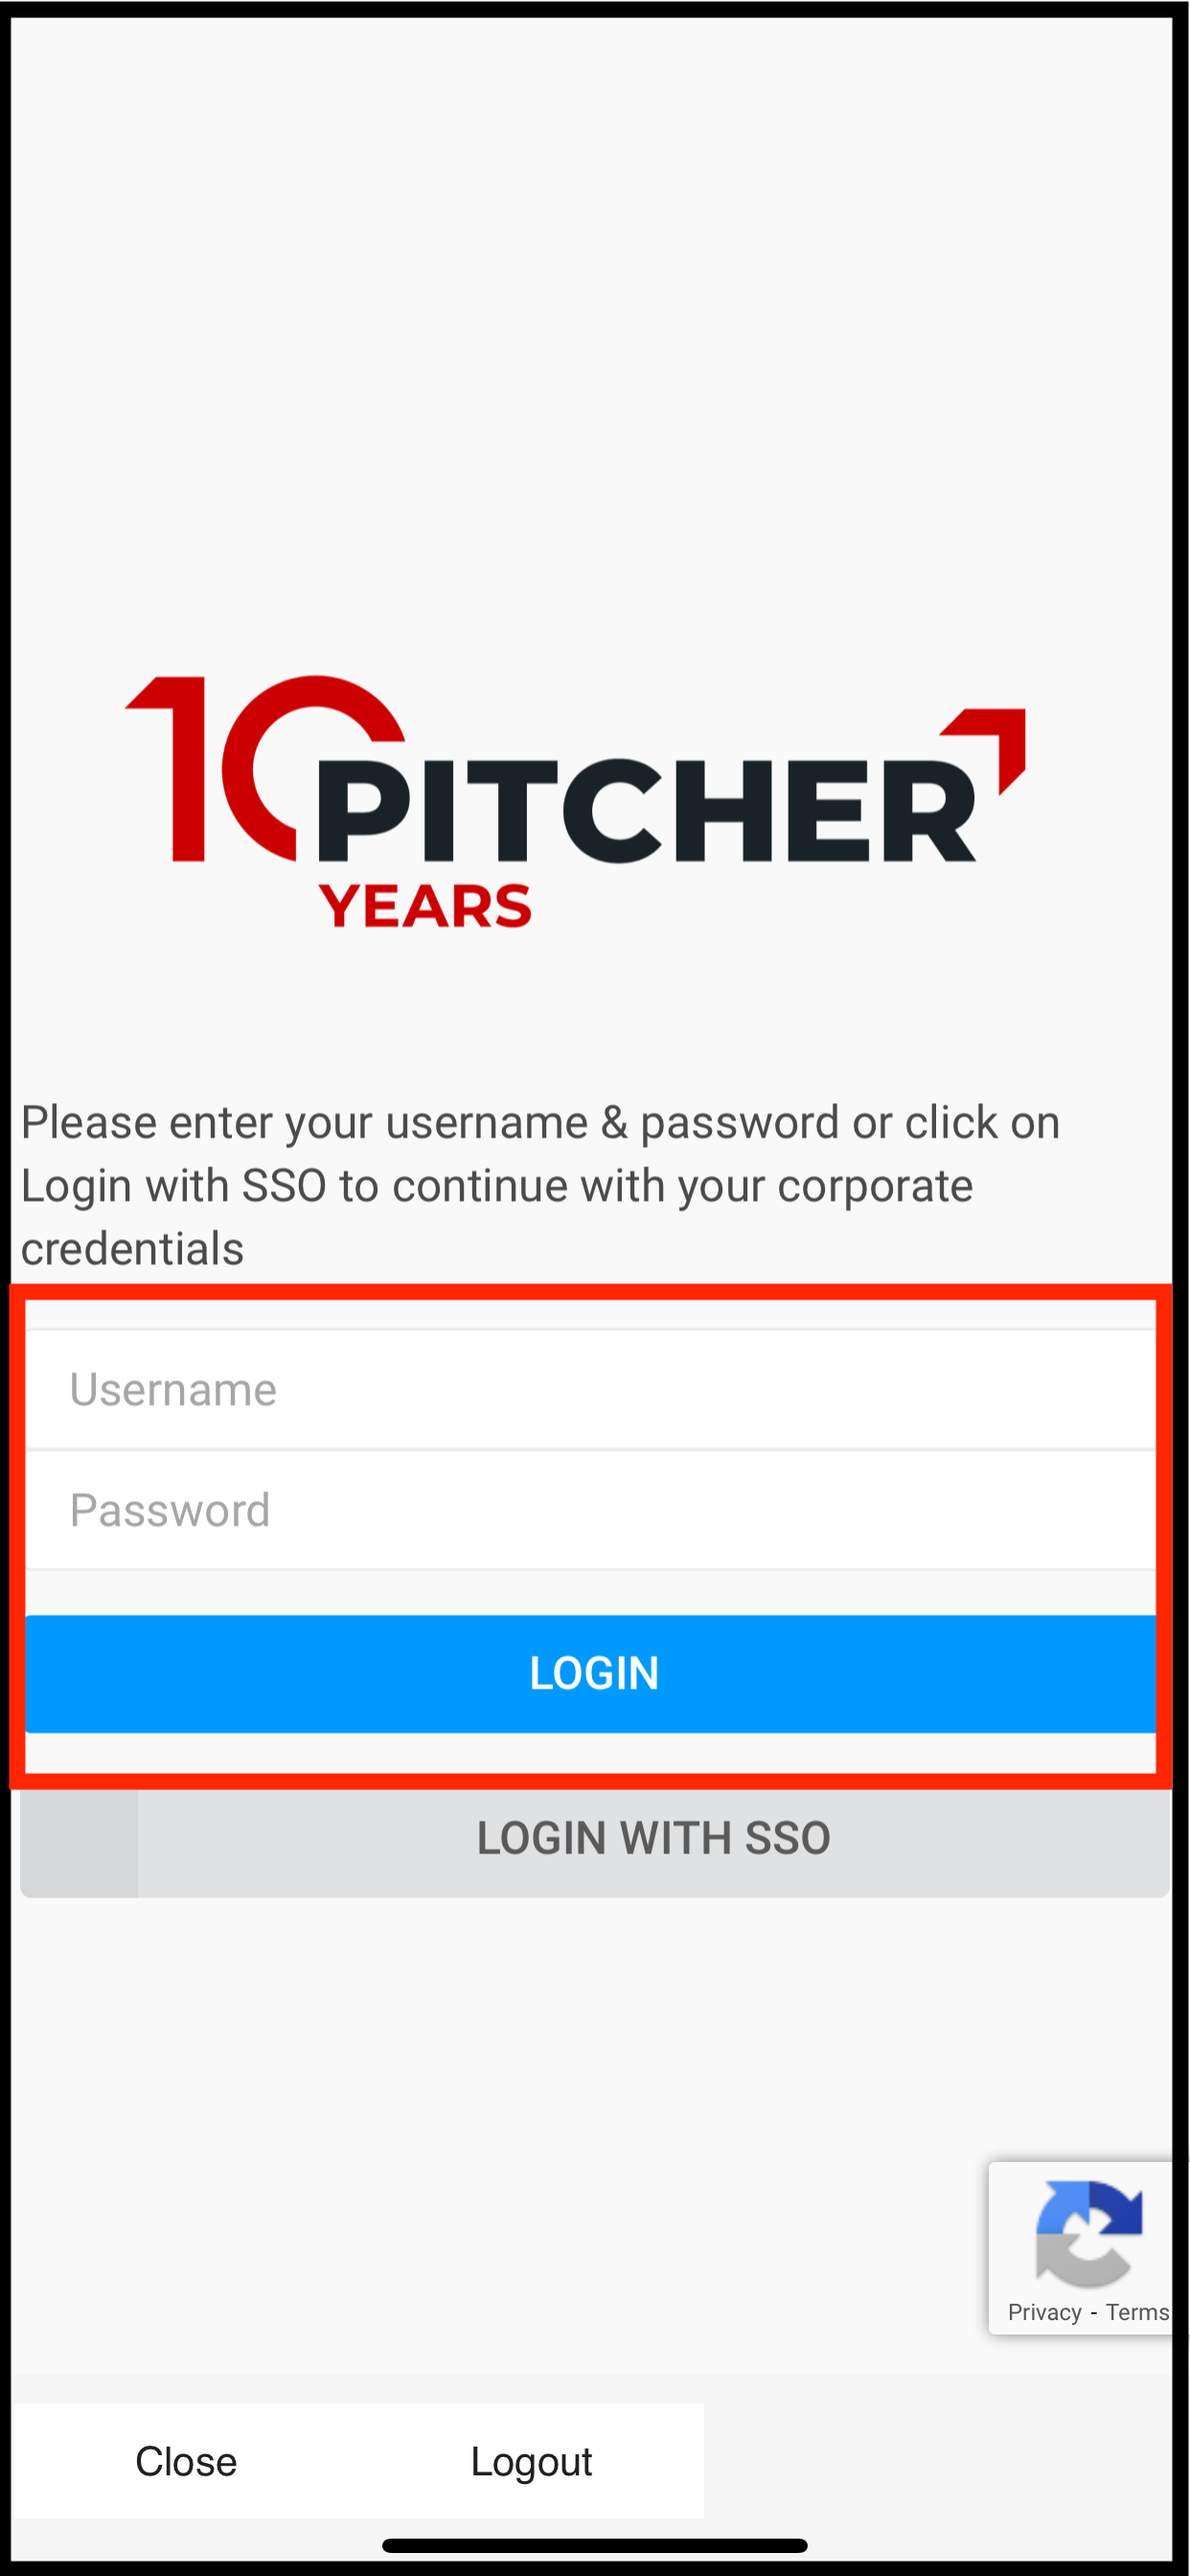
Login with Password
With Username and Password
If the user is provided with username and password, then the same can also be used to login to the particular instance. Login with Password also provides option of login using the SSO.
It is important to note that during the first login the user has to be online but afterwards the app can be operated in offline mode as well.
%20-%202022-07-03%20at%2021.29.22.png?inst-v=973f3c37-d617-4a1c-9816-b97ed52324dd)
Login with Password to access the instance
Tapping on Login with Password should open a pop up window that allows the user to provide username and password provided by the system Admin.
%20-%202022-07-03%20at%2021.15.24.png?inst-v=973f3c37-d617-4a1c-9816-b97ed52324dd)
Login Window in Impact App
Tapping on logout option will close and exit application.
The close button will close the pop up window and user can login by tapping the Login option after they have provided the username and password.
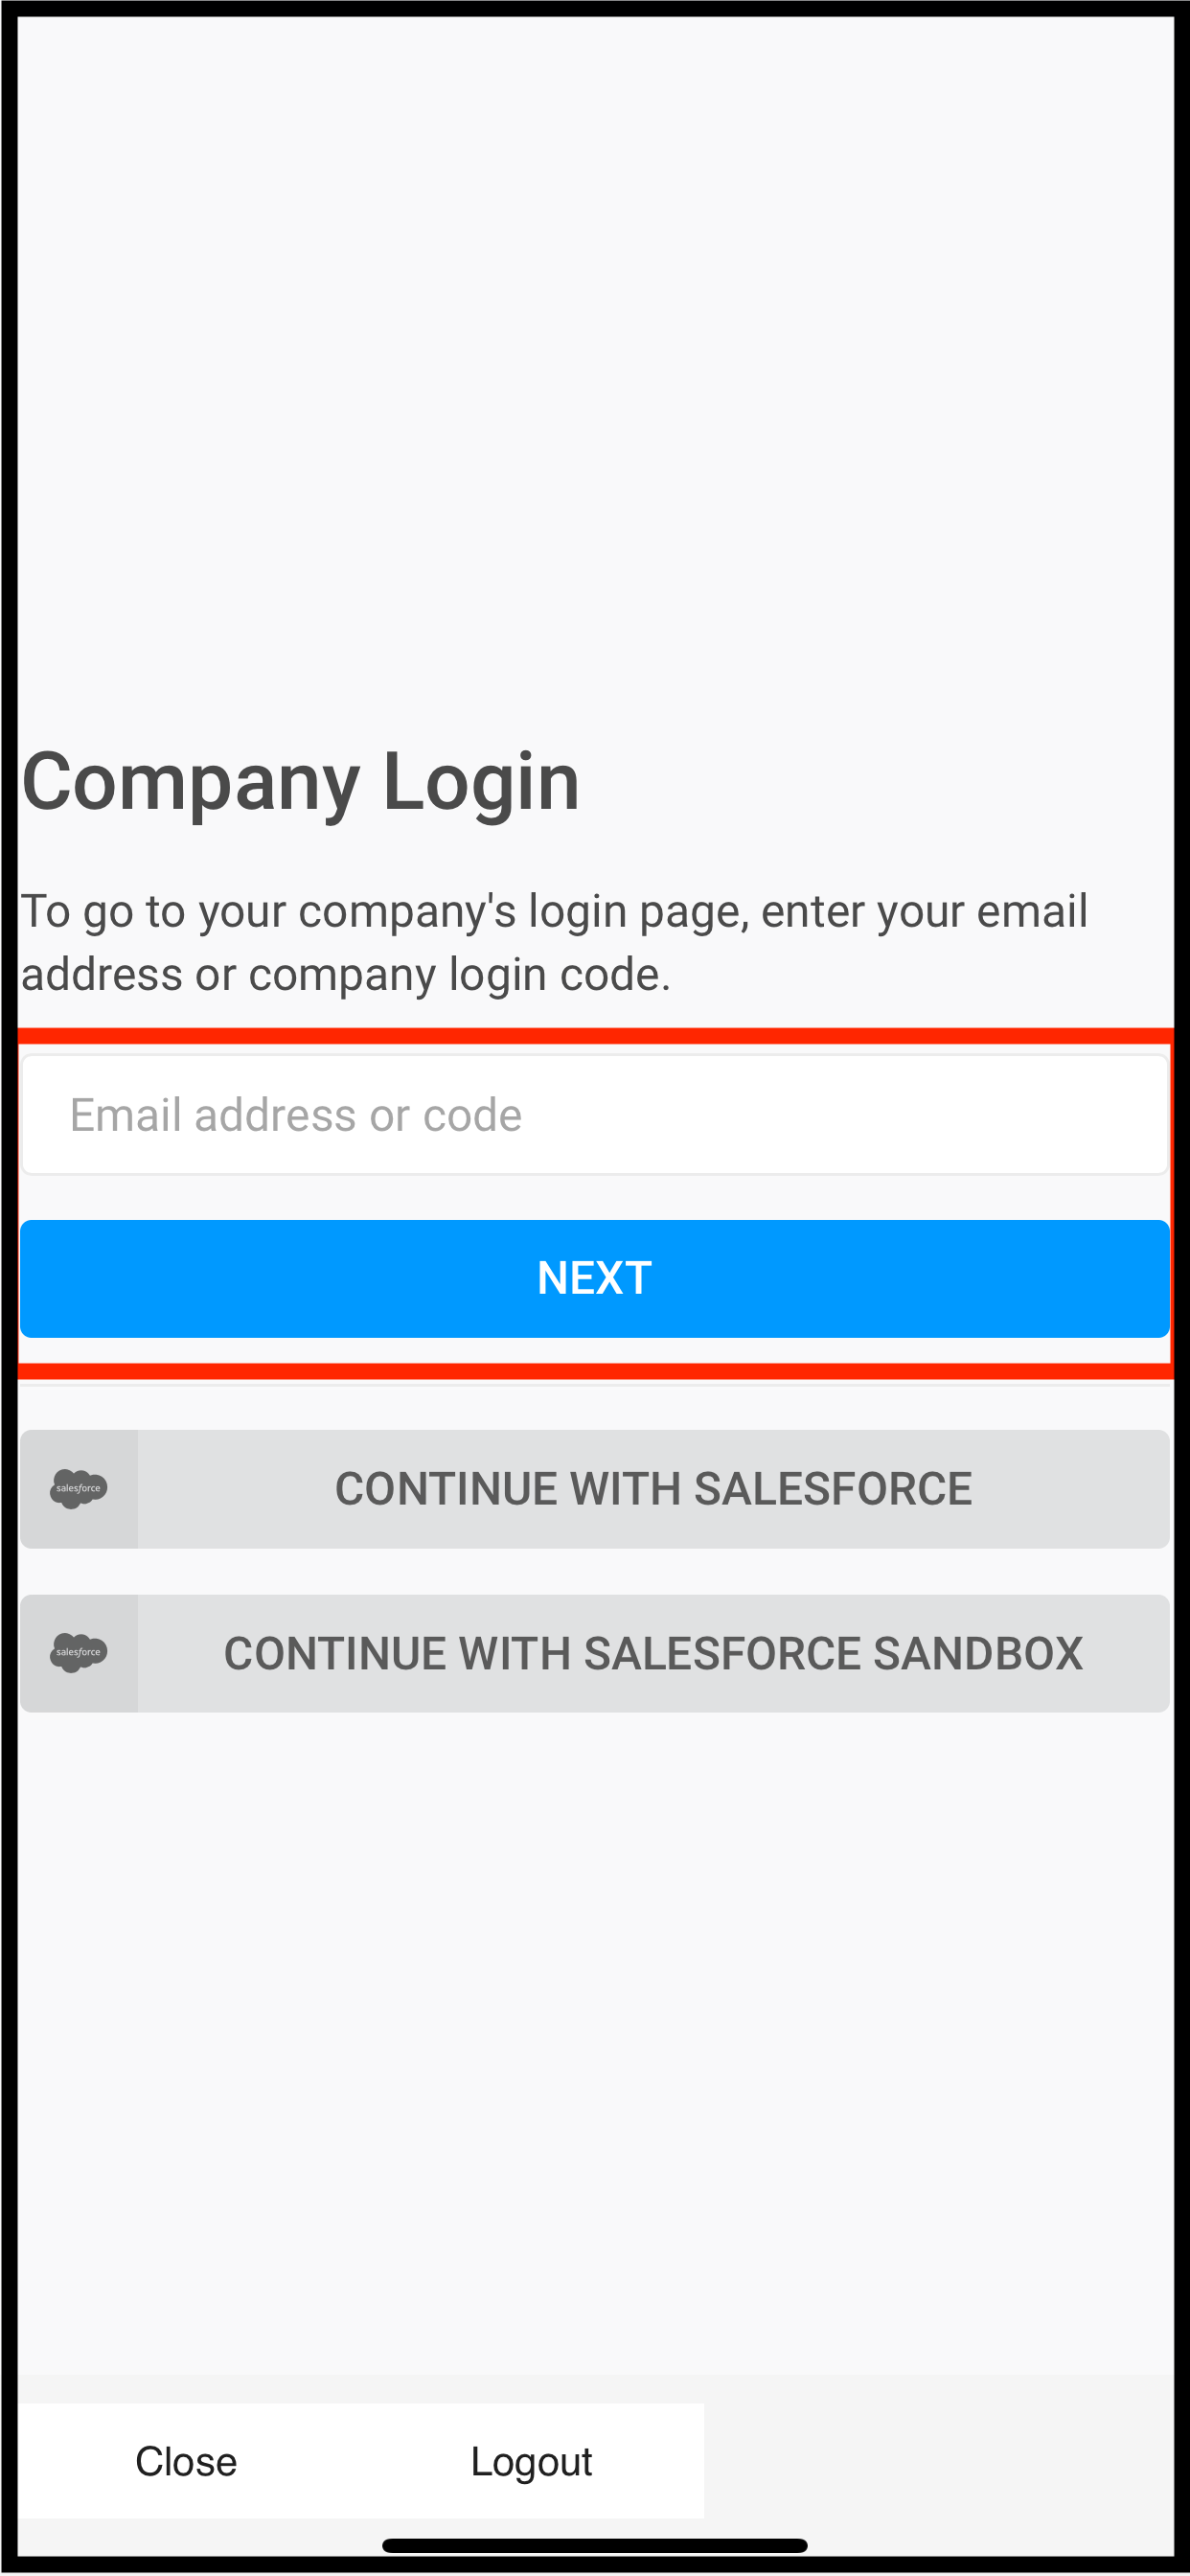
Login with SSO
%20-%202022-07-03%20at%2021.21.51.png?inst-v=973f3c37-d617-4a1c-9816-b97ed52324dd)
Login With SSO
Login with SSO is another way by which the user can access the instances of Pitcher Impact app. Tapping on SSO will open another pop up window as shown below
%20-%202022-07-03%20at%2021.35.13.png?inst-v=973f3c37-d617-4a1c-9816-b97ed52324dd)
Login with SSO window
The users can provide email or code provided by their System Admin or IT support team. If in case the Salesforce is integrated to the instance then the users can also tap Continue with the Salesforce or Continue with the Salesforce Sandbox
SSO login with Company Email Address or Code
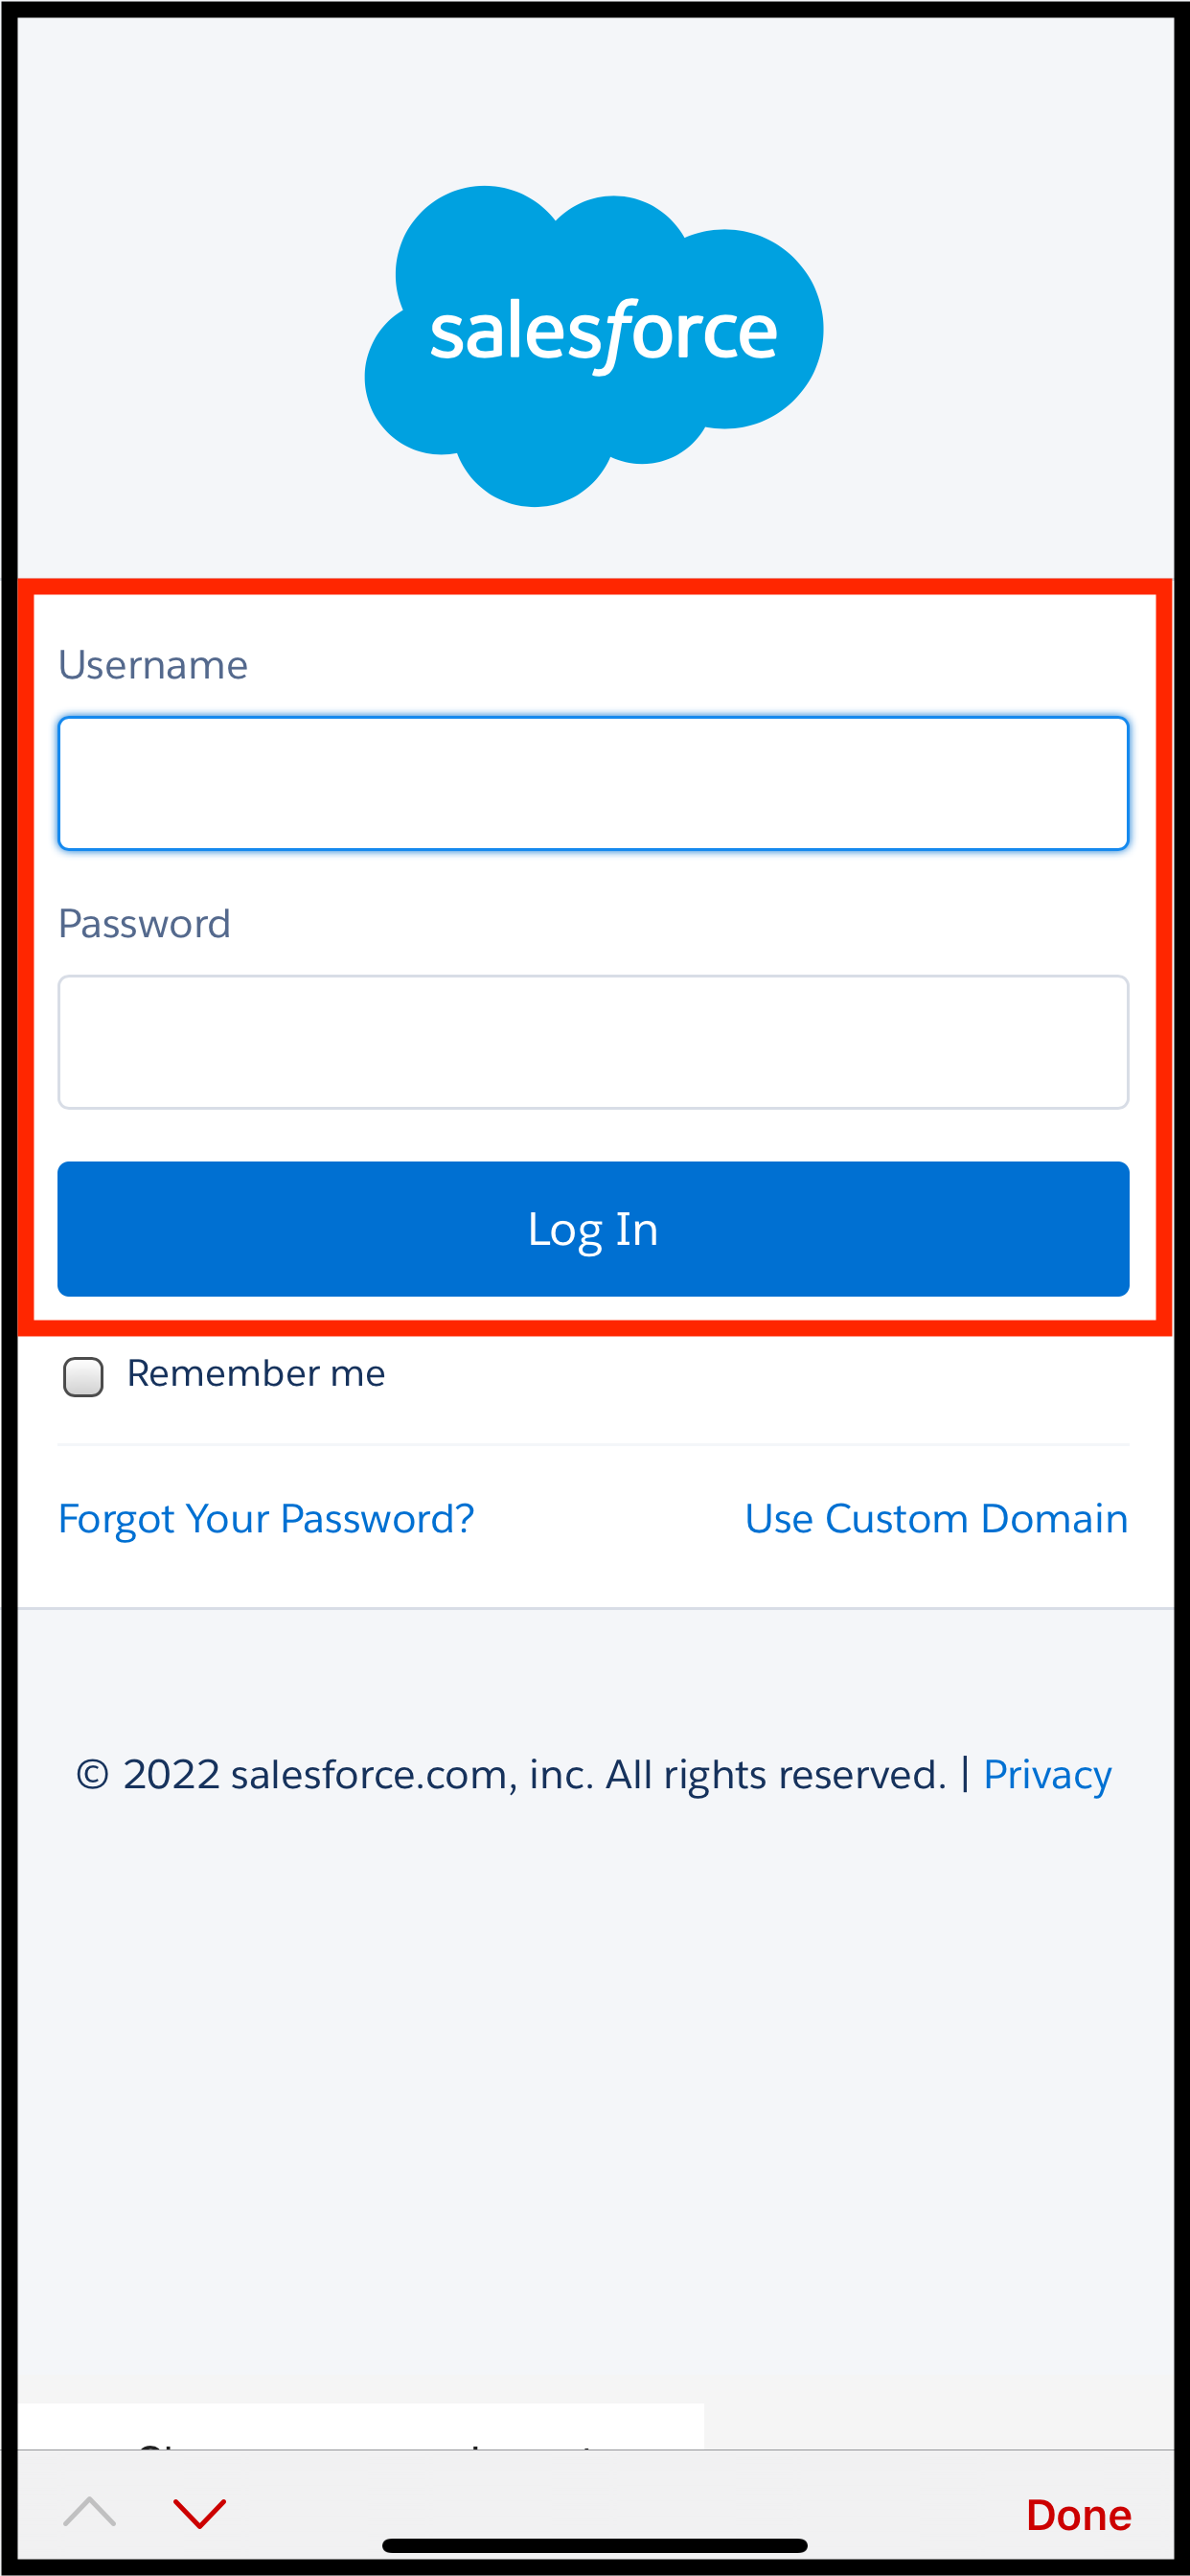
On tapping the Next option after the username or code has been provided (given by the customer’s system admin) default system browser will open a page as shown in the sample below
This page will ask for the user’s credential and will sign in to the instance.
%20-%202022-07-03%20at%2021.49.53.png?inst-v=973f3c37-d617-4a1c-9816-b97ed52324dd)
A browser login window for SSO
SSO Login with CRM and CRM Sandbox (For instances connected to CRM)
%20-%202022-07-03%20at%2021.56.35.png?inst-v=973f3c37-d617-4a1c-9816-b97ed52324dd)
CRM Login Option
Tapping on Continue with the Salesforce or Continue with the Salesforce Sandbox will open another window as shown below.
%20-%202022-07-03%20at%2022.01.17.png?inst-v=973f3c37-d617-4a1c-9816-b97ed52324dd)
CRM Login Window
Here user can provide CRM credentials which will authenticate against the CRM connected to the instances and will give access to the instances.
By Default Pitcher provides Sales Force as a CRM integrated with the Impact app. However, a specific customer instance can also have other third party CRM integrated with the application.
Using Custom Domain
Users can also opt for Use Custom Domain to login to CRM.
%20-%202022-07-03%20at%2022.09.58.png?inst-v=973f3c37-d617-4a1c-9816-b97ed52324dd)
Custom Domain for Login
On tapping Use Custom Domain a window will open as shown below where users can provide their organization’s custom domain.
%20-%202022-07-03%20at%2022.13.54.png?inst-v=973f3c37-d617-4a1c-9816-b97ed52324dd)
Custom Domain Window
Continue will open a new page in the web browser which further authenticates the user’s credentials.
Via Device Code
There are two ways to get a device code from the home screen of the impact app.
Scanning the QR Code
%20-%202022-07-03%20at%2020.59.50.png?inst-v=973f3c37-d617-4a1c-9816-b97ed52324dd)
The QR Code
The system admin can scan the QR code on the user’s device using the QR code scanner app and set it in the Pitcher Admin Portal.
The QR code contains the device code.
QR Code Scanner App
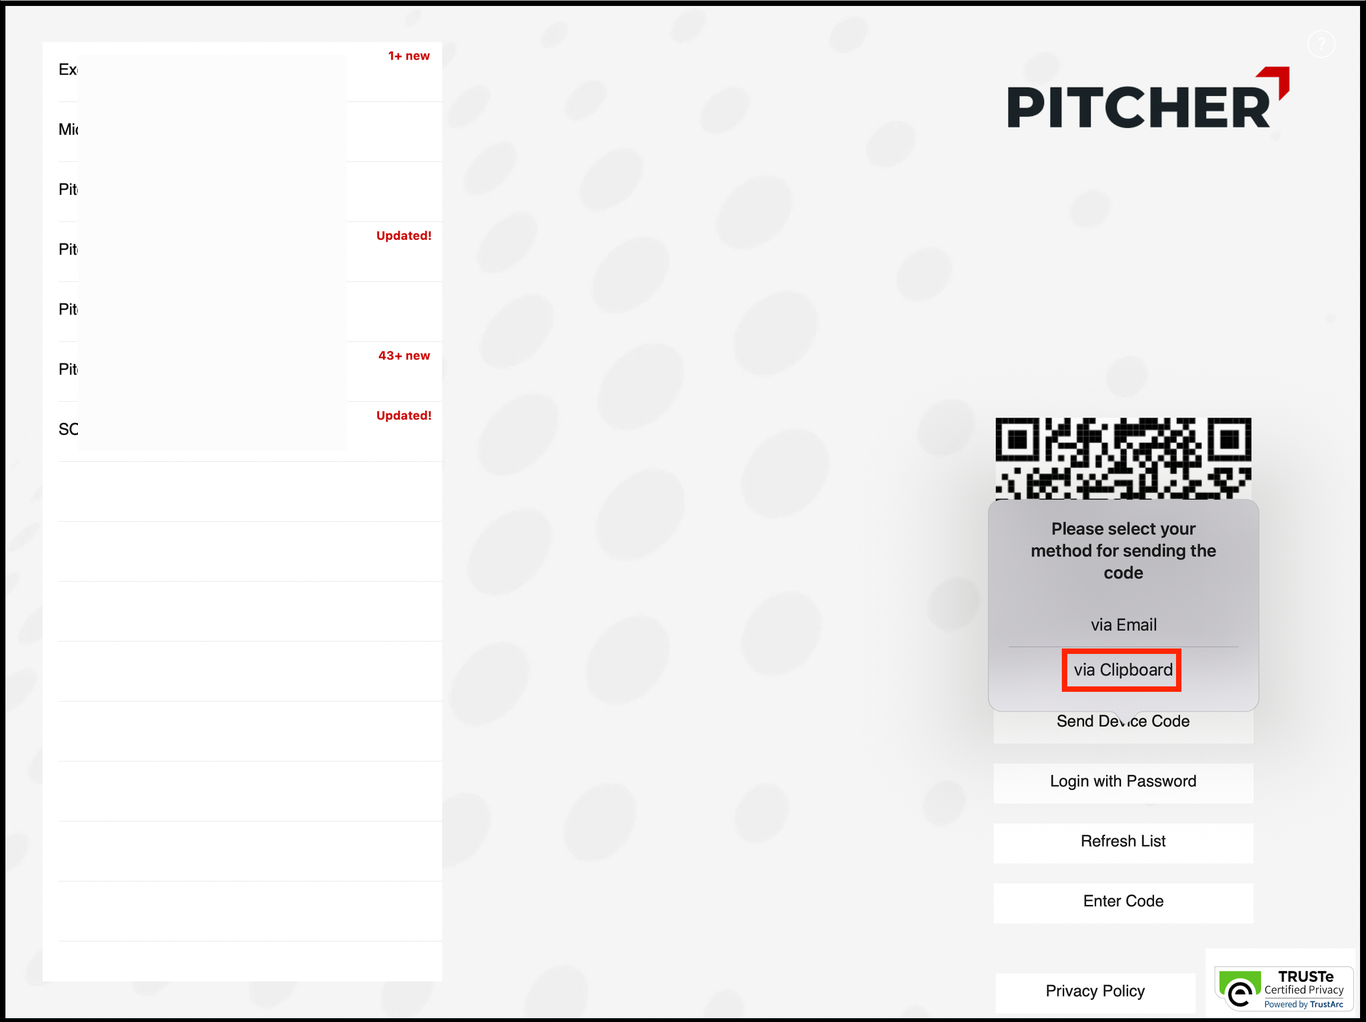
Using the Send Device Code
In case the list of instances is empty, then tapping on Send Device Code provides options to the user to provide the device code to the System Admin.
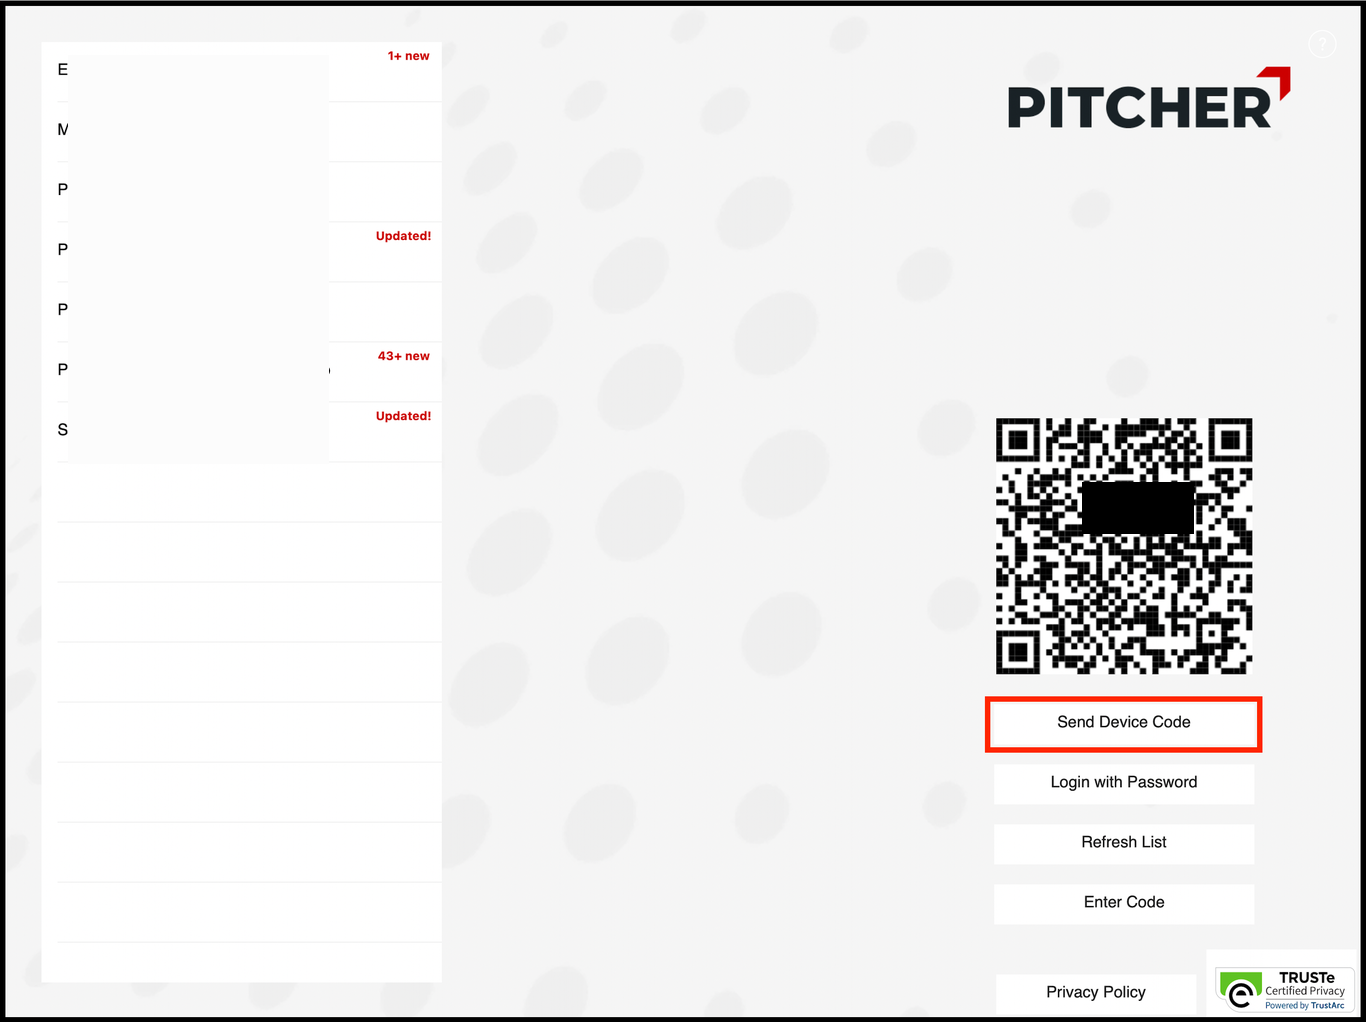
Send Device Code Option in the app
Send Device Code provides two options to send the code via Email and via Clipboard
via Email
%20-%202022-07-03%20at%2021.06.07.png?inst-v=973f3c37-d617-4a1c-9816-b97ed52324dd)
Send Device Code via Email
Via Email option will open default email client in the iPad (if it is configured) with the device code in the body of the email as shown below.

Email Client for sending the device code
The email can be forwarded of the system admin who will add it to the Pitcher Admin Portal.
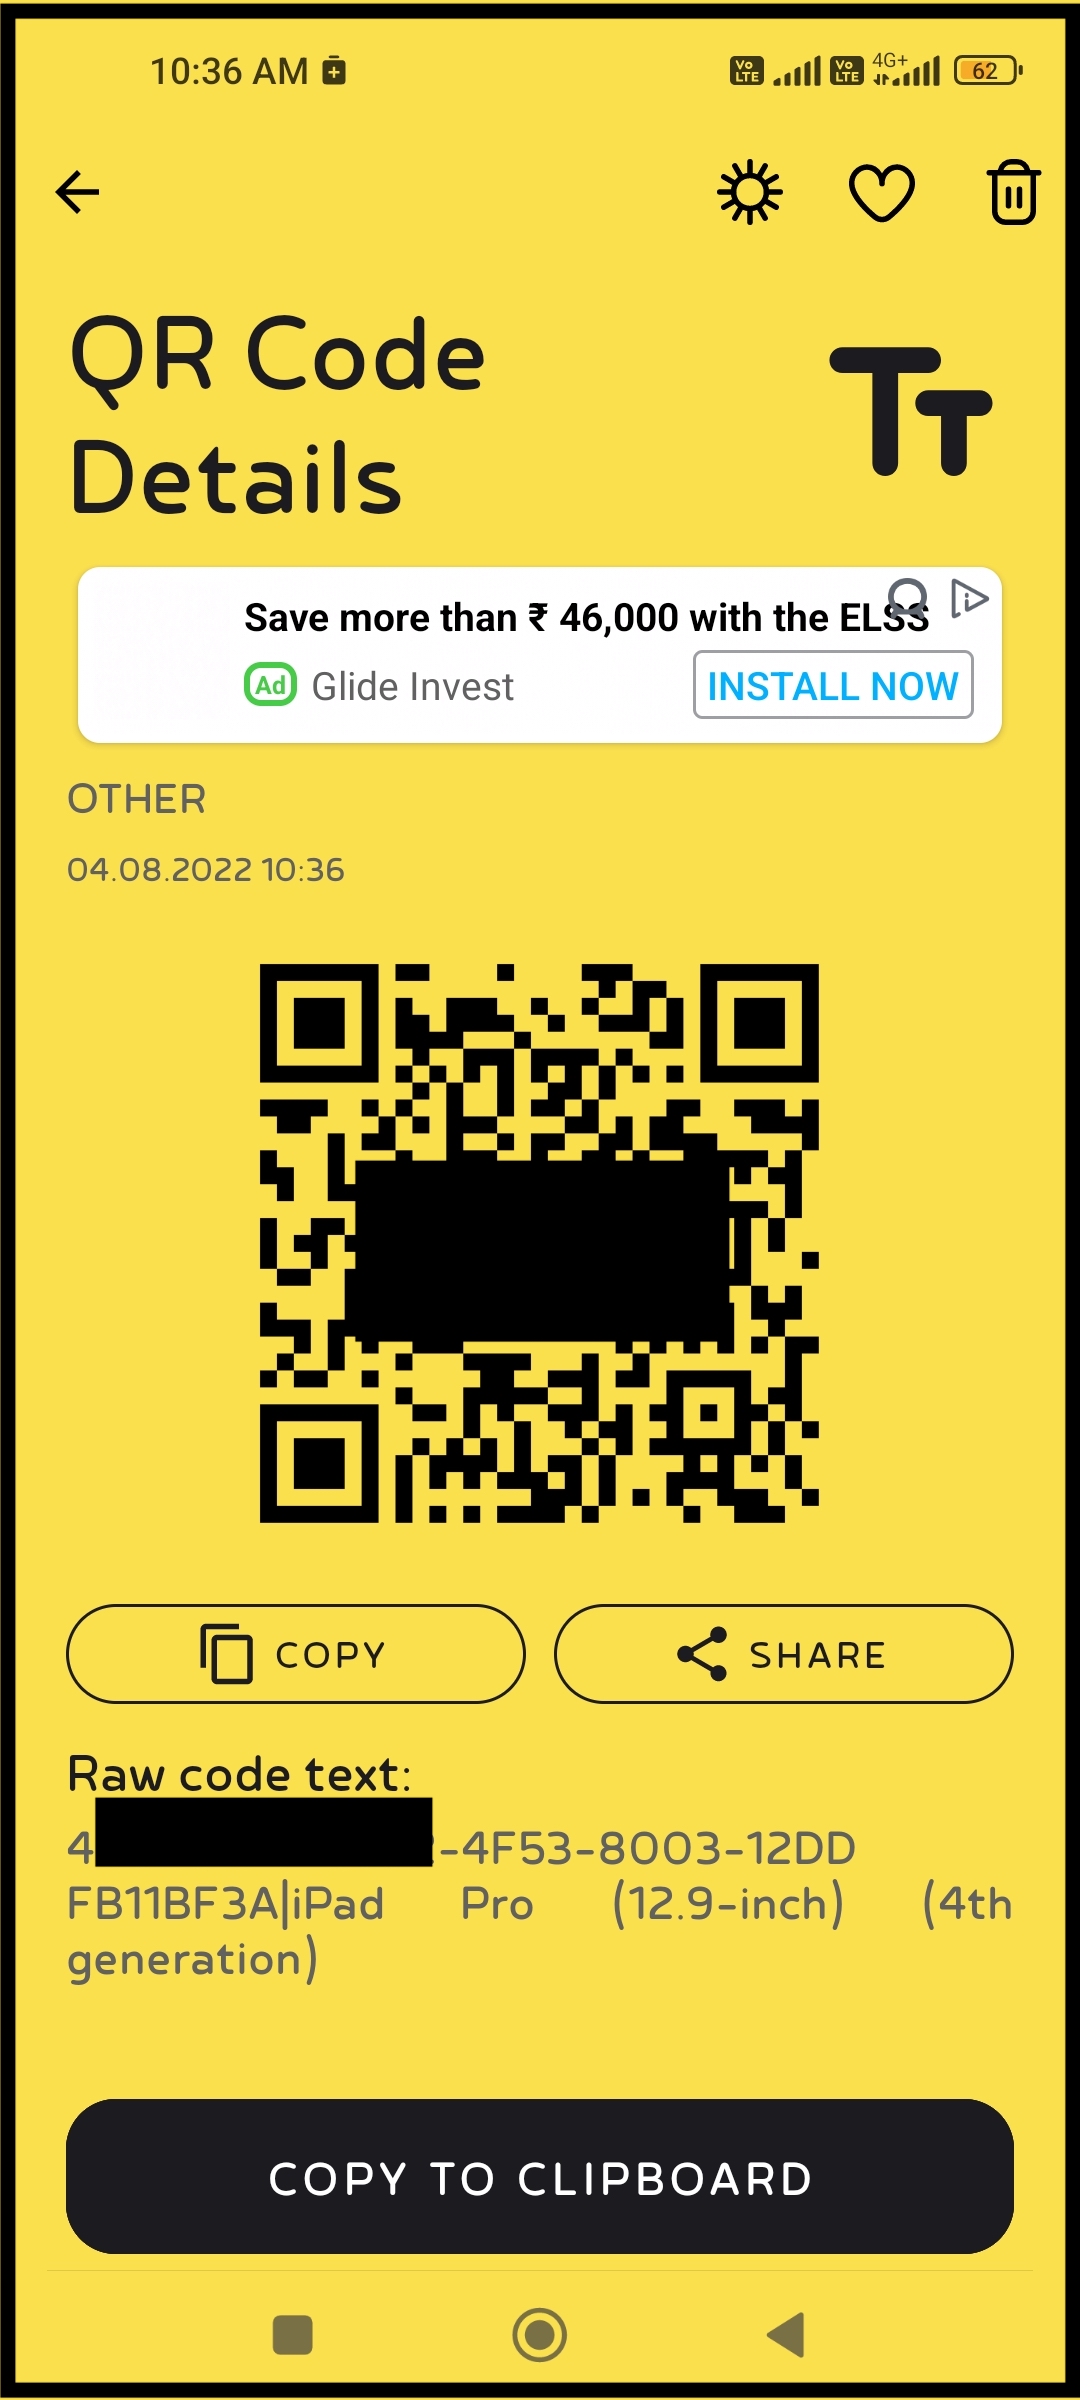
via Clipboard
Copy device code to the Clipboard
Another way is to copy the device code to the clipboard.
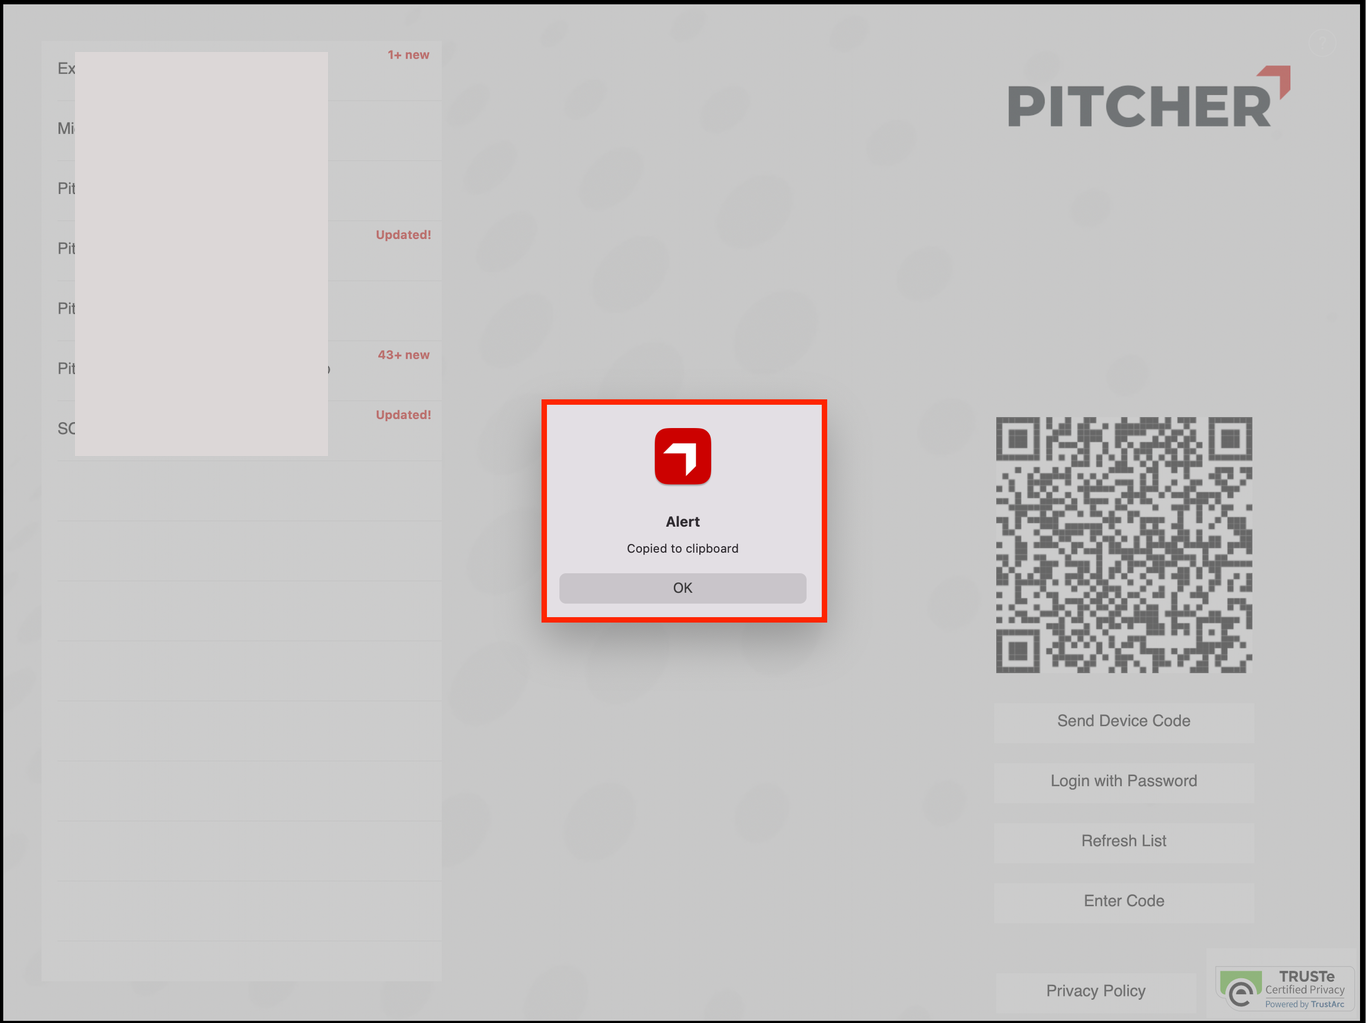
Alert message confirming the device code is copied
The code is copied to clipboard and this code can be then sent via email or can be sent to the system Admin through any other means to be set in the Pitcher Admin Portal.
Via Enter Code
If a code is provided by the admin or the Pitcher team, same can be added using the option Enter Code as shown below.
%20-%202022-07-03%20at%2022.16.39.png?inst-v=973f3c37-d617-4a1c-9816-b97ed52324dd)
Enter the Code window
Tap on Enter Code
Give the code provided by the admin and then send.
Important: If the user has access to only one instance then this window will not be visible. To make it visible, Pitcher settings section should be referred.
If a confirmation mail has been received by the user, then it should be ensured that iOS device is connected to a wifi network and Refresh List should be tapped.
If there are no instances on the left side, it should be ensured that iOS devices should be connected to wifi and Refresh List should be tapped.
Pitcher Settings in iPad
Pitcher has its app settings integrated into the system settings app on the iPad.
Go to iPad Settings
Settings for Pitcher
To make changes to the default behaviour, please launch the settings app.
Select the Pitcher App
Pitcher Setting on iPad
Please choose Pitcher from the list on the left. Your list might be significantly longer.
Default PDF Reading Mode: The default mode for PDF Reading can be changed as per the requirement. Within the app, the user can also switch between modes, as shown below:
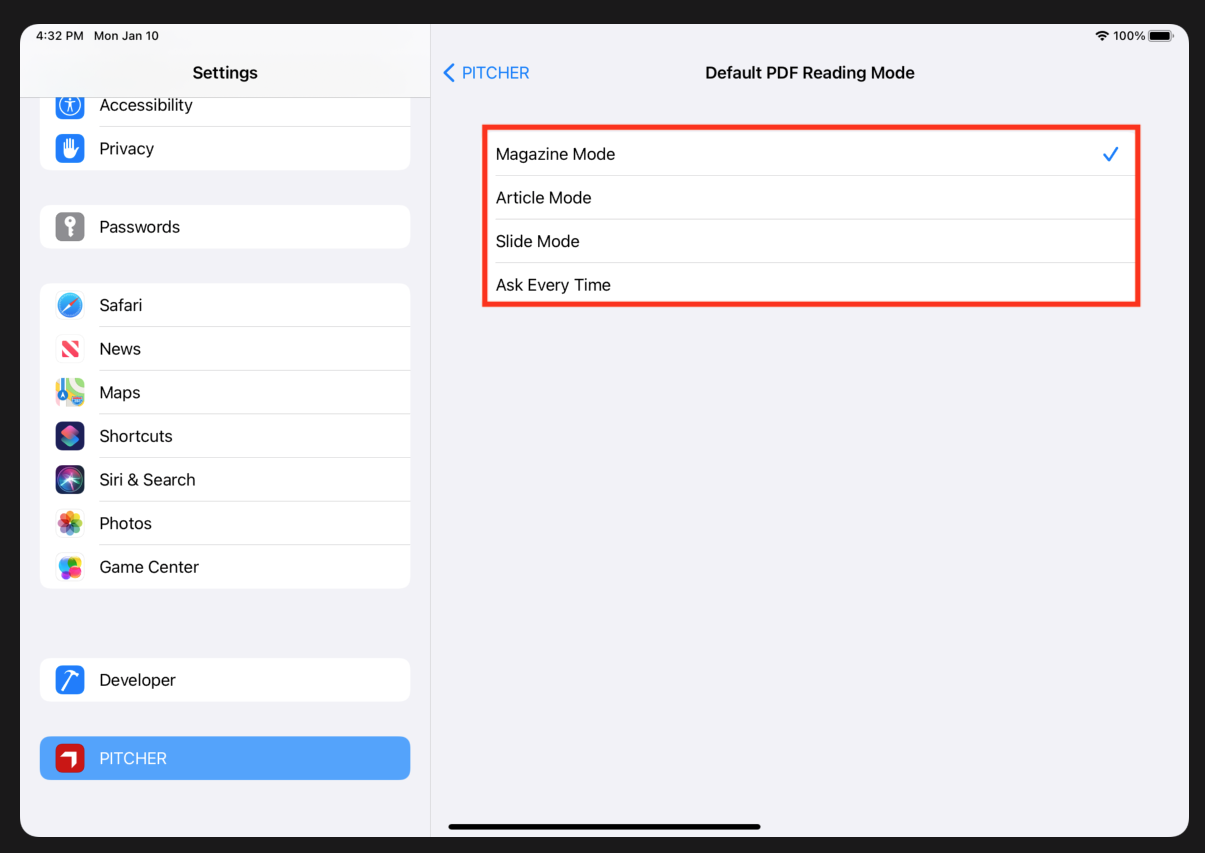
PDF Reading Modes in Pitcher Settings
Language: Enable Pitcher to use the default system language or choose a different language that will only be enabled for Pitcher.
First day of the week: Use the system default for the first day of the week or select a different day to be used in your Pitcher calendar or selector date models.
Advanced Search: Enable advanced search to search diacritics and non-ordered cases.
Microsoft Exchange Mode for Calendar: Enable synching using Outlook integration in addition to iCal (Apple Calendar).
Use Local Database for Calendars: Disable iCal integration (Apple Calendar).
Use System Default Calendar: Use the iPad default calendar instead of the Pitcher calendar.
Auto Synch with CRM at Launch: Pitcher will auto-sync with CRM at each launch. This can be turned off in case this behaviour is not desired.
Reset Local Database at Next Launch: If in case local database is required to be reset at the next launch, then this option can be turned on or off accordingly.
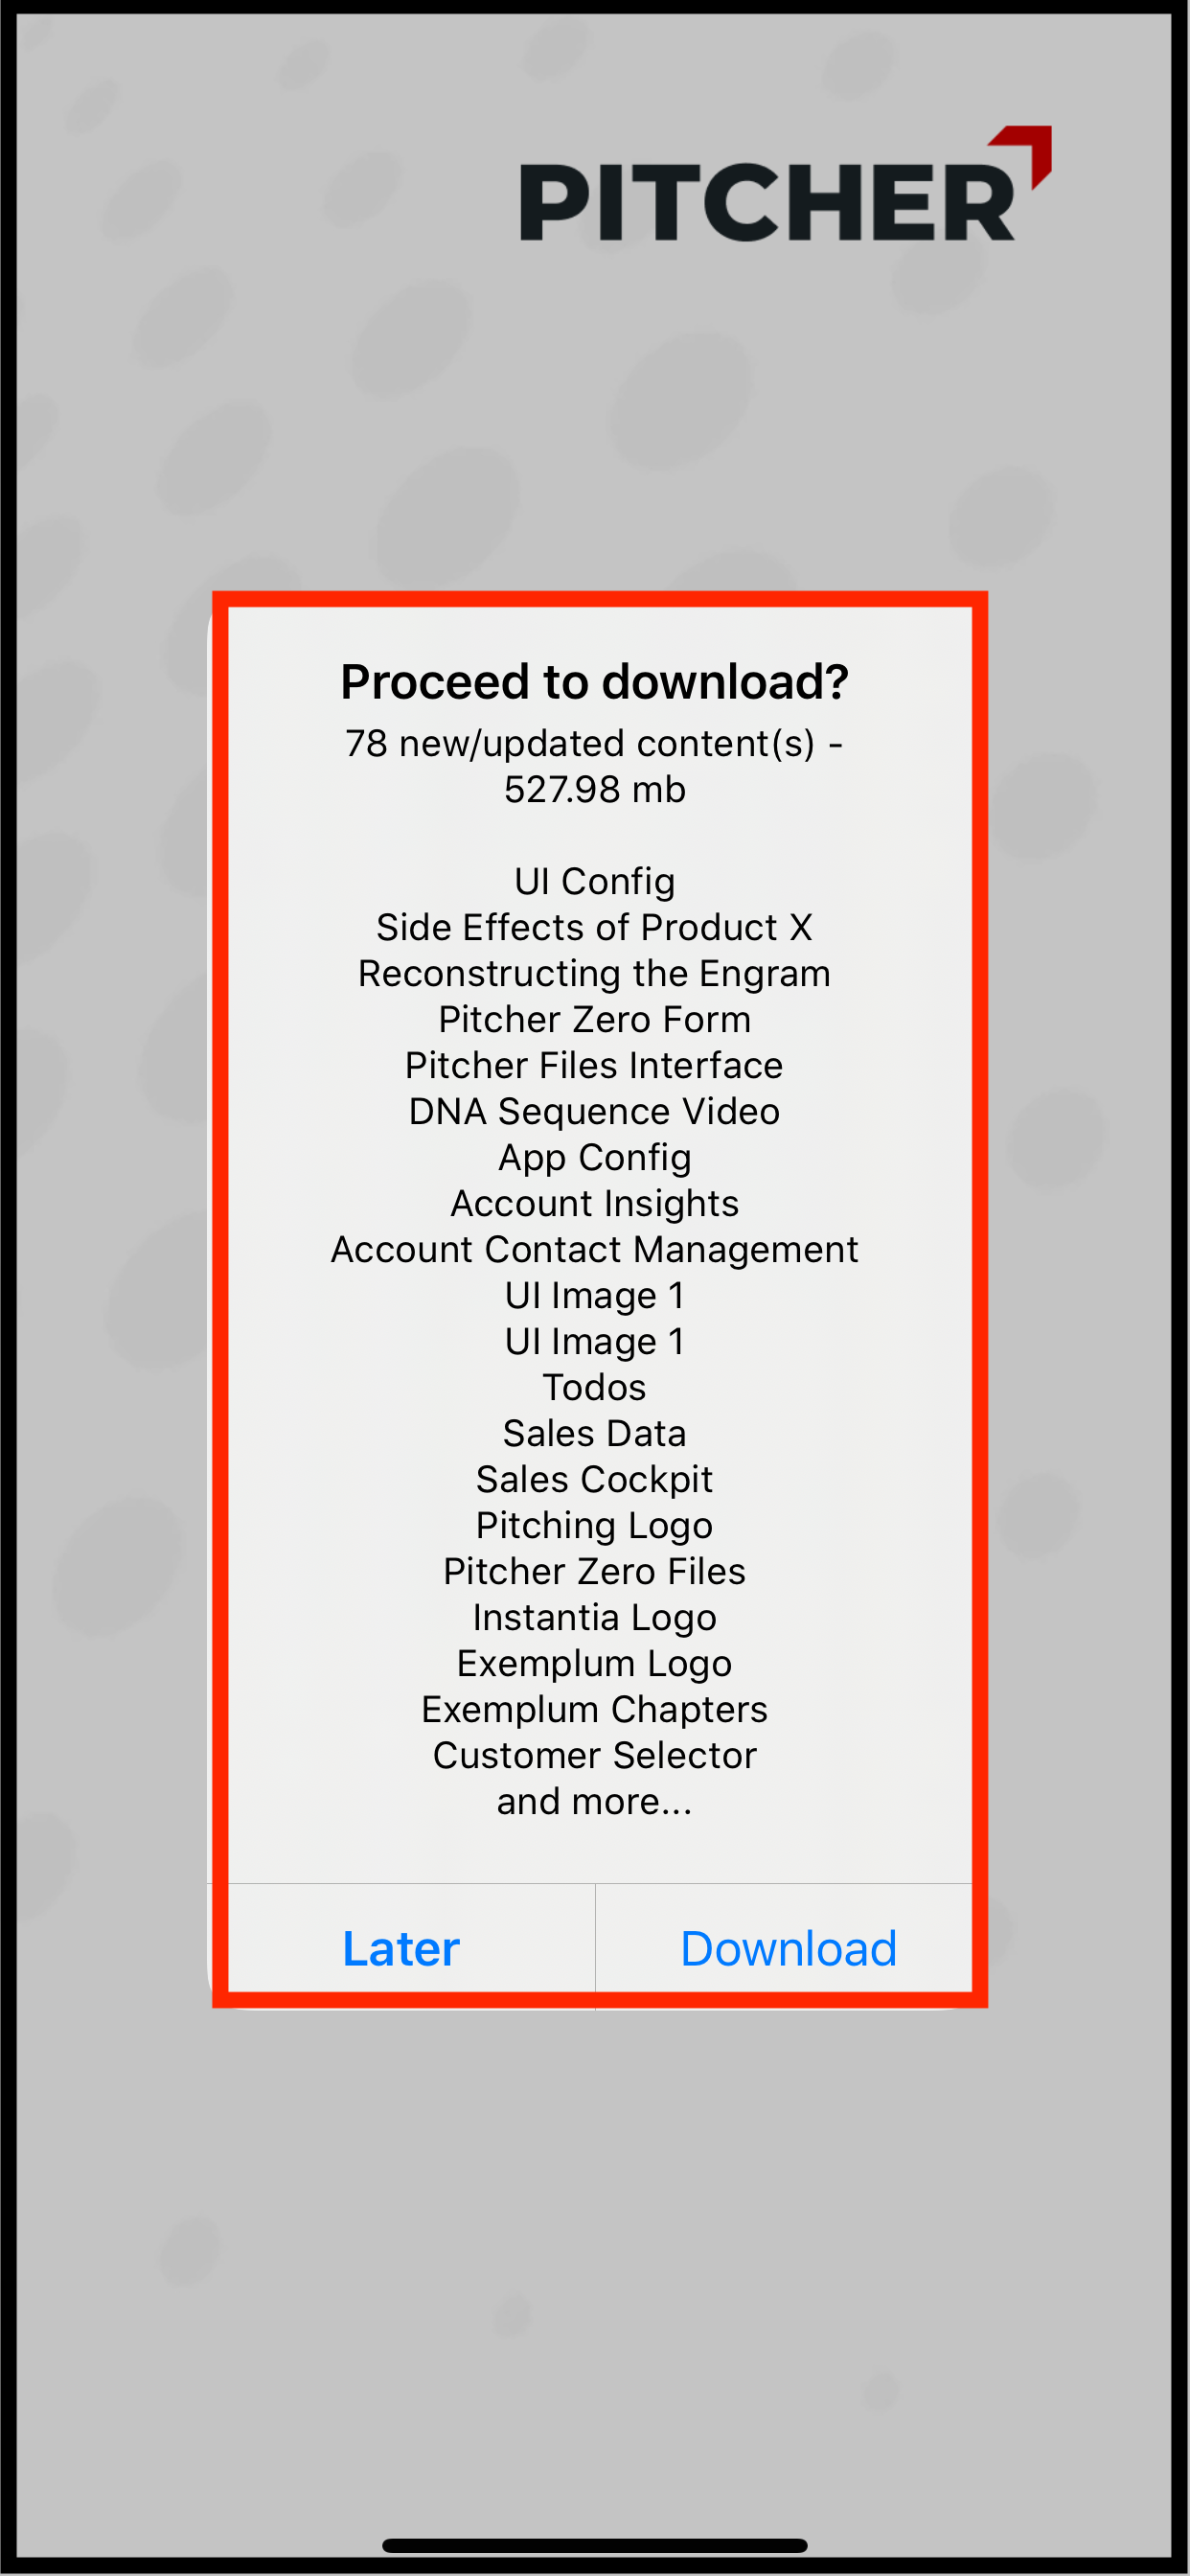
Downloading Updates
After choosing the instance, the user will see the download popup if it is the first launch or if the contents have been updated.
Download Popup
If there are any updates to the instances, these will be shown, and on tapping the instance, the user can always choose Later or initiate the download immediately. The list will include the file names and, if available, release notes. If the user doesn’t download in the initial launch, the system will not work as system files will be missing. During onboarding, make sure there is good wifi. The download might take some time to finish.
Download Progress
%20-%202022-07-03%20at%2022.24.14.png?inst-v=973f3c37-d617-4a1c-9816-b97ed52324dd)
Download Popup
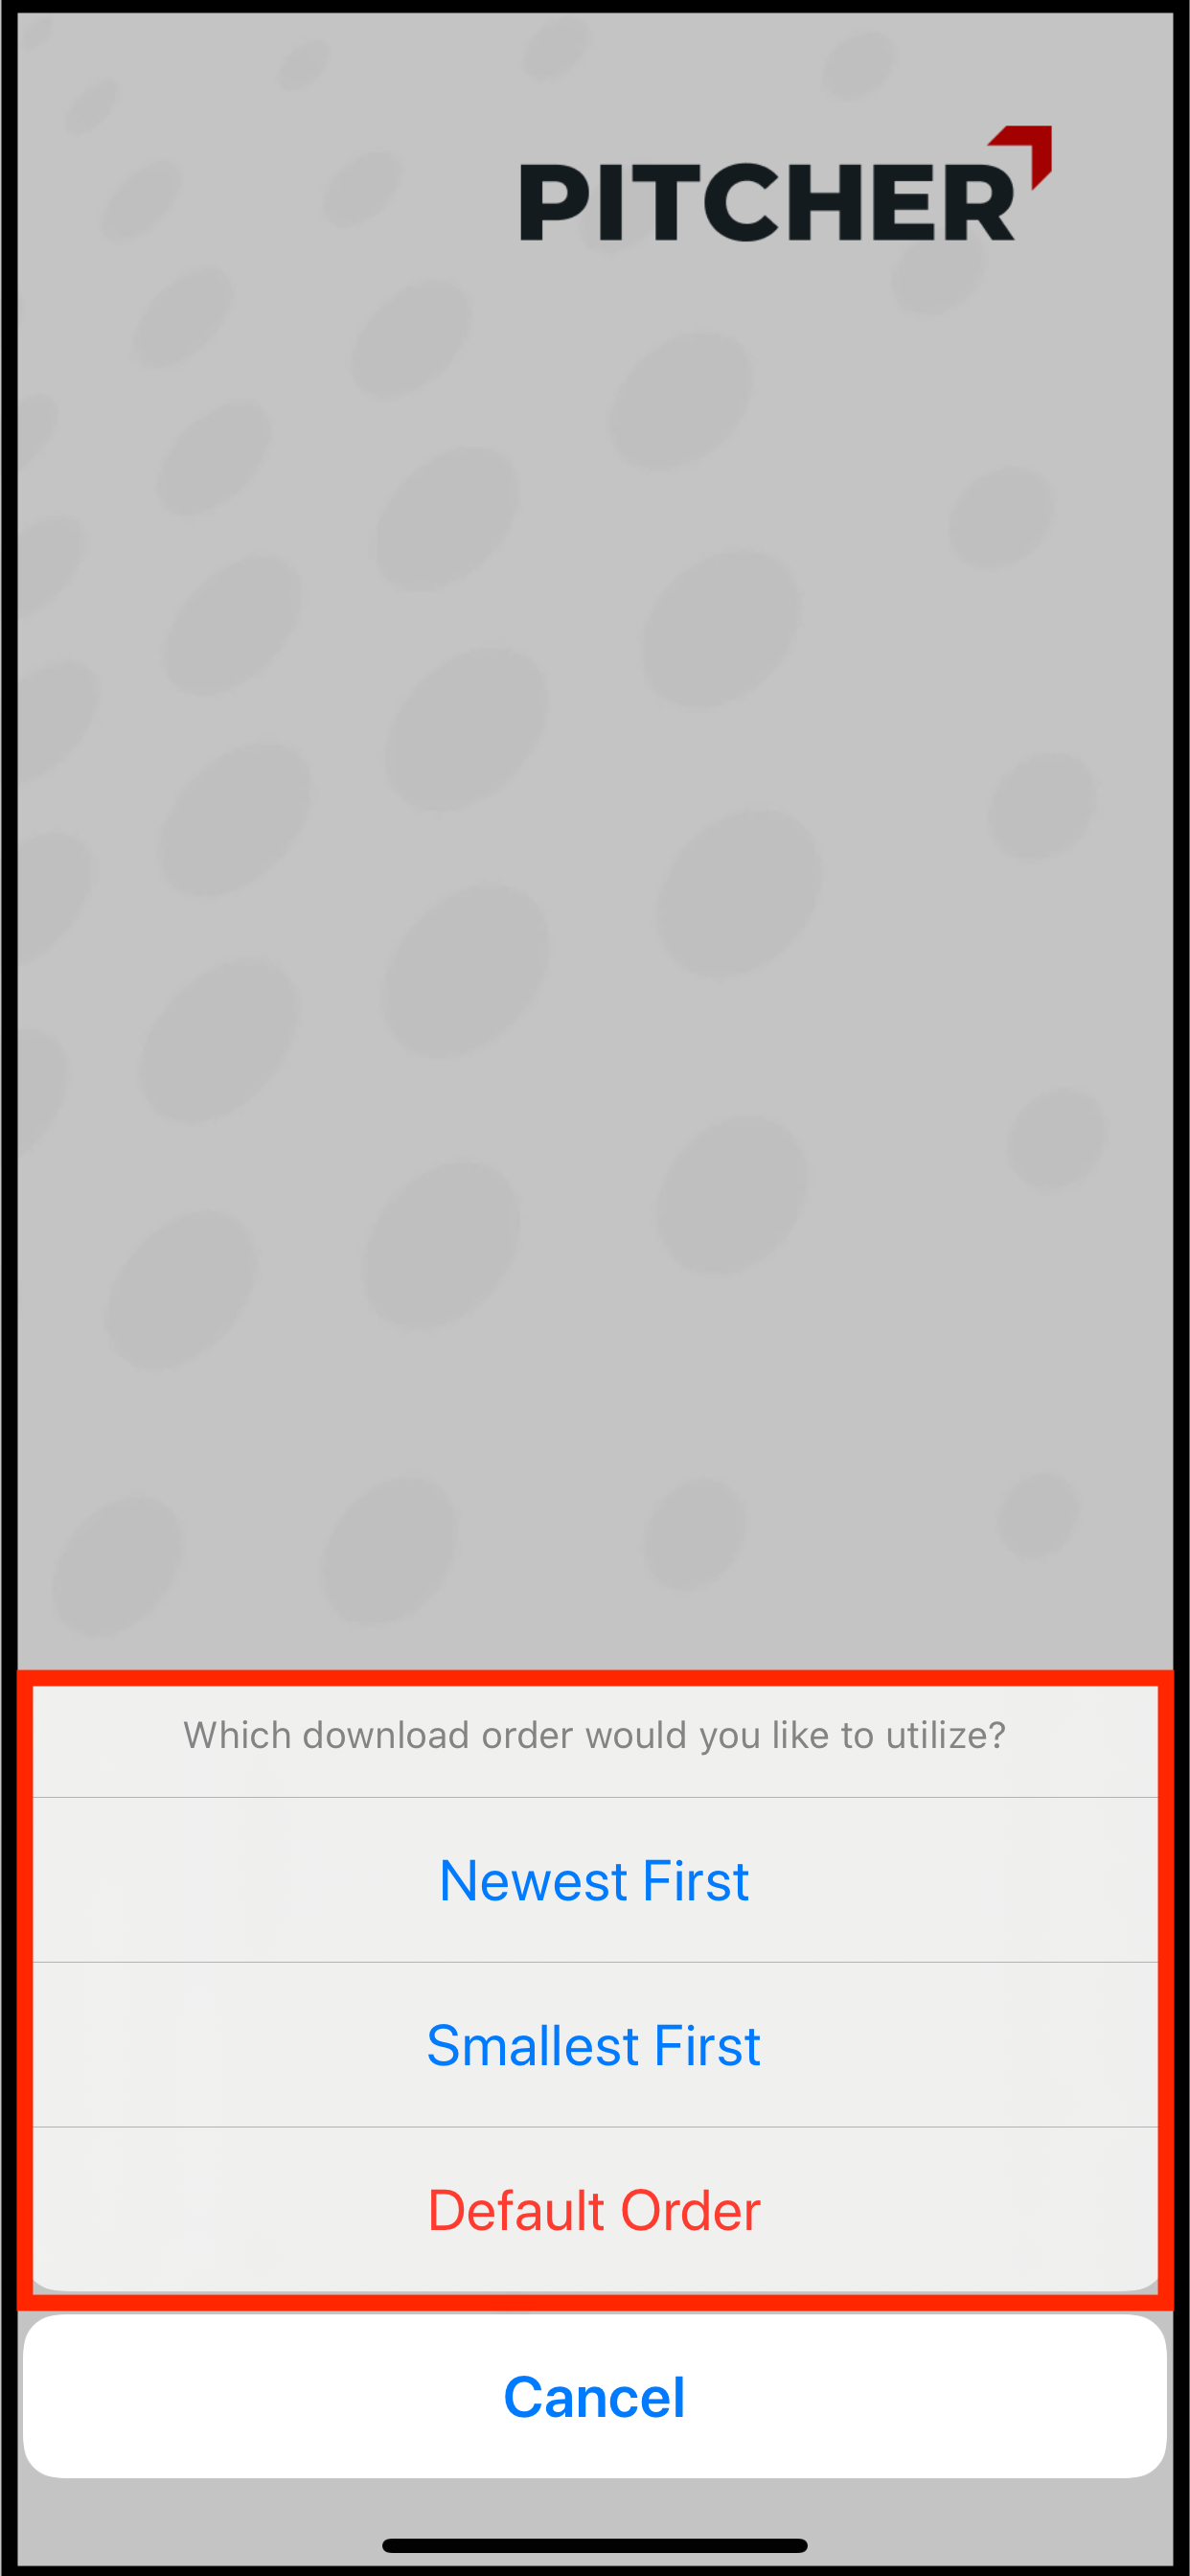
If Download option is tapped the application allows the user to choose between default order, download the newest file, or the smallest file first.
%20-%202022-07-03%20at%2022.28.09.png?inst-v=973f3c37-d617-4a1c-9816-b97ed52324dd)
Download Preference
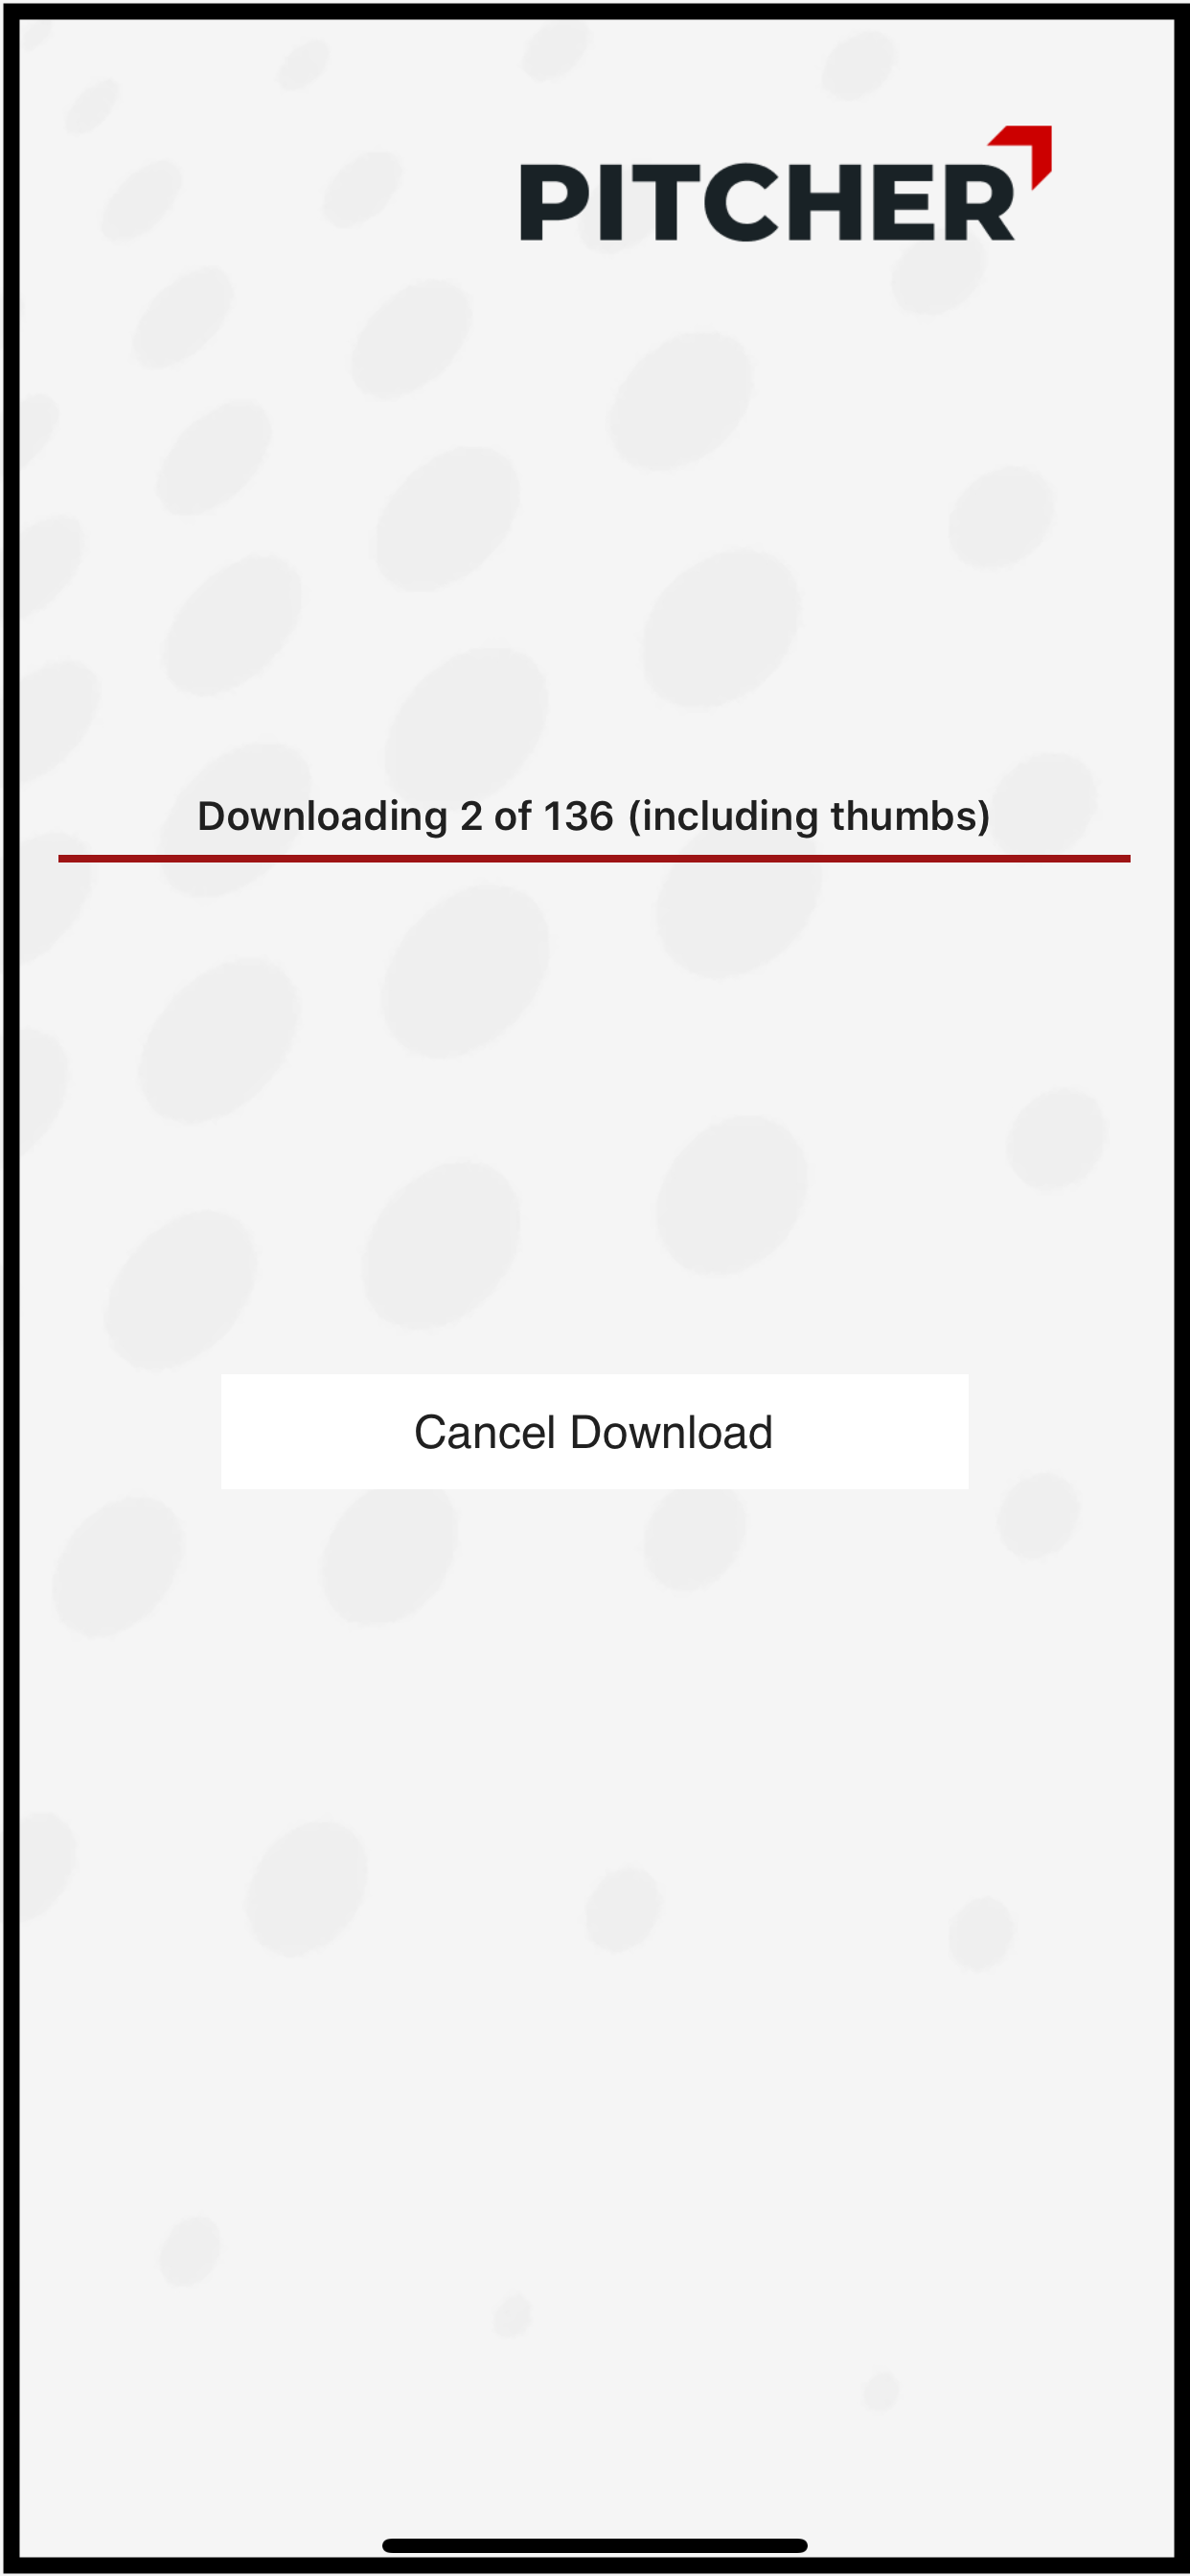
The Download will start and will take some time to complete.
%20-%202022-07-03%20at%2022.31.35.png?inst-v=973f3c37-d617-4a1c-9816-b97ed52324dd)
Download Progress
Download process can be cancelled any time and can be resumed later as well.
Troubleshooting: If files cannot be downloaded then, iOS device Time Zone settings should be checked. The documents have an expiration date which is linked to the actual iOS device date.
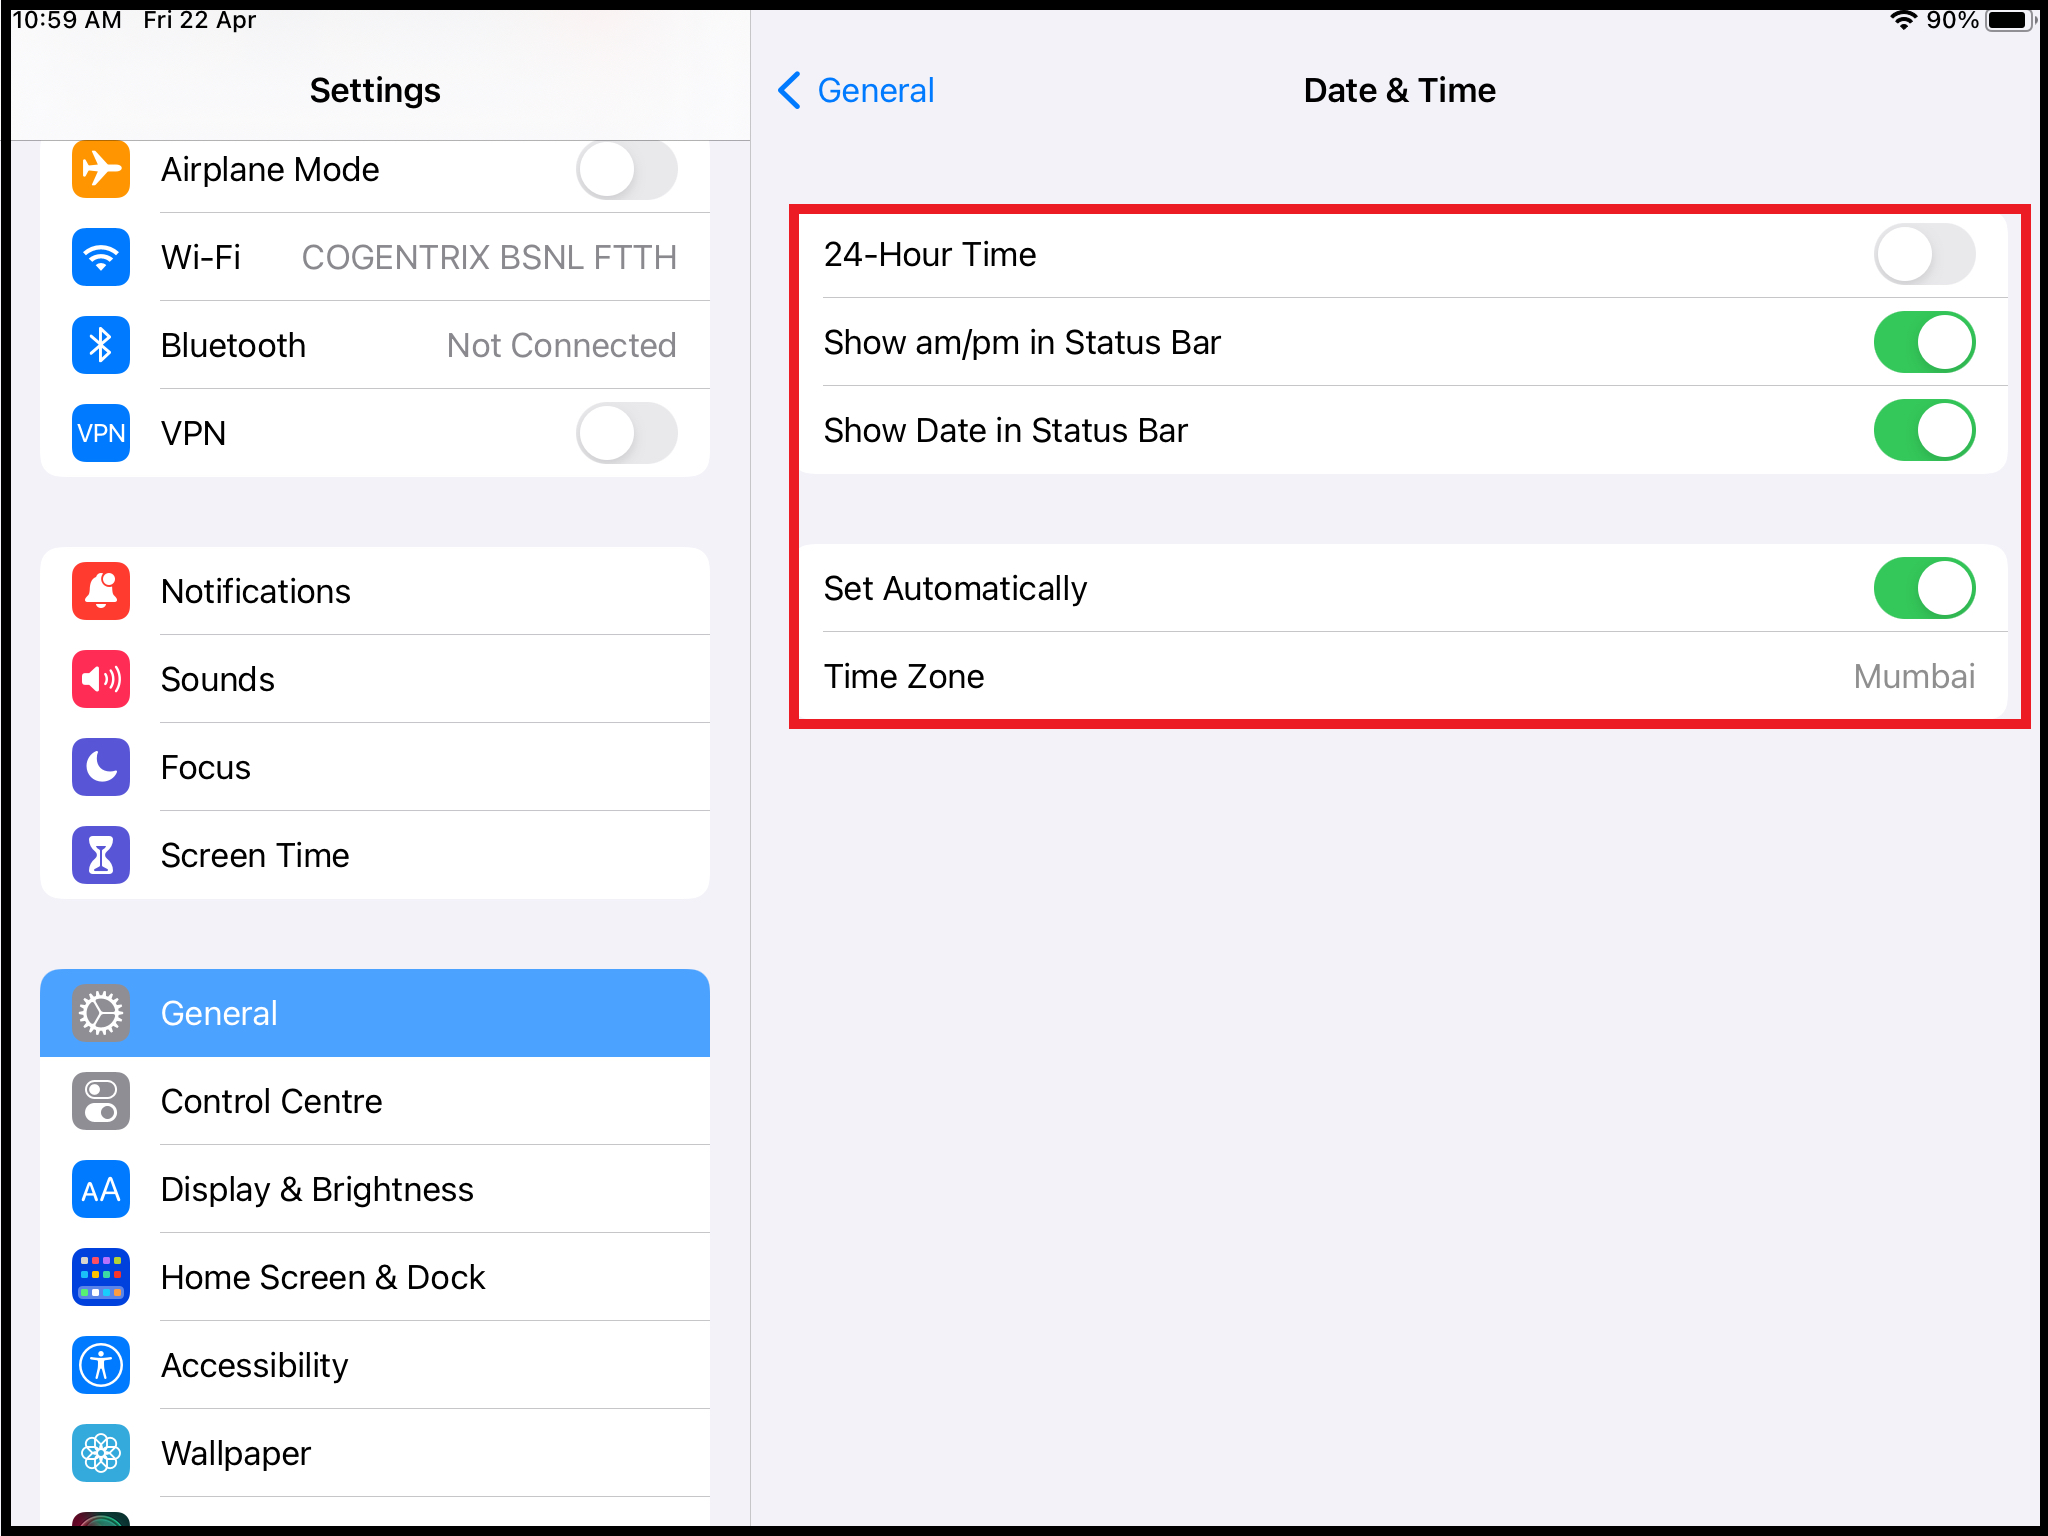
Time Zone settings in iPad
iPhone
Most of the steps in iPhone are same as that of an iPad.
Download & Install the App
Search for the application in the app store and install it.
Application search in the app store
.jpg?inst-v=973f3c37-d617-4a1c-9816-b97ed52324dd)
Application download
Run the Application
.jpg?inst-v=973f3c37-d617-4a1c-9816-b97ed52324dd)
Launch the Application
After installation, please click on the Pitcher icon to launch the app.
Initial Launch Screen
Initial Launch Screen on iPhone 1
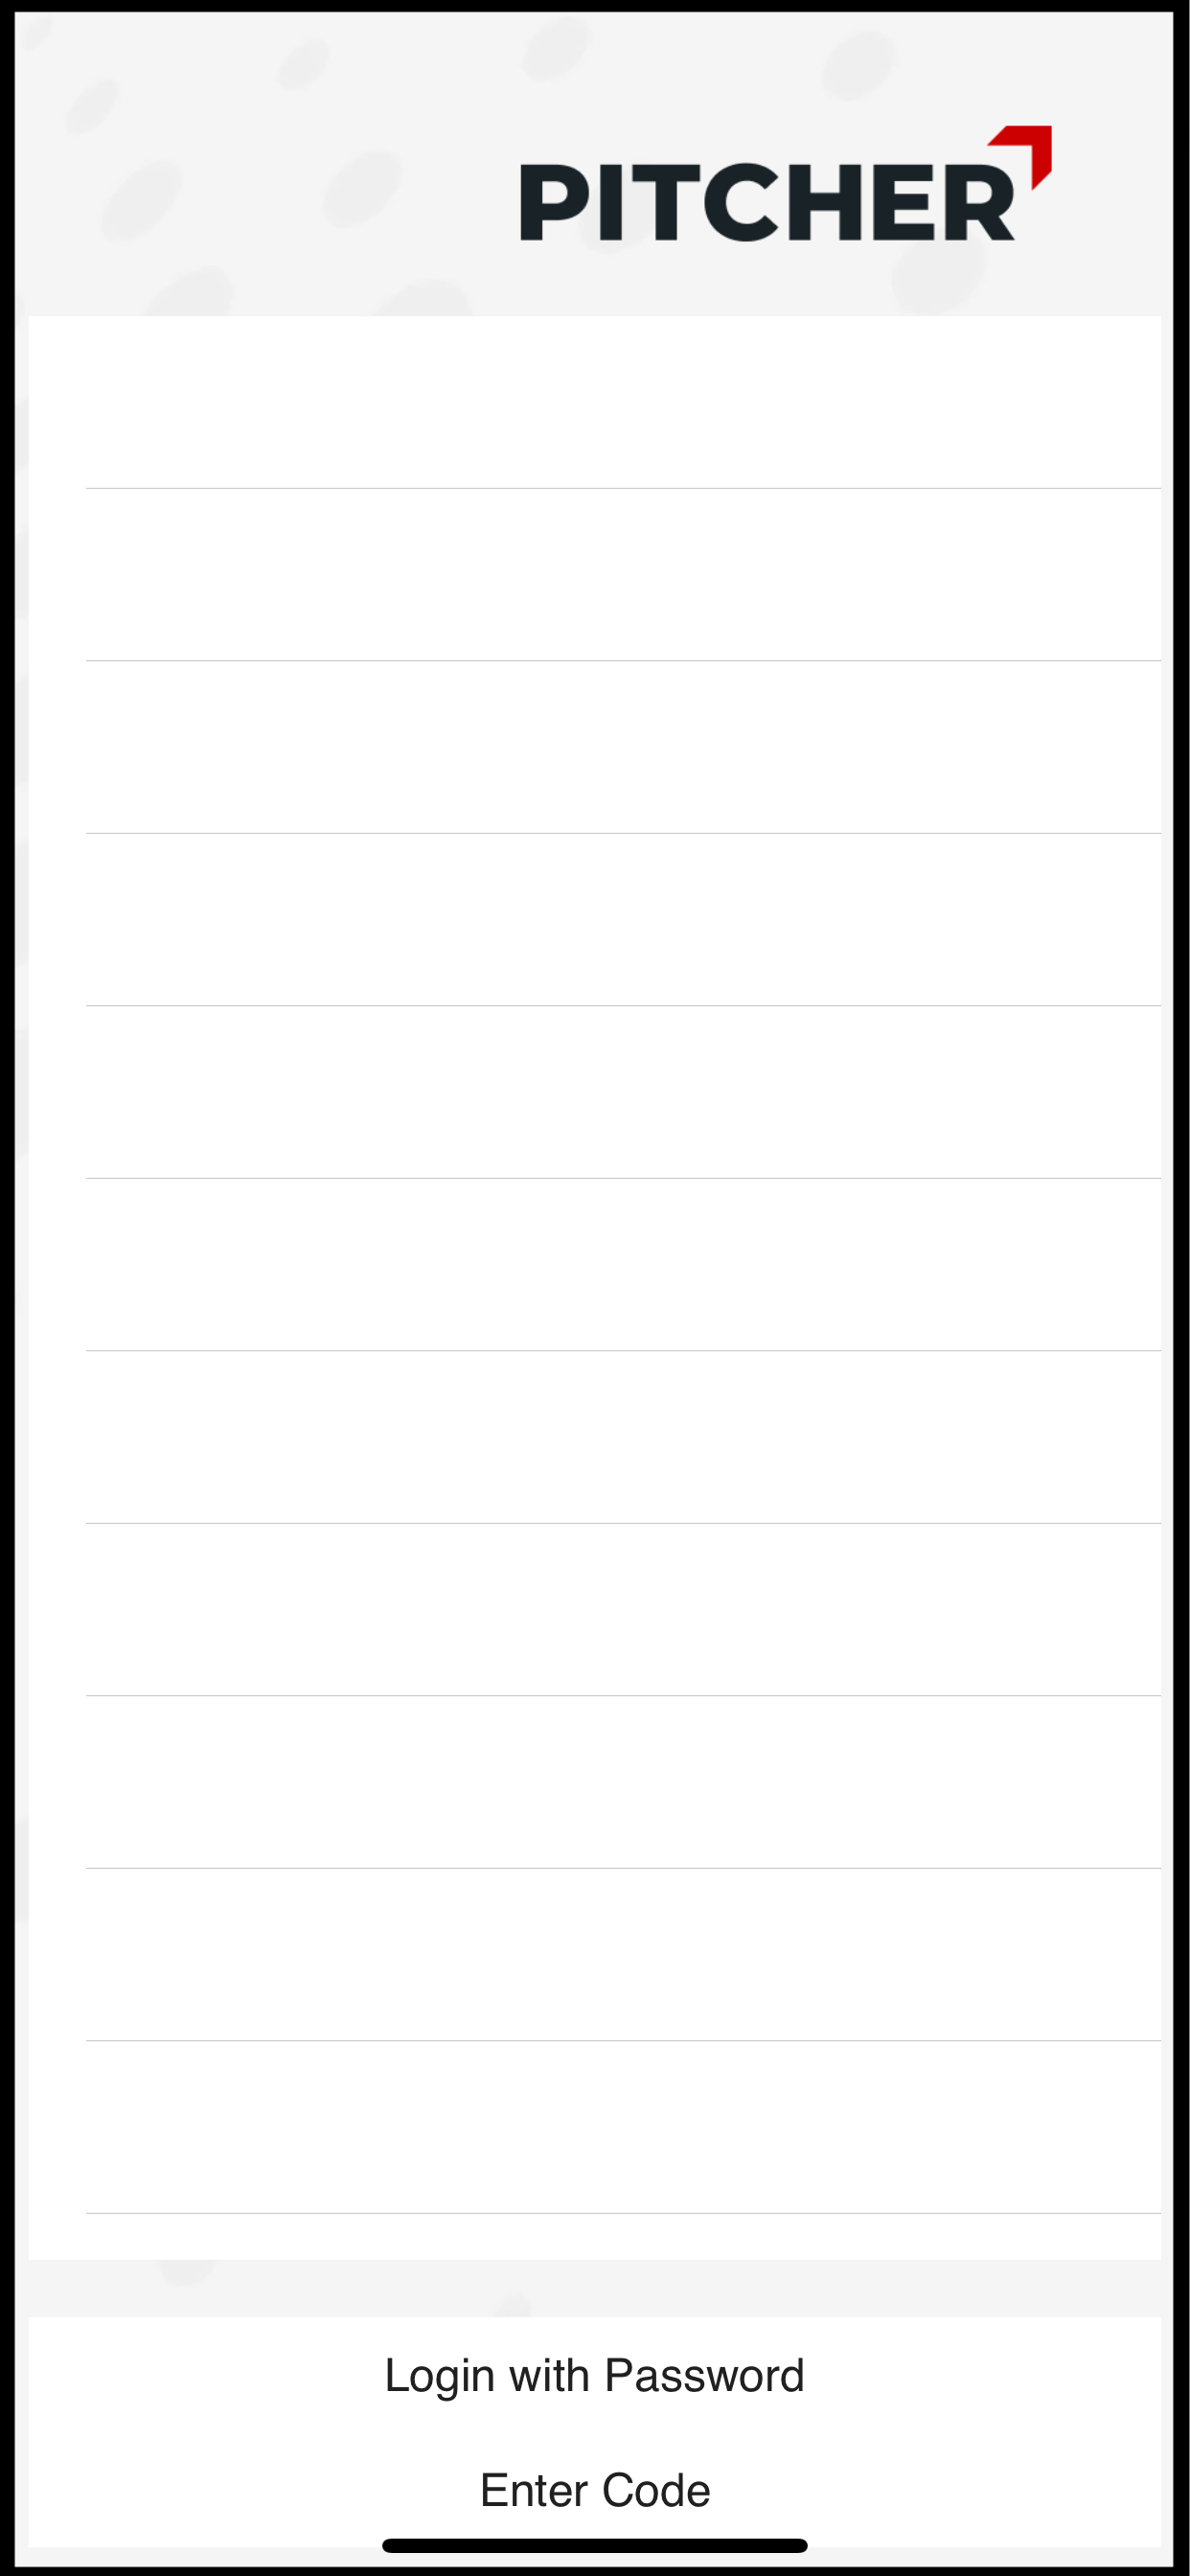
Initial Launch Screen on iPhone 2
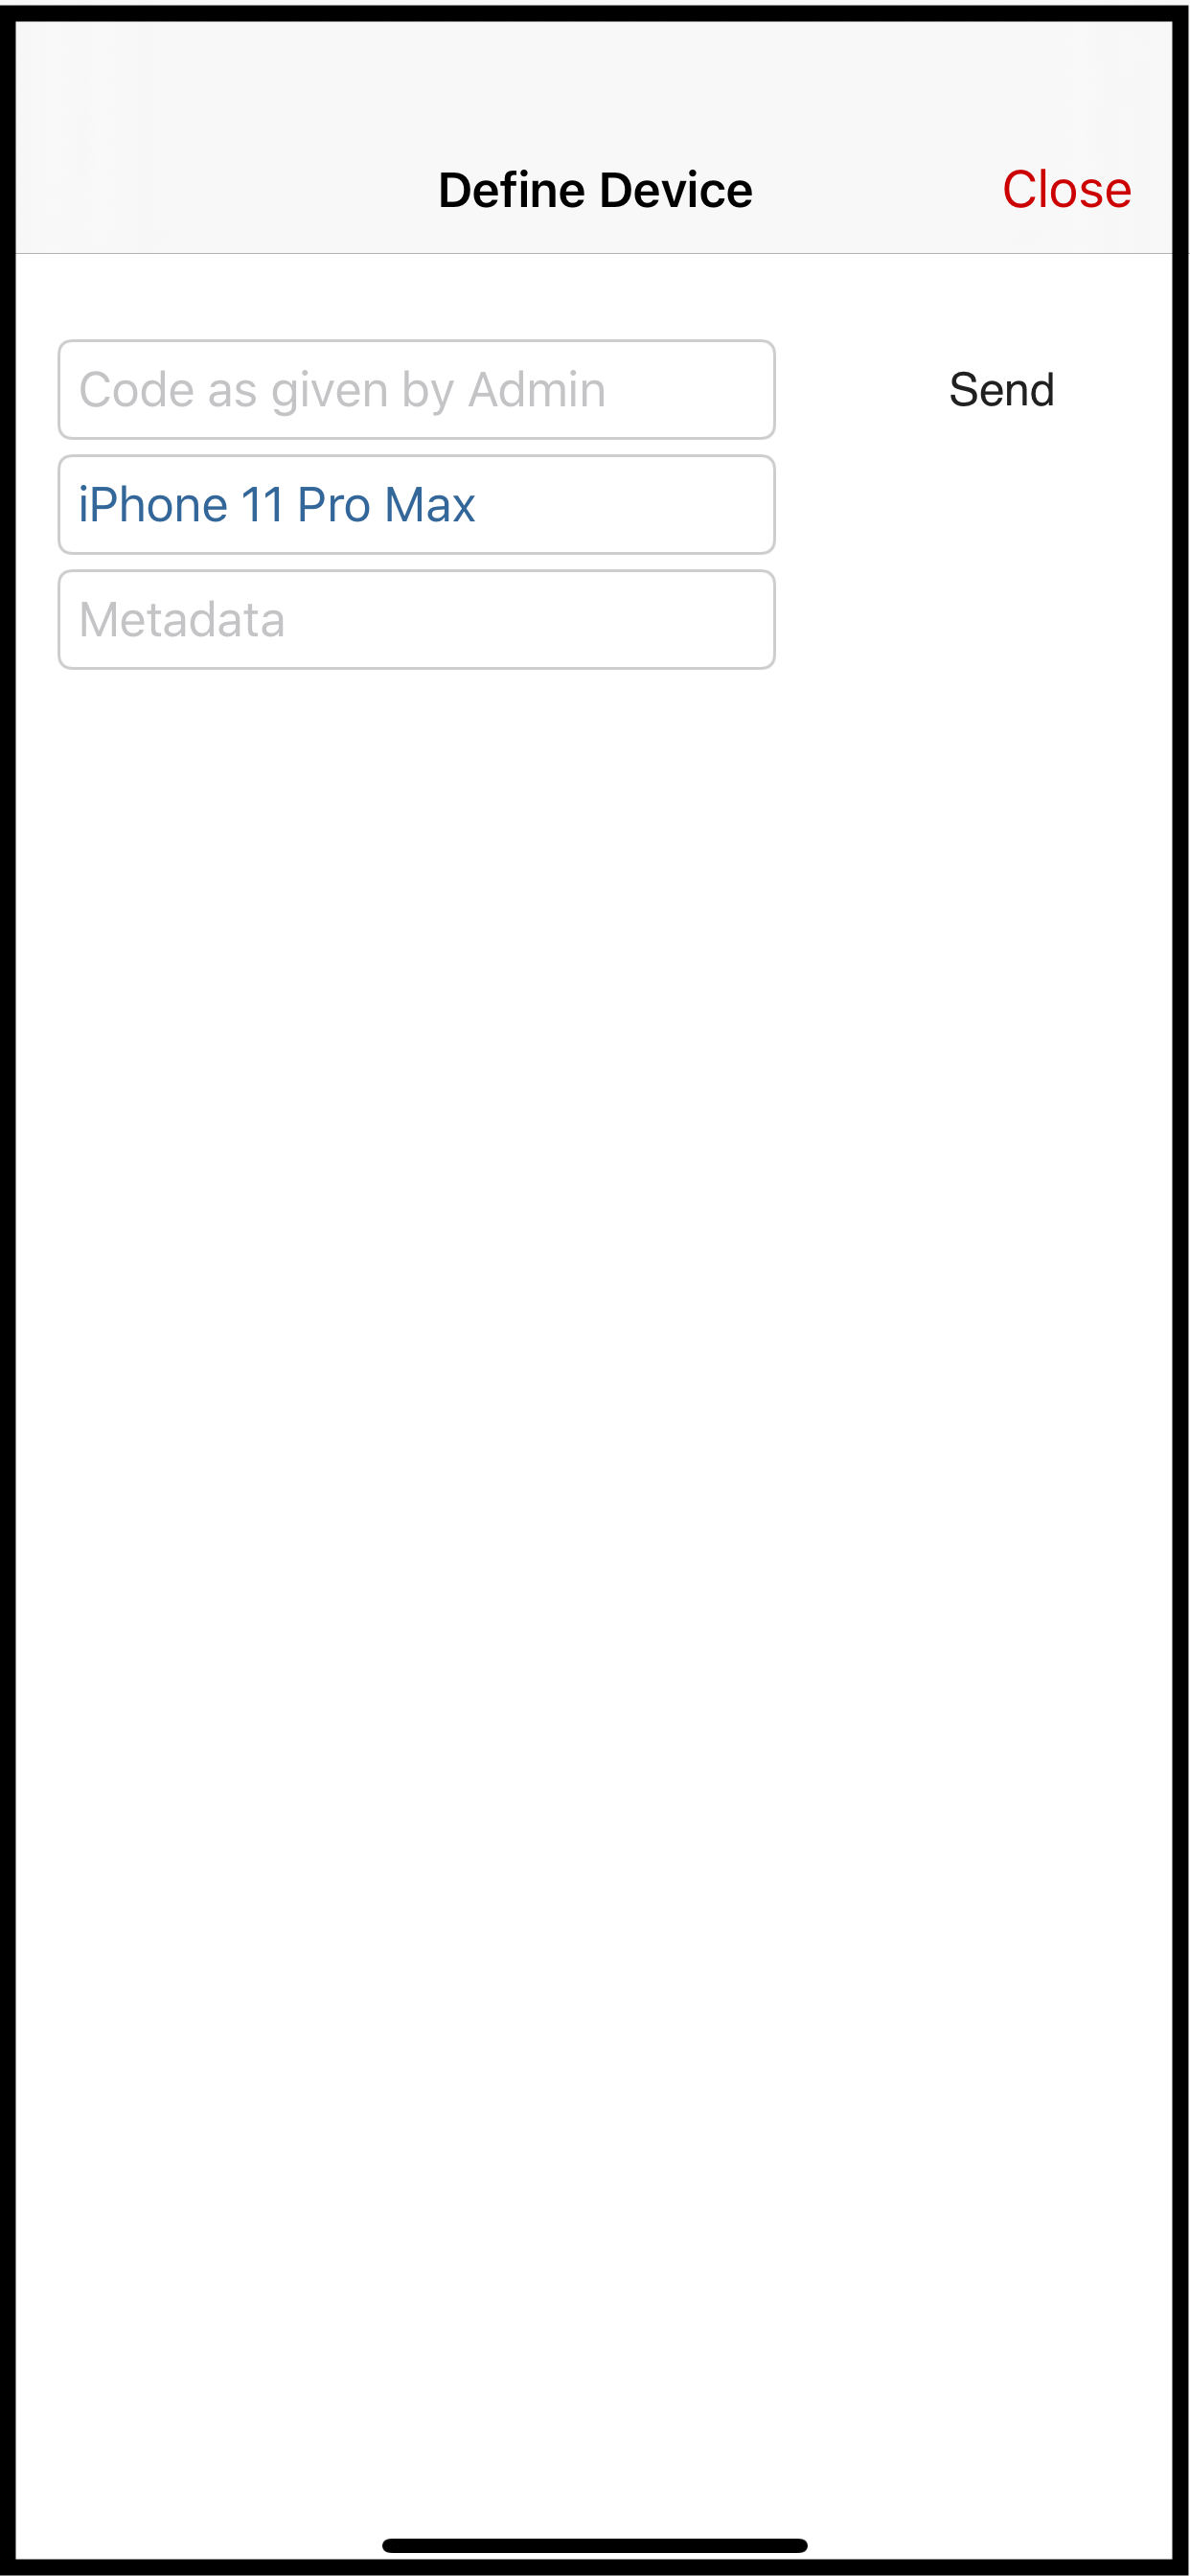
When the application is launched then the screen 1(image 1 above) will ask the user to define the device. If this window is closed then screen 2(image 2 above) will appear.
Description of the Initial Launch Screen
The first screen is quite similar to iPad’s access to instance Via Device Code feature. The second screen after closing the first launch screen will look as shown below.
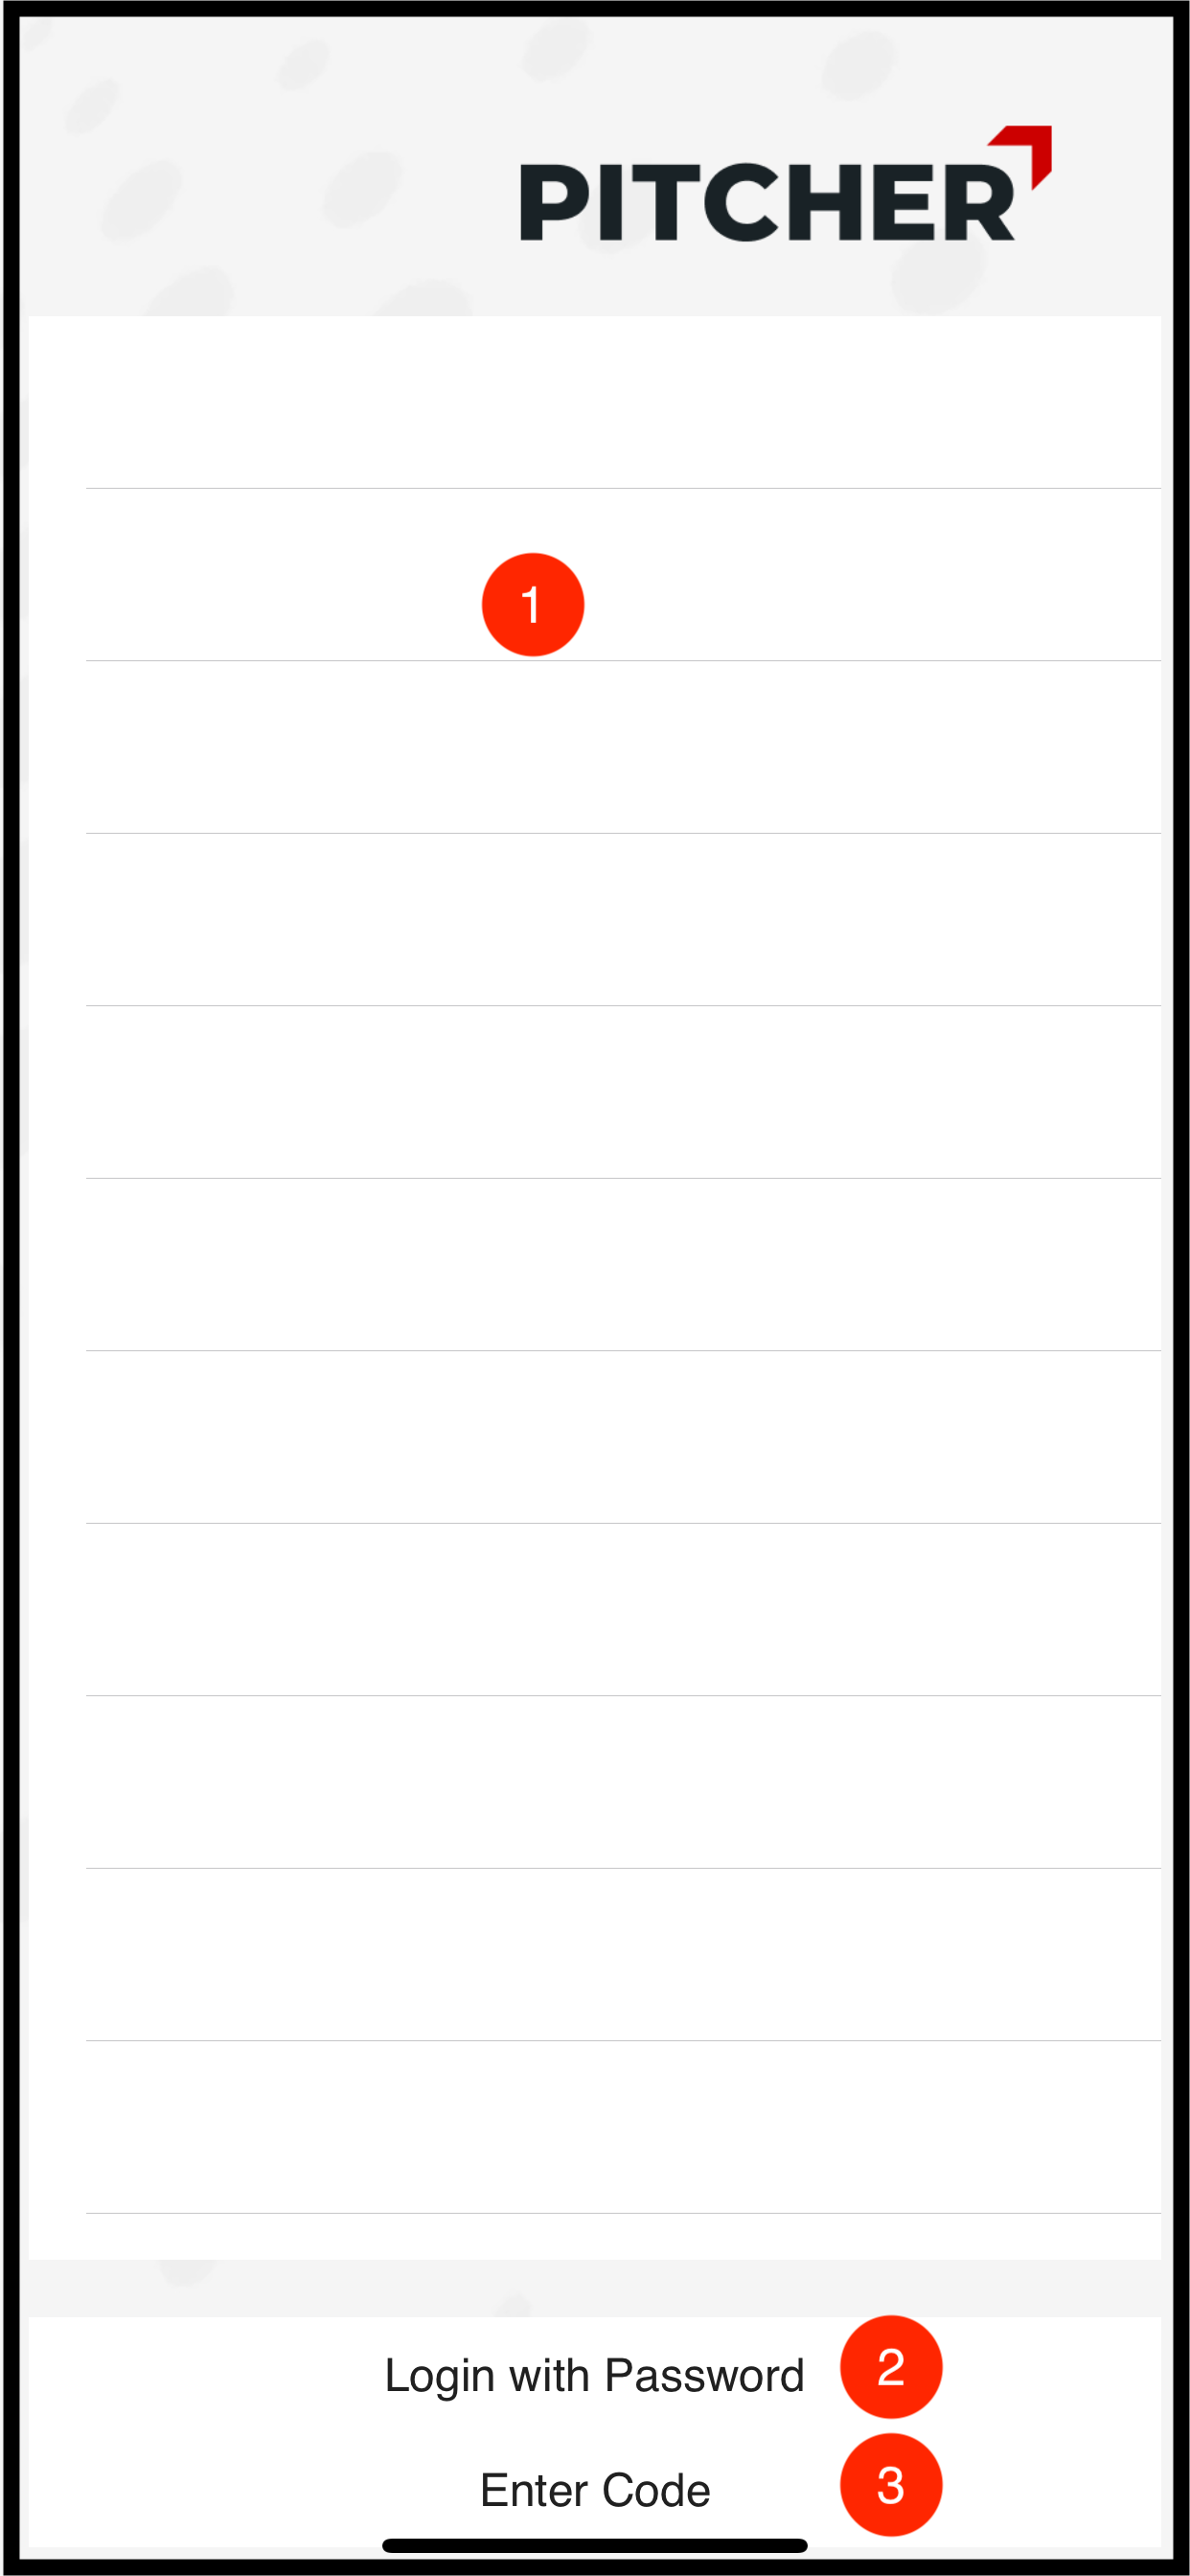
Here is the description of the second launch screen:
Instance(s) display area
Login with Password - Provides the option to the user to login either via providing username/password or login via SSO.
Enter Code - Allows the user to provide the code provided by the admin along with the Meta Data.
Unlike iPad, for iPhone user can only opt for Login with Password or Enter Code provided by the admin
Login with Password
This is login process is similar to Login with Password in iPad. Please refer to Login with Password section in iPad.
Login with Password in iPhone
Login with SSO
SSO login is also similar to the SSO login process in iPad. Refer to Login with SSO section in iPad.
SSO Login in iPhone
CRM Login in iPhone

Custom Domain Login in iPhone
Pitcher Settings in iPhone
.jpg?inst-v=973f3c37-d617-4a1c-9816-b97ed52324dd)
Pitcher Settings in iPhone 1
.jpg?inst-v=973f3c37-d617-4a1c-9816-b97ed52324dd)
Pitcher Settings in iPhone 2
Settings are similar to that of iPad. Refer this section.
Downloading Updates in iPhone
Refer Downloading Updates in iPad.
Download popup in iPhone
Download confirmation in iPhone
Download progress in iPhone