Distribution
This page gives a walkthrough on how to distribute a document in Pitcher Admin. Distribution is used to send one or multiple files to a device/multiple devices and groups. Using group distribution makes it simpler to set which devices get which files. Distribution allows selecting categories and setting permissions for file distribution.
Steps To Follow
In order to distribute the document(s) follow these steps:
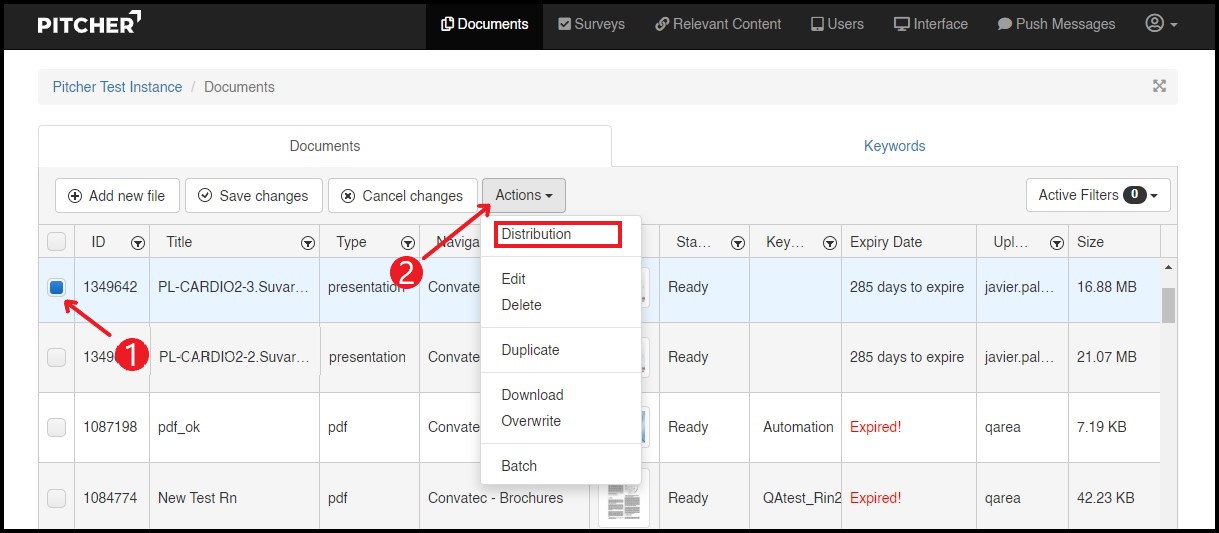
Select the document(s) for Distribution.
Click on Actions dropdown and select Distribution.
A distribution form will open with different fields to update distribution related information.
Distribution Form
A Distribution form will open with different fields. The Distribution view is similar to the view during the upload process. Here you can select the User(s)/Group(s) you wish to distribute a file or multiple files to. Make sure to set a valid time frame, if the expiration date has passed the file will no longer be visible in the device it is distributed to.
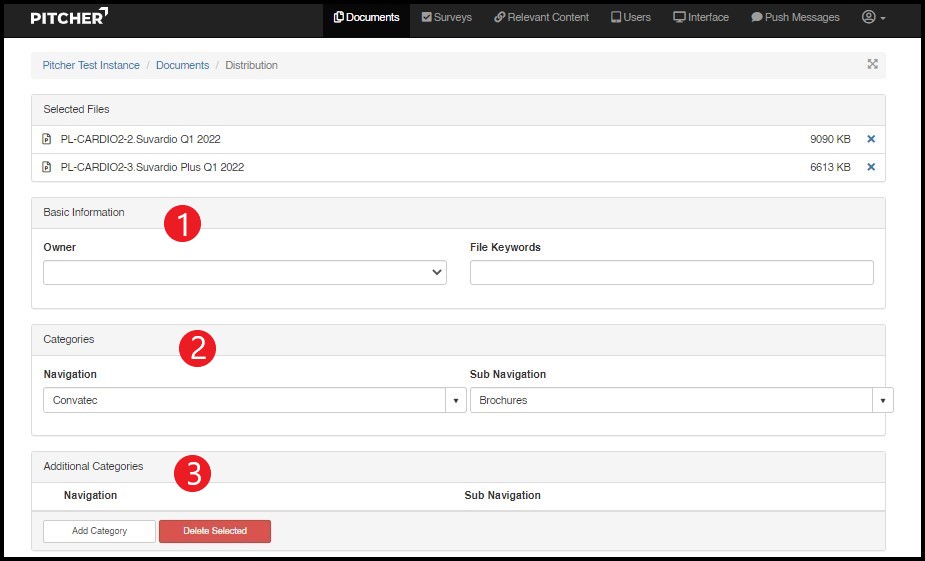
Basic Information - Here you can update the Basic Information for the Distribution such as Owner and File Keywords.
Categories - Here you can define the categories of the document(s) uploaded. The categories can be updated for Navigation & Sub-Navigation.
Additional Categories - Update any additional categories for the document(s).
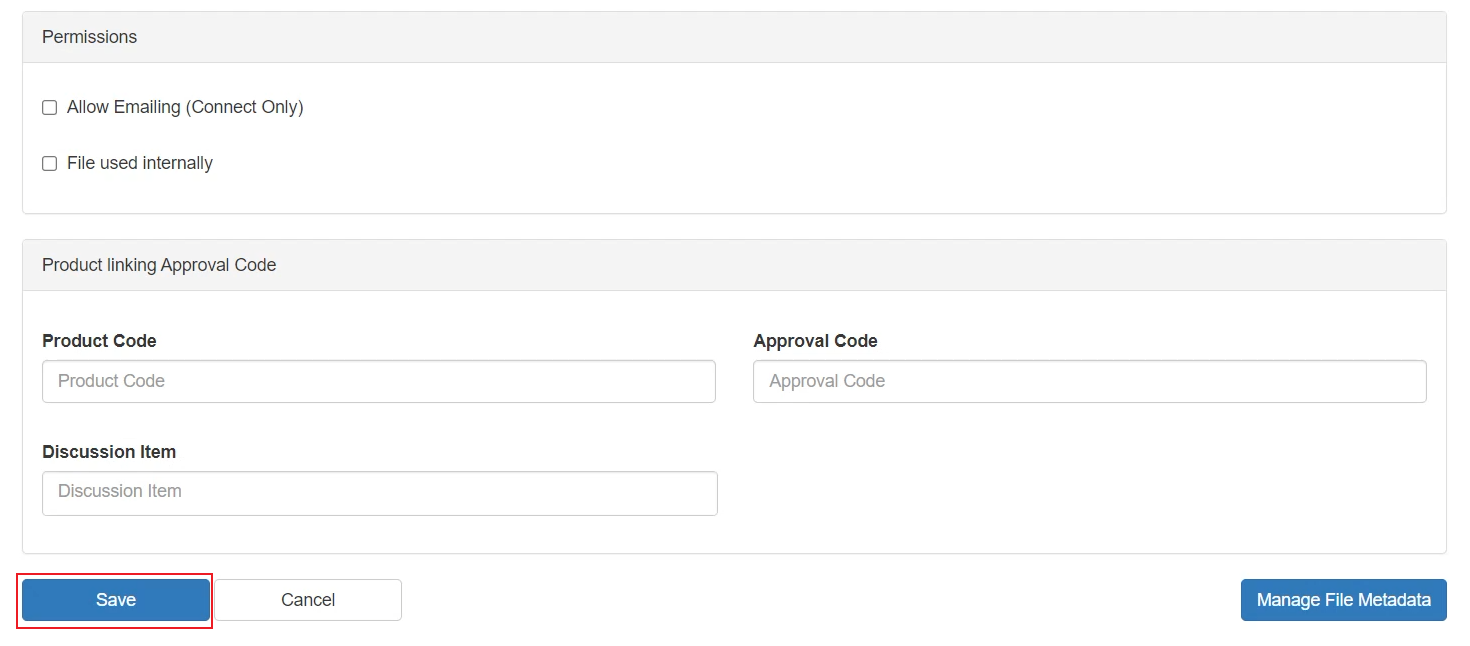
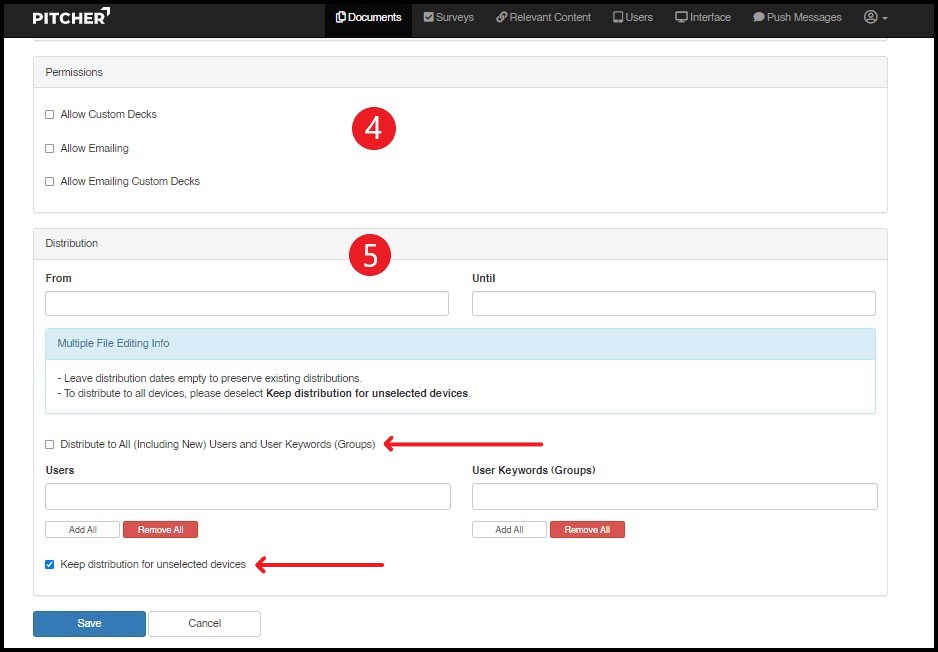
Permissions - Permissions can be set for the document such as “Allow Custom Decks”, “Allow Emailing” & “Allow Emailing Custom Decks”. For pdf files there is an additional permission “Allow Printing”.
Distribution - Here you can define the time frame for the document distribution. Define a start date and expiration date for the file(s). Select the User(s) and User Keywords (Groups) to which the file(s) needs to be distributed.
Checkbox: Distribute to All (Including New) Users and User Keywords (Groups) - Checking this box will distribute the document(s) to all the users and groups.
Checkbox: Keep distribution for unselected devices - By default this checkbox is checked. It will keep the distribution for the unselected devices.
IMPORTANT: If you edit multiple files the existing distribution will be removed, unless you select the option "Keep distribution for unselected devices"
When you're done editing distribution click Save.
Creating User Keywords (Groups)

To create/edit groups follow these steps:
1. Click on Users (User Manager) Tab.
2. Click on User to select the User Device.
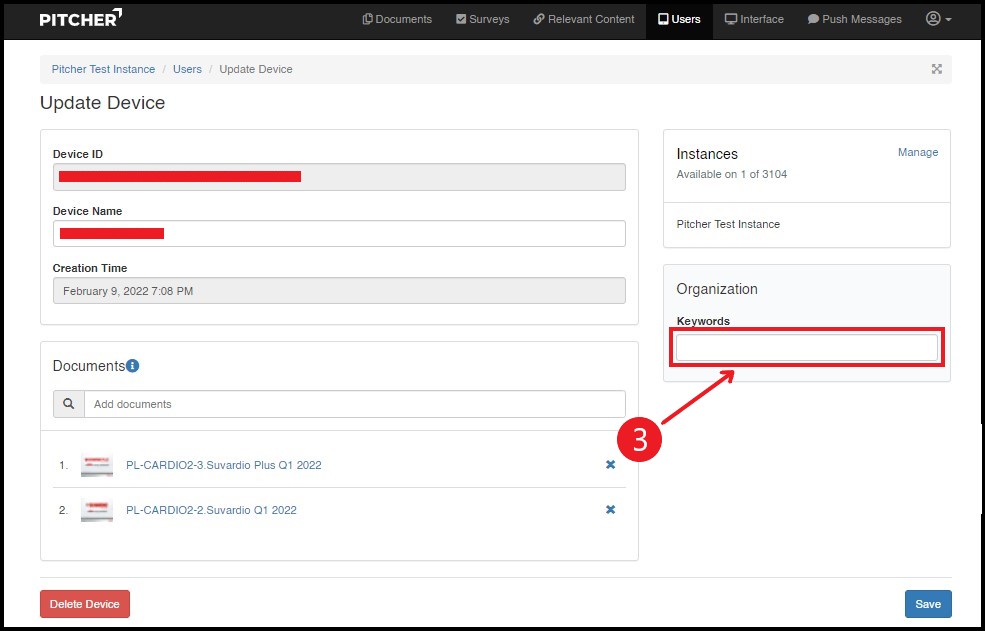
3. Click on the Keywords field to add keywords.
4. To add to a group just type the group name and save. If the group doesn't exist yet it will be created automatically. E.g. tagging a device with "Test" will automatically create groups with those names. To remove the device from a group simply delete the keyword and save.
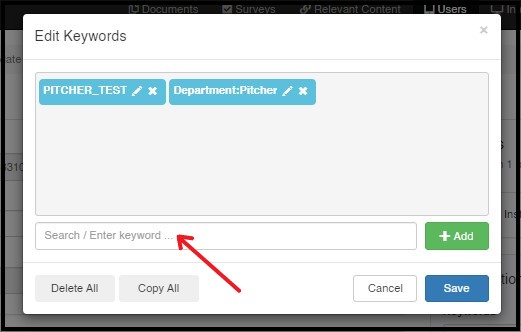
The system suggests tags based on existing groups (google style keyword search). So if you type any character the system will suggest existing groups containing the character.
Also, if you have distribution groups in different languages such as "german", "french" and "italian", you can use all three groups separately in order to have the reps in the German-speaking region only receive the German content, the reps in the French-speaking region only the French content etc. To do this you would:
Tag the corresponding devices with german, french or italian (you can also tag one device with multiple keywords, e.g. french, italian)
Upload German, French and Italian content.
Distribute German content to group: german, French to group: french, Italian to group: italian.
IMPORTANT: When changing a tag make sure you adhere to the best practice:
Add the new tag to one user in order to create the new tag
Re-Distribute the content from the old tag to the new tag (IT IS CRUCIAL THAT YOU DE-SELECT THE OLD GROUP AND SELECT THE NEW)
Remove the old tag from all users to make it disappear. You need to make sure there is no file distributed to the old tag before you remove it because you will not see it anymore afterward
How Distribution Works
Distribution works the same with multiple documents and single documents.
Select the device(s) that need access to the documents.
Select the group(s) that need access to the documents or find the devices/groups with the search function, then select.
Make sure to save your changes.
This feature allows you to mass distribute documents, so you can easily control which devices can access specific documents. For example, employees in Group A might need different documents from those in Group B, depending on their language regions or jurisdictions.
When you add a new device, just choose which group(s) it belongs to in the User Manager. Then, the device will automatically have access to the same files as other devices in that group. This means that if an employee moves from one group (like a different region), you can quickly edit the documents they can access by removing them from one group and adding them to another.
Deleting File Distribution
Deleting file distribution allows you to prevent the expiration of system files when necessary. You can delete the file distribution from the Distribution form.
The Delete File Distribution option is available only when deleteFileDistribution is set as True from the Pitcher Admin Instance Settings > Extra Field.
To delete a file distribution:
Select the respective document from the Documents view.
Click Actions and then select Distribution.
Navigate towards the end of the page and click the Delete File Distribution button.
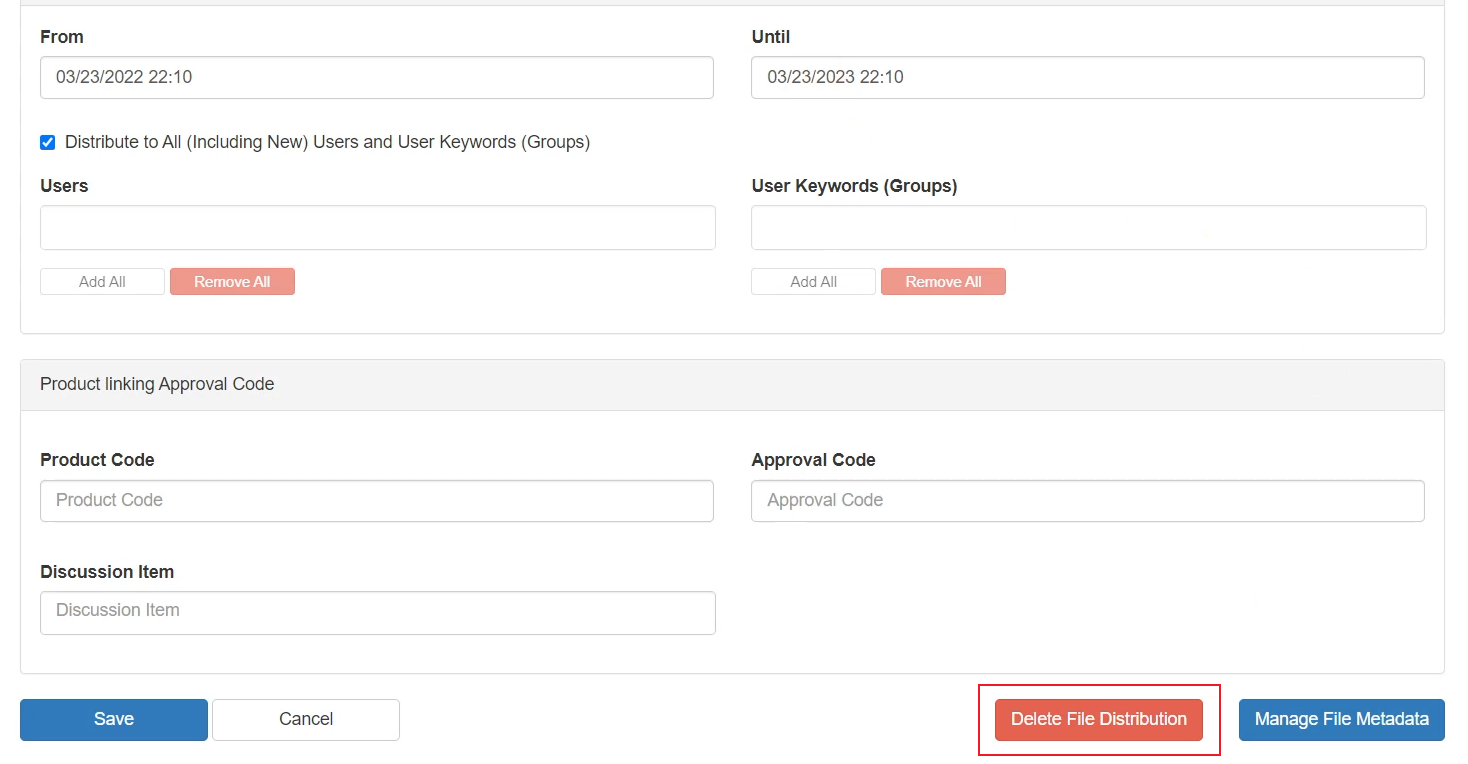
Confirm the Are you sure you want to delete this file distribution? message.
After you confirm the message, the Delete File Distribution button will disappear.
Now click Save to save the distribution form. You’ll be directed to the Documents view.
