Add & Edit HotSpots
This page explains about how to add & edit hotspots in Pitcher Admin. Hotspots are "clickable areas" you can add to the slides in presentations. Tapping these areas on the iPad enables you to jump to a page, launch other content, send report event, go to a web page or exit presentation.
Adding Hotspot
In order to add hotspot in a document follow these steps:
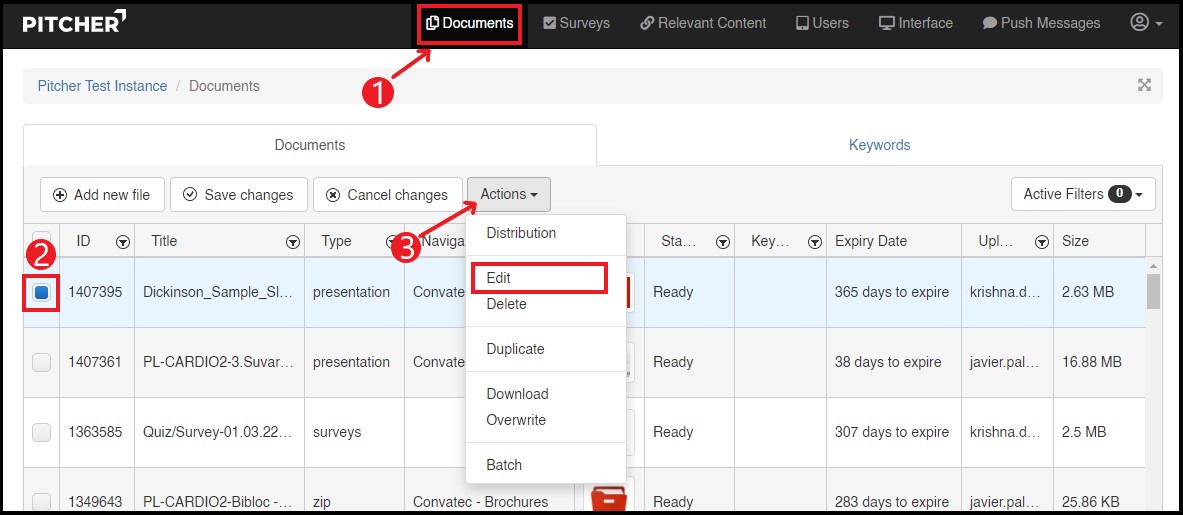
1. Click on Documents tab.
2. Select a document (PPT or PDF).
Please ensure that your PDF file is optimized according to the guidelines provided in https://pitcher-ag.atlassian.net/wiki/spaces/PDOC/pages/233112575/Optimize+PDF+for+Mobile+Rendering#Flatten-a-PDF-file certain cases, hotspots may not function correctly if the PDF is not exported as a flat document
3. Click on Actions dropdown and select Edit.
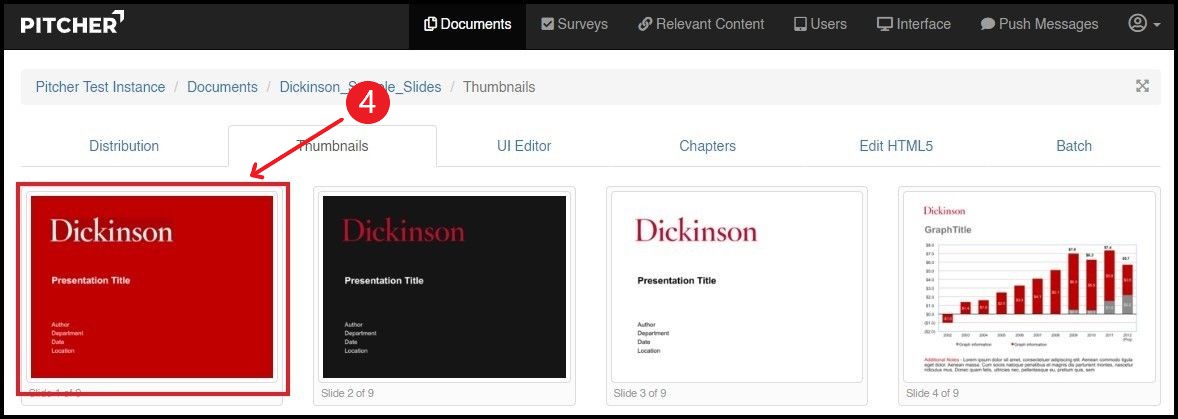
4. You will now see thumbnails of the slides. Click on a slide to add a hotspot.
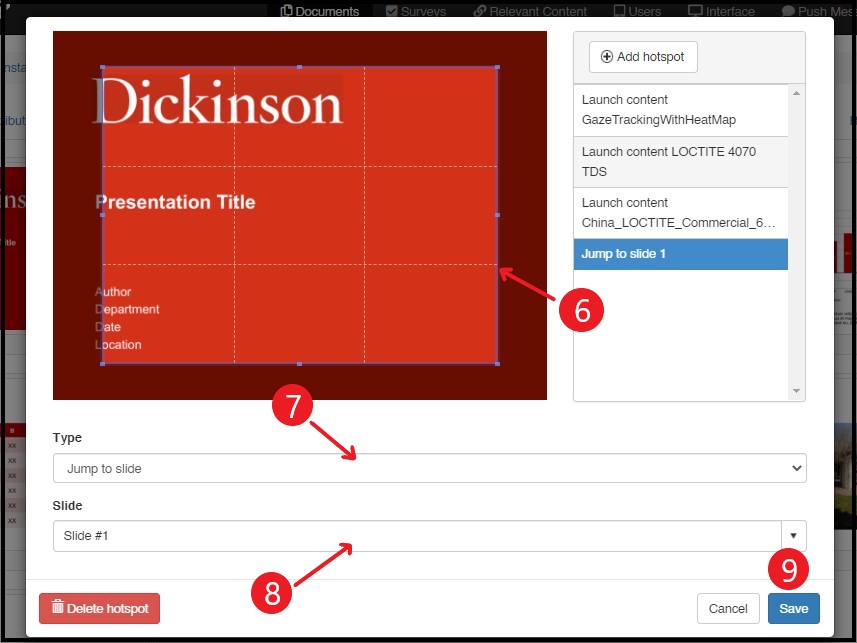
5. "Add Hotspot" enables you to create a "clickable area". Afterwards you define the action to be taken when the area is tapped.

6. A highlighted area will appear on the left side of the slide. It allows you to define the clickable hotspot area.
7. The Hotspot "Type" shows the options of what should happen when the area is tapped:
Jump to Page: Lets you jump to a different page within the same document
Launch Other Content: Opens a different content available within this Pitcher instance (presentation, brochure and video). For documents you can also choose a specific page to be opened.
Send Report Event: Will send an individual text to the Analytics (on- and offline available)
Go to web page: Opens a website (NOTE: Internet connection is required)
Exit Presentation: Closes the document.
Go Back: It allows to Go Back to previously shown slide.
8. This field changes with respect to Hotspot “Type”. For example if the Type is selected to:
Jump to slide then the corresponding field will be Slide and you can select slide no. to jump to.
Launch other content then the corresponding field will be Choose Content and you can select other content. If you select the checkbox then the content will be embedded in the hotspot area.
Send report event then the corresponding field will be Event Name which allows you to define the event name.
Go to web page then the corresponding field will be Web Address which allows you to enter web address.
Exit presentation closes the document. If you select the checkbox Fullscreen then it blocks the interaction.
Go back allows to go back to previously shown slide. If you select the checkbox Fullscreen then it blocks the interaction.
9. Once the Hotspot area and Type is defined you can Save the changes. Cancel reverts the changes you made to the Hotspots you were editing.
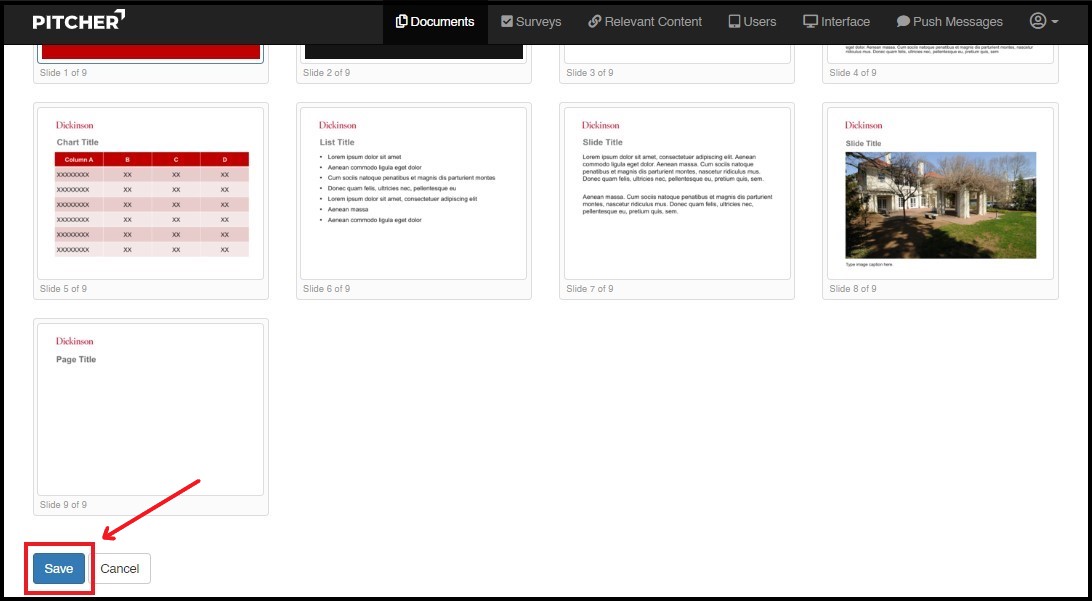
10. After saving the Hotspot the editor will be closed and you’ll be redirected to slide overview popup.
11. In the slide overview popup you can click on Back to Thumbnails which will bring you back to the thumbnails overview. Once you click Save Slide you will be returned to the thumbnail view of all of the slides in the presentation you selected. Here you can select another slide to add/edit Hotspots for.
Important: Please be sure to click "Save" at the bottom of the thumbnail view page. Otherwise none of the Hotspots you added/edited will be saved.